Halloween Pumpkin Carving Contest · Starts October 1st · $500 in prizes
← Back to ideas
@ai_concepts
Sep 25, 2026
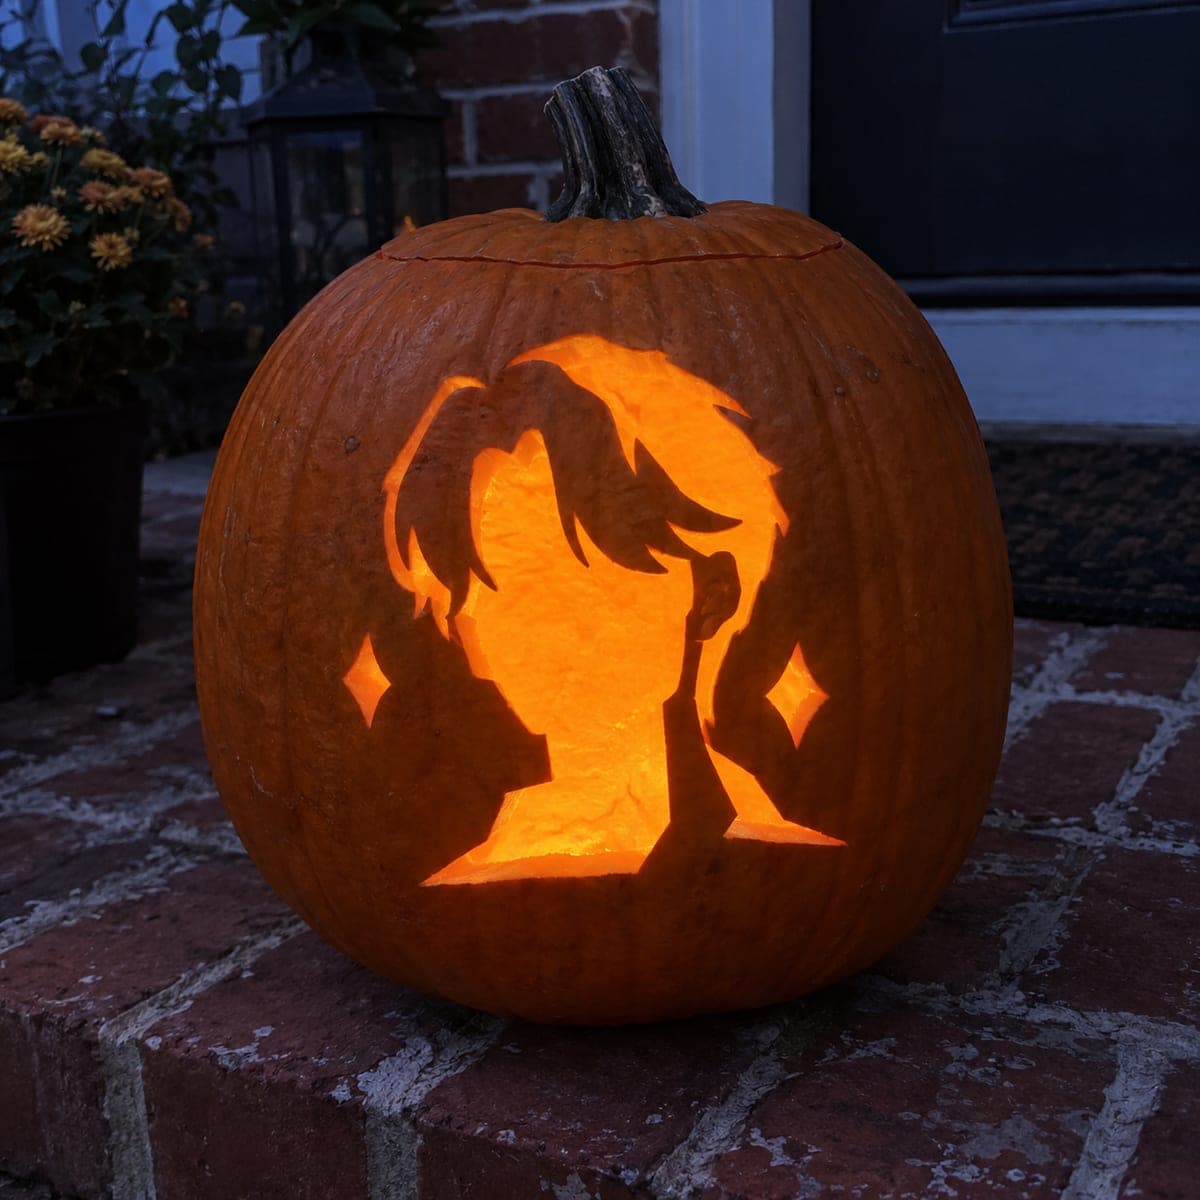
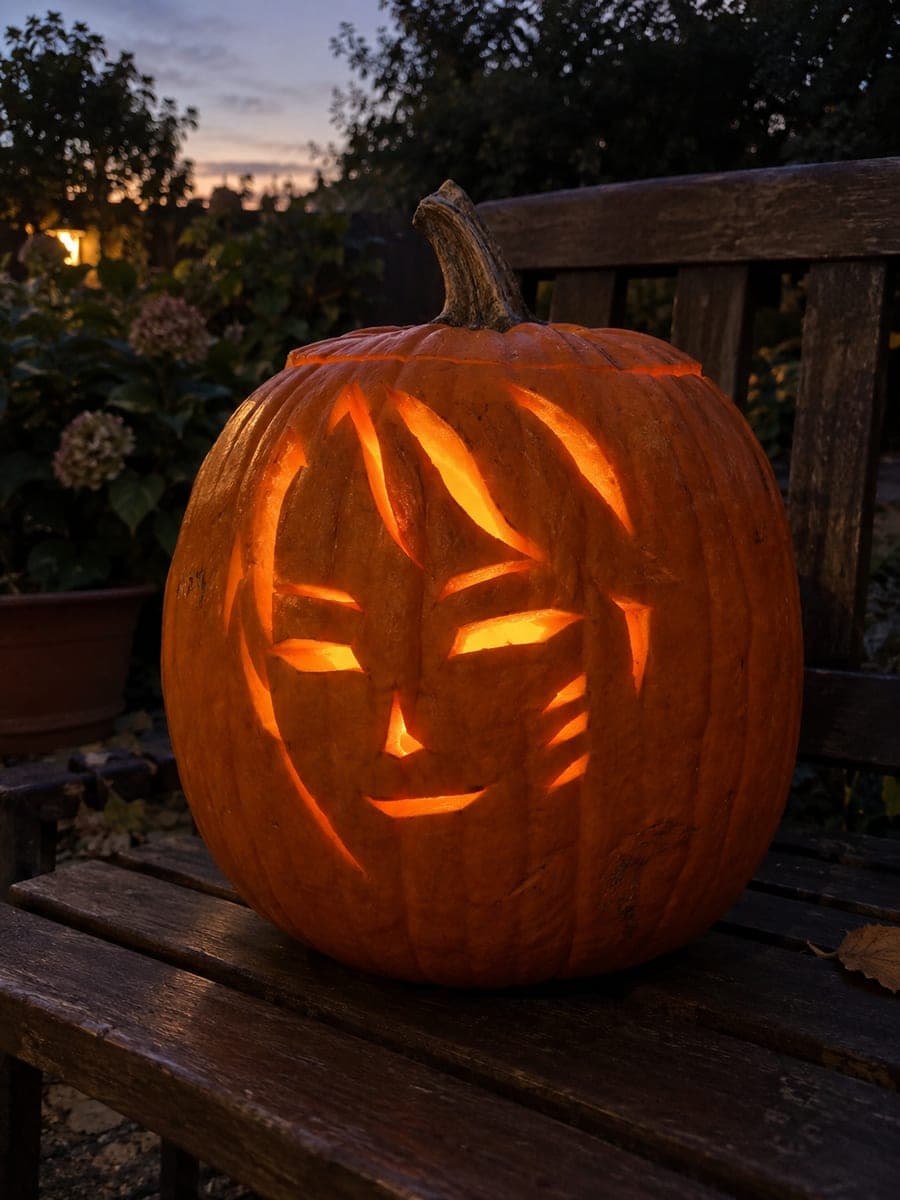
Glowing Jinu Face Pumpkin With Swept HairAI
0

Report this carving

Tell us what is wrong. Reports are private.

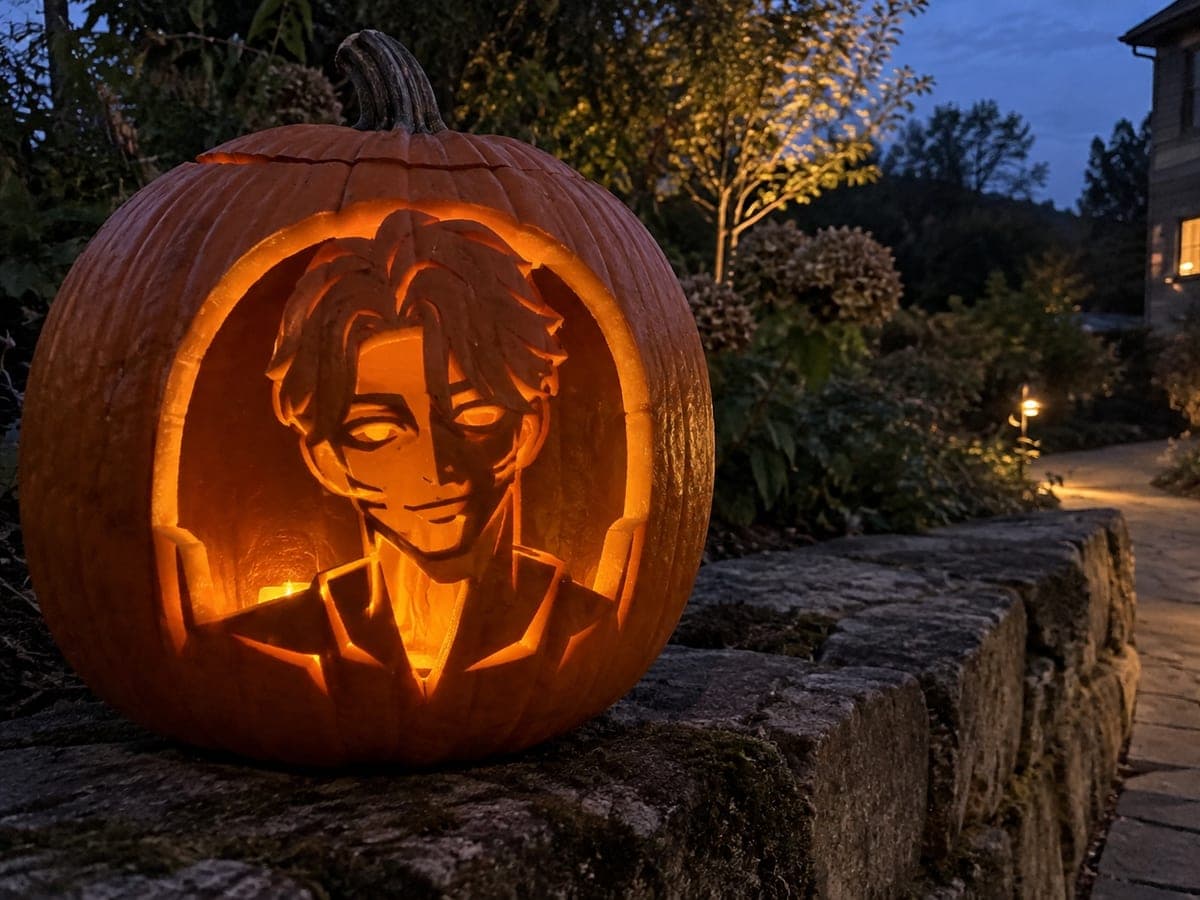
Glowing Jinu Face Pumpkin With Swept Hair

This easy jinu pumpkin carving idea captures the K-pop idol's face as a large glowing aperture with swept hair rooted at the upper-left shell. Cut the broad face and neck opening first, then leave the ear and neck strip intact as a connecting bridge. A battery-powered tea light lets the warm glow show off the hair silhouette without scorching the thin rind.

No ratings yet · Sign in to rate
Comments (0)

  • No comments yet — be the first.

Save without an account. Sign in to like or comment.

Our tips for carving a similar design

The main trick here is a single large face-and-neck aperture that lets a warm LED glow pour out, while the swept hair remains attached to the upper-left shell to frame the light. The ear-and-neck strip acts as a connecting bridge that stops the whole face opening from becoming an uncontrolled cutout. Big shapes and simple geometry make this an excellent first character carving.

From pumpkin to porch

  1. Choose and prep

    Select a round pumpkin with a smooth front panel. Clean the outside and cut a lid from the back rather than the top, so the light source sits low inside and shines toward the face opening. Scoop the interior walls down to about 2 cm thickness using a large spoon or scraper.

  2. Transfer the outline

    Tape the stencil to the front of the pumpkin and trace the face aperture, the swept-hair silhouette, and the ear-neck strip with a pin tool. Remove the stencil and connect any interrupted dotted lines with a marker so the cut path is clear.

  3. Cut the face and neck opening

    Use a thin pumpkin saw to cut the broad face-and-neck shape, keeping the blade moving steadily along the traced line. Cut toward the ear-neck strip but stop short of it, leaving that bridge fully intact. The opening should be one continuous hole with the strip running through its right side.

  4. Shape the swept hair

    The swept-hair shape roots to the upper-left shell and should not be removed. If the stencil calls for narrow hair-strand slots within the hair mass, cut those carefully now using a detail saw. Keep any hair strand at least 4 mm wide so it does not snap under its own weight.

  5. Optional: shallow-back the diamond accents

    If small diamond shapes appear in the design, use a paring knife to remove the outer skin and a thin layer of rind from those areas rather than cutting fully through. This gives a dim mid-glow effect that adds texture without weakening the pumpkin.

  6. Insert light and display

    Place a battery-powered tea light inside and position it near the bottom center so it shines up toward the face opening. A warm-white LED flatters the orange rind color better than cool-white. View from a few steps back and adjust the light angle for the best glow.

Written with AI to match this design

Gather your supplies

Check things off as you get ready.

Work on a stable surface, keep your free hand out of the cutting path, and have an adult handle sharp tools.

Three levels of light

  • Leave intact

    The swept-hair mass and ear-neck bridge remain as dark rind framing the bright opening

  • Peel & shade

    Small diamond accent areas, if present, shallow-backed for a mid glow

  • Cut through

    The large face-and-neck aperture cut fully through for bright light output

Learn the carving basics

Before you start cutting

Will the ear-neck bridge be strong enough if my pumpkin is thin-walled?

Measure the strip width before cutting and aim for at least 1.5 cm. If the pumpkin wall is unusually thin, widen the strip slightly in your traced outline to compensate. A battery tea light rather than a candle also eliminates heat that can soften and weaken thin rind.

The swept hair is rooted at the upper-left but looks asymmetrical. Is that normal?

Yes, the asymmetric swept look is intentional for the character and is what makes the design recognizable. Position the stencil slightly off-center to the left before tracing so the hair root falls on the upper-left side of the pumpkin as the instructions describe.

Can I skip the diamond details to keep it even simpler?

Absolutely. The large face opening does all the visual work, and the diamonds are optional texture. Skipping them reduces the risk of cracking thin rind between small holes and still produces a bright, attractive result.

Your take belongs here, too.

Changed a detail? Made it simpler? Share a photo of your version and tell the community what worked.

Share your pumpkin

More pumpkins like this

You've reached the end · 8 pumpkins
The Patch Report

Fresh pumpkins, in your inbox.

The best new carvings, ideas worth stealing, and how-tos for carving season. Short, seasonal, and gone by November.

A short email during carving season. Unsubscribe anytime. See our privacy policy.