Halloween Pumpkin Carving Contest · Starts October 1st · $500 in prizes
← Back to ideas
@ai_concepts
Sep 25, 2026
Mira Flowing Hair Easy KPop Pumpkin CarvingAI
0

Report this carving

Tell us what is wrong. Reports are private.

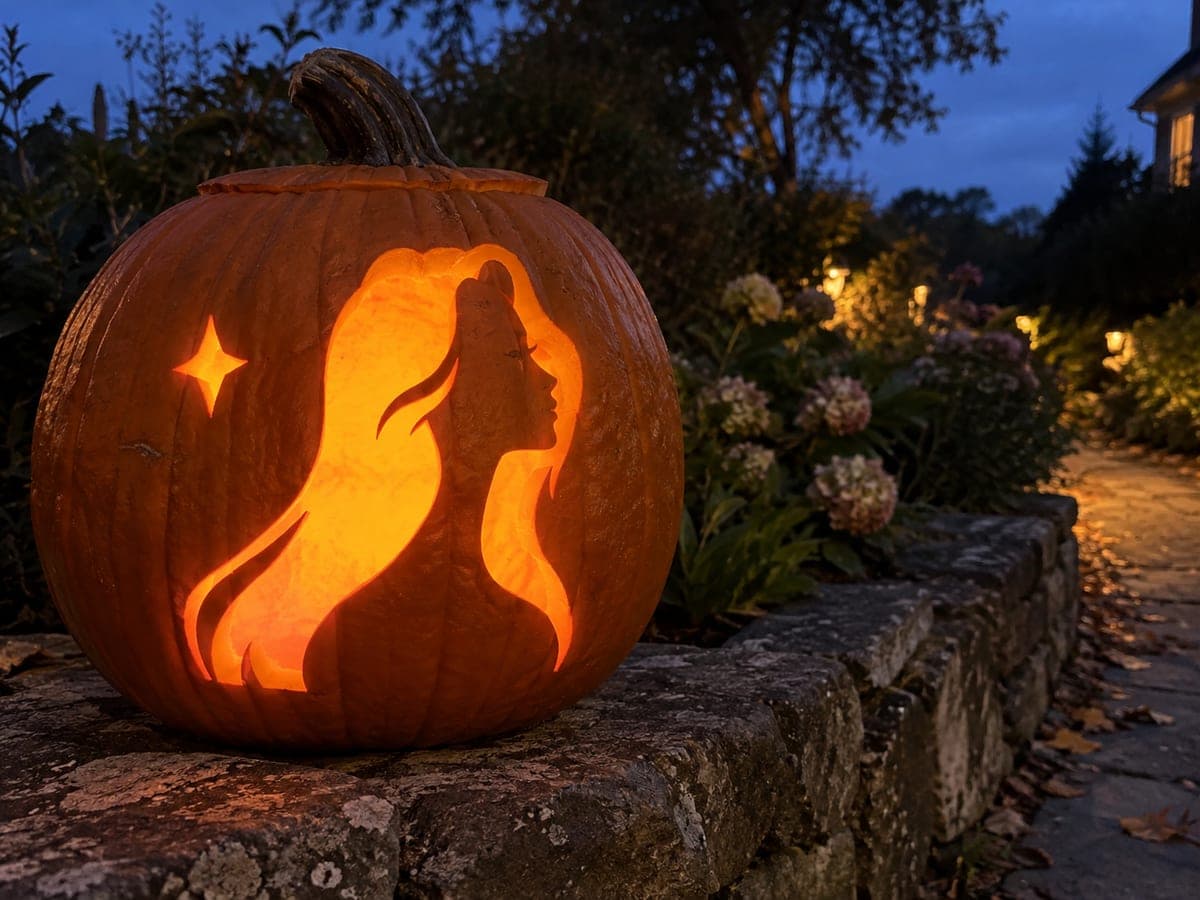
Mira Flowing Hair Easy KPop Pumpkin Carving

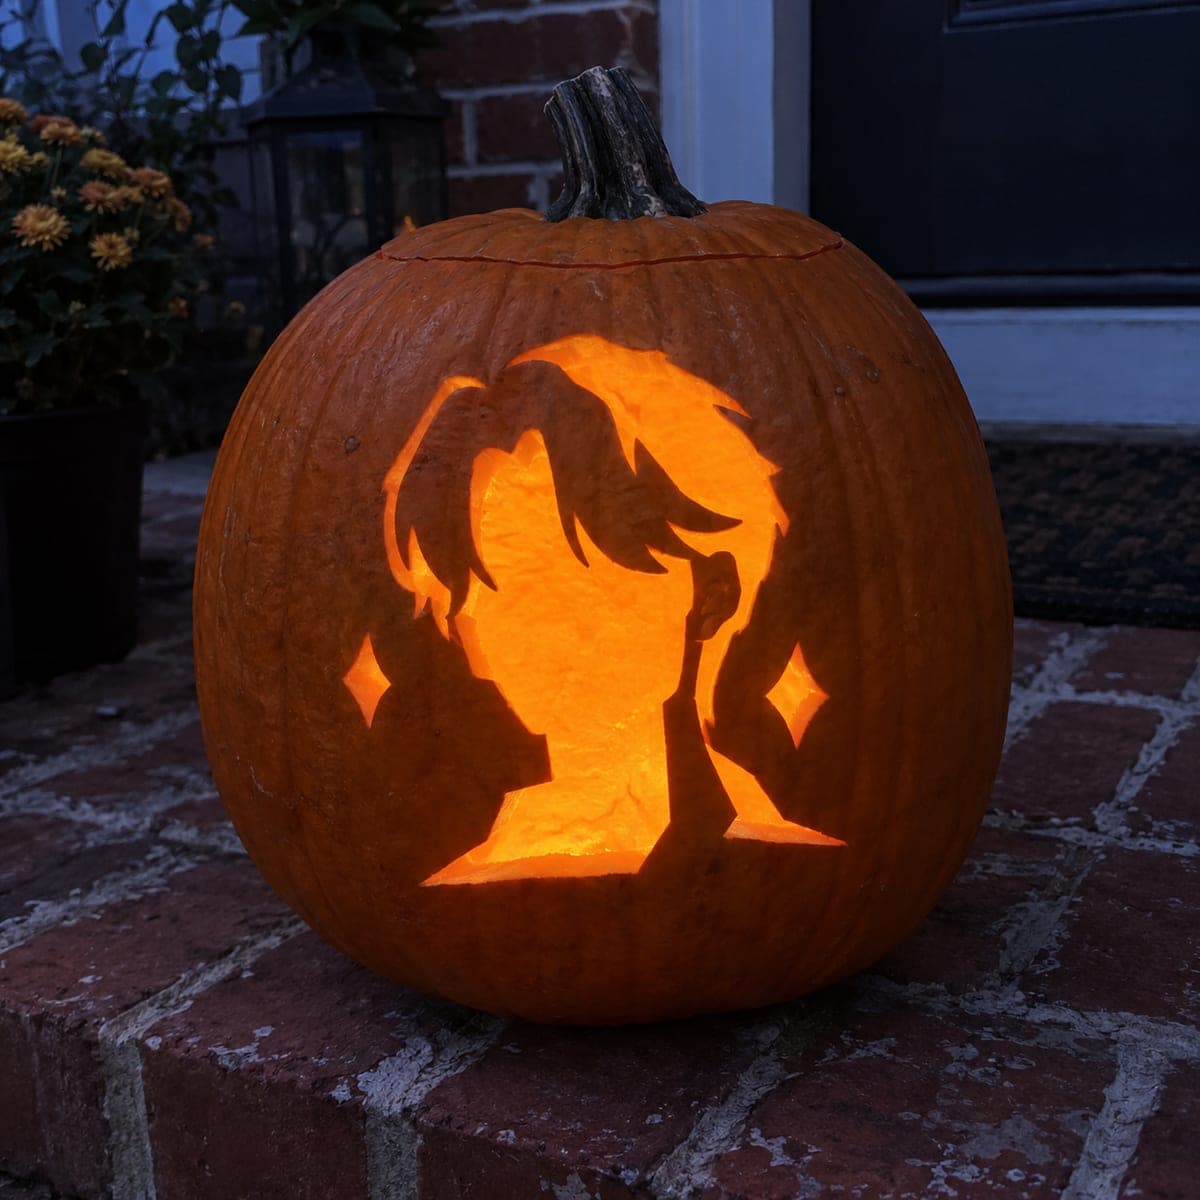
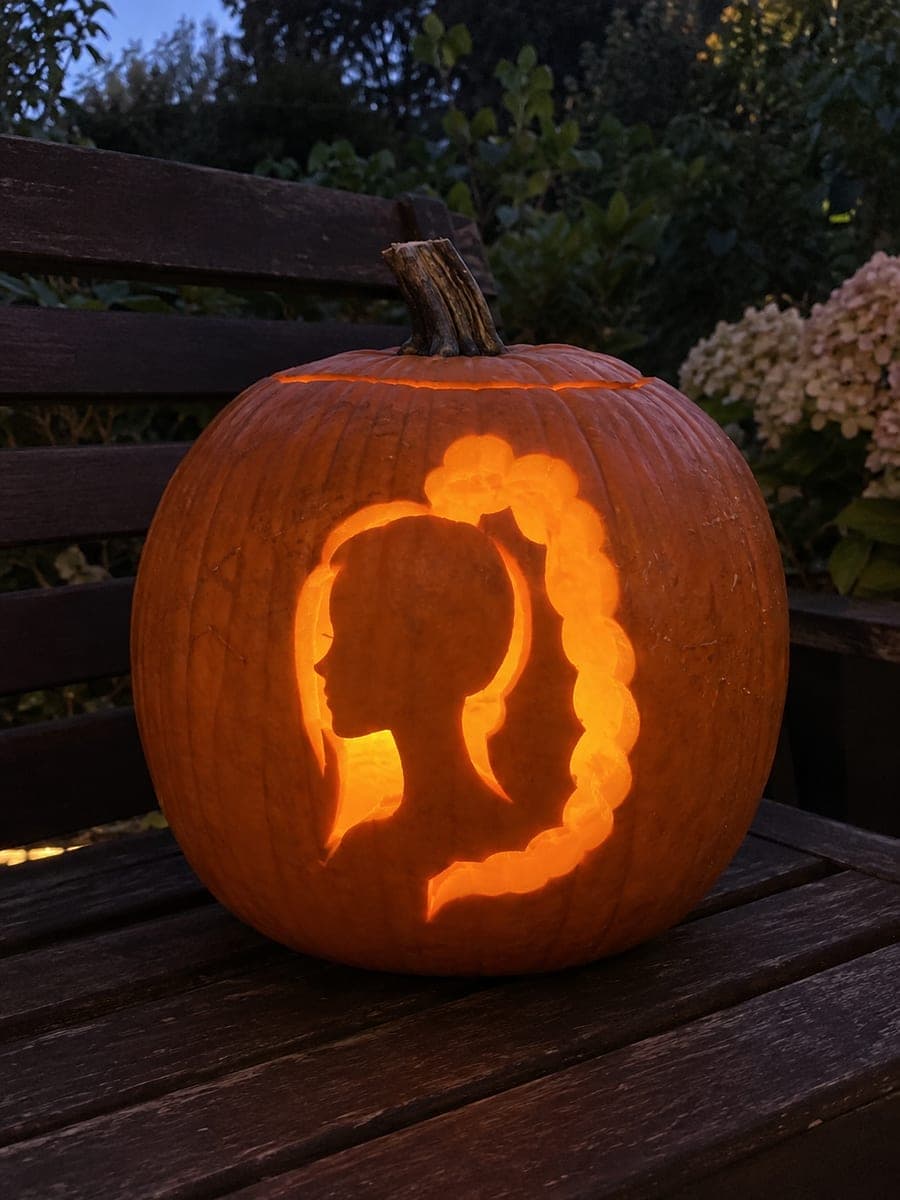
Mira's profile silhouette is retained as a dark shape against a bright flowing-hair background opening in this easy mira pumpkin carving idea, rooted broadly through the neck and shoulder down to the base so the figure holds firm. The flowing hair-shaped background is removed as a single hollow cutout, and a separate sparkle accent may be scored shallow for extra detail. Trace the hair-shaped opening carefully before cutting, as its organic curves define the character's look. A warm LED placed close to the back wall illuminates the entire hair outline for a vivid glow.

No ratings yet · Sign in to rate
Comments (0)

  • No comments yet — be the first.

Save without an account. Sign in to like or comment.

Our tips for carving a similar design

Mira's side profile is retained as a dark shape while the flowing hair-shaped background opening is removed entirely, producing a dramatic glow around the character's silhouette. The figure is rooted broadly through the neck and shoulder all the way to the base, making this one of the most stable retained silhouette designs in the KPop Demon Hunters set. Tracing the flowing hair opening carefully is the most important preparation step, since that organic curve is what defines Mira's look.

From pumpkin to porch

  1. Hollow and check the front wall

    Cut a back or bottom opening and scoop the cavity clean, leaving about 1 inch of wall on the front face. The flowing hair background opening removes a significant section of rind, so an even front wall gives the remaining retained profile its maximum rigidity. Dry the interior thoroughly before transferring.

  2. Transfer the design

    Transfer the full template with a stylus, marking the retained profile boundary, the flowing hair background opening, and the approximate location of any sparkle accent if you plan to include it. The retained profile includes the entire face, neck, and shoulder area. Confirm the neck and shoulder root spans the full lower width of the figure.

  3. Trace the flowing hair boundary

    Perforate the flowing hair opening boundary carefully, paying extra attention to the organic top curve that defines the character's swept hair. This curve is what makes Mira recognizable, so a sloppy outline produces a generic blob shape rather than a character silhouette. Take your time on this boundary line.

  4. Remove the flowing hair background

    Cut the hair-shaped background opening in sections, beginning with the outermost area at the top of the hair sweep and working inward toward the profile boundary. Remove each section cleanly and confirm the retained profile is still firmly attached to the base after each removal.

  5. Score a sparkle accent if desired

    For extra detail, use a V-gouge to score a small star or sparkle shape at a focal point near the hair opening. Score to one-third rind depth so it glows softly when lit. Keep the sparkle at least 2 cm from the profile boundary and the outer rind edge.

  6. Light and display

    Place a warm LED close to the back wall and view in a dark room. Mira's retained profile should appear as a crisp dark shape with a glowing hair-shaped halo of warm light around it. Display at a viewing height where the full hair sweep is visible from straight ahead.

Written with AI to match this design

Gather your supplies

Check things off as you get ready.

Work on a stable surface, keep your free hand out of the cutting path, and have an adult handle sharp tools.

Three levels of light

  • Leave intact

    Retained dark Mira profile including face, neck, and shoulder, all remaining completely dark

  • Peel & shade

    Shallow sparkle accent score if added, glowing softly near the hair opening

  • Cut through

    The fully open flowing hair background opening surrounding the profile, blazing with full warm light

Learn the carving basics

Before you start cutting

How do I reproduce the flowing hair curve accurately on the pumpkin?

Print the template at the actual planned size and check that the hair curve looks right before perforating. On the pumpkin, perforate the curve in short 1 cm dots following the outline closely rather than trying to draw the whole curve in one pass. Short dots are easier to follow around organic shapes than long sweeping perforations.

Will removing the flowing hair background in one piece cause any structural risk?

Attempting to remove it in one large piece risks a crack that propagates toward the retained profile boundary. Instead, score the hair opening into three or four sections before cutting, and remove each section separately. The extra cuts take less than two minutes and significantly reduce the risk of a crack reaching the profile.

Can I add a second Mira profile on the other side of the pumpkin for a paired display?

Yes, if the pumpkin is wide enough. Place the second profile on the opposite side of the pumpkin face, mirrored horizontally, and confirm at least 1.5 cm of rind separates the two profiles at their closest point. Two profiles sharing one pumpkin creates a striking symmetrical display but doubles the cutting time.

Your take belongs here, too.

Changed a detail? Made it simpler? Share a photo of your version and tell the community what worked.

Share your pumpkin

More pumpkins like this

You've reached the end · 8 pumpkins
The Patch Report

Fresh pumpkins, in your inbox.

The best new carvings, ideas worth stealing, and how-tos for carving season. Short, seasonal, and gone by November.

A short email during carving season. Unsubscribe anytime. See our privacy policy.