Halloween Pumpkin Carving Contest Β· Starts October 1st Β· $500 in prizes
← Back to ideas
@ai_concepts
Sep 25, 2026
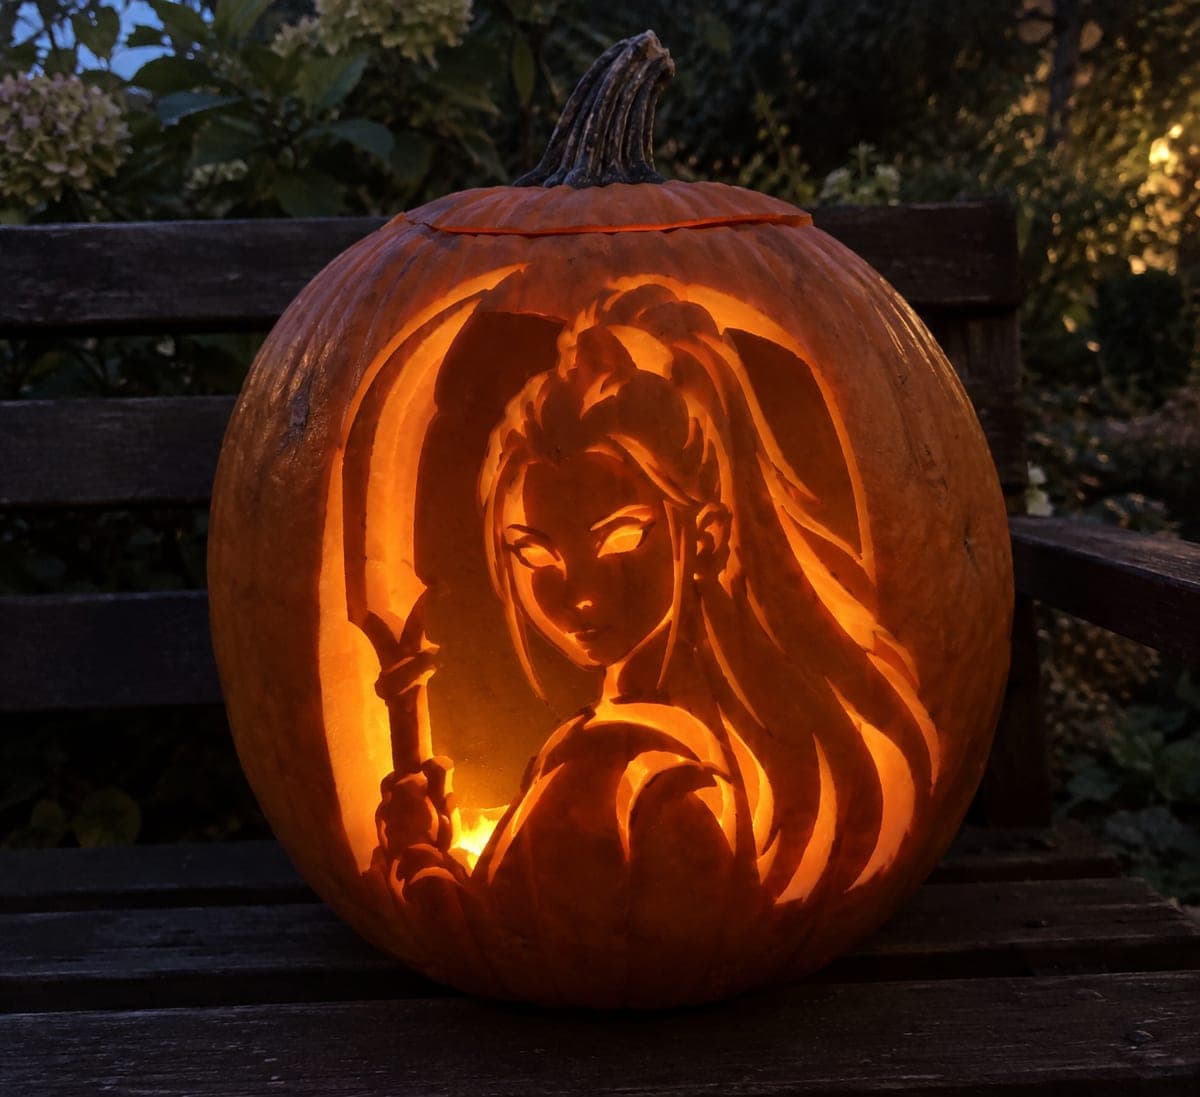
Expert Mira KPop Jack-O-Lantern With Curved BladeAI
0

Report this carving

Tell us what is wrong. Reports are private.

Expert Mira KPop Jack-O-Lantern With Curved Blade

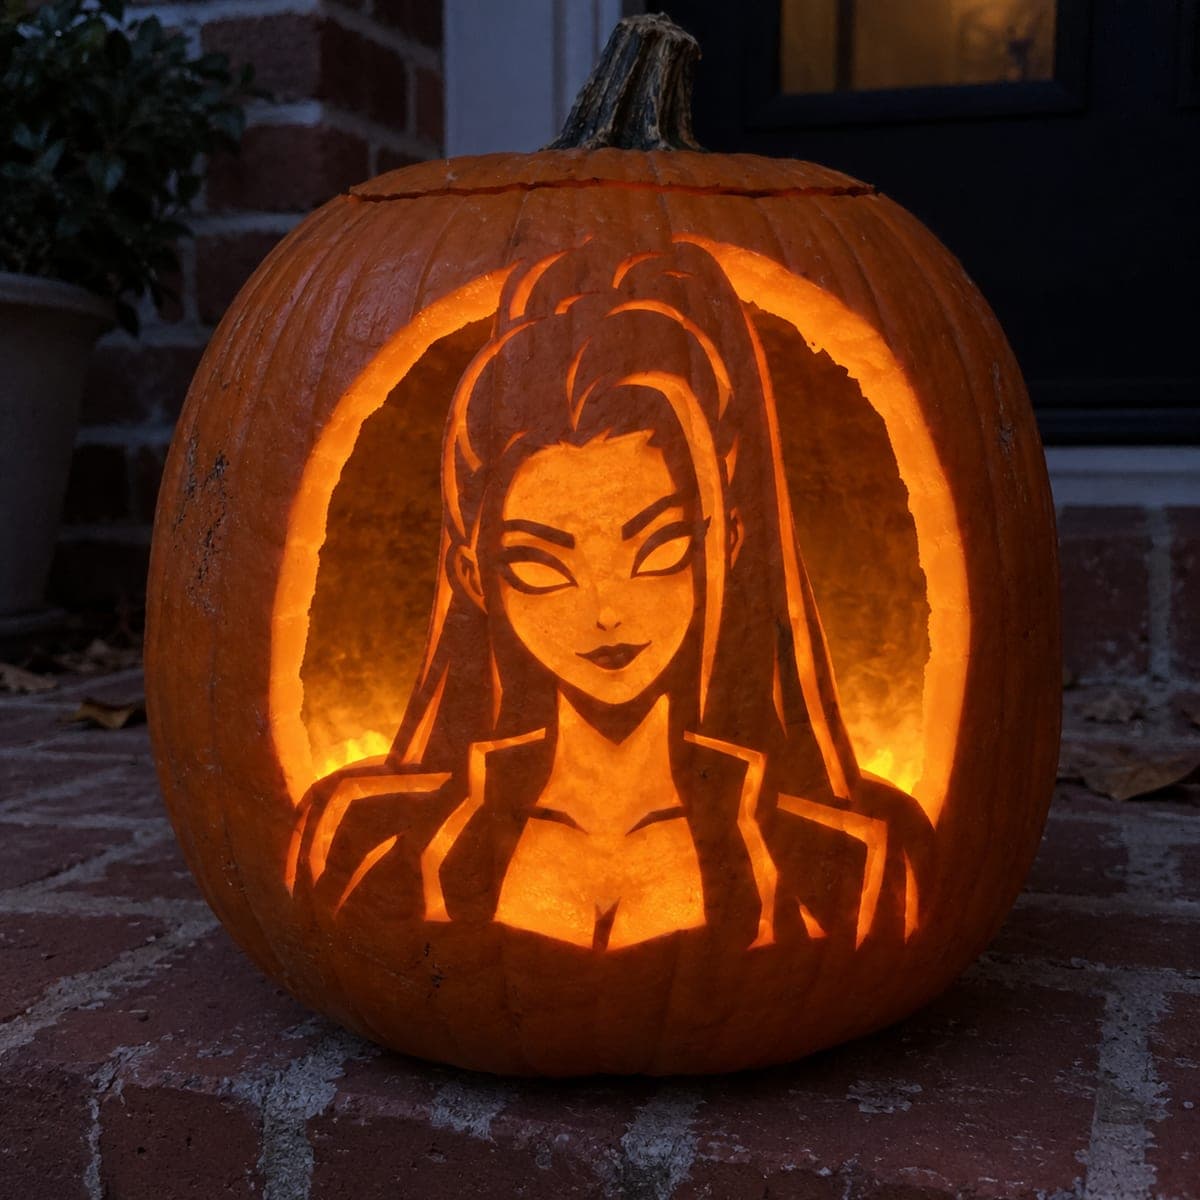
An open arched background surrounds Mira's retained bust and flowing hair in this expert mira pumpkin carving idea, with the base rooted to the lower edge, upper hair and a curved blade connecting to the top frame, and the hand and handle joining the lower body for a fully supported composition. Face eye openings cut fully through, and fine costume and hair details are shallow-backed engravings throughout. Establish every structural connection point before cutting the arch openings, then work the hollow eye cuts, and finish with the engraved detail last.

No ratings yet Β· Sign in to rate

Comments (0)

  • No comments yet β€” be the first.

Save without an account. Sign in to like or comment.

Our tips for carving a similar design

The expert Mira design layers a fully open arched background, a retained bust with flowing hair, and a curved blade into a single composition with four structural connections: the base roots to the lower edge, the upper hair to the top frame, and the blade handle and upper rim joining the lower and upper body. Face eye openings cut fully through, and fine costume and hair details are shallow-backed throughout. Identifying every structural connection point before the first cut is the most critical preparation step.

From pumpkin to porch

  1. Hollow and plan all four connections

    Cut a back opening and hollow to a consistent 1 inch throughout. Sketch all four structural connection zones on the front face in chalk before transferring: lower base root, upper hair frame connection, blade handle at the hand, and blade tip at the upper rim. Confirm every connection is at least 1.5 cm wide.

  2. Expert design transfer

    Transfer the complete design with a stylus using three perforation patterns: solid for cutouts (arch windows and eye holes), dashes for mid-depth scoring, and dots for fine texture. Mark all four structural connection zones explicitly with a permanent marker so they are impossible to accidentally cut through.

  3. Cut the arch windows

    Remove all arch background sections in small pieces, starting furthest from the connections and working inward. Stop 5 mm short of each connection zone, clear all other sections, then return to cut the connection-adjacent areas last using very short controlled strokes.

  4. Cut the eye openings and blade

    Cut the face eye holes within the retained bust, then cut the curved blade as a fully open shape, preserving both the handle and rim connections. Cut the blade from its center outward toward both connection ends rather than from one end to the other.

  5. Engrave the portrait and costume detail

    Using a Dremel ball-tip bit for organic face texture and a V-gouge for linear costume and hair details, work the full engraving pass across the retained bust. Begin at the outer face edges and work inward. The flowing hair scoring uses long curved strokes following the hair direction, while the costume uses defined channel lines.

  6. Light and present

    Place a warm diffuse LED inside and evaluate the full composition from six feet away. All arch windows and eye holes should blaze at full brightness while the portrait glows softly. Photograph from a slight distance so the arch framing and the curved blade are both visible in the same frame.

Written with AI to match this design

Gather your supplies

Check things off as you get ready.

Work on a stable surface, keep your free hand out of the cutting path, and have an adult handle sharp tools.

Three levels of light

  • Leave intact

    Retained dark bust body, hair surface before scoring, and all four structural connection strips

  • Peel & shade

    Engraved face texture, hair line scoring, and fine costume detail channels across the retained bust, glowing at warm mid-level

  • Cut through

    All open arch window sections, both eye holes, and the fully open curved blade shape, all blazing at full brightness

Learn the carving basics

Before you start cutting

How do I cut a curved blade without cracking it at the bends?

Use short curved saw strokes that follow the blade's curve, cutting from the midpoint of the blade outward to each connection. Avoid long sweeping strokes that cross the curve in one pass, as the saw blade resists sharp lateral direction changes and may lever against the rind. Short 2 to 3 cm strokes per direction change give the most control.

Can I add a blade edge engraving to the retained blade outline area?

The curved blade in this design is fully cut through, so there is no retained blade surface to engrave. If you want a visible blade edge, slightly widen the cutout at one side to create a thin retained rind strip next to the opening, then score that strip with a shallow V-gouge edge line. This is a significant design modification best planned before cutting.

How do I judge whether the upper hair-to-frame connection can support the weight of the retained bust above it?

Press the retained bust very gently sideways with one finger after the arch is removed. It should feel completely rigid. Any slight flex means the crown connection is bearing more weight than expected. If it flexes, apply a strip of packing tape from the inner face of the crown connection to the pumpkin body above it for extra support.

Your take belongs here, too.

Changed a detail? Made it simpler? Share a photo of your version and tell the community what worked.

Share your pumpkin

More pumpkins like this

You've reached the end Β· 8 pumpkins
The Patch Report

Fresh pumpkins, in your inbox.

The best new carvings, ideas worth stealing, and how-tos for carving season. Short, seasonal, and gone by November.

A short email during carving season. Unsubscribe anytime. See our privacy policy.