Halloween Pumpkin Carving Contest · Starts October 1st · $500 in prizes
← Back to ideas
@ai_concepts
Sep 25, 2026
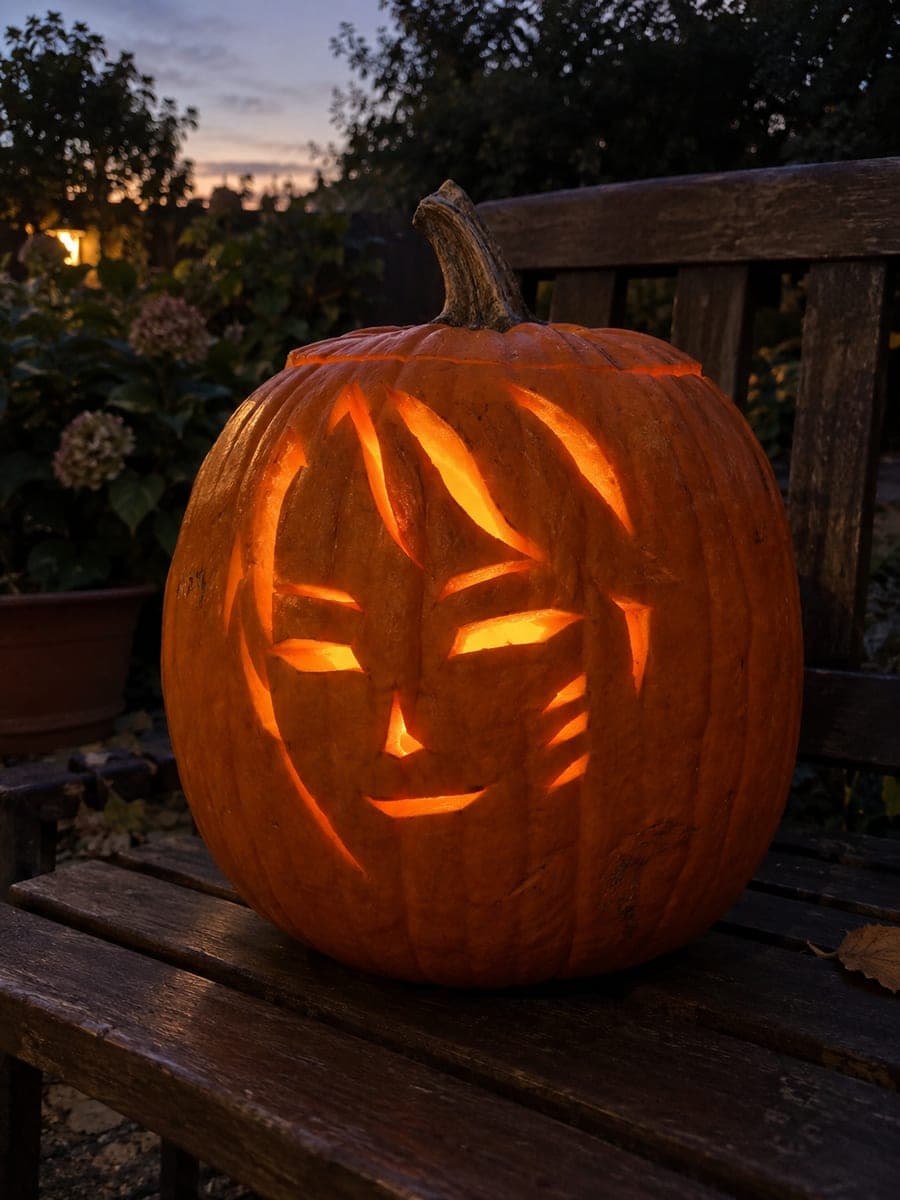
Jinu Portrait Pumpkin Inside an Open Oval FrameAI
0

Report this carving

Tell us what is wrong. Reports are private.

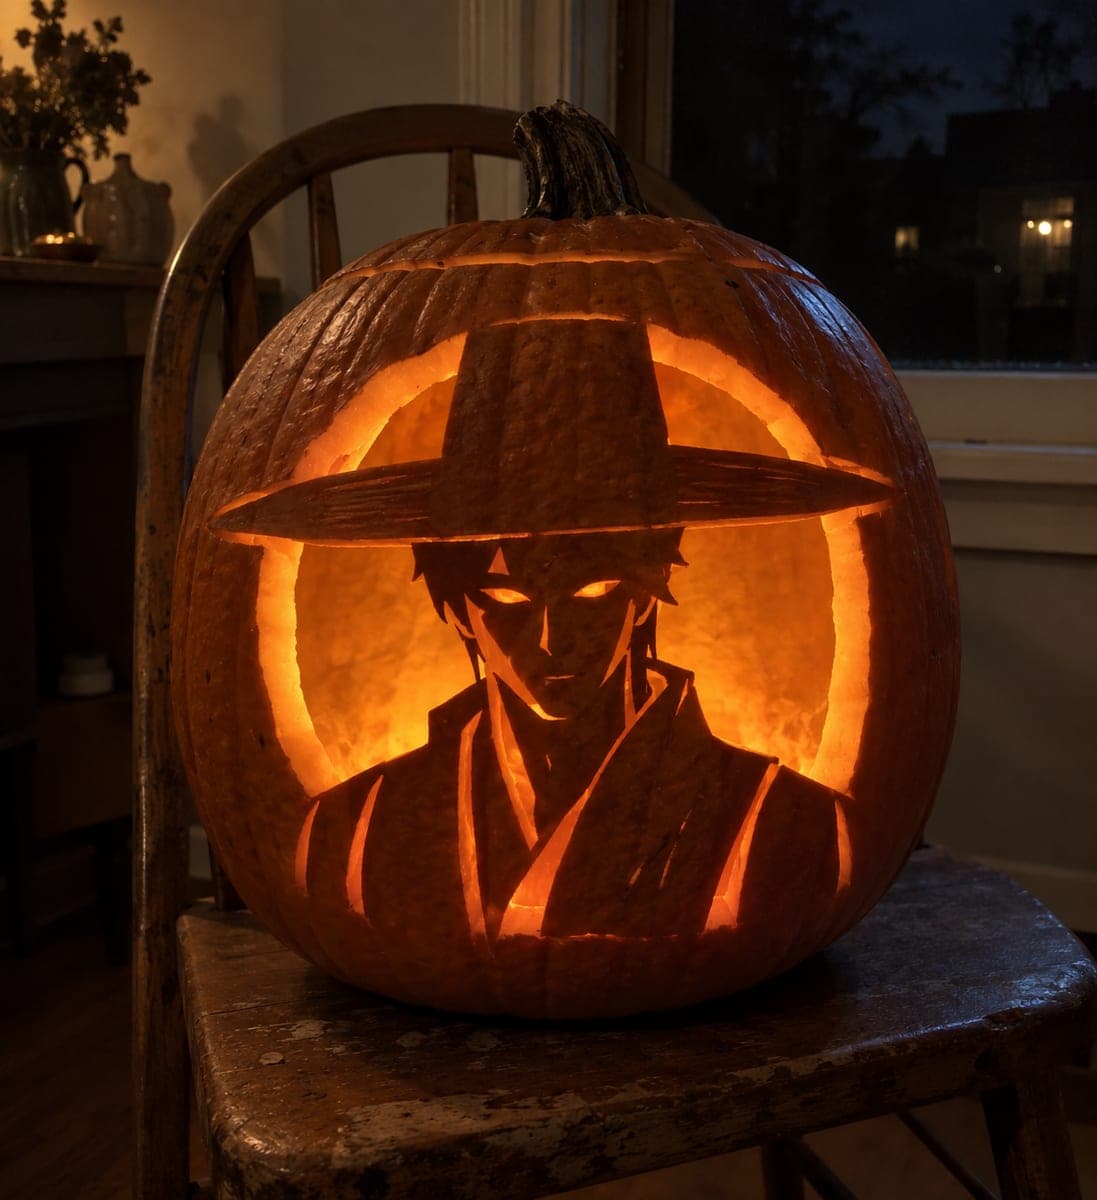
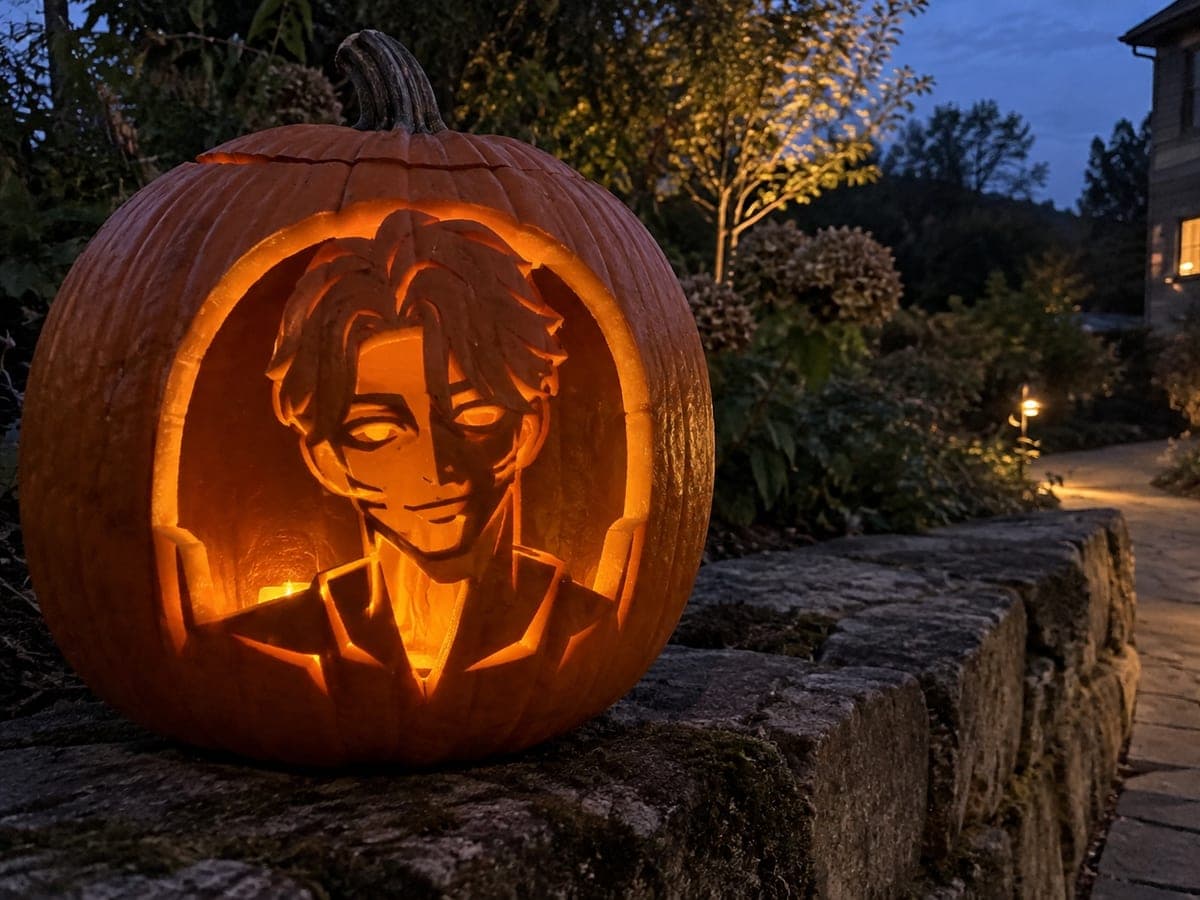
Jinu Portrait Pumpkin Inside an Open Oval Frame

The hard version of this jinu pumpkin carving idea frames a retained dark-rind portrait inside an open oval window, with the figure rooted at the lower coat and upper hair contact points. Shallow-back the facial and cheek details rather than cutting fully through, so they catch light without becoming fragile. Cut the oval surround first, then work inward on the face details.

No ratings yet · Sign in to rate
Comments (0)

  • No comments yet — be the first.

Save without an account. Sign in to like or comment.

Our tips for carving a similar design

A large empty oval surrounding a retained dark-rind portrait is the central technique, and the design's durability depends on keeping both the lower coat contact and the upper hair contact points broad and undamaged. Shallow-backing the facial and cheek details rather than cutting through them keeps the face strong while still giving it visual texture under light. Cutting the oval surround first establishes the frame before any detail work begins.

From pumpkin to porch

  1. Prep and measure

    Clean the pumpkin and cut an access lid from the back. Scrape the inside wall to a 2 cm thickness around the face area. Print the stencil at the correct scale so the oval occupies roughly two-thirds of the pumpkin's height, leaving room for both root contact points.

  2. Transfer the stencil

    Tape the stencil to the front and pin-transfer all outlines: the oval edge, the portrait silhouette including hair and coat, and the facial detail areas. Mark the lower coat root and upper hair contact points with a bold marker dot so you do not accidentally cut through them.

  3. Cut the oval surround

    Use a thin-blade saw to cut the empty oval, working around the curve in sections. Stop precisely at each root contact point and leave those bridges wide. The oval cut removes the most rind at once, so complete it before any interior work.

  4. Shallow-back the face and cheek details

    Use a linoleum gouge or paring knife to remove the outer skin and half the rind thickness from the facial detail areas and cheek marks. Test with a thin flashlight held inside: backed areas should glow softly without passing light fully through. Work from the edges of each detail inward.

  5. Add collar channel cuts

    The collar area has separated channels that are cut fully through but kept narrow and well-separated by solid rind strips. Use a detail saw and cut these channels last, after all shallow-backing is complete, so you are working on the most stable version of the pumpkin for as long as possible.

  6. Light and display

    Insert a battery LED and angle it toward the oval opening. The retained portrait should appear as a glowing silhouette against the brighter oval background. Adjust the light position until the shallow-backed face details are visible as a dimmer texture within the portrait.

Written with AI to match this design

Gather your supplies

Check things off as you get ready.

Work on a stable surface, keep your free hand out of the cutting path, and have an adult handle sharp tools.

Three levels of light

  • Leave intact

    The retained dark-rind portrait body, including intact coat and hair mass, sits as a dark silhouette

  • Peel & shade

    Facial features, cheek details, and any textured surface areas shallow-backed to a mid-glow level

  • Cut through

    The surrounding empty oval and narrow collar channel slots cut fully through for full light output

Learn the carving basics

Before you start cutting

How wide should the lower coat and upper hair root contact points be?

Each root point should be at least 2 cm wide to handle the weight of the retained portrait. Wider is better for this style of carving. If your stencil shows a narrow contact, widen it slightly in your traced outline before cutting.

The shallow-backed areas look uneven under light. How do I fix that?

Hold the LED inside and look at the face from the front. Dark spots within a backed area usually mean the rind is still too thick there. Use a gouge to shave a little more material from those spots, removing just the minimum needed to even out the glow. Work gradually to avoid punching through.

Should I cut the collar channels before or after the oval?

Always cut the oval first. The oval establishes the frame and reveals how much structural rind remains for the portrait. With the oval in place, you can judge whether the portrait is stable enough to safely add the narrow collar channels without the piece loosening.

Your take belongs here, too.

Changed a detail? Made it simpler? Share a photo of your version and tell the community what worked.

Share your pumpkin

More pumpkins like this

You've reached the end · 8 pumpkins
The Patch Report

Fresh pumpkins, in your inbox.

The best new carvings, ideas worth stealing, and how-tos for carving season. Short, seasonal, and gone by November.

A short email during carving season. Unsubscribe anytime. See our privacy policy.