Halloween Pumpkin Carving Contest · Starts October 1st · $500 in prizes
← Back to ideas
@ai_concepts
Sep 25, 2026
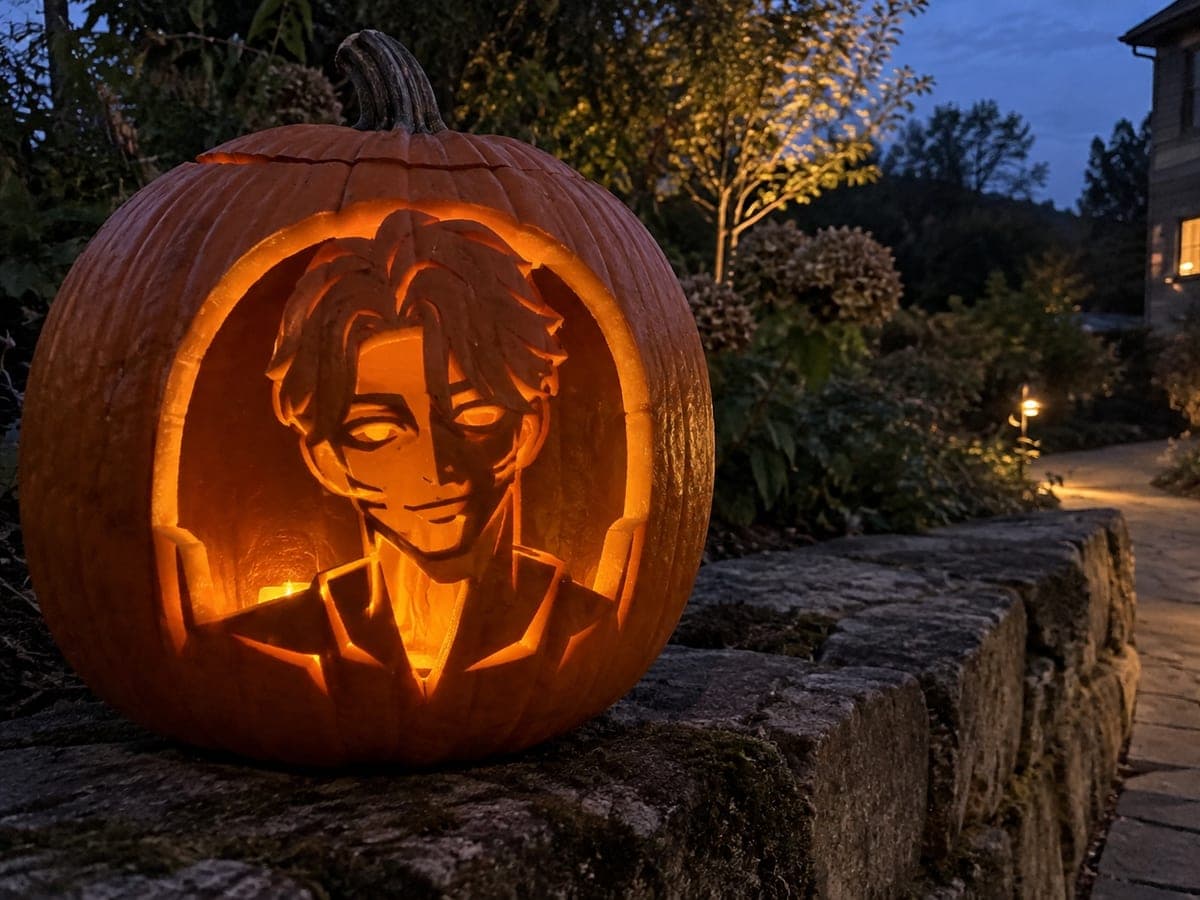
Jinu in Traditional Gat Hat Jack-O-LanternAI
0

Report this carving

Tell us what is wrong. Reports are private.

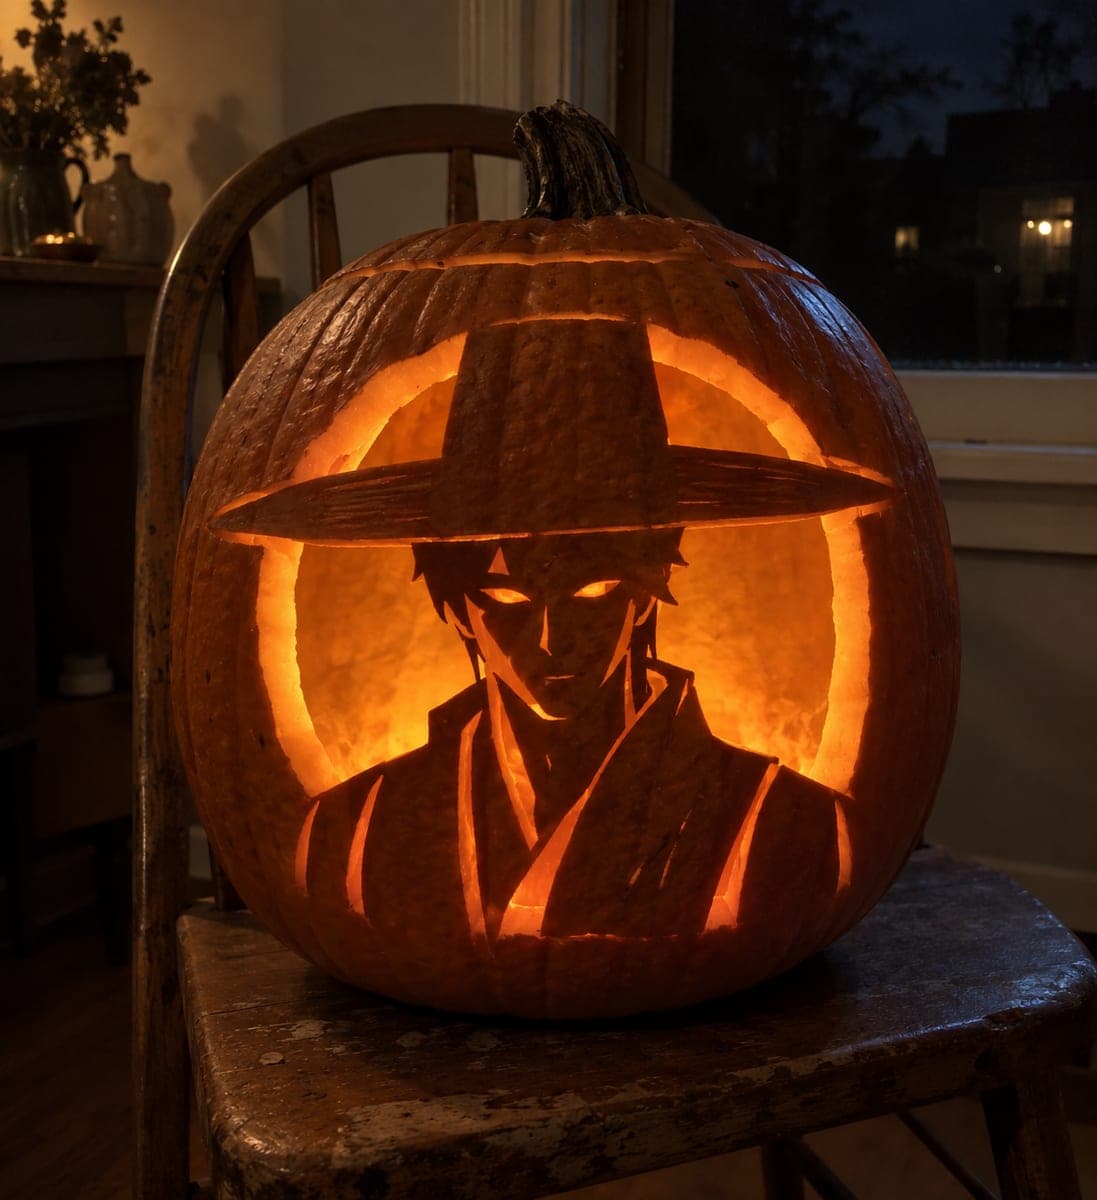
Jinu in Traditional Gat Hat Jack-O-Lantern

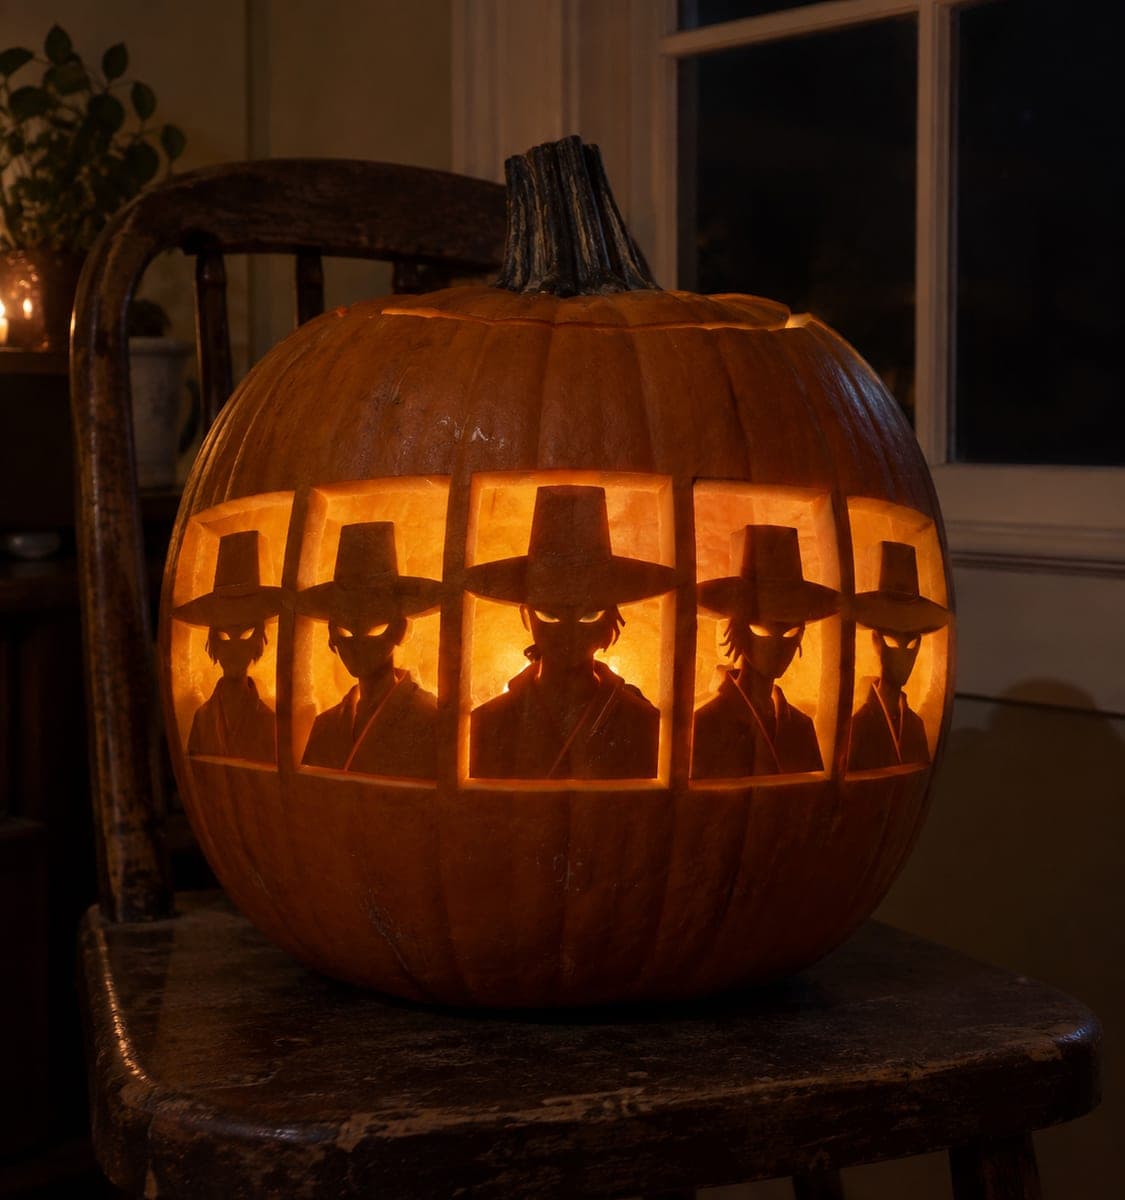
This expert jinu pumpkin carving shows the idol wearing a broad traditional gat hat and long coat as a retained dark-rind portrait inside an open oval window. The wide hat brim spans both sides of the frame and the crown bridges the top, while the thick neck and jacket root the bottom. Cut the hat brim bridge last to avoid losing structural support, and shallow-back the hat weave texture rather than cutting it through.

No ratings yet · Sign in to rate
Comments (0)

  • No comments yet — be the first.

Save without an account. Sign in to like or comment.

Our tips for carving a similar design

The wide gat hat brim spans both sides of the oval frame and the crown bridges the top, turning the hat into both a design element and a primary structural support. The thick neck and jacket anchor the bottom of the portrait. Shallow-backing the hat weave texture rather than cutting it through preserves the hat's mass, which is critical because it also serves as the upper bridge. The hat brim bridge should be cut last to protect structural integrity for as long as possible.

From pumpkin to porch

  1. Prep the surface

    Select a large, vertically tall pumpkin to accommodate the full hat-crown-to-jacket composition. Cut a back lid, scrape walls to 2 cm, and clean the carving surface. Print the stencil to fill the pumpkin's front panel completely.

  2. Transfer every detail

    Tape the stencil and pin-transfer the oval edge, hat outline including brim and crown bridge, portrait silhouette, face slot positions, collar and sleeve holes, and the weave texture pattern on the hat. Use different colored marker dots to distinguish cut-through areas from shallow-back areas.

  3. Cut the oval body

    Begin with the oval surround, cutting from the lower sides upward. Leave the hat brim bridge at the top completely intact for now. Cut around the sides of the portrait and confirm the neck and jacket base root is solid before proceeding.

  4. Engrave the hat weave texture

    Use a linoleum gouge to shallow-back the hat surface, creating the woven texture without cutting through. This is detailed, patient work. Remove the outer skin plus about one-third of the rind depth to create a subtle relief, and test with a back light after every few strokes to avoid going too deep.

  5. Add face slots and collar details

    Cut the open face eye slots with a detail saw, keeping the surrounding face rind intact. Add separated collar and sleeve holes with narrow cuts, leaving solid rind between each one. These cuts are small so they are low risk, but make them after all engraving so the pumpkin is still maximally stable.

  6. Cut the hat brim bridge last

    Only after all other cuts and engravings are complete, carefully cut the hat brim bridge at the top of the oval. Support the portrait from behind with your free hand as you make this cut. Insert the LED immediately and check all connections before displaying.

Written with AI to match this design

Gather your supplies

Check things off as you get ready.

Work on a stable surface, keep your free hand out of the cutting path, and have an adult handle sharp tools.

Three levels of light

  • Leave intact

    Retained dark-rind portrait body including coat, neck, and the hat crown mass

  • Peel & shade

    Hat weave texture pattern shallow-engraved for a mid-glow relief effect

  • Cut through

    Open oval surround, face eye slots, separated collar channels, and sleeve holes cut fully through

Learn the carving basics

Before you start cutting

Why is the hat brim bridge cut last, and what happens if I cut it early?

The hat brim spans both sides of the oval and is one of only two top-edge connections for the retained portrait. Cutting it early means the portrait is hanging by only the hat crown bridge and the lower jacket root, which is much less stable for all the subsequent detail work. Cutting it last ensures you always have firm support while handling the pumpkin.

The hat weave texture is very fine. Is there a simpler way to suggest it?

Yes. Instead of engraving individual weave intersections, use a V-gouge to cut a diagonal cross-hatch pattern with fewer, wider lines. Viewed from a normal display distance this reads as woven texture without requiring the same level of precision. Two to three lines per centimeter is plenty.

How do I stabilize the portrait if a contact point cracks during carving?

Stop carving immediately and press the cracked area back into position. Apply a small piece of clear tape to the back of the crack from inside the pumpkin to hold it while you finish. Use a battery LED rather than a candle to avoid any heat that might expand the crack further.

Your take belongs here, too.

Changed a detail? Made it simpler? Share a photo of your version and tell the community what worked.

Share your pumpkin

More pumpkins like this

You've reached the end · 8 pumpkins
The Patch Report

Fresh pumpkins, in your inbox.

The best new carvings, ideas worth stealing, and how-tos for carving season. Short, seasonal, and gone by November.

A short email during carving season. Unsubscribe anytime. See our privacy policy.