Halloween Pumpkin Carving Contest · Starts October 1st · $500 in prizes
← Back to ideas
@ai_concepts
Sep 25, 2026
Expert Saja Boys Performance Arch PumpkinAI
0

Report this carving

Tell us what is wrong. Reports are private.

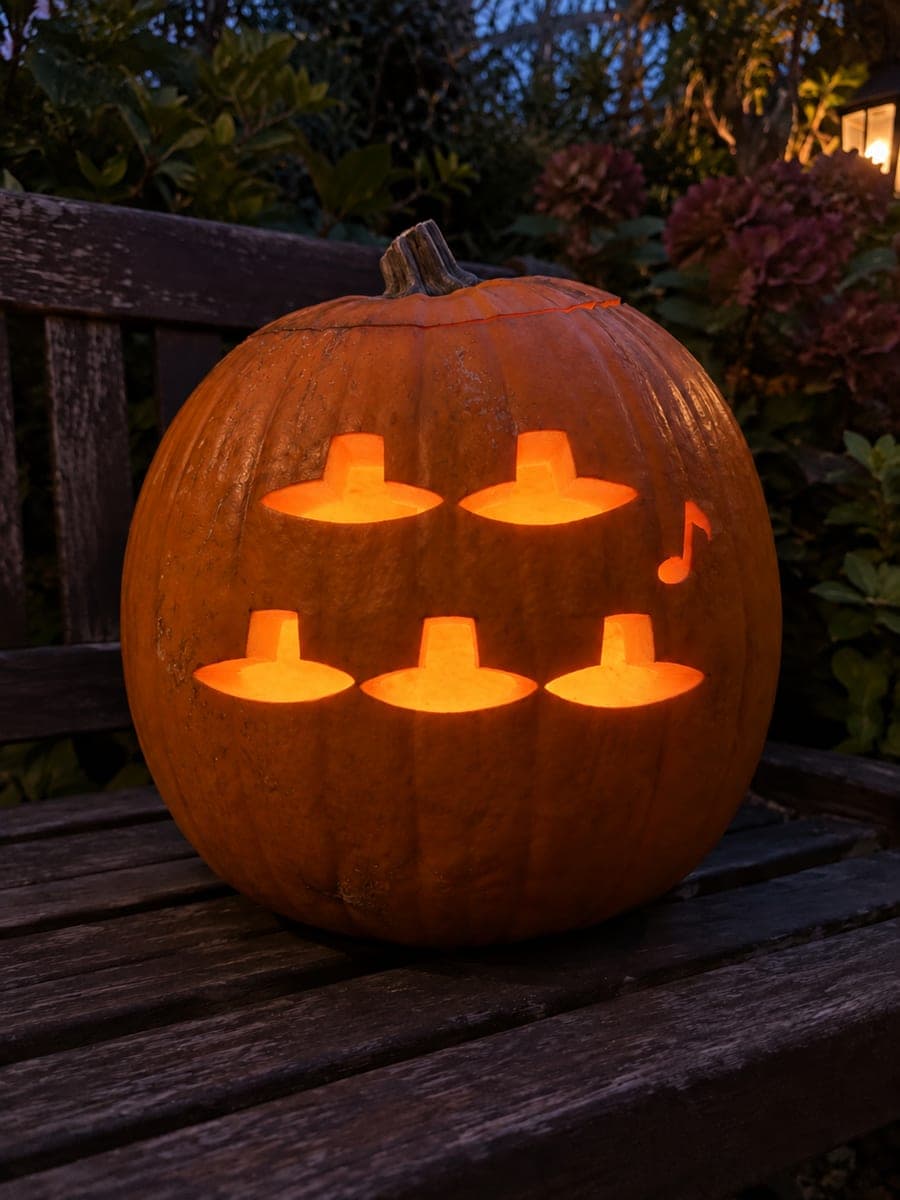
Expert Saja Boys Performance Arch Pumpkin

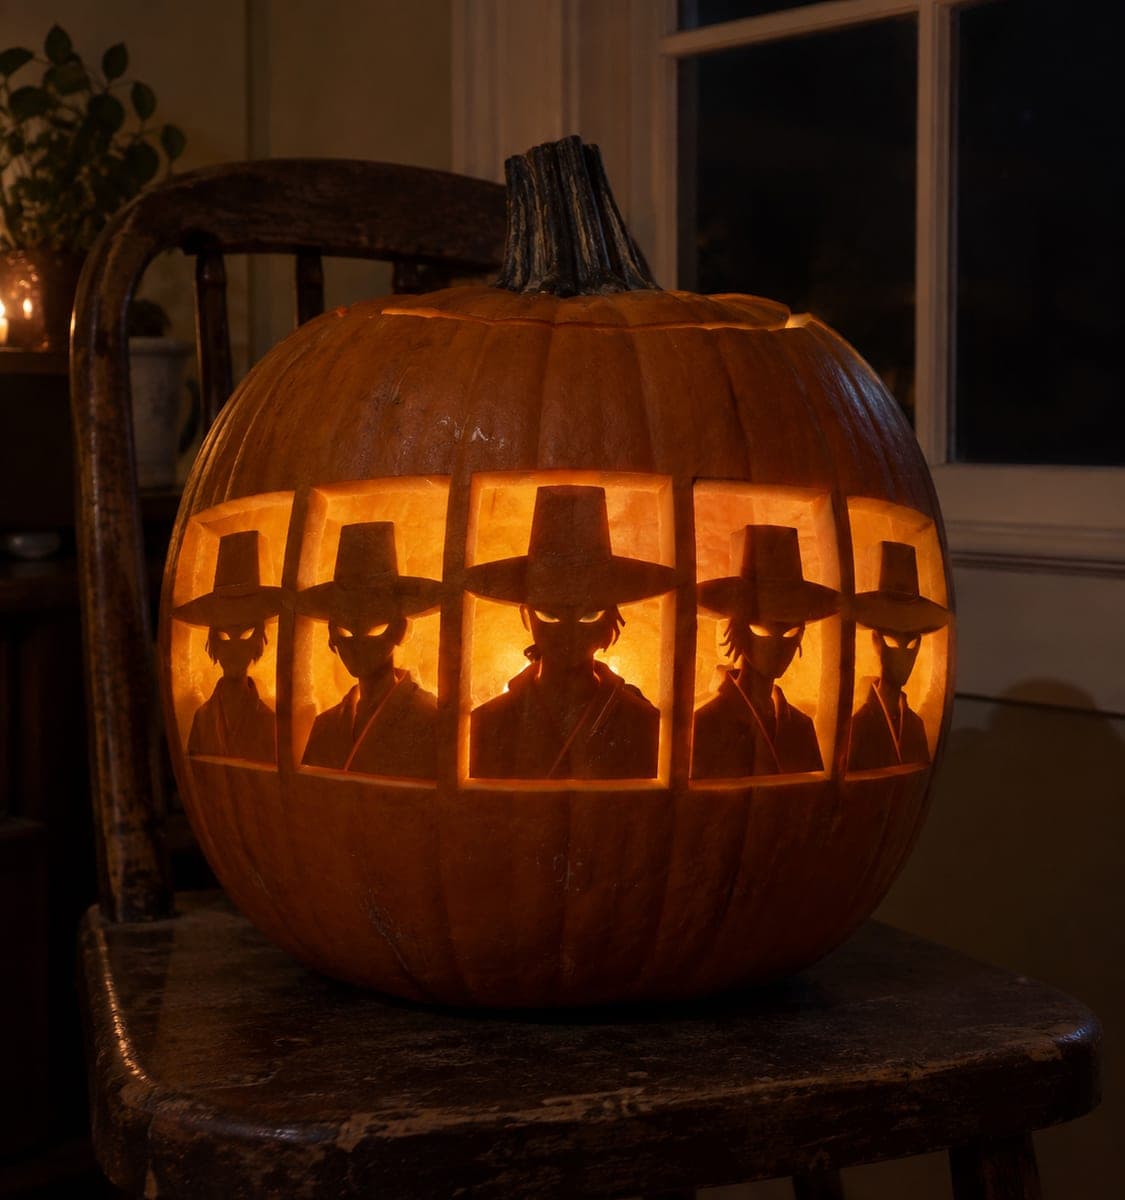
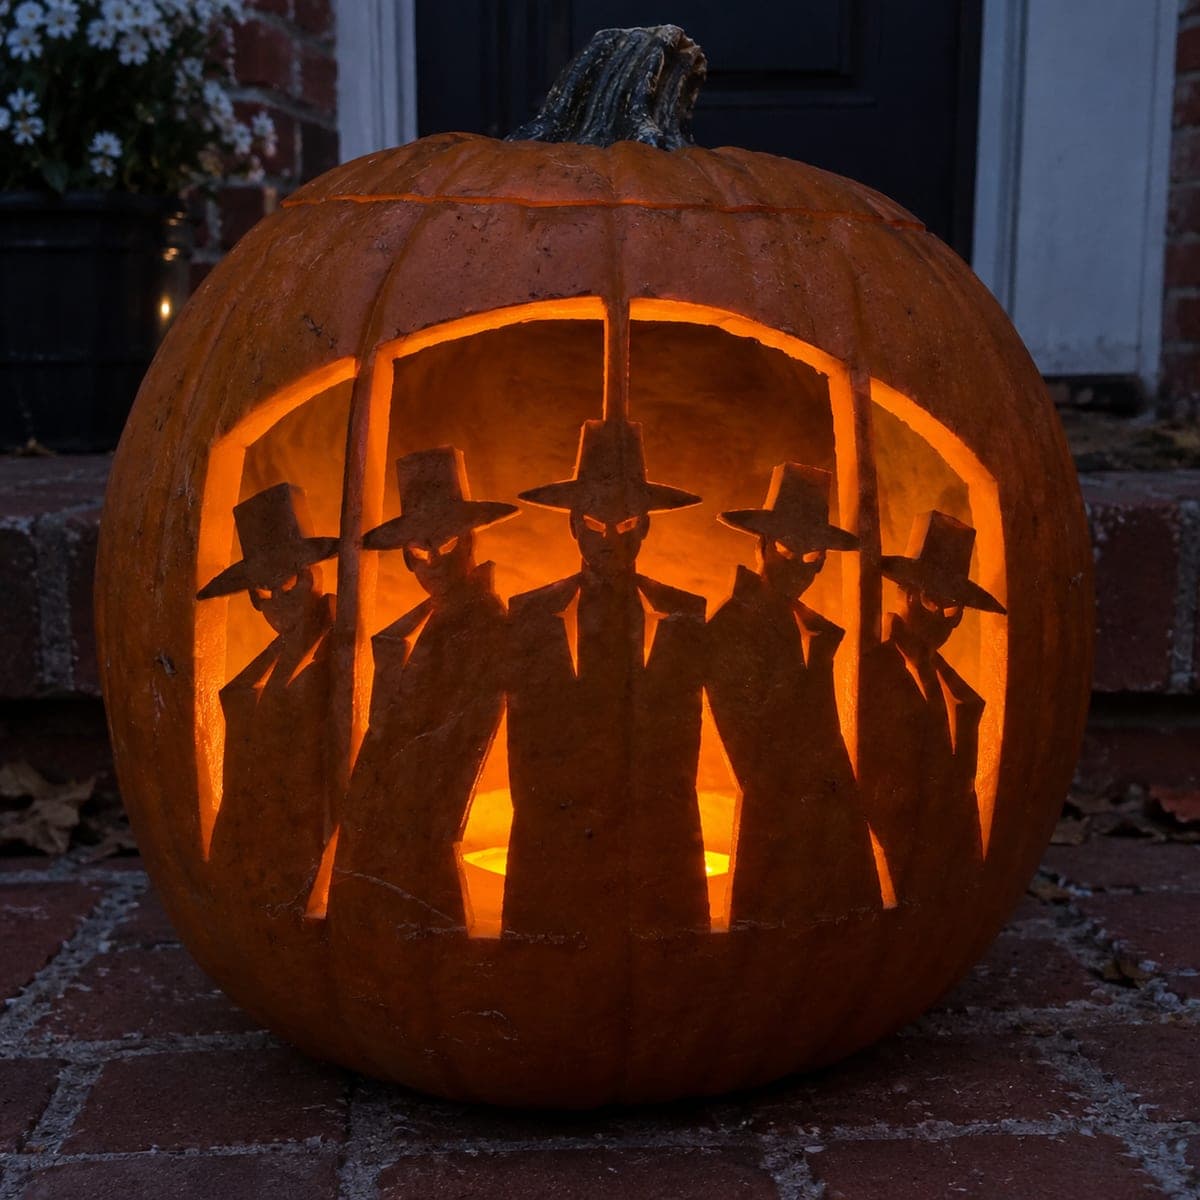
This expert saja boys pumpkin carving idea arranges five dark rind hat-and-coat silhouettes inside an open arch, each thick coat sharing a connected base while broad hat brims join individual vertical frame posts. The center hat also joins the upper frame for extra support. Keep the lapel slits and eye holes small and well-rooted, and place this pumpkin carving idea somewhere backlit to make the arch glow like a concert stage.

No ratings yet · Sign in to rate
Comments (0)

  • No comments yet — be the first.

Save without an account. Sign in to like or comment.

Our tips for carving a similar design

Five dark-rind coat silhouettes are arranged inside one open arch, with each thick coat sharing a common connected base and the individual hat brims each joining a vertical frame post for structural support. The center hat also contacts the upper arch frame, providing a vital third anchor at the top. Small eye holes and lapel slits are cut last after the arch and figure bodies are fully secured. Positioning this pumpkin where light catches the arch from behind maximizes the concert-stage effect.

From pumpkin to porch

  1. Plan and mark the arch

    Draw the full arch outline on the pumpkin with a marker, sizing it so the arch crown sits about 2 cm below the stem and the arch legs run to about a third of the way up from the base. Mark each vertical frame post position and the five figure placements within the arch before any cutting begins.

  2. Cut the arch opening

    Use a thin-blade saw to cut the open arch interior, removing the background rind inside the arch in sections. Do not cut the frame posts or the center hat contact point at the crown. The arch is the single largest cut, so completing it first establishes the main light source of the design.

  3. Establish the shared coat base

    Trace and cut the connected base strip that roots all five coat silhouettes to the lower rind. This base runs as a single horizontal piece connecting each figure to the pumpkin shell. Cut its bottom edge cleanly to separate it from the lower rind, but leave its side ends well attached to the arch legs.

  4. Shape the coat and hat silhouettes

    Working from the outside edges of the arch inward, define each coat and hat brim shape by cutting away the open space around them. Each hat brim must contact its vertical frame post cleanly. The center hat should also press lightly against the arch crown or be connected with a narrow bridge.

  5. Cut the eye holes and lapel slits

    Add the small separate eye openings and narrow lapel slits within each figure last. Use a detail saw for the slits and keep them at least 4 mm wide so they do not crack. Do not add any cheek texture cuts unless the figure has at least 1 cm of surrounding rind to support them.

  6. Insert light and view

    Place an LED puck inside and step back to assess the full design. The five dark silhouettes should stand out against the bright arch glow, resembling spotlit performers. If any connection point looks fragile, reinforce it from inside with a small wedge of toothpick and food-safe glue.

Written with AI to match this design

Gather your supplies

Check things off as you get ready.

Work on a stable surface, keep your free hand out of the cutting path, and have an adult handle sharp tools.

Three levels of light

  • Leave intact

    Five retained dark coat-and-hat silhouettes, the vertical frame posts, and the arch frame edge

  • Peel & shade

    Minimal shallow cheek textures on figures if desired, backed rather than cut through

  • Cut through

    The large open arch background and small eye holes and lapel slits cut fully through

Learn the carving basics

Before you start cutting

What if the center hat is not quite touching the arch crown after carving?

A small gap between the center hat and the arch crown is not a structural problem as long as the hat brim still contacts both vertical frame posts. If the gap concerns you, use a toothpick segment dipped in food-safe glue to bridge the gap from inside. Let it dry before moving the pumpkin.

The shared coat base is thin. How do I cut it without it snapping?

Cut the bottom edge of the base strip in a single smooth pass rather than multiple short strokes that can fatigue the rind. Keep the base at least 1.5 cm tall so it has enough body to handle the weight above it. If it does snap, reattach with food-safe glue and let dry before proceeding.

Can I skip the eye holes to simplify this design?

Yes, skipping the eye holes removes the most structurally risky cuts while preserving the whole performance-arch concept. The dark silhouettes against the glowing arch are visually complete without any facial detail. The lapel slits alone add enough texture to maintain the costume read.

Your take belongs here, too.

Changed a detail? Made it simpler? Share a photo of your version and tell the community what worked.

Share your pumpkin

More pumpkins like this

You've reached the end · 8 pumpkins
The Patch Report

Fresh pumpkins, in your inbox.

The best new carvings, ideas worth stealing, and how-tos for carving season. Short, seasonal, and gone by November.

A short email during carving season. Unsubscribe anytime. See our privacy policy.