Halloween Pumpkin Carving Contest · Starts October 1st · $500 in prizes
← Back to ideas
@ai_concepts
Sep 25, 2026
Saja Boys Bust Silhouette Pumpkin Carving IdeaAI
0

Report this carving

Tell us what is wrong. Reports are private.

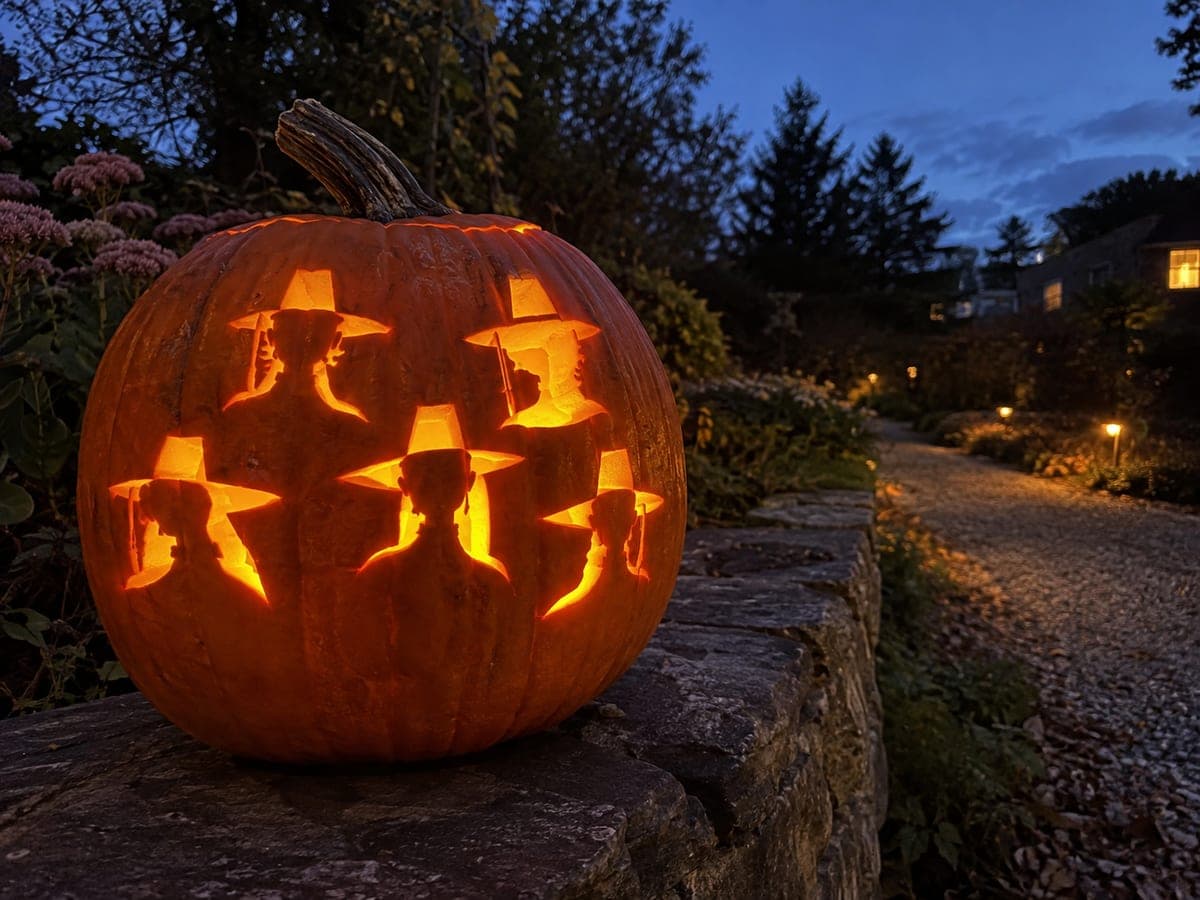
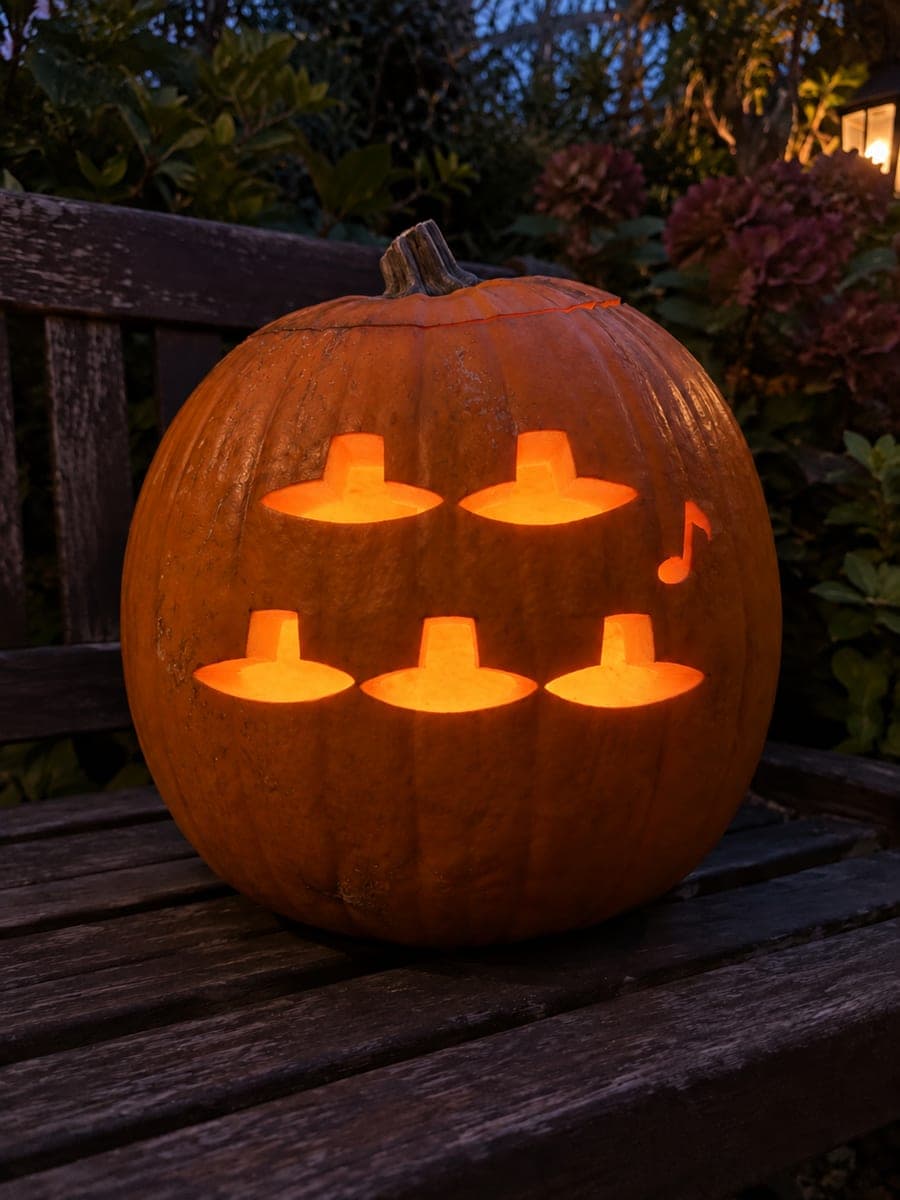
Saja Boys Bust Silhouette Pumpkin Carving Idea

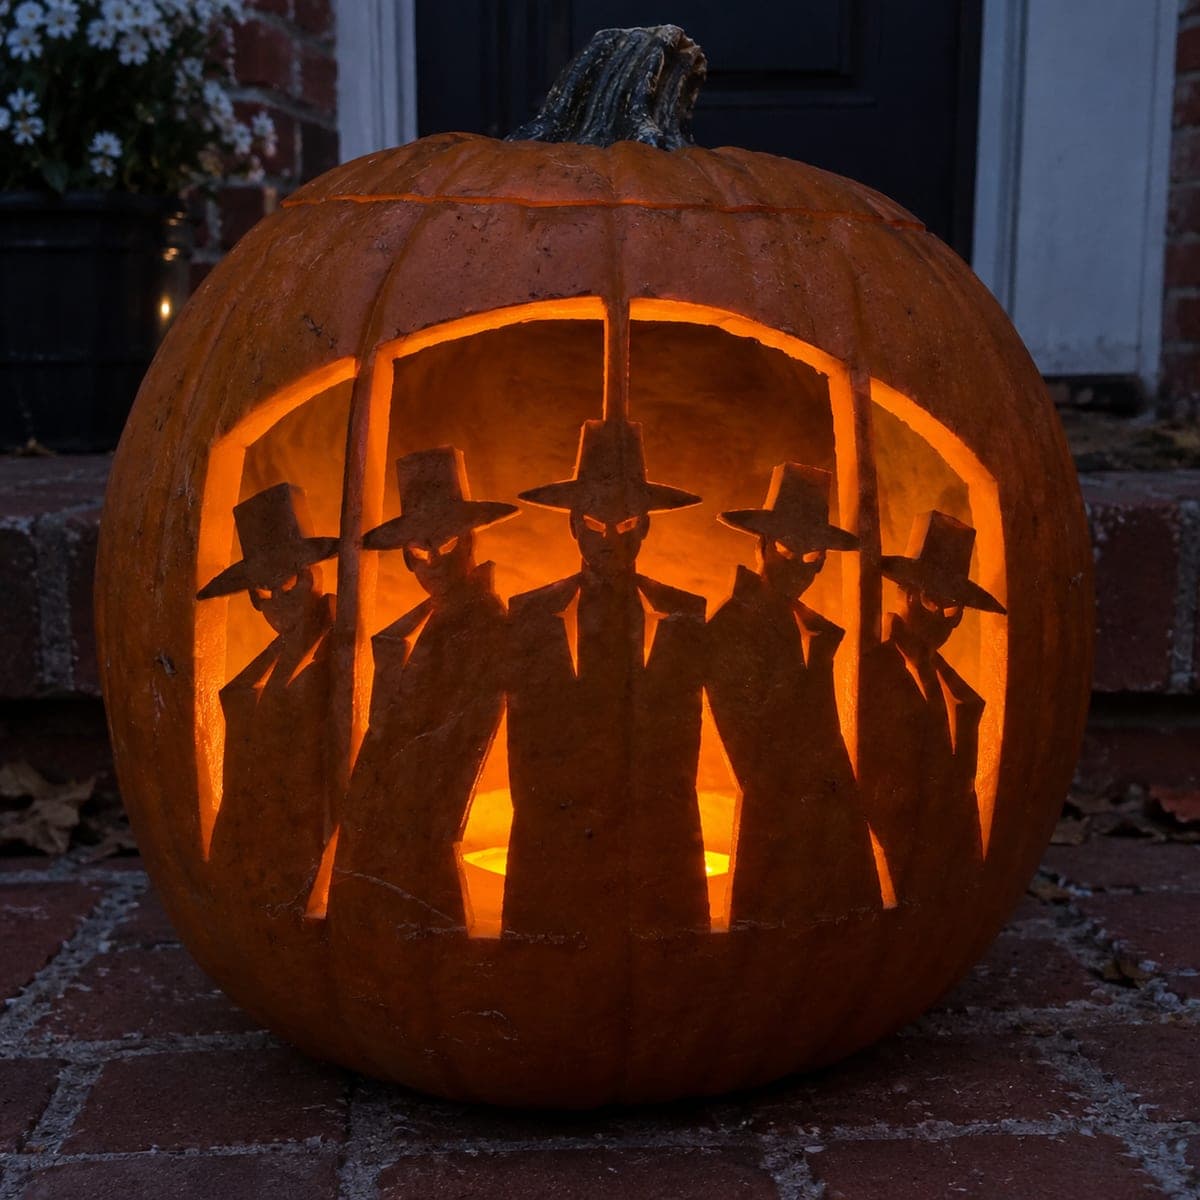
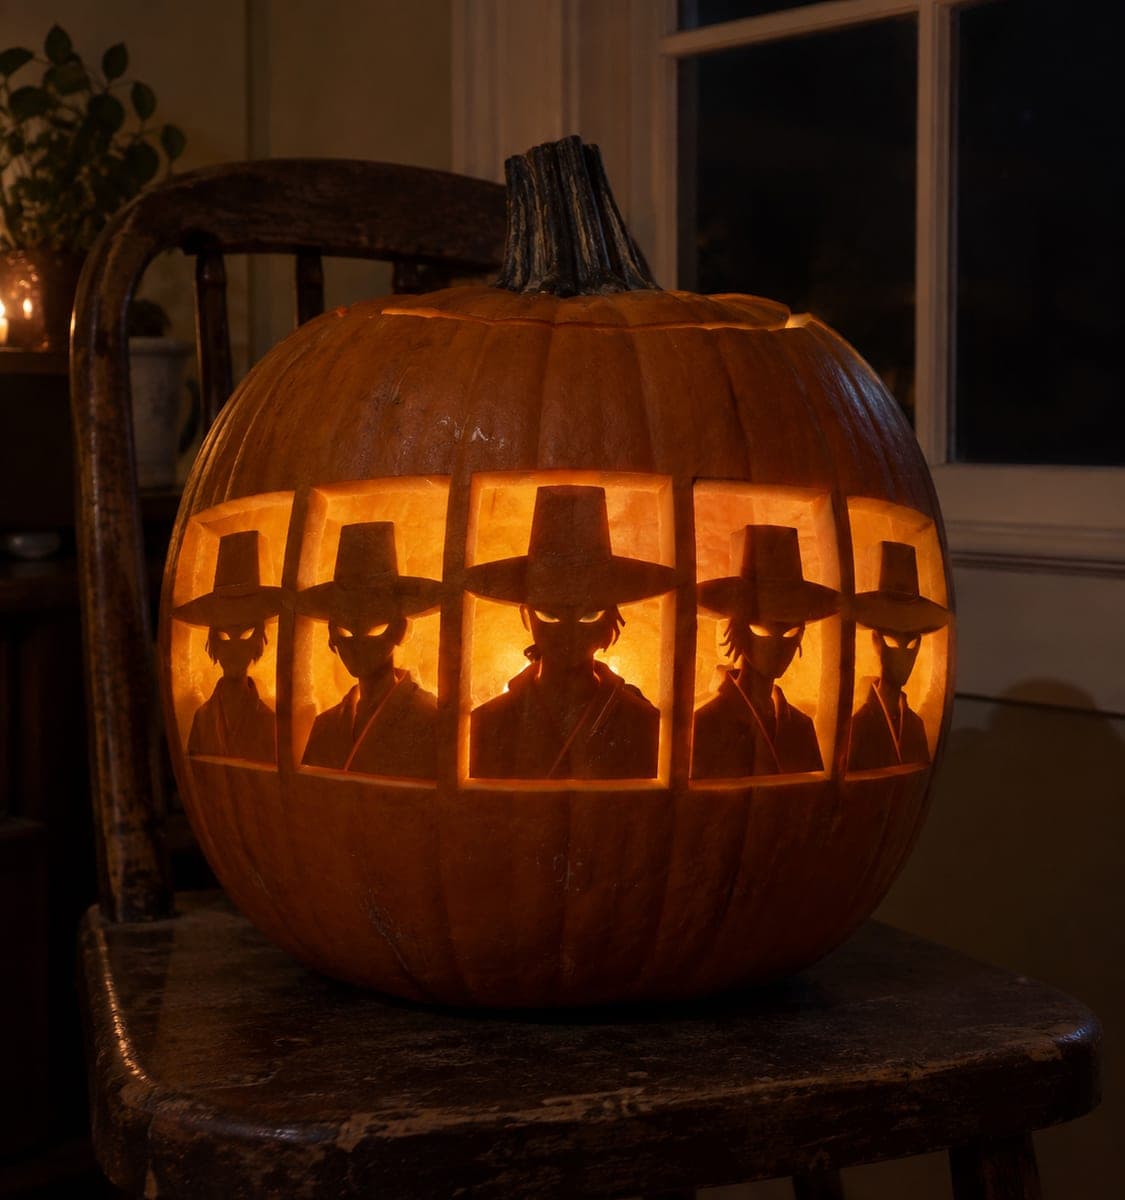
At intermediate difficulty, this saja boys pumpkin carving idea presents five hat-and-bust motifs where the dark retained busts are rooted at broad shoulders and glow against open background cuts. One upper-right figure flips to a fully open negative silhouette for variety. Secure each bust by keeping the shoulder base wide, and use a sharp detail blade for the clean hat-brim curves.

No ratings yet · Sign in to rate
Comments (0)

  • No comments yet — be the first.

Save without an account. Sign in to like or comment.

Our tips for carving a similar design

Five hat-and-bust motifs use a mixed positive-negative technique: most busts are retained dark rind rooted at broad shoulders against open glowing backgrounds, while the upper-right figure reverses to a fully open negative silhouette for visual variety. Keeping every shoulder base wide is the key structural move. A sharp detail blade handles the clean hat-brim curves that define each figure's silhouette.

From pumpkin to porch

  1. Plan the layout

    Sketch five hat-and-bust positions across the pumpkin face with a marker, leaving room for the upper-right figure to sit slightly offset as the reversed motif. Mark which four busts are retained-dark and which one is open-negative before any cutting begins. A clear plan at this stage prevents cutting the wrong shape.

  2. Cut the open background areas

    For the four retained-dark busts, cut the open background areas around each figure first. These are the large glowing spaces that frame each dark bust. Work from top to bottom so the pumpkin is still maximally solid as you move down the face.

  3. Define the hat brims

    Use a sharp detail blade to cut the clean curves of each hat brim. The brim is the top edge of each bust motif and must be crisp for the character to read clearly. Cut toward the retained rind from outside rather than from inside the bust to maintain control.

  4. Cut the open-negative silhouette

    For the upper-right figure, cut the entire hat-and-bust shape out as a single open hole rather than retaining it. This reversal adds visual interest to the composition without adding structural difficulty. Cut this figure after the others so you know exactly how much rind remains.

  5. Check all shoulder roots

    Before inserting a light source, gently press each retained bust to confirm it is firmly anchored at the shoulder base. Any bust that moves or feels loose needs a wider connection to the surrounding rind. Extend the shoulder join slightly downward if necessary.

  6. Light and position

    Place an LED inside and view from the front. The dark retained busts should stand out sharply against the bright open background, and the one open-negative silhouette will glow as pure light. Adjust the pumpkin angle so all five figures are at eye level for best impact.

Written with AI to match this design

Gather your supplies

Check things off as you get ready.

Work on a stable surface, keep your free hand out of the cutting path, and have an adult handle sharp tools.

Three levels of light

  • Leave intact

    Four retained dark-rind bust-and-hat motifs rooted at broad shoulder bases

  • Peel & shade

    None required for this silhouette-focused design

  • Cut through

    Open background areas framing the retained busts, plus the one fully open negative silhouette of the upper-right figure

Learn the carving basics

Before you start cutting

How do I make the hat brim curves look sharp and clean?

Use a detail blade with a fresh tip and cut the brim in one continuous arc rather than in segments. Pull the blade around the curve while rotating the pumpkin slightly so you are always cutting in a comfortable direction. Stopping and restarting mid-curve often leaves a small notch that is visible when lit.

The retained busts look very similar. How do I make the reversed one stand out?

Position the open-negative silhouette slightly higher or lower than its neighbors and make its hat brim slightly wider. The change in light value from dark-retained to bright-open is already the biggest differentiator, but a slight size or position variation reinforces it.

How wide should each shoulder base be to keep the busts secure?

Aim for a shoulder base of at least 2.5 cm wide for each retained bust. The bust rests its weight on this connection, especially as the pumpkin ages and the rind softens. If you are unsure, err on the wider side because you can always remove a little more rind later but cannot add it back.

Your take belongs here, too.

Changed a detail? Made it simpler? Share a photo of your version and tell the community what worked.

Share your pumpkin

More pumpkins like this

You've reached the end · 8 pumpkins
The Patch Report

Fresh pumpkins, in your inbox.

The best new carvings, ideas worth stealing, and how-tos for carving season. Short, seasonal, and gone by November.

A short email during carving season. Unsubscribe anytime. See our privacy policy.