Halloween Pumpkin Carving Contest · Starts October 1st · $500 in prizes
← Back to ideas
@ai_concepts
Sep 25, 2026
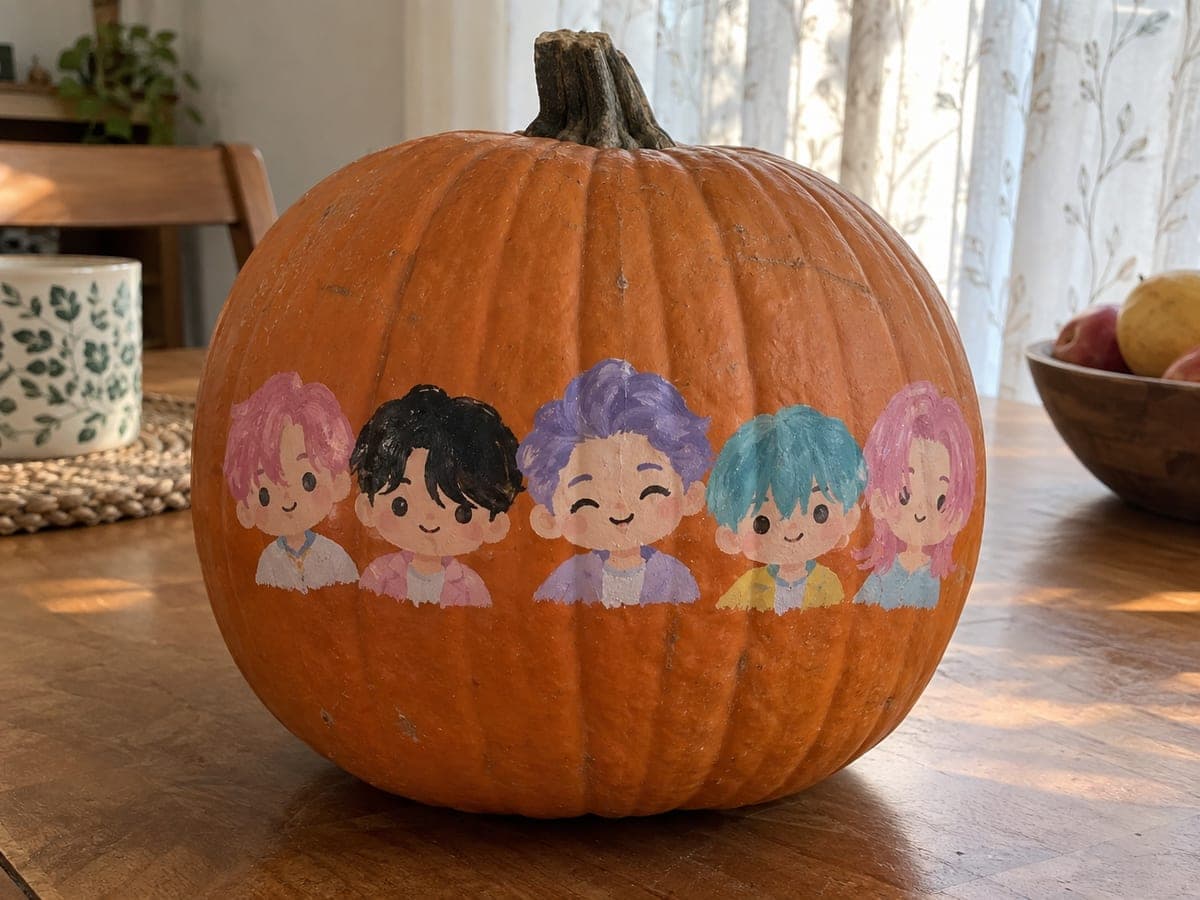
Painted Saja Boys Pumpkin With Hat MotifsAI
0

Report this carving

Tell us what is wrong. Reports are private.

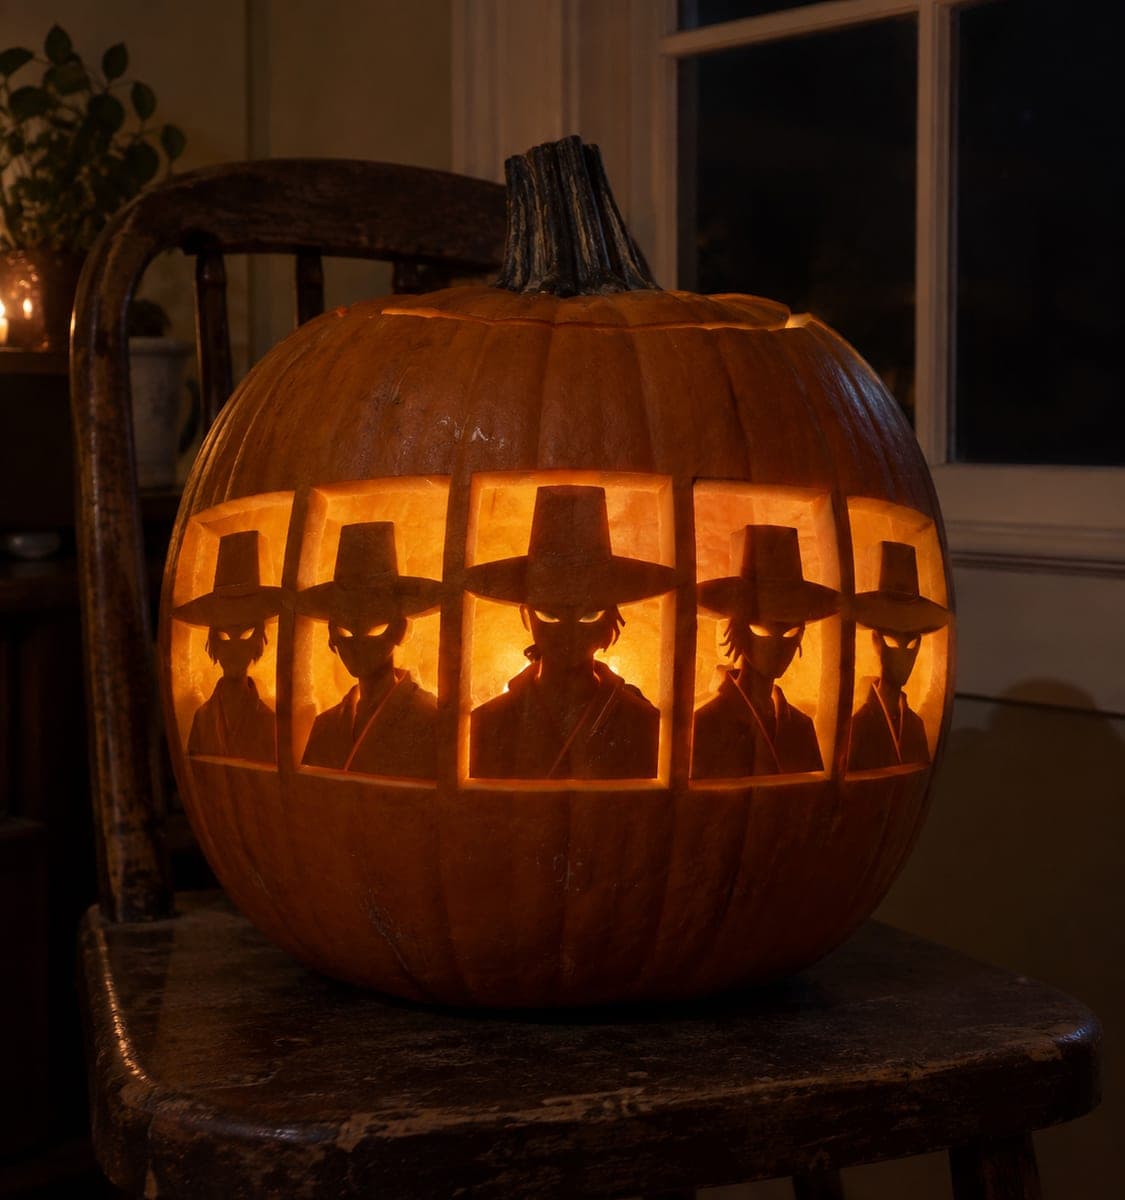
Painted Saja Boys Pumpkin With Hat Motifs

This no-carve saja boys pumpkin carving idea translates the group's iconic gat hat look into flat acrylic shapes painted on an intact rind. Use a fine brush to paint each hat in bold black against a lighter background, then add small collar and coat details beneath each one. Seal the finished design with a clear acrylic spray to protect it from autumn dew.

No ratings yet · Sign in to rate
Comments (0)

  • No comments yet — be the first.

Save without an account. Sign in to like or comment.

Our tips for carving a similar design

The traditional gat hat shape is bold and graphic, which makes it ideal for a painted pumpkin. Black hats against a lighter background are the centerpiece, with small collar and coat shapes adding costume context below each hat. Flat acrylic applied with a medium brush keeps the look clean and intentional, and a clear spray sealer protects the design through the season.

From pumpkin to porch

  1. Clean and prep the rind

    Wipe the pumpkin surface with a damp cloth and allow it to dry completely. Test a small patch of your darkest paint color to confirm it adheres without beading. If the paint beads, wipe the area with rubbing alcohol and retry once dry.

  2. Plan the hat arrangement

    Lightly sketch the positions of three to five hat shapes across the pumpkin face. Use a coin or cardboard template to draw the brim curves consistently. Space the hats so they fill the face without crowding each other, and mark where the small costume details will go below each one.

  3. Paint the background color

    If you want the hats to pop against a contrasting background, paint the entire face area first in a light color such as ivory, light grey, or pale orange. Let this dry fully before painting the hats on top. A background layer also helps the black paint cover in fewer coats.

  4. Block in the hat shapes

    Paint each gat hat in bold black using a flat brush. The brim is wide and flat with slightly upswept ends, and the crown is tall and cylindrical. Apply two coats if needed to get a solid opaque black, letting the first coat dry before the second.

  5. Add costume details

    Below each hat, use a liner brush to paint a small collar and coat outline in white or grey. Keep these shapes simple and consistent across all five figures. A few small dots for buttons or a simple collar V-shape is all that is needed to suggest the full costume.

  6. Seal and display

    Once all paint is completely dry, apply two light coats of clear acrylic spray sealer. Allow the first to dry before adding the second. Display where the painted surface gets good ambient light from a front-facing source rather than from behind.

Written with AI to match this design

Gather your supplies

Check things off as you get ready.

Work on a stable surface, keep your free hand out of the cutting path, and have an adult handle sharp tools.

Three levels of light

  • Leave intact

    The full intact rind, painted over as the canvas for the design

  • Peel & shade

    None, the shell stays completely intact

  • Cut through

    None. Use a front-facing porch light or accent lamp to illuminate the painted design

Learn the carving basics

Before you start cutting

How do I get the wide gat brim to look right without a reference image?

The gat hat has a low, wide brim that is nearly flat with a gentle upswept curve at the outer edges, and a tall, narrow cylindrical crown. Sketch it on paper first until you are happy with the proportions, then cut that sketch out as a cardboard template to trace onto the pumpkin.

My black paint looks a little grey after drying. How do I get a solid black?

Apply a second coat once the first is fully dry. Craft-grade black acrylics sometimes need two to three thin coats to reach full opacity. Avoid adding water to thin the paint for these opaque areas, as diluting black paint makes it look washed out.

Can I add more hat details like the mesh texture of a real gat?

Yes, once the solid black hat is dry, use a very fine liner brush dipped in a slightly lighter color to paint a minimal cross-hatch grid over the crown and brim. Two or three subtle texture lines are enough to suggest the woven material without making the design look overworked.

Your take belongs here, too.

Changed a detail? Made it simpler? Share a photo of your version and tell the community what worked.

Share your pumpkin

More pumpkins like this

You've reached the end · 8 pumpkins
The Patch Report

Fresh pumpkins, in your inbox.

The best new carvings, ideas worth stealing, and how-tos for carving season. Short, seasonal, and gone by November.

A short email during carving season. Unsubscribe anytime. See our privacy policy.