Halloween Pumpkin Carving Contest · Starts October 1st · $500 in prizes
← Back to ideas
@ai_concepts
Sep 25, 2026
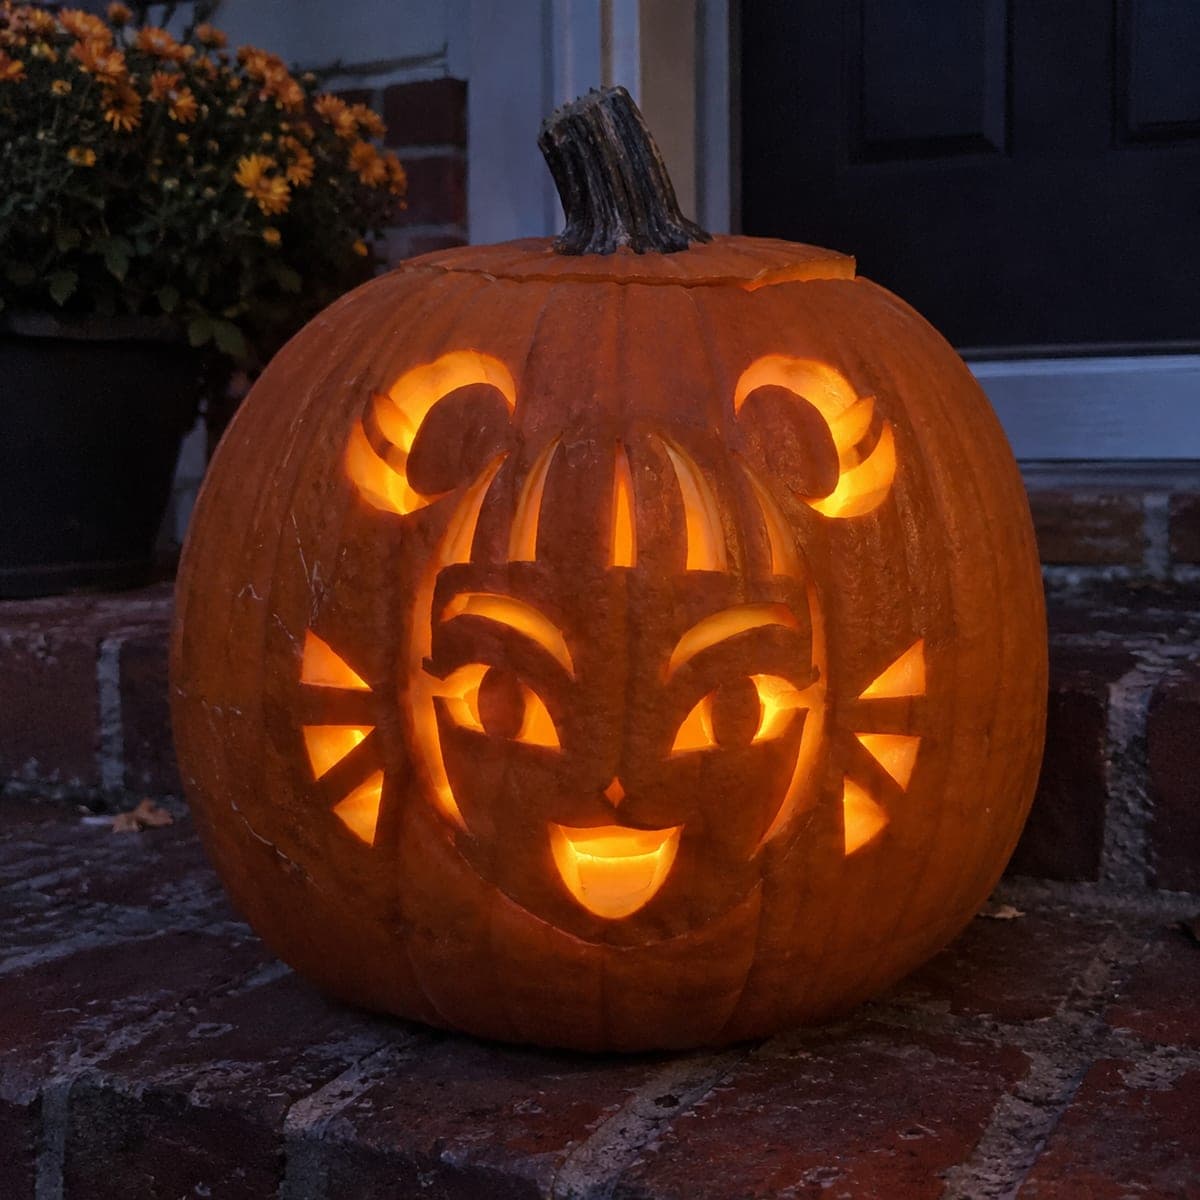
Expert Zoey KPop Jack-O-Lantern With MicrophoneAI
0

Report this carving

Tell us what is wrong. Reports are private.

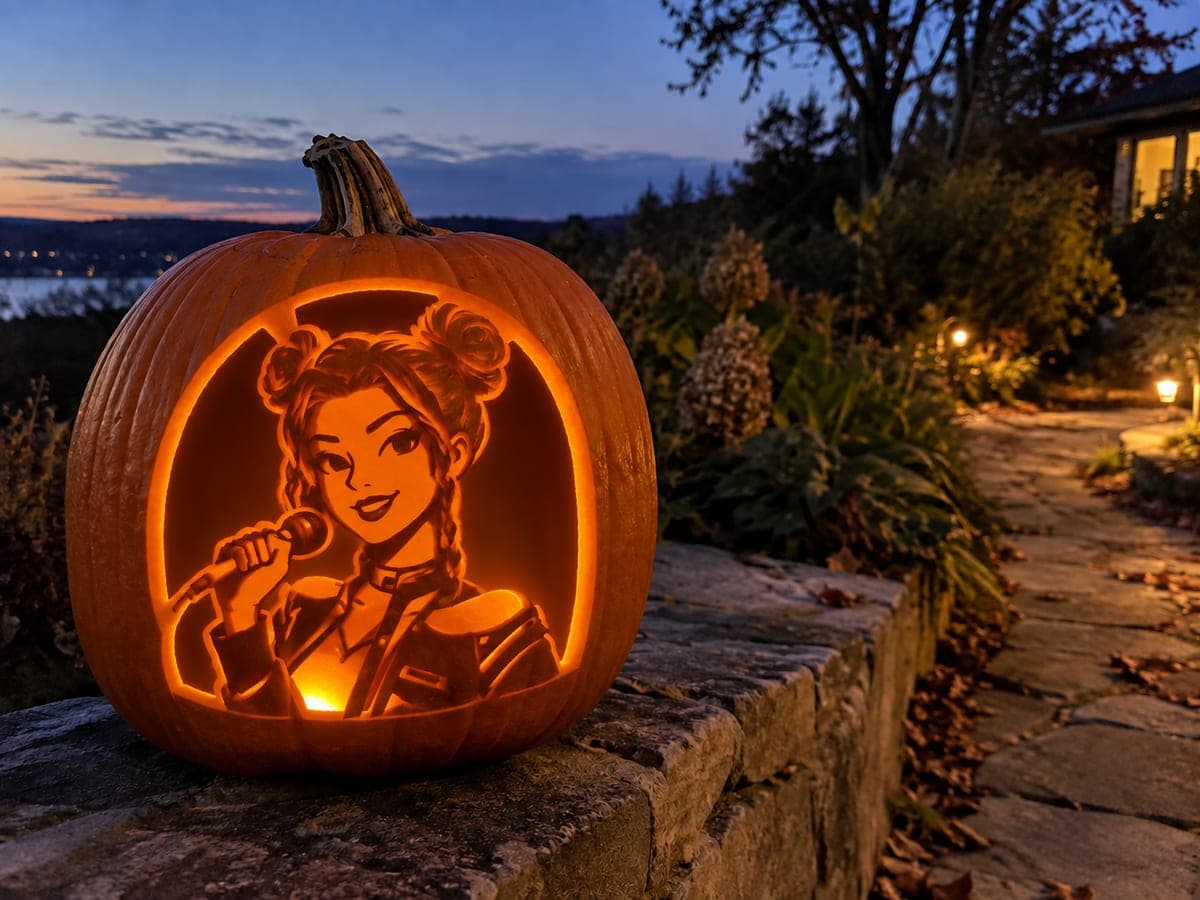
Expert Zoey KPop Jack-O-Lantern With Microphone

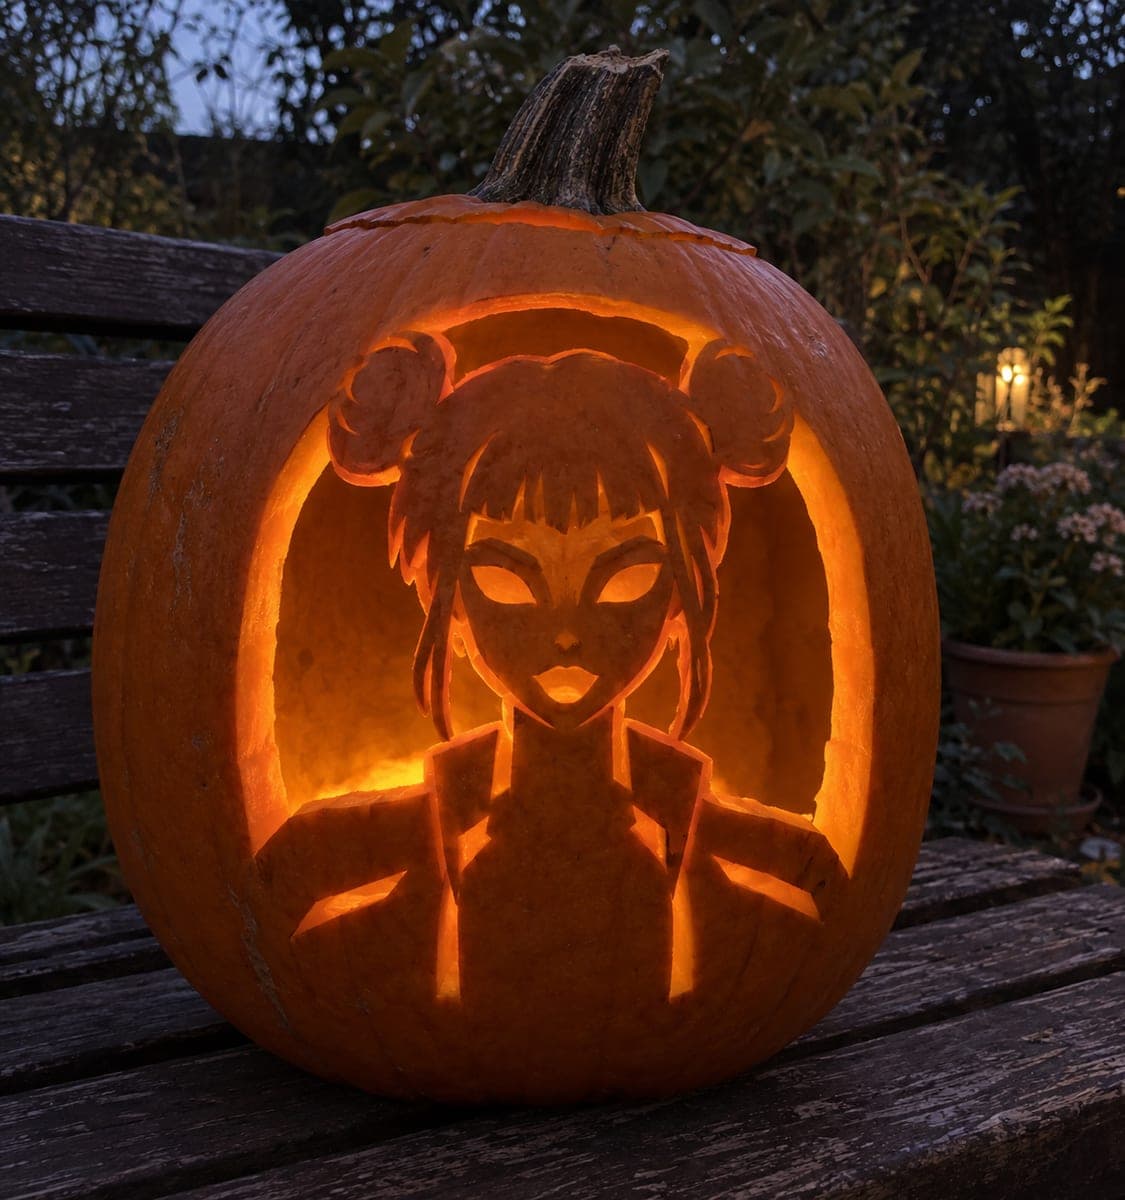
A true empty oval frames Zoey's full retained portrait in this expert zoey pumpkin carving idea, with broad bun bridges reaching to the upper rim, a full lower base root, a microphone joined at the hand, and the mic cable rooted to the left edge for complete structural support. Portrait face and costume details are shallow-backed engravings throughout the retained area. Carve the oval opening first and verify every bridge is secure, then work the engraved face and costume detail from the outside of the figure inward.

No ratings yet · Sign in to rate
Comments (0)

  • No comments yet — be the first.

Save without an account. Sign in to like or comment.

Our tips for carving a similar design

The design frames Zoey's full figure as a retained dark-rind portrait inside a true empty oval, with broad bun bridges at the top and a full lower base keeping the piece attached to the shell. The microphone joins at the hand and its cable roots to the left edge, turning what could be fragile connection points into load-bearing anchors. Portrait face and costume details are shallow-backed engravings worked from outside the figure inward after the oval is fully established.

From pumpkin to porch

  1. Prep and trace

    Choose a large, flat-fronted pumpkin and clean the exterior. Print and tape the stencil firmly, then transfer every outline with a pin tool. Mark the oval boundary, all bridge locations, the microphone shape, and the cable path before removing the paper.

  2. Cut the oval surround

    Carve the empty oval opening first, working slowly around the curve with a thin-blade saw. Stop at each bridge point and verify the retained portrait still feels solid before continuing. Keep the cut perpendicular to the shell so the glow reads cleanly from the front.

  3. Establish bridges and cable anchor

    Confirm the broad bun bridges at the top and the full lower base root are fully intact and undamaged. Carve the microphone cable path down to the left edge, leaving a generous rind strip at each anchor point. Do not narrow any bridge below about 1 cm at its thinnest point.

  4. Shallow-back the portrait details

    Using a linoleum gouge or the tip of a small paring knife, shallow-back the facial features, costume lines, and hair detail within the retained area. Remove roughly half the rind thickness so these areas catch diffused light without becoming holes. Work from the outer edges of the face toward the center.

  5. Add the microphone cutout

    Cut the microphone body and any open grill slots fully through the rind, keeping the hand connection firmly joined. Use a narrow detail saw for the grill slots and cut them last to preserve grip on the pumpkin. An LED tea light placed inside will light the mic slots without heat-wilting the thin pieces.

  6. Light and display

    Insert a battery-powered LED puck and position it to face the oval opening. View from across the room and adjust the angle until the engraved portrait detail is visible in the glow. Photograph in a darkened room to capture the full effect before displaying outdoors.

Written with AI to match this design

Gather your supplies

Check things off as you get ready.

Work on a stable surface, keep your free hand out of the cutting path, and have an adult handle sharp tools.

Three levels of light

  • Leave intact

    The retained dark-rind portrait body, including face and costume areas with shallow engraving

  • Peel & shade

    Facial feature areas and costume line details that are shallow-backed to catch diffused glow

  • Cut through

    The empty oval surround, microphone cable channel, and mic grill slots cut fully through

Learn the carving basics

Before you start cutting

How do I keep the broad bun bridges from snapping while I carve the oval?

Cut the oval in short segments, pausing at each bridge to check that the portrait is still stable. Avoid applying lateral pressure against the bridge direction. If a bridge feels wobbly, stop and brace the retained piece from the inside with a folded paper towel before continuing.

The microphone cable channel is very thin. How can I cut it without cracking the rind?

Score the channel outline lightly with a craft knife first, then deepen the cut in two or three passes rather than forcing through in one go. Keep the cable channel at least 4 mm wide so the saw has room to travel without binding. Cut toward the left-edge anchor, not away from it.

How deep should the shallow-backed engravings be for the portrait details?

Aim to remove about half the rind thickness, leaving a translucent but intact shell. Hold a flashlight inside as you work: the backing should glow dimly without any light leaking through as a full cut. Stop as soon as you see that faint glow appear.

Your take belongs here, too.

Changed a detail? Made it simpler? Share a photo of your version and tell the community what worked.

Share your pumpkin

More pumpkins like this

You've reached the end · 8 pumpkins
The Patch Report

Fresh pumpkins, in your inbox.

The best new carvings, ideas worth stealing, and how-tos for carving season. Short, seasonal, and gone by November.

A short email during carving season. Unsubscribe anytime. See our privacy policy.