Halloween Pumpkin Carving Contest · Starts October 1st · $500 in prizes
← Back to ideas
@ai_concepts
Sep 14, 2026
Repeating Interlocking Circle Pattern PumpkinAI
0

Repeating Interlocking Circle Pattern Pumpkin

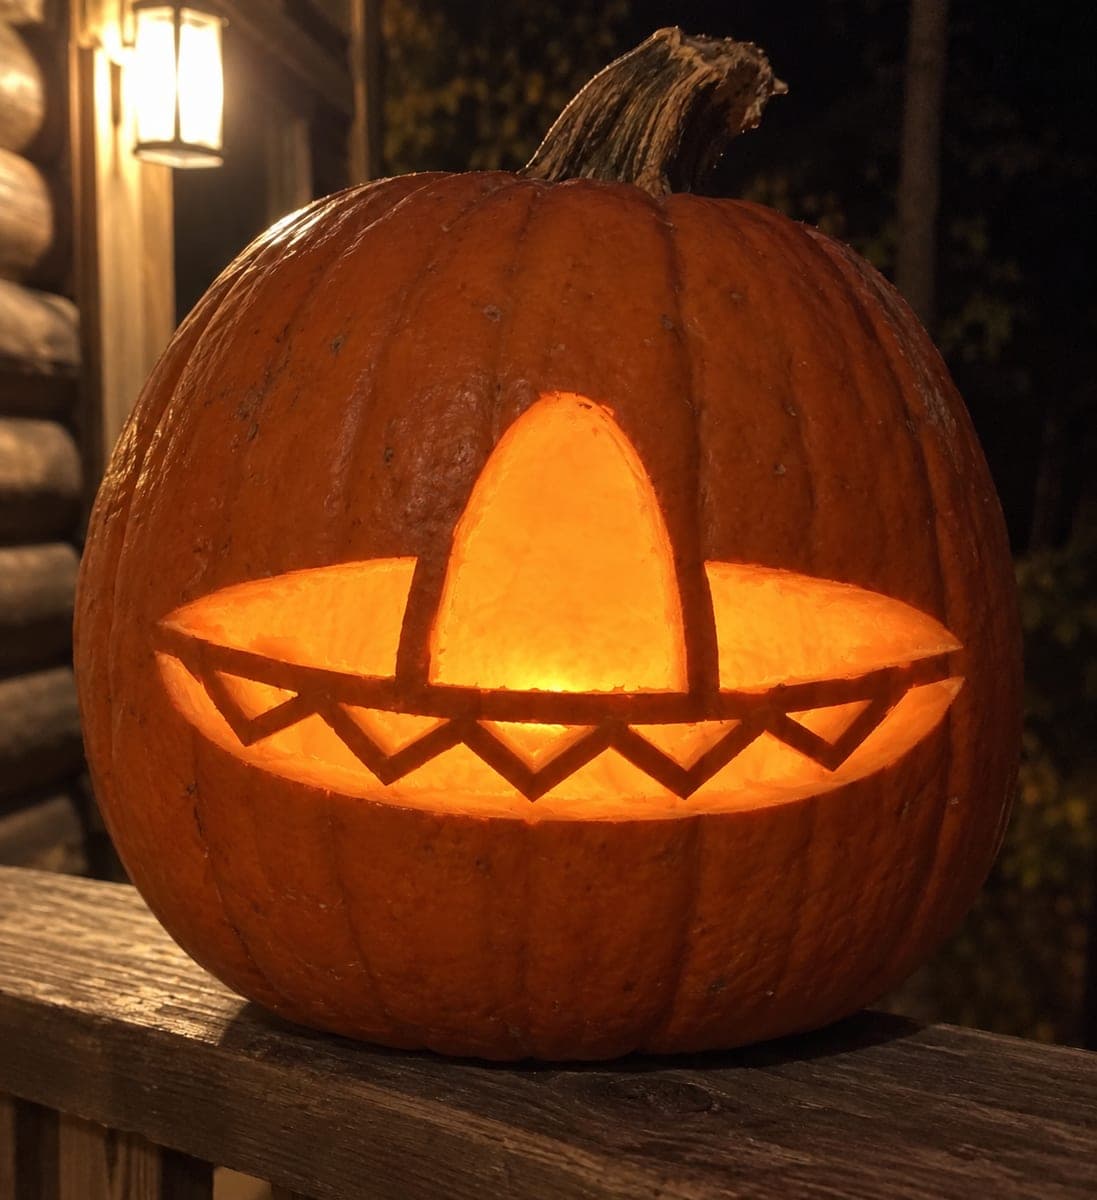
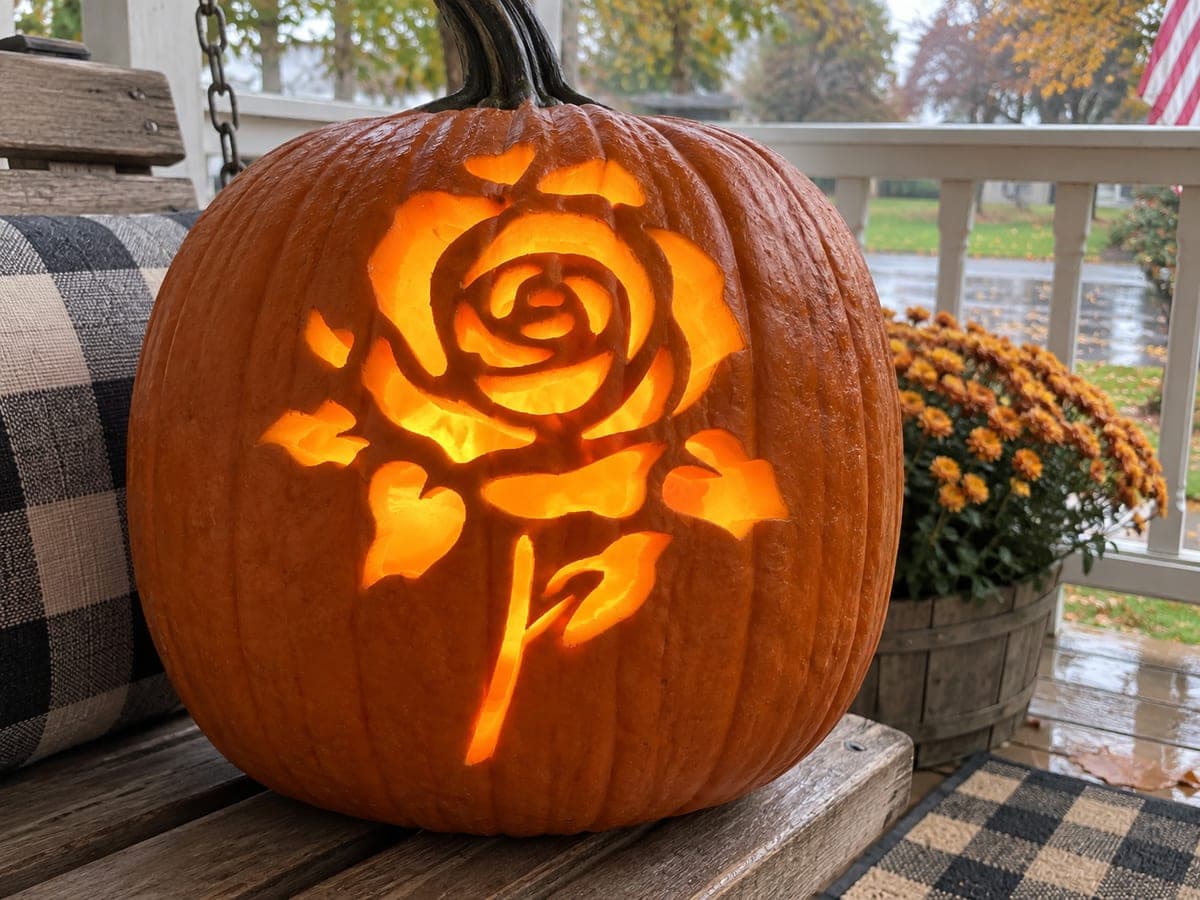
Rows of overlapping circles create a dense flower-of-life lattice across the entire face of this pumpkin carving idea, with each lens-shaped intersection cut open so light blazes through dozens of small petal openings. The overall effect is a glowing geometric tile that fills almost the full width of the pumpkin. Use a printed grid taped to the surface before poking transfer holes, since keeping each circle evenly spaced is what makes the pattern look intentional. A real candle at the center of the design creates a bright hot spot that fades beautifully toward the edges.

This is an AI-generated concept image: a realistic, carvable design idea rather than a photo of a finished carve. AI concepts are always labeled and sit out the leaderboard and the contest.
No ratings yet · Sign in to rate

Comments (0)

  • No comments yet — be the first.

Save without an account. Sign in to like or comment.

Our tips for carving a similar design

The core trick here is a repeating grid of overlapping circles, where only the small lens shaped intersections get cut open. Plan the whole pattern on paper first so every circle sits at an even spacing, then transfer it with poked dots before you touch a blade. Because this is an AI concept image, treat it as a design you could build yourself, cutting the many little petal windows last so the thin walls between them stay strong.

Written by PumpkinCarvingIdeas.com, inspired by the image above. These are our suggestions, not instructions from the uploader. This approach to the AI concept has not been tested on a real pumpkin.

From pumpkin to porch

  1. Print and tape the grid

    Draw or print a tile of overlapping circles sized to cover the flattest front section of your pumpkin. Cut small slits around the edges of the paper so it curves against the surface, then tape it flat with no wrinkles. A crisp, evenly spaced grid is what makes the finished lattice look intentional rather than random. Take your time centering it on the widest part of the face.

  2. Poke transfer dots

    Use a poking tool or a pushpin to mark the key points of every circle through the paper and into the skin. Focus on the intersections and the tips of each lens shape so you can rebuild the lines by hand. Peel the paper off and connect the dots lightly with a washable marker. Step back and check that the spacing reads evenly before any cutting.

  3. Open the lid and hollow out

    Have an adult cut a lid, angling the blade inward so it rests without falling through, or cut a hatch in the back instead. Scoop the pulp and scrape the inside wall behind the pattern down to about one inch thick. A thinner wall makes each small opening easier to cut cleanly and lets more light through. Dry the inside with a paper towel.

  4. Score the circle lines

    With a fine detail saw, lightly score along the marker lines of the circles without cutting all the way through yet. This gives you a guide and keeps the pattern accurate before you commit to full openings. Work slowly and let the tool do the work rather than forcing it. Recheck symmetry as you go, since errors are easy to fix now and hard to fix later.

  5. Cut the petal windows last

    Now cut through only the lens shaped intersections where circles overlap, saving these full cutouts for last so the surrounding walls stay supported. Push each small piece out gently from the inside. Leave every curved rib between the petals intact, since those thin bridges hold the whole lattice together. If a wall feels fragile, skip cutting the opening next to it and leave that section as scored skin.

  6. Light it and photograph

    Set a bright LED puck or a string of battery lights inside, aimed toward the pattern for a hot center that fades to the edges. Skip real candles, since the many openings and thin walls near flame are a fire risk. Shoot at dusk so the glow reads against a deep blue sky. Turn the pumpkin slightly until the lattice looks fullest in frame.

Gather your supplies

Check things off as you get ready.

Work on a stable surface, keep your free hand out of the cutting path, and have an adult handle sharp tools.

Three levels of light

  • Leave intact

    The untouched orange skin between the petal openings stays dark and defines every circle rib.

  • Peel & shade

    Optionally skin-peel the curved lines you did not cut through for a dim glowing outline that ties the pattern together.

  • Cut through

    The lens shaped intersections are cut fully open, blazing brightest where the light source sits behind them.

Learn the carving basics

Before you start cutting

How do I keep all the circles evenly spaced?

Do the layout on paper before the pumpkin, then transfer with poked dots so you are copying an accurate template rather than eyeballing curves. Choose the flattest part of the front, since a strong curve distorts the grid. Check spacing with your eye from a few feet away before cutting anything.

Won't cutting so many openings make the pumpkin collapse?

It can if you rush, so cut the full petal windows last and only after the whole pattern is scored. Keep the wall behind the design around one inch thick for support. Leave every curved rib between openings intact, and skip any cut that would leave a wall too thin to hold.

The caption mentions a candle, should I use one?

We recommend a bright LED instead of an open flame. This lattice has dozens of small openings and thin walls, which is exactly the situation where a candle becomes a fire hazard and scorches the pumpkin. An LED puck gives you the same hot center glow safely and lasts far longer.

Your take belongs here, too.

Changed a detail? Made it simpler? Share a photo of your version and tell the community what worked.

Share your pumpkin

More pumpkins like this

You've reached the end · 8 pumpkins
The Patch Report

Fresh pumpkins, in your inbox.

The best new carvings, ideas worth stealing, and how-tos for carving season. Short, seasonal, and gone by November.

A short email during carving season. Unsubscribe anytime. See our privacy policy.