Halloween Pumpkin Carving Contest · Starts October 1st · $500 in prizes
← Back to ideas
@ai_concepts
Sep 25, 2026
Intricate Concentric Aperture Mandala Pumpkin CarvingAI
0

Report this carving

Tell us what is wrong. Reports are private.

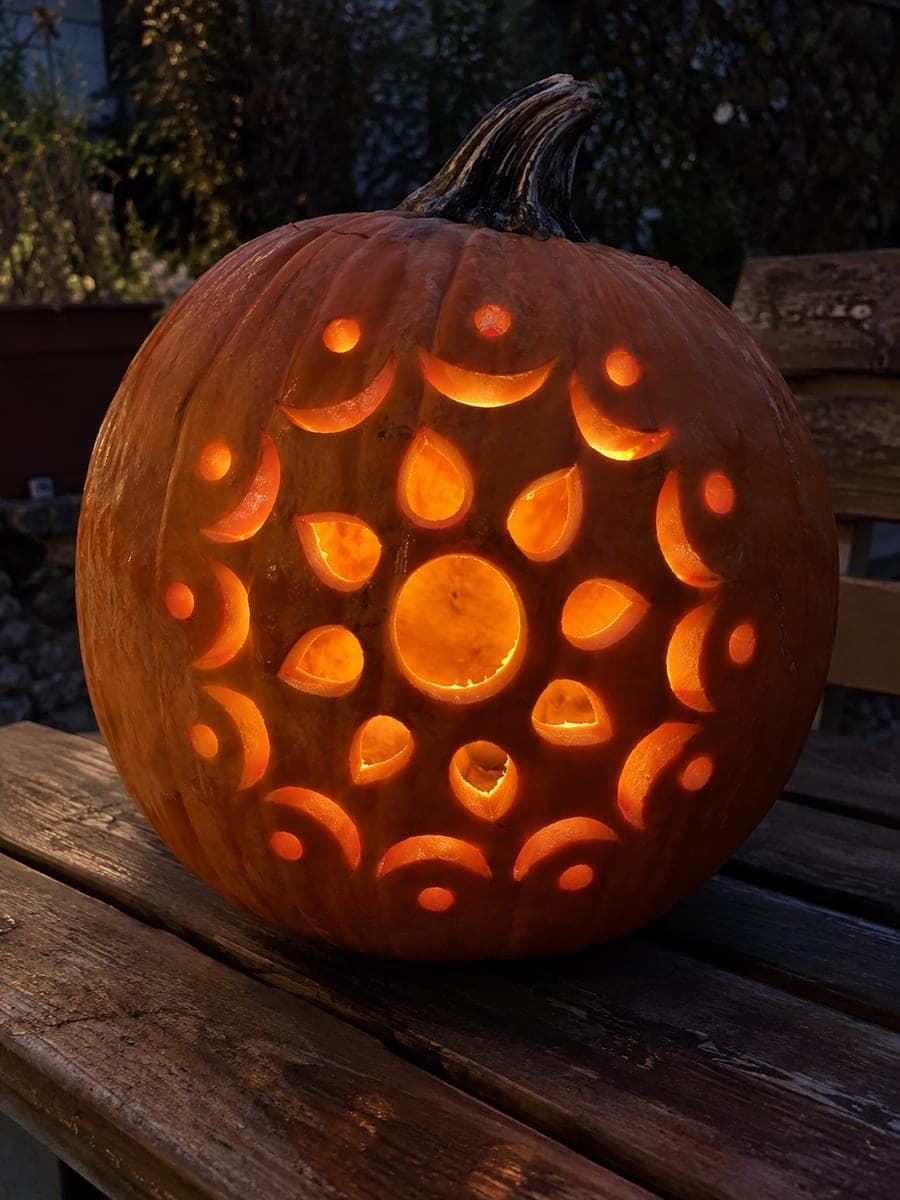
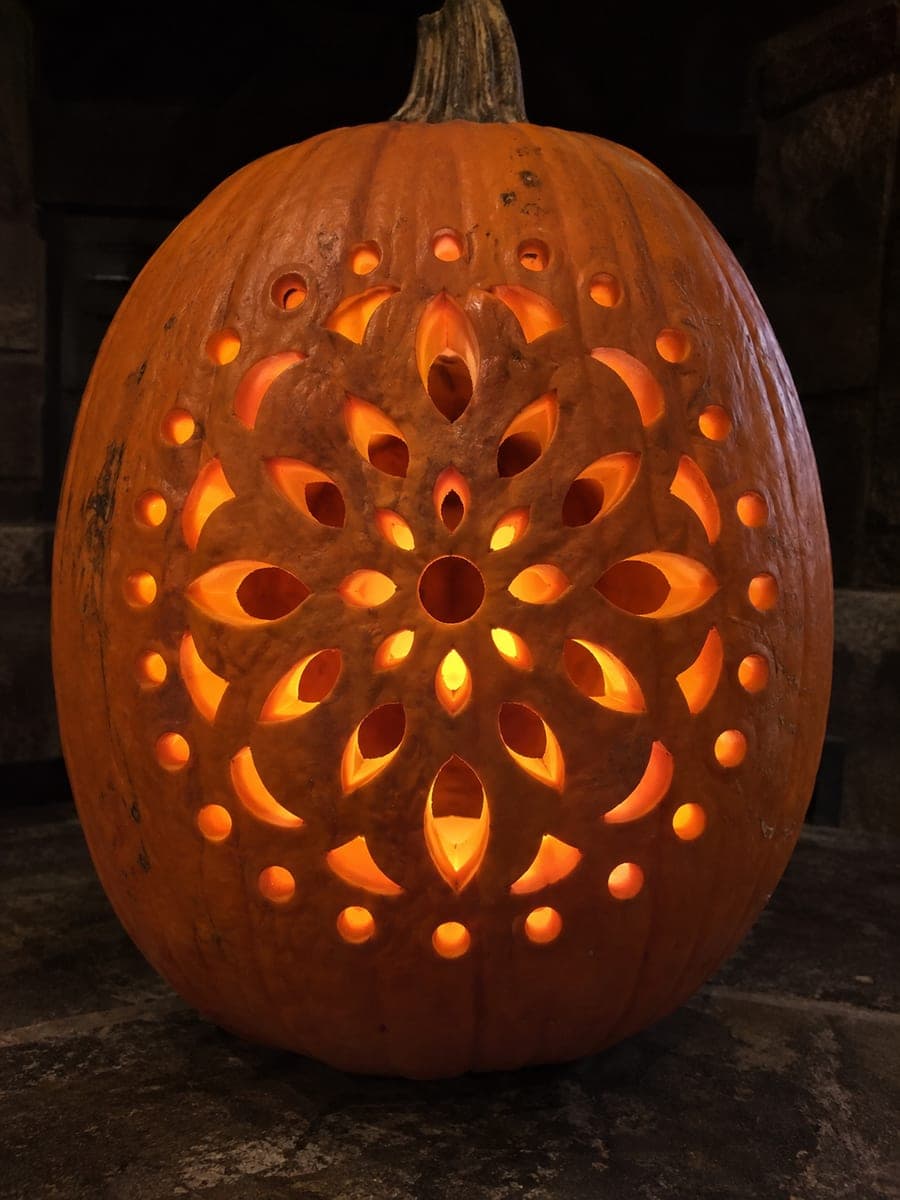
Intricate Concentric Aperture Mandala Pumpkin Carving

Dense concentric rows of isolated glowing apertures cover nearly every surface of this expert-level mandala pumpkin carving idea, demanding precision and patience from start to finish. Cut each hole completely independently, keeping the broad continuous spokes and connecting bands intact to retain all the material and prevent collapse. Print and tape your pattern directly to the pumpkin, then use a small detail saw to work from the center outward one row at a time. A warm LED placed low inside pushes light evenly through every row.

No ratings yet · Sign in to rate
Comments (0)

  • No comments yet — be the first.

Save without an account. Sign in to like or comment.

Our tips for carving a similar design

Dense concentric rows of isolated glowing apertures fill nearly the entire pumpkin face, with broad continuous spokes and connecting bands kept completely intact throughout. Printing and taping the pattern directly to the pumpkin removes the guesswork from placement. Working center-outward one row at a time keeps the shell balanced as the openings multiply. A warm LED positioned low inside pushes light evenly through every row.

From pumpkin to porch

  1. Select and prep a large pumpkin

    Choose a large pumpkin with a smooth, wide face. Cut a bottom lid and hollow completely, leaving a full inch of wall everywhere. Tape a sheet of clean white paper temporarily to the inside back wall to help reflect light evenly when you test the glow between sessions.

  2. Print and tape the full pattern

    Print the complete mandala pattern at full scale and tape it directly and firmly to the pumpkin face. Use several strips of tape along all edges so the template cannot shift while you work through the rows. Secure tape failures at this step can misalign later rows.

  3. Poke the entire pattern through the template

    Use a scratch awl to poke a pilot hole at every aperture position through the paper template. Number the rows outward from center on the template before removing it, so you always know which row you are on during cutting.

  4. Cut from the center outward, one row at a time

    Use a small detail saw or sharp carving knife to cut each aperture in the innermost row first. Complete all cuts in one full row before moving to the next. Keep every aperture isolated and leave the broad spokes and connecting bands intact throughout.

  5. Refrigerate between sessions

    After each hour of work, refrigerate the pumpkin for at least an hour to firm up the rind. The many apertures gradually reduce the shell's rigidity, and cool, firm rind is significantly easier to cut cleanly than warm, soft rind.

  6. Light with a warm LED and display

    Place a warm LED bulb low inside so light radiates upward and outward, reaching the outermost rows. Display in a completely dark setting. The hundreds of small glowing apertures read as a cohesive luminous mandala rather than individual holes.

Written with AI to match this design

Gather your supplies

Check things off as you get ready.

Work on a stable surface, keep your free hand out of the cutting path, and have an adult handle sharp tools.

Three levels of light

  • Leave intact

    Broad continuous spokes and connecting bands throughout all rows stay fully dark, forming the mandala's geometric framework.

  • Peel & shade

    None for this cutout design.

  • Cut through

    Every isolated aperture in every row is fully cut through for a dense, even full-body glow.

Learn the carving basics

Before you start cutting

How long should I realistically expect this to take?

Expert-level dense mandala carvings typically require six to ten hours spread over two to three days. Start at least four days before Halloween so you can refrigerate the pumpkin between sessions and still have time to fix any mistakes.

One of my spokes is getting very thin as I cut adjacent rows. What should I do?

Stop cutting in that area immediately. Reinforce the thin spoke from the inside with a small piece of foam wedged against it. Adjust the aperture sizes in the next planned row near that spoke so the spoke stays wider. It is better to slightly deviate from the template than to lose a section of the design.

How do I prevent the template from slipping partway through the long carving session?

Re-tape any loose edges of the template before each session. Once the template is removed after poking all holes, use a fine-tip marker to trace a few key reference lines directly on the rind as a guide for the rows you have not yet cut.

Your take belongs here, too.

Changed a detail? Made it simpler? Share a photo of your version and tell the community what worked.

Share your pumpkin

More pumpkins like this

You've reached the end · 8 pumpkins
The Patch Report

Fresh pumpkins, in your inbox.

The best new carvings, ideas worth stealing, and how-tos for carving season. Short, seasonal, and gone by November.

A short email during carving season. Unsubscribe anytime. See our privacy policy.