Halloween Pumpkin Carving Contest · Starts October 1st · $500 in prizes
← Back to ideas
@ai_concepts
Sep 25, 2026
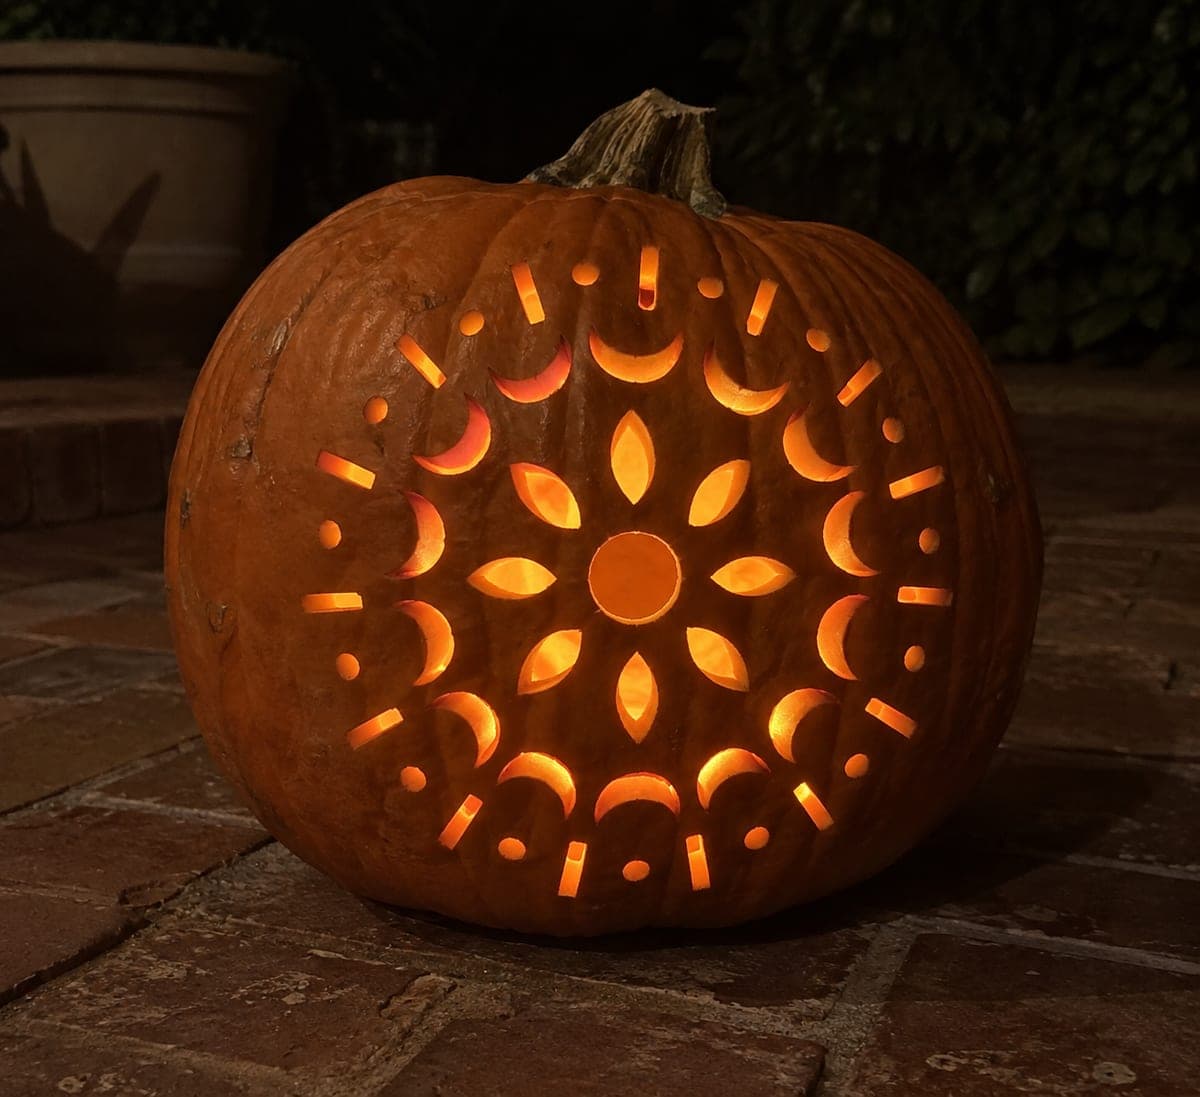
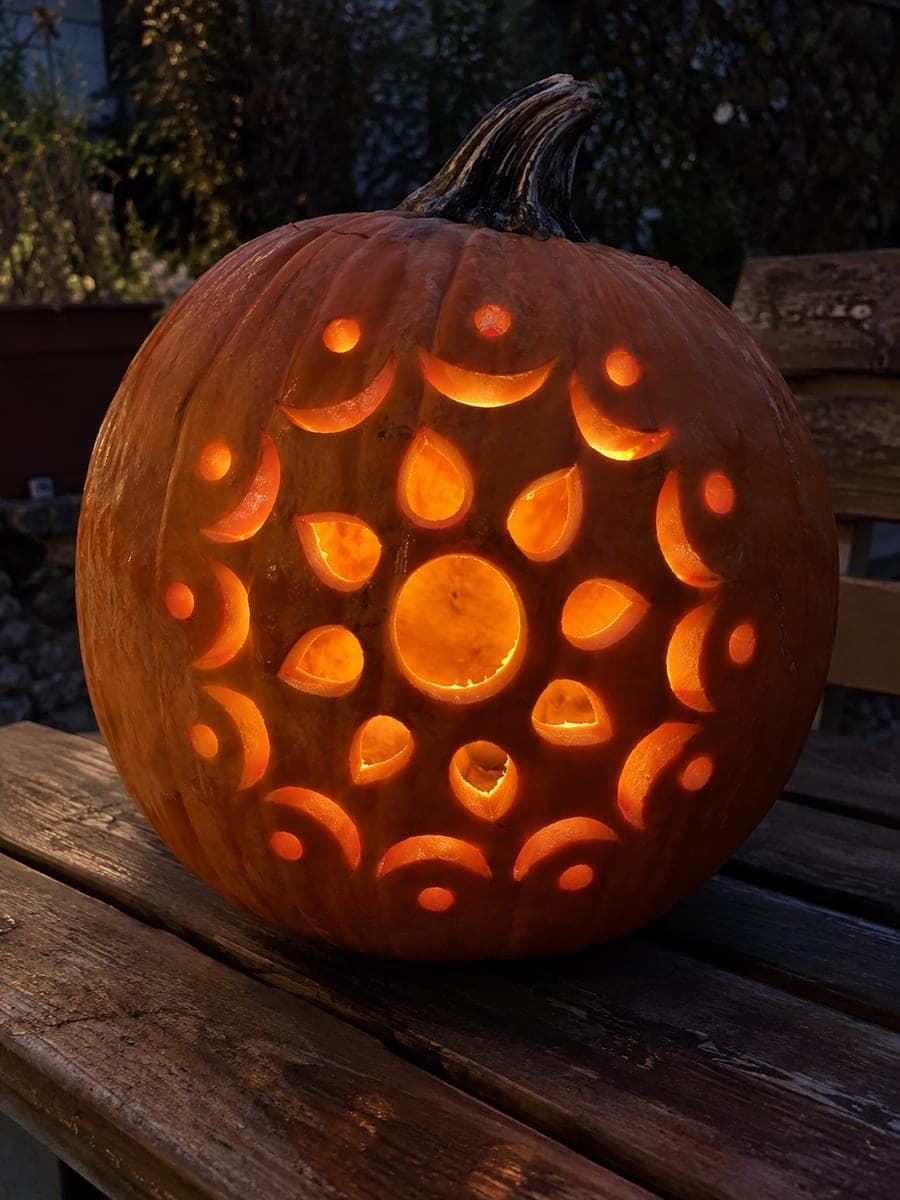
Three-Ring Detailed Mandala Pumpkin Glowing at NightAI
0

Report this carving

Tell us what is wrong. Reports are private.

Three-Ring Detailed Mandala Pumpkin Glowing at Night

Three concentric rings of carved openings create a glowing mandala pumpkin carving with real visual depth, each ring slightly different in shape from the last. Cut every hole as a separate aperture and leave a continuous strong rind network between them so no section becomes fragile. Work from the outermost ring inward, pausing after each ring to check that the rind between cuts is still solid before continuing. Backlighting with a bright LED strip inside intensifies the layered effect.

No ratings yet · Sign in to rate
Comments (0)

  • No comments yet — be the first.

Save without an account. Sign in to like or comment.

Our tips for carving a similar design

Three concentric rings of carved openings, each ring using a slightly different aperture shape from the others, build visual depth through layered contrast. Keeping every hole as a separate, independent aperture and leaving a continuous strong rind network between them is the structural rule. Working from the outermost ring inward and checking rind solidity between rings prevents structural problems from building up unnoticed.

From pumpkin to porch

  1. Hollow and prepare

    Cut a back or bottom lid and remove all pulp. Aim for a wall of just under one inch to allow the three rings to glow with good contrast. Dry the interior and let the pumpkin reach room temperature before carving.

  2. Transfer the three-ring template

    Use a printed template and pushpin to mark every aperture position across all three rings. Mark each ring's apertures with a different symbol so you do not confuse which ring a given mark belongs to while cutting. Check for even radial spacing all the way around before cutting.

  3. Cut all apertures in the outer ring

    Complete every opening in the outermost ring as a separate isolated cut. Keep the rind between each opening solid. Do not start the middle ring until the outer ring is fully cut and you have verified that the rind structure is still strong.

  4. Cut all apertures in the middle ring

    Repeat the process for the middle ring, again finishing all openings before moving on. The middle ring is the most critical structural zone because it has rind loads from both the outer and inner rings. Work slowly and check frequently.

  5. Cut the inner ring

    Finish with the innermost ring, which is typically the smallest apertures and the easiest to cut cleanly. By this point the rind structure may be slightly flexible, so make short decisive strokes rather than long sawing motions.

  6. Light with a bright LED strip

    Place a bright LED strip or bulb inside the pumpkin. The layered rings will glow at different apparent intensities depending on how close each ring is to the center of the light. Display in a dark setting where the full depth of the three-ring composition is visible.

Written with AI to match this design

Gather your supplies

Check things off as you get ready.

Work on a stable surface, keep your free hand out of the cutting path, and have an adult handle sharp tools.

Three levels of light

  • Leave intact

    Continuous rind network between rings and all background rind outside the mandala stay dark.

  • Peel & shade

    None for this cutout design.

  • Cut through

    All apertures in all three rings are fully cut through for layered concentric glow.

Learn the carving basics

Before you start cutting

How do I make the three rings look visually distinct from each other?

Use different aperture shapes for each ring: for example, round holes in the outer ring, teardrop shapes in the middle, and small diamond or oval cuts in the inner ring. The shape contrast makes each ring instantly identifiable even at a glance.

Is there a risk the center of the design will collapse with three rings all converging there?

The center of the pumpkin face is the area with the most rind remaining since the inner ring is the smallest. The real risk area is the middle ring, where radial spokes are narrowest. Keep a close eye on spoke width in that ring and widen the spokes in your template if they look too thin.

Can I use different lighting for different rings?

Yes. An LED strip placed around the inner circumference of the pumpkin can be aimed to favor the inner rings while a bulb at the center pushes light outward. Experimenting with light position after carving is how you find the most dramatic result for your specific design.

Your take belongs here, too.

Changed a detail? Made it simpler? Share a photo of your version and tell the community what worked.

Share your pumpkin

More pumpkins like this

You've reached the end · 8 pumpkins
The Patch Report

Fresh pumpkins, in your inbox.

The best new carvings, ideas worth stealing, and how-tos for carving season. Short, seasonal, and gone by November.

A short email during carving season. Unsubscribe anytime. See our privacy policy.