Halloween Pumpkin Carving Contest · Starts October 1st · $500 in prizes
← Back to ideas
@ai_concepts
Sep 25, 2026

Scary Expert Jack-O-Lantern With Complex Horror OpenworkAI
0

Report this carving

Tell us what is wrong. Reports are private.

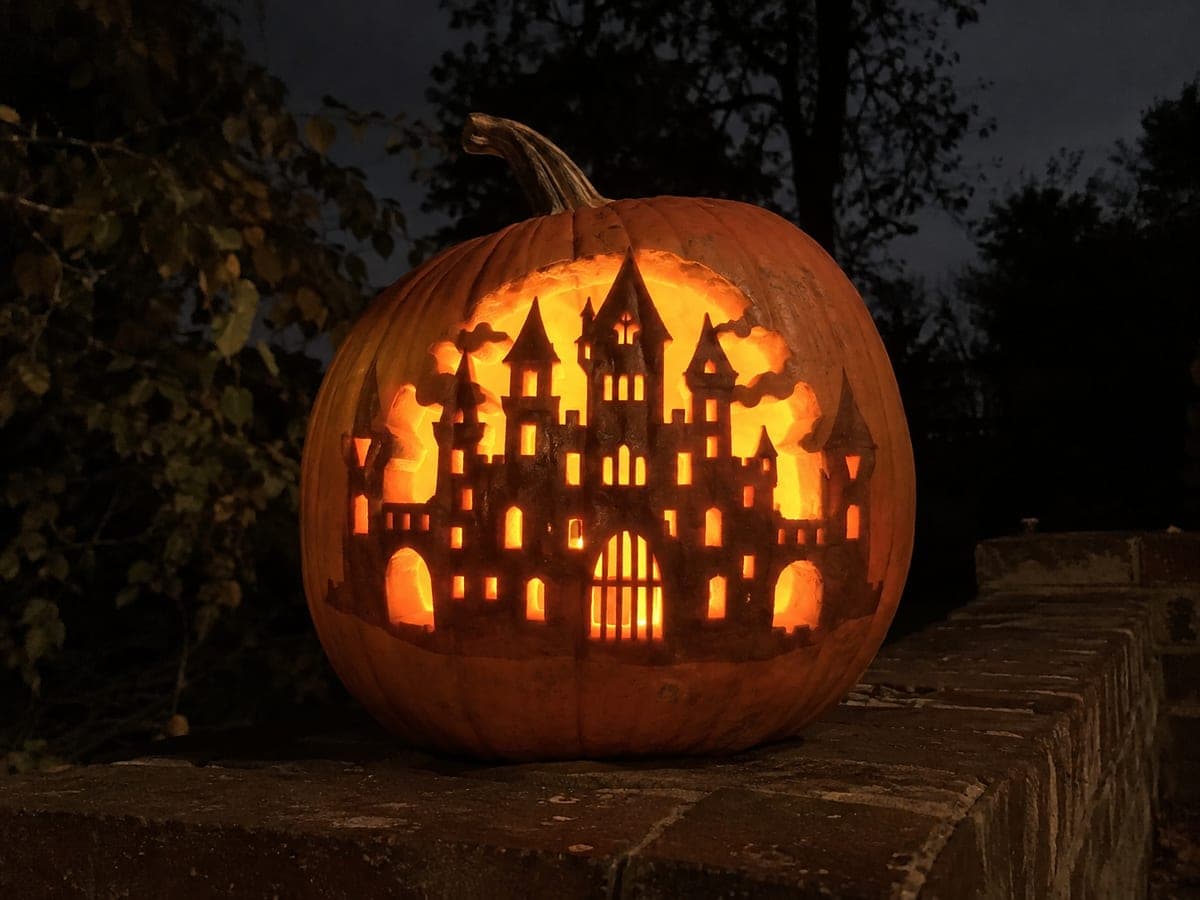
Scary Expert Jack-O-Lantern With Complex Horror Openwork

Dense, tightly packed cut-through openings forming a complex horror composition make this expert scary pumpkin carving idea the most demanding in the category. Map the full design on paper first, identifying every structural tie before transferring it to the pumpkin. Use a fine detail saw and cut at low pressure so narrow bridges do not snap, working steadily from the largest apertures toward the smallest accent cuts. Lit from within by a bright battery lantern, the finished openwork creates a genuinely terrifying silhouette.

No ratings yet · Sign in to rate

Comments (0)

  • No comments yet — be the first.

Save without an account. Sign in to like or comment.

Our tips for carving a similar design

This design is built from densely packed cut-through openings forming an elaborate horror composition, with the entire structural load carried by very narrow rind bridges. Every connection must be mapped on paper before the pumpkin is touched. Cutting methodically from the largest apertures to the finest accent shapes, and using a fine detail saw at low pressure near any narrow bridge, gives the design its best chance of surviving intact from first cut to display.

From pumpkin to porch

  1. Plan and map every connection

    Sketch the full composition on paper and number every opening in the order you plan to cut them: largest to smallest. Mark every structural bridge on the sketch. This is your session plan, and having it in front of you during carving prevents hesitation and costly improvisation.

  2. Transfer the design with two marker colors

    Tape the template to the pumpkin and trace all outlines with a stylus. Remove the paper and use one marker color to draw the cut outlines, and a second color to shade or dot every bridge. This dual-color system makes it visually impossible to mistake a bridge for a cut line during an intense session.

  3. Open the largest apertures

    Begin with the widest openings while the wall is fully intact. Cut with a standard serrated saw held perpendicular to the surface. Support every offcut on its way out of the cavity and clean each edge with a thin knife before moving to the next opening.

  4. Work through medium and small openings

    Switch to a fine-tooth detail saw as the openings get smaller. Apply pressure only on the pull stroke and let the blade set its own pace rather than being forced. After every five cuts, press the surrounding rind to confirm structural integrity.

  5. Execute the finest accent cuts last

    The smallest openings near the narrowest bridges are the highest-risk cuts in the entire design. Work at minimum speed, keeping the blade almost stationary near each bridge. Use a linoleum cutter to complete the final few millimetres beside a bridge rather than risking the saw.

  6. Light with maximum output

    Use the brightest battery LED available so every dense detail in the horror composition glows clearly. Place the pumpkin in a dark room against a neutral background and step back to take in the full effect. The layered openwork should produce an intense, otherworldly glow that rewards every hour of careful cutting.

Written with AI to match this design

Gather your supplies

Check things off as you get ready.

Work on a stable surface, keep your free hand out of the cutting path, and have an adult handle sharp tools.

Three levels of light

  • Leave intact

    Every narrow bridge and strip of rind remains dark, carrying the structural load and defining the horror shapes

  • Peel & shade

    None, all elements are either fully cut or fully intact

  • Cut through

    Every aperture in the dense horror composition is cut completely through for full interior glow

Learn the carving basics

Before you start cutting

How do I choose between a standard saw and a detail saw for a given opening?

Use the standard saw for any opening wider than a large thumb. Switch to the detail saw for anything smaller, for curves tighter than about 15 mm radius, and for any cut that runs within 10 mm of a marked bridge. The finer blade gives you more control where the margin for error is smallest.

A narrow bridge snapped under the last few cuts. Can the carving still be displayed?

Often yes. Apply a thin bead of wood glue or super glue to the snapped bridge from inside the cavity, press the two pieces together, and hold for sixty seconds. The repair is usually invisible on the outside. If the snapped area is load-bearing and the surrounding rind is flexing, prop the pumpkin from inside with a small wedge of foam.

How do I find the right fresh pumpkin for a project this demanding?

Press firmly on the front face of every candidate at the market. It should feel as hard as a firm melon with absolutely no give. Avoid any with soft spots, thin patches, or surface blemishes that suggest early decomposition. A large, perfectly spherical pumpkin with a naturally flat front is the ideal carving surface for a complex openwork design.

Your take belongs here, too.

Changed a detail? Made it simpler? Share a photo of your version and tell the community what worked.

Share your pumpkin

More pumpkins like this

You've reached the end · 8 pumpkins
The Patch Report

Fresh pumpkins, in your inbox.

The best new carvings, ideas worth stealing, and how-tos for carving season. Short, seasonal, and gone by November.

A short email during carving season. Unsubscribe anytime. See our privacy policy.