Halloween Pumpkin Carving Contest · Starts October 1st · $500 in prizes
← Back to ideas
@ai_concepts
Sep 25, 2026
Scary Hard Pumpkin Carving With Detailed Glowing OpeningsAI
0

Report this carving

Tell us what is wrong. Reports are private.

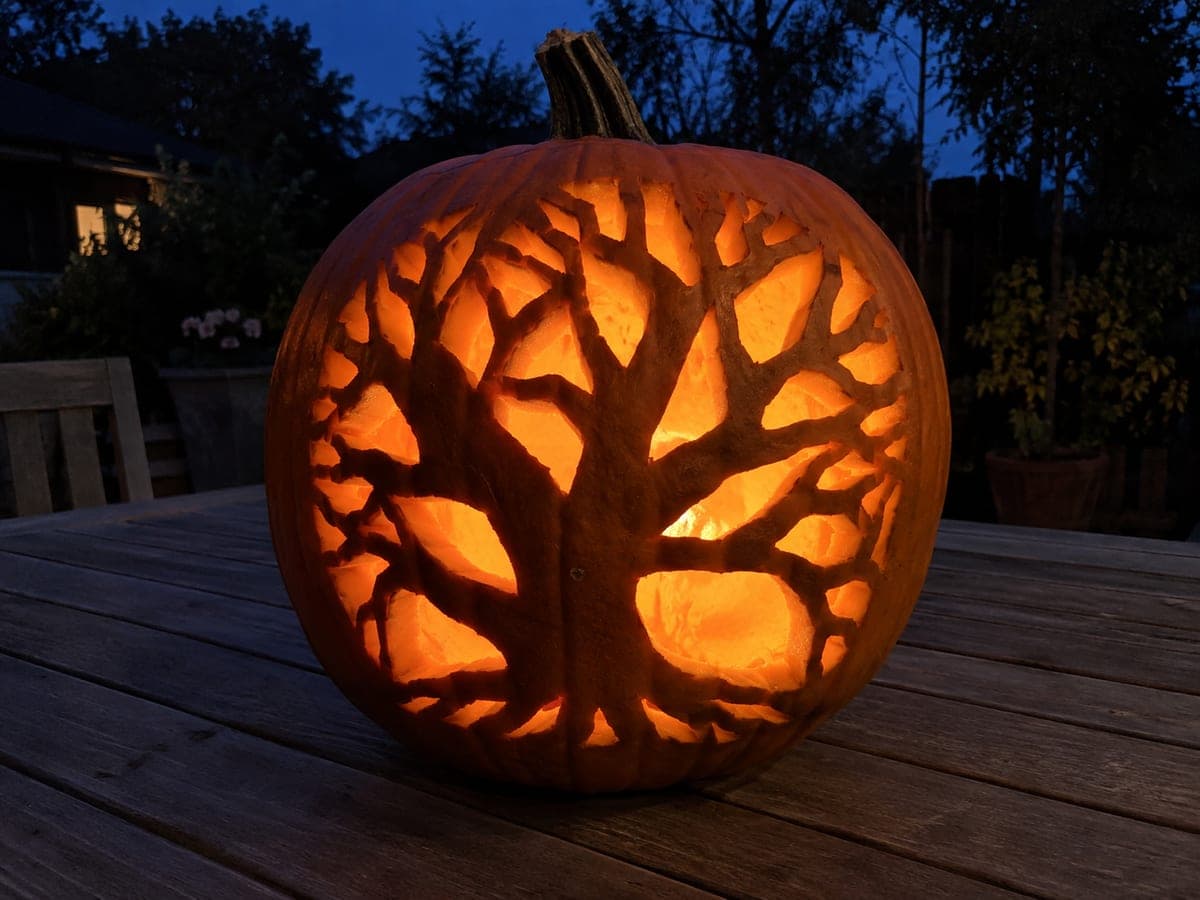
Scary Hard Pumpkin Carving With Detailed Glowing Openings

Closely spaced and intricately shaped cut-through openings give this hard scary pumpkin carving idea a layered, detailed horror quality that basic designs cannot match. Plan all structural bridges before the first cut, marking each connection clearly so none are accidentally severed. Cut from the center outward, checking rind stability frequently as each opening is removed. A high-output LED lantern inside maximizes the impact of every fine detail after dark.

No ratings yet · Sign in to rate

Comments (0)

  • No comments yet — be the first.

Save without an account. Sign in to like or comment.

Our tips for carving a similar design

The layered quality of this design comes from openings that are more numerous and more intricately shaped than a standard scary face, packed close enough together to form a fine rind web. Marking every structural bridge before the first cut is essential. Cutting from the center outward and checking rind stability frequently keeps the wall from collapsing as each successive opening removes more material.

From pumpkin to porch

  1. Select a firm pumpkin

    A dense, firm pumpkin with a broad flat carving face gives you the most working room for closely spaced openings. Avoid any pumpkin with soft spots or depressions, which indicate early rot and will cause the rind to crack under the stress of intricate cuts. Hollow from the base and aim for a consistent one-inch wall.

  2. Transfer and mark all bridges

    Transfer the full design with a stylus, then go through it carefully and mark every connecting strip with a distinctive mark. Use a different marker color or a small dot at each end of every bridge. This two-stage preparation step takes fifteen minutes and can prevent hours of wasted work.

  3. Cut from the center outward

    Begin with the openings at the visual center of the design and work progressively toward the outer border. This method keeps the largest amount of intact rind supporting the area you are actively cutting at all times. Use a fine-tooth detail saw for any opening smaller than a coin.

  4. Test stability regularly

    After every three or four cuts, press on the carved area and the surrounding rind with moderate finger pressure. Any flex or softness is a warning signal. Skip the openings immediately adjacent to the soft area and cut several others farther away before returning, so the weakened zone gains additional support from surrounding completed cuts.

  5. Finish near the outer border

    Cut the openings closest to the outer border last, working at your slowest pace. These cuts reduce the structural margin the most, and a snap here is harder to repair than one in the center. Support every offcut carefully as it releases so it does not catch on a bridge.

  6. Illuminate fully

    A high-output LED lantern is the right light source for a detailed scary carving: it ensures every small opening glows clearly rather than leaving outer details dim. Photograph the finished piece in a dark room from about two metres to capture the full depth of the horror expression.

Written with AI to match this design

Gather your supplies

Check things off as you get ready.

Work on a stable surface, keep your free hand out of the cutting path, and have an adult handle sharp tools.

Three levels of light

  • Leave intact

    All narrow rind bridges between openings remain dark, forming the structural web of the horror face

  • Peel & shade

    None, every element is either fully cut or fully intact

  • Cut through

    Every opening in the detailed scary face is cut completely through for full interior glow

Learn the carving basics

Before you start cutting

How do I keep a fine-tooth saw from flexing on tight curves?

Short, controlled strokes work better than long ones on tight curves. Let the blade pivot in the hole rather than forcing it sideways. If the curve is very tight, remove material on both sides of it with two straight cuts meeting at a point rather than trying to cut the arc in one pass.

The design has several openings that are almost touching. Is there a way to widen the bridge between them?

At this point in the planning stage, yes: shift the position of one or both openings by a few millimetres in the template before transferring it to the pumpkin. Once the outlines are on the pumpkin surface, you can nudge a marker line slightly inward to create the extra few millimetres you need.

Will a standard tea light produce enough glow to show all the small details?

A tea light may leave the smallest outer openings looking dim compared to the larger central ones. A high-output battery LED gives a more even, brighter illumination across the entire face, which is especially important for a detailed design where every opening needs to read clearly.

Your take belongs here, too.

Changed a detail? Made it simpler? Share a photo of your version and tell the community what worked.

Share your pumpkin

More pumpkins like this

You've reached the end · 8 pumpkins
The Patch Report

Fresh pumpkins, in your inbox.

The best new carvings, ideas worth stealing, and how-tos for carving season. Short, seasonal, and gone by November.

A short email during carving season. Unsubscribe anytime. See our privacy policy.