Halloween Pumpkin Carving Contest · Starts October 1st · $500 in prizes
← Back to ideas
@ai_concepts
Sep 25, 2026
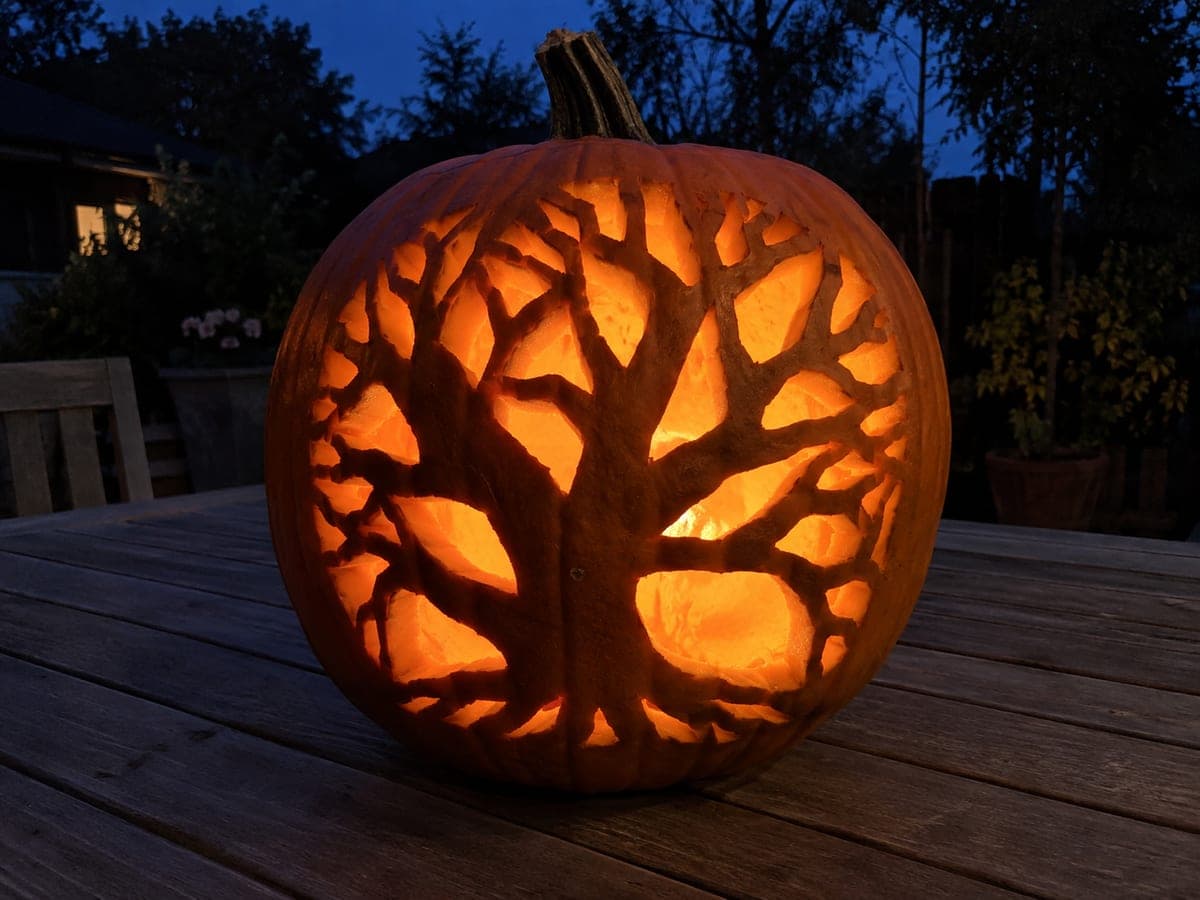
Spooky Hard Pumpkin Carving With Intricate Glowing OpeningsAI
0

Report this carving

Tell us what is wrong. Reports are private.

Spooky Hard Pumpkin Carving With Intricate Glowing Openings

Numerous closely spaced cut-through shapes give this hard spooky pumpkin carving idea a rich, textured glow that simpler designs cannot replicate. Plan all connecting bridges before cutting and mark them on the surface so they are never accidentally removed. Work from the center of the design outward to the border, cutting the largest openings first and finishing with the smallest accent holes. Photographed at night, the intricate openwork produces a dense, atmospheric glow.

No ratings yet · Sign in to rate

Comments (0)

  • No comments yet — be the first.

Save without an account. Sign in to like or comment.

Our tips for carving a similar design

The richness of this design comes from having many more openings than a standard spooky face, arranged closely enough that the dark rind between them forms a textured pattern. Planning every bridge before cutting and working from the center outward keeps the rind from flexing or cracking as each successive opening removes more material. Photographed at night, the dense openwork produces a dramatically atmospheric glow.

From pumpkin to porch

  1. Prepare the pumpkin

    Select a large, firm pumpkin with a broad carving face and hollow it from the base to a consistent inch-thick wall. Mark the center of the carving area with a light chalk mark so you have a clear starting point for the center-outward cutting sequence.

  2. Transfer all outlines and mark bridges

    Trace the template onto the surface with a stylus, then mark every structural bridge with a second marker color or a distinctive dot at each end. Bridges narrower than 8 mm should get an extra mark since they require the most caution. Review the full design before picking up the saw.

  3. Cut from the center outward

    Begin with the openings at the design's center and work progressively toward the outer border. This approach keeps the largest ring of intact rind supporting all the already-cut interior. Use a fine-tooth detail saw for any opening smaller than a coin, holding it perpendicular and cutting on the pull stroke.

  4. Check stability after every few cuts

    Press the carved area and surrounding rind after every three or four cuts. Any flexing means the nearby bridges are under stress. Move to a section farther away and return to the flexible area only after the surrounding rind has been stabilized by completing adjacent cuts.

  5. Finish at the outer border

    The final openings near the outer edge of the design reduce structural margin the most. Work slowly here, support every offcut, and avoid forcing the saw sideways near any bridge. Cleaning each edge immediately after cutting keeps debris from obscuring the remaining cut lines.

  6. Photograph at night

    Insert a battery LED lantern and view the pumpkin in a dark room or on a dark porch. The dense openwork produces a layered glow with a rich texture that single-opening designs cannot match. Set your phone to night mode or a slightly longer exposure to capture the full depth of the illuminated design.

Written with AI to match this design

Gather your supplies

Check things off as you get ready.

Work on a stable surface, keep your free hand out of the cutting path, and have an adult handle sharp tools.

Three levels of light

  • Leave intact

    All narrow rind bridges between openings stay dark, forming the spooky face's textured pattern

  • Peel & shade

    None, every element is either fully cut or fully intact

  • Cut through

    Every opening in the intricate spooky face is cut completely through for full interior glow

Learn the carving basics

Before you start cutting

How do I avoid losing track of which openings I have already cut on a dense design?

Before cutting, number every opening in your planned cutting sequence on the surface with a washable marker. Cross each number off as you complete that opening. The numbers wash away with a damp cloth once the carving is done, and the counting system prevents you from accidentally skipping an opening or cutting in the wrong order.

Can I use a rotary tool instead of a saw for the smallest openings?

A rotary tool with a small cutting bit can produce very clean results on tiny openings and is less likely to snap a thin bridge than a saw. The trade-off is speed: a rotary tool is slower on any opening larger than a thumbnail. Many experienced carvers use both, switching between tools depending on the opening size.

How long can I display this pumpkin before the dense carving causes it to collapse?

A densely carved pumpkin exposes a lot of inner surface to air and dries faster than a lightly carved one. Apply petroleum jelly to every cut edge right after finishing, store the pumpkin in a sealed bag in a refrigerator when not on display, and expect a display life of four to six days rather than the eight or nine you might get from a simpler carving.

Your take belongs here, too.

Changed a detail? Made it simpler? Share a photo of your version and tell the community what worked.

Share your pumpkin

More pumpkins like this

You've reached the end · 8 pumpkins
The Patch Report

Fresh pumpkins, in your inbox.

The best new carvings, ideas worth stealing, and how-tos for carving season. Short, seasonal, and gone by November.

A short email during carving season. Unsubscribe anytime. See our privacy policy.