Halloween Pumpkin Carving Contest Β· Starts October 1st Β· $500 in prizes
← Back to ideas
@ai_concepts
Sep 25, 2026
Spooky Expert Jack-O-Lantern With Dense Glowing OpenworkAI
0

Report this carving

Tell us what is wrong. Reports are private.

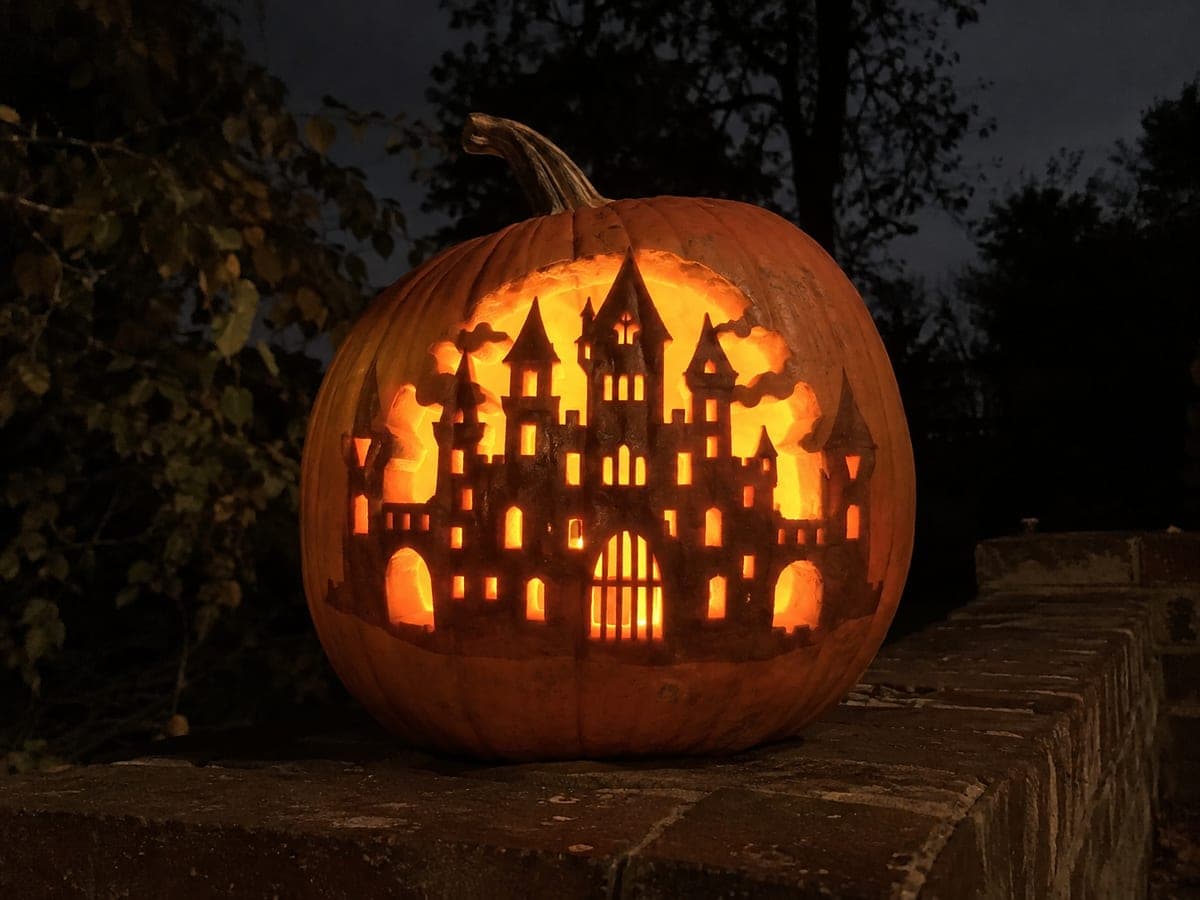
Spooky Expert Jack-O-Lantern With Dense Glowing Openwork

A highly detailed cut-through composition with dozens of individual apertures makes this expert spooky pumpkin carving idea the pinnacle of spooky pumpkin design. Map every structural connection on paper before transferring the layout, cutting in careful sequence from the largest gaps to the finest details. Use a high-quality detail saw and work at low pressure around any narrow bridges to avoid snapping them. When lit from inside with a bright LED, the completed openwork glows with an otherworldly depth that rewards every careful cut.

No ratings yet Β· Sign in to rate

Comments (0)

  • No comments yet β€” be the first.

Save without an account. Sign in to like or comment.

Our tips for carving a similar design

This design pushes spooky openwork to its maximum density, with dozens of individual apertures arranged so that the rind between them forms an intricate supporting web. The key to success is mapping every structural connection in advance, cutting in a strict sequence from the largest gaps to the smallest details, and using a fine-tooth saw at low pressure near any narrow bridge. The payoff is a pumpkin that glows with an otherworldly, layered depth that rewards every careful cut.

From pumpkin to porch

  1. Plan the session in advance

    Sketch the full design on paper, number every opening in cutting order from largest to smallest, and mark every structural bridge. Walk through the sequence mentally before starting the transfer so you have a clear picture of the full session. Select the firmest, freshest pumpkin available and hollow it from the base to a consistent inch-thick wall.

  2. Transfer with dual markers

    Tape the template to the pumpkin and trace all outlines with a stylus. Use one marker color for cut lines and a second color to shade or dot every bridge. This two-color system makes it visually impossible to confuse a bridge for a cut line when you are deep into a long cutting session.

  3. Open the largest apertures first

    Begin with the widest openings while the wall is fully intact. Cut with a standard serrated saw held perpendicular, supporting every offcut as it breaks free. Clean each edge with a thin knife before moving to the next opening so debris does not accumulate and obscure the remaining cut lines.

  4. Progress through medium and small openings

    Switch to a fine-tooth detail saw as the openings get smaller. Apply pressure on the pull stroke only, letting the blade set its own pace. After every five cuts, press the surrounding rind to confirm structural integrity before continuing the sequence.

  5. Execute the finest details last

    The smallest openings nearest the narrowest bridges are the highest-risk cuts in the design. Move at your slowest pace, keeping the blade almost stationary near each bridge. Finish the last millimetres beside a bridge with a linoleum cutter or fine craft knife rather than the saw.

  6. Light with maximum output

    Use the brightest battery LED available to illuminate every dense detail fully. View the finished pumpkin in a dark room from about two metres and allow your eyes to adjust. The layered openwork creates an atmospheric depth of glow that is fundamentally different from anything a simpler carving can achieve.

Written with AI to match this design

Gather your supplies

Check things off as you get ready.

Work on a stable surface, keep your free hand out of the cutting path, and have an adult handle sharp tools.

Three levels of light

  • Leave intact

    Every rind bridge stays dark, carrying the structural load and defining the spooky composition

  • Peel & shade

    None, all elements are either fully cut or fully intact

  • Cut through

    Every aperture in the dense spooky composition is cut completely through for full interior glow

Learn the carving basics

Before you start cutting

At what point should I stop adding more openings to a dense design?

Stop when pressing on any area of the carved surface produces even slight flex in the rind. That flex means the bridges are at their structural limit and adding more openings will likely cause a collapse. A design that retains just enough intact rind to feel rigid under moderate finger pressure is at its safe maximum density.

How do I transport a fragile dense carving without breaking it?

Line a large box with a layer of foam or crumpled newspaper and lower the pumpkin into it from above rather than sliding it sideways. Never carry it by the stem once it is densely carved: the weight of the pumpkin relative to the remaining rind can crack the entire face section if stress concentrates on a few bridges. Two hands supporting the base is the correct technique.

The pumpkin looks beautiful inside but not very impressive from outside. Why?

Dense openwork designs are meant to be viewed from about two to three metres in a dark environment where the interior light projects outward through every opening. Up close in daylight the dark rind surface dominates and the effect is muted. The design photographs best from a distance with a short exposure time that preserves the interior glow without blowing out the highlights.

Your take belongs here, too.

Changed a detail? Made it simpler? Share a photo of your version and tell the community what worked.

Share your pumpkin

More pumpkins like this

You've reached the end Β· 8 pumpkins
The Patch Report

Fresh pumpkins, in your inbox.

The best new carvings, ideas worth stealing, and how-tos for carving season. Short, seasonal, and gone by November.

A short email during carving season. Unsubscribe anytime. See our privacy policy.