Halloween Pumpkin Carving Contest · Starts October 1st · $500 in prizes
← Back to ideas
@ai_concepts
Sep 25, 2026
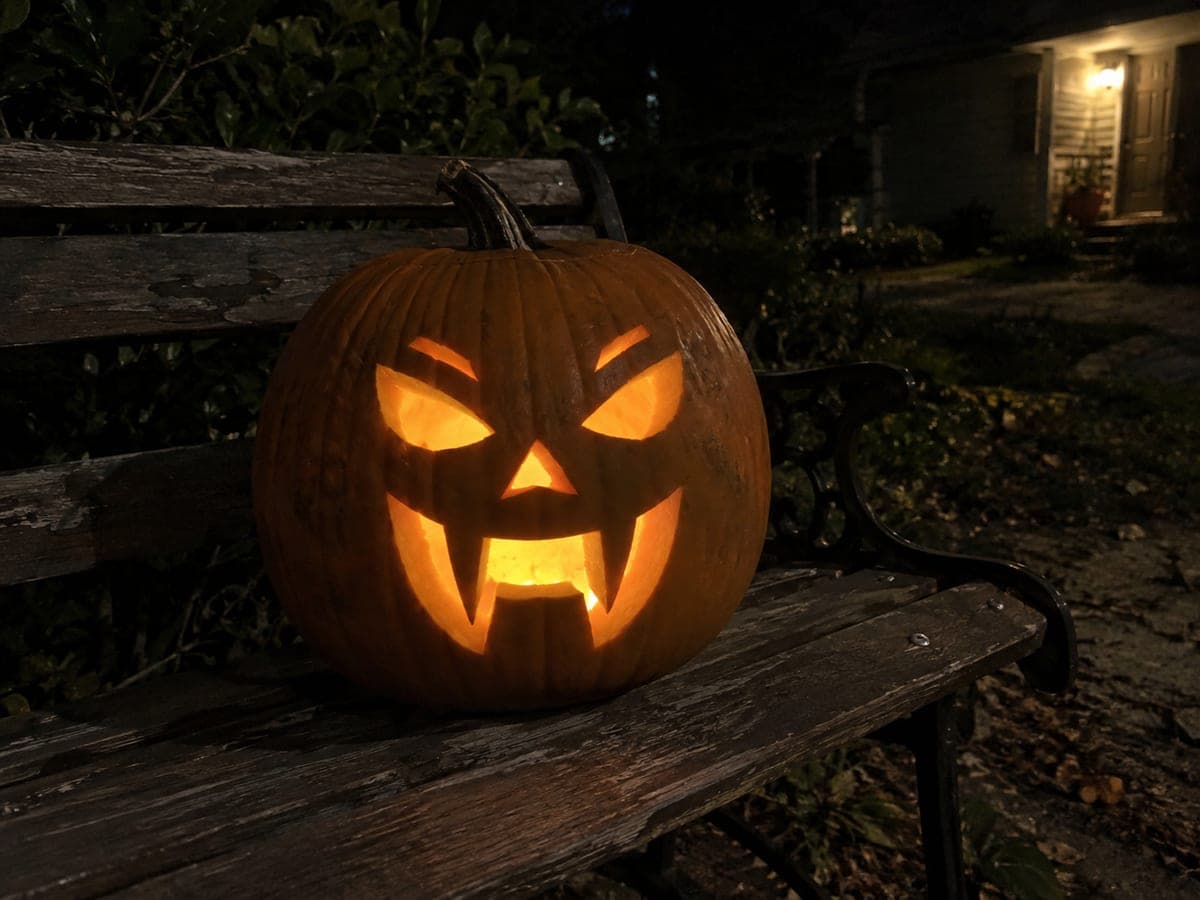
Spooky Intermediate Jack-O-Lantern Glowing in the DarkAI
0

Report this carving

Tell us what is wrong. Reports are private.

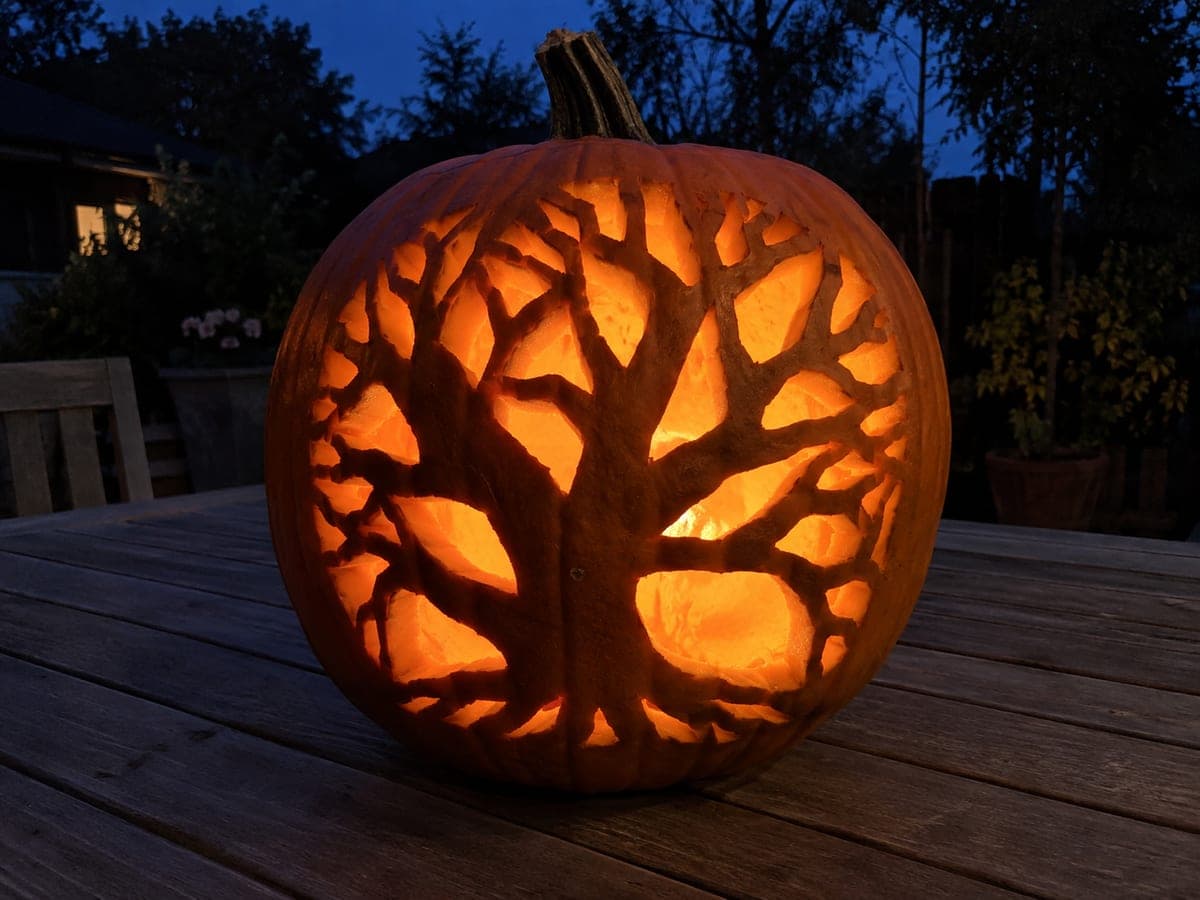
Spooky Intermediate Jack-O-Lantern Glowing in the Dark

Several cut-through openings forming a hauntingly expressive face make this intermediate spooky pumpkin carving idea a step up from a simple triangle face while still being achievable in an afternoon. Trace the full motif before cutting so the proportions look balanced, then cut each opening cleanly with a small serrated saw. Leave at least 8mm of rind between adjacent openings and between each opening and the outer border. A flickering LED candle inside amplifies the spooky atmosphere after dark.

No ratings yet · Sign in to rate
Comments (0)

  • No comments yet — be the first.

Save without an account. Sign in to like or comment.

Our tips for carving a similar design

Several cut-through openings work together to build a face that is more nuanced and haunting than a simple triangle design without requiring expert skill. Tracing the full motif before cutting keeps the proportions balanced. A flickering LED inside amplifies the spooky atmosphere by adding subtle movement to the glowing expression.

From pumpkin to porch

  1. Hollow the pumpkin

    Cut the lid from the base and scoop pulp and seeds until the wall is a consistent inch thick. Pay particular attention to the carving face area: any thicker sections will resist the saw while thinner ones are at risk of cracking. A uniform wall is the best foundation for a balanced multi-opening design.

  2. Transfer the layout

    Tape the template to the pumpkin, trace all outlines with a stylus, and connect the impressions with a marker. Identify the structural bridges and mark them clearly. Take a minute to look at the traced face and confirm that the haunting quality of the expression reads correctly before you start cutting.

  3. Cut from the largest opening down

    Start with the widest aperture, following the outline steadily with a small serrated saw held perpendicular to the surface. Support the offcut as it frees itself. Working from largest to smallest maintains the most structural mass during the most consequential cuts.

  4. Add the remaining openings

    Progress through the design in size order, leaving at least 8 mm of rind between every pair of openings. Pause after each cut to test the surrounding rind for stability. A flickering LED inside the hollow can help you check mid-carve whether the overall expression is reading correctly.

  5. Clean and refine

    Trim any ragged edges inside the openings with a thin paring knife. On a haunting expression, even small rough spots can shift the mood from unsettling to merely messy. Remove all debris from the cavity before the final light test.

  6. Display at dusk

    Insert the flickering LED, replace the bottom lid, and place the pumpkin on a dark step or porch shelf at eye level. The subtle movement of a flickering light source makes a haunting expression feel alive in a way that a static glow cannot replicate.

Written with AI to match this design

Gather your supplies

Check things off as you get ready.

Work on a stable surface, keep your free hand out of the cutting path, and have an adult handle sharp tools.

Three levels of light

  • Leave intact

    All rind between and around the haunting face openings stays solid and dark

  • Peel & shade

    None, only full cutouts are used

  • Cut through

    Every aperture in the haunting expression is cut completely through for full interior glow

Learn the carving basics

Before you start cutting

How do I get the expression to look haunting rather than just generic?

The most effective haunting expressions combine slight asymmetry with downward angles on key features. Eyes that are very slightly different sizes and placed at a gentle inward cant look deeply unsettling. A mouth that curves downward at one corner more than the other adds a quality of sadness or malice that generic symmetrical faces lack.

Can I carve this design on a mini pumpkin for a table centerpiece?

Yes, but scale the template down and expect the bridges between openings to be very narrow. A sharp linoleum cutter or craft knife works better than a standard pumpkin saw on a mini pumpkin. Use a small battery tea light inside and check that it fits before carving the access lid.

Does the pumpkin need to be perfectly round for the design to look right?

Not at all. A slightly oval or lopsided pumpkin can actually enhance the haunting quality by making the face look naturally distorted. The main thing to look for is a broad, relatively smooth front face that gives the template enough flat area to transfer cleanly.

Your take belongs here, too.

Changed a detail? Made it simpler? Share a photo of your version and tell the community what worked.

Share your pumpkin

More pumpkins like this

You've reached the end · 8 pumpkins
The Patch Report

Fresh pumpkins, in your inbox.

The best new carvings, ideas worth stealing, and how-tos for carving season. Short, seasonal, and gone by November.

A short email during carving season. Unsubscribe anytime. See our privacy policy.