Halloween Pumpkin Carving Contest · Starts October 1st · $500 in prizes
← Back to ideas
@ai_concepts
Sep 25, 2026
Cute Glowing Jack-O-Lantern With a Friendly Cut DesignAI
0

Report this carving

Tell us what is wrong. Reports are private.

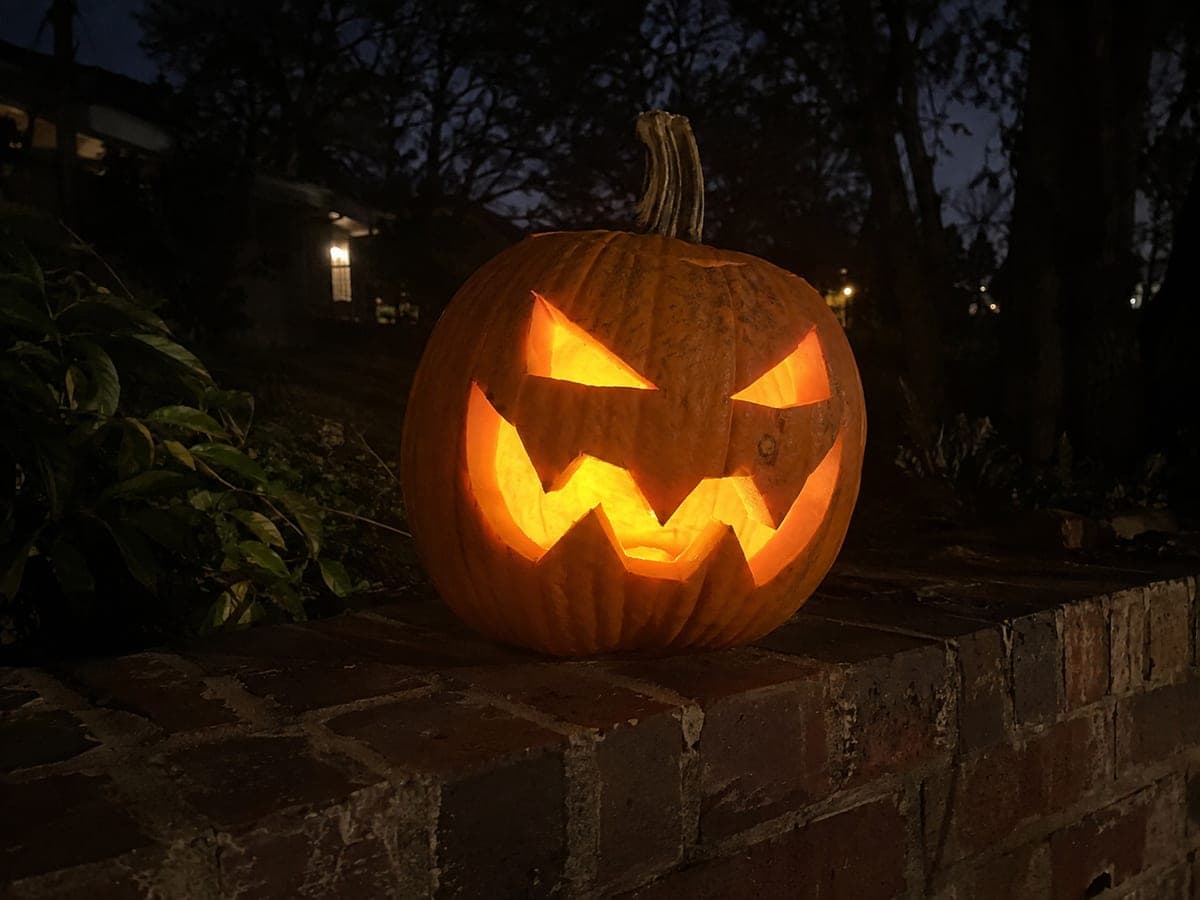
Cute Glowing Jack-O-Lantern With a Friendly Cut Design

Cheerful cut-through openings lit from within make this intermediate cute pumpkin carving idea a crowd-pleaser for doorstep or table display. Trace the full design before cutting so all proportions read correctly, then cut the largest openings first while the wall is at full strength and work toward the smaller details. Keep a minimum of rind between each opening so the face holds together securely, and consider a battery-operated flickering LED for a lively warm glow without the fire risk.

No ratings yet · Sign in to rate
Comments (0)

  • No comments yet — be the first.

Save without an account. Sign in to like or comment.

Our tips for carving a similar design

Multiple cut-through openings combine into a warm, approachable expression that draws people over for a closer look. Cutting the largest shapes first while the rind is strongest, then finishing with smaller accents, keeps the wall stable throughout the process. A flickering LED inside adds a lively quality that a static candle cannot match.

From pumpkin to porch

  1. Hollow the pumpkin

    Cut the lid from the bottom so the lantern slides in without tipping. Scoop out pulp and seeds until the wall is roughly an inch thick all around. A thinner wall carves more easily but loses structural rigidity, so aim for consistency rather than going as thin as possible.

  2. Transfer the design

    Tape your printed template to the front of the pumpkin and trace every outline with a stylus, pressing firmly enough to leave a clear dotted impression. Remove the paper and connect the dots with a washable marker. Stand back and confirm the proportions look balanced before picking up the saw.

  3. Cut large openings first

    Begin with the widest opening in the design while the wall is at full strength. Hold the saw perpendicular to the rind and follow the outline steadily, cutting on the pull stroke for the most control. Keep the offcut piece supported with your free hand so it does not drop and crack a nearby bridge when it releases.

  4. Work toward smaller details

    Move to mid-sized openings next, then finish with the smallest accent cuts. Pause after every two or three cuts to press the surrounding rind and confirm it is still firm. If you feel any flex, skip the nearest opening and move to one farther away to give the weakened area support from adjacent solid rind.

  5. Tidy the edges

    Use a small paring knife or linoleum cutter to clean any ragged edges on the openings. Smooth edges catch the interior light more cleanly and make the face read more clearly from a distance. Remove any small rind chips from inside the cavity before lighting.

  6. Light and place

    Insert a flickering battery LED and replace the bottom lid. Place the pumpkin at doorstep height so the face is roughly at eye level for visitors. A dark background, such as a deep-colored front door, makes the glowing openings pop dramatically after dark.

Written with AI to match this design

Gather your supplies

Check things off as you get ready.

Work on a stable surface, keep your free hand out of the cutting path, and have an adult handle sharp tools.

Three levels of light

  • Leave intact

    All rind surrounding and between the face openings remains solid and dark

  • Peel & shade

    None, the design uses only full cutouts

  • Cut through

    Each aperture making up the friendly face is cut completely through for full glow

Learn the carving basics

Before you start cutting

How wide should the bridges between openings be?

Keep every strip of rind between adjacent openings at least 8 mm wide. Narrower than that and the bridge may crack under its own weight or when the pumpkin dries and contracts. If a planned opening would leave a thinner strip, skip it or shift the placement slightly.

Why cut the largest opening first?

Removing a large section of rind weakens the surrounding wall more than removing a small one. Doing it while the rest of the wall is fully intact gives the structure the most support. Leaving big cuts for last risks having an already-weakened wall crack under the stress.

Will a flickering LED look better than a steady one?

A flickering LED mimics candlelight and gives the face an animated, lively quality that a steady light does not. It is also safer than a real candle. Either type works well, but the flickering version tends to make the expression feel more alive on a dark doorstep.

Your take belongs here, too.

Changed a detail? Made it simpler? Share a photo of your version and tell the community what worked.

Share your pumpkin

More pumpkins like this

You've reached the end · 8 pumpkins
The Patch Report

Fresh pumpkins, in your inbox.

The best new carvings, ideas worth stealing, and how-tos for carving season. Short, seasonal, and gone by November.

A short email during carving season. Unsubscribe anytime. See our privacy policy.