Halloween Pumpkin Carving Contest · Starts October 1st · $500 in prizes
← Back to ideas
@ai_concepts
Sep 10, 2026
Simple Daisy Flower Carved PumpkinAI
0

Simple Daisy Flower Carved Pumpkin

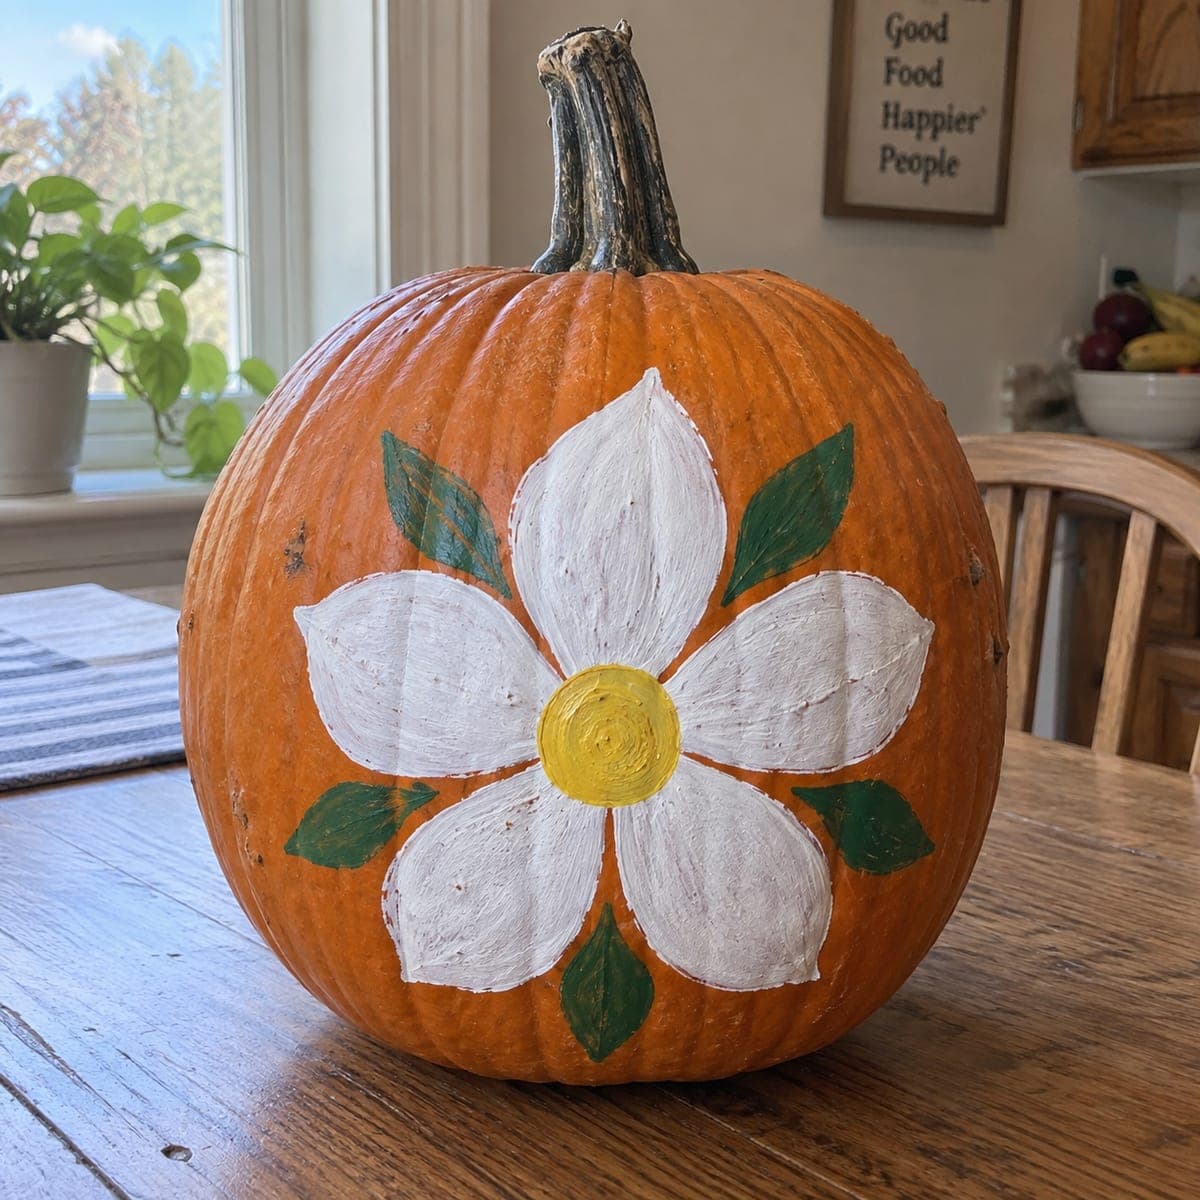
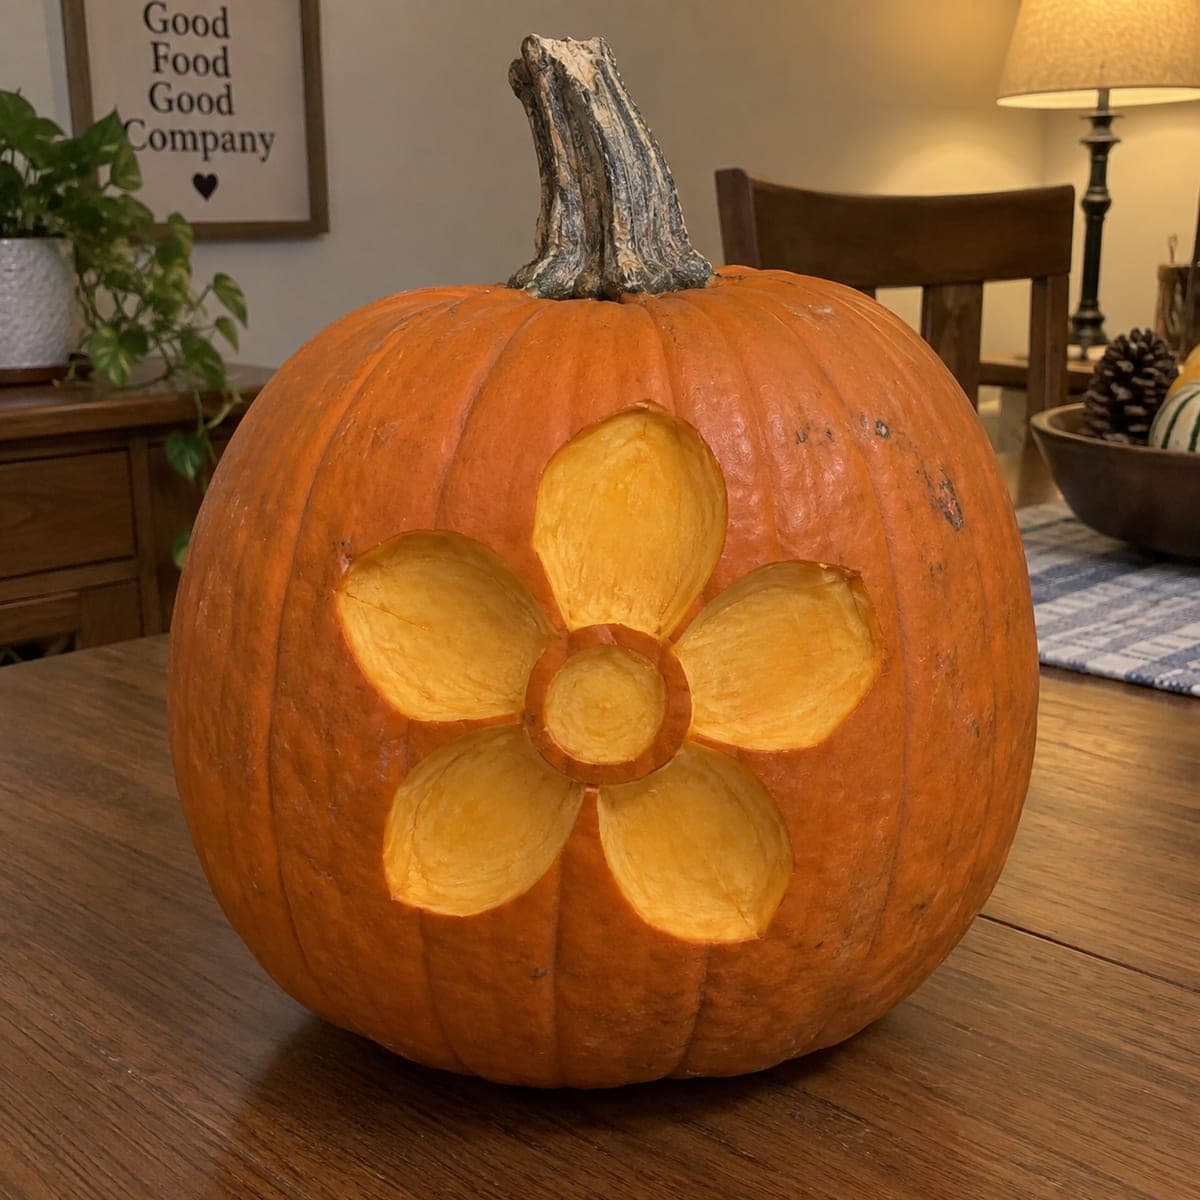
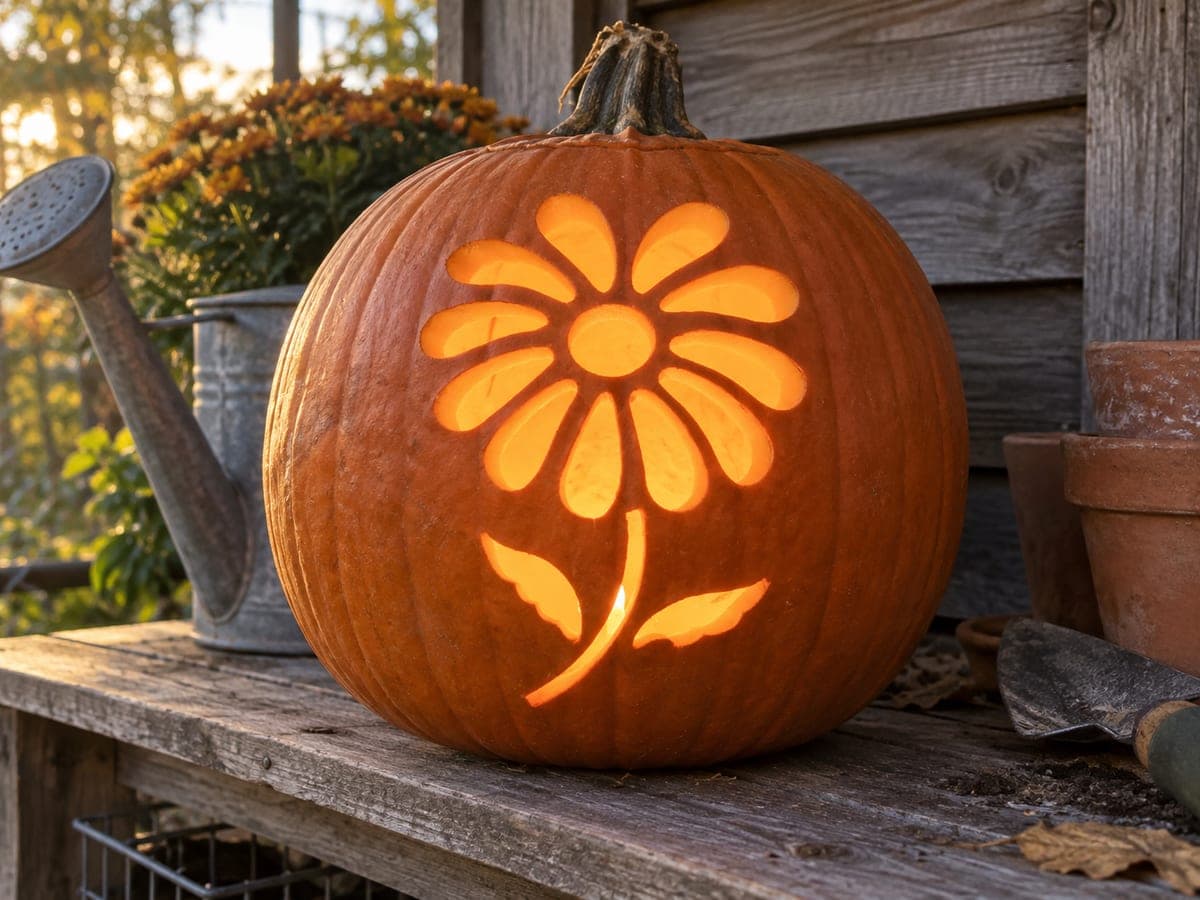
Five broad petals scooped down to the golden flesh surround a raised center ring on this daisy pumpkin, a clean design that works beautifully unlit on a dining table. Each petal is outlined with a knife and then cleared with a spoon or scoop gouge, leaving the rim of skin as the outline. Keep the petal floors an even depth so the color stays uniform, and rub the cut surfaces with petroleum jelly to keep them from drying out.

This is an AI-generated concept image: a realistic, carvable design idea rather than a photo of a finished carve. AI concepts are always labeled and sit out the leaderboard and the contest.

No ratings yet · Sign in to rate
Comments (0)

  • No comments yet — be the first.

Save without an account. Sign in to like or comment.

Our tips for carving a similar design

The whole design leans on one trick: instead of cutting all the way through, you scoop each petal down to the bright golden flesh and leave a thin rim of skin as the outline. Five broad petals radiate from a raised center ring, so the shapes stay simple and forgiving. Because nothing is cut through, this daisy looks great unlit on a table and only needs a soft glow to shine.

Written by PumpkinCarvingIdeas.com, inspired by the image above. These are our suggestions, not instructions from the uploader. This approach to the AI concept has not been tested on a real pumpkin.

From pumpkin to porch

  1. Transfer the daisy outline

    Sketch or tape a five petal daisy onto the smoothest face of the pumpkin, with a small circle in the middle for the center ring. Keep the petals broad and evenly spaced so the flower reads clearly from a few feet away. Poke through the lines with a pin or a transfer tool to leave a dotted guide on the skin. Step back and check the spacing before you commit to any cuts.

  2. Score the outlines first

    With a small carving knife, trace shallow cuts along every petal edge and around the center ring, going only about a quarter inch deep. These score lines become the rim of skin that defines each shape, so take your time keeping them smooth. Do not scoop yet. Have an adult handle the knife and always cut away from your holding hand.

  3. Scoop the petals to golden flesh

    Switch to a spoon or a scoop gouge and clear the flesh inside each petal, staying just inside your score lines. Work down to an even depth, roughly a half inch, until you reach the bright golden layer. Aim for the same depth in all five petals so the color stays uniform when it catches the light. Leave the center circle raised and untouched so the ring stands proud.

  4. Refine the rims and center ring

    Clean up the edge of each petal so the thin band of skin reads as a crisp outline. Round the inside walls slightly so the scooped floors curve up smoothly to the rim. Carve gently around the raised center so the ring keeps a clean circular edge. Brush out any loose pulp with a dry paintbrush.

  5. Seal the cut surfaces

    Rub a thin coat of petroleum jelly over every scooped floor and rim to slow drying and keep the golden color from turning brown. Wipe away the excess so it does not look greasy. If you plan to display it for several days, store it somewhere cool overnight. Reapply the jelly if the surfaces start to look dull.

  6. Light it and photograph

    This daisy shows off beautifully unlit, but a warm LED tea light set behind the face gives the petals a soft inner glow. Never use a real flame, since the scooped flesh is thin and can scorch. Shoot in low room light so the golden petals stand out against the darker skin. Try one photo lit and one plain to see which you like best.

Gather your supplies

Check things off as you get ready.

Work on a stable surface, keep your free hand out of the cutting path, and have an adult handle sharp tools.

Three levels of light

  • Leave intact

    The untouched skin around the flower and the raised center ring stay dark orange.

  • Peel & shade

    The five scooped petals glow a soft, even golden orange since they are shaved down to the flesh but not cut through.

  • Cut through

    This design has no full cutouts, so it stays gentle; if you want one brighter accent you could pierce a tiny vent hole hidden in a petal floor.

Learn the carving basics

Before you start cutting

How deep should I scoop each petal?

Aim for about a half inch, just deep enough to reach the bright golden layer under the skin. The exact depth matters less than keeping all five petals the same, since uneven floors show up as blotchy color. Go slow and check the tone as you work.

Why leave the center as a raised ring instead of carving it out?

The raised ring gives the daisy a real focal point and keeps the design structurally simple, with no delicate cut pieces to snap. It also creates a nice contrast, since the dark skin ring sits against the glowing petals. Just score cleanly around it and scoop only up to the line.

Will this design last on a dining table for a few days?

Scooped pumpkins dry faster than uncarved ones, but the petroleum jelly coat slows it down a lot. Keep it out of direct sun and warm spots, and stash it somewhere cool overnight. Reapply jelly if the golden surfaces start to look dry or dull.

Your take belongs here, too.

Changed a detail? Made it simpler? Share a photo of your version and tell the community what worked.

Share your pumpkin

More pumpkins like this

You've reached the end · 8 pumpkins
The Patch Report

Fresh pumpkins, in your inbox.

The best new carvings, ideas worth stealing, and how-tos for carving season. Short, seasonal, and gone by November.

A short email during carving season. Unsubscribe anytime. See our privacy policy.