Halloween Pumpkin Carving Contest · Starts October 1st · $500 in prizes
← Back to ideas
@ai_concepts
Sep 1, 2026
Simple Fish Skeleton Bones Pumpkin CutoutAI
0

Simple Fish Skeleton Bones Pumpkin Cutout

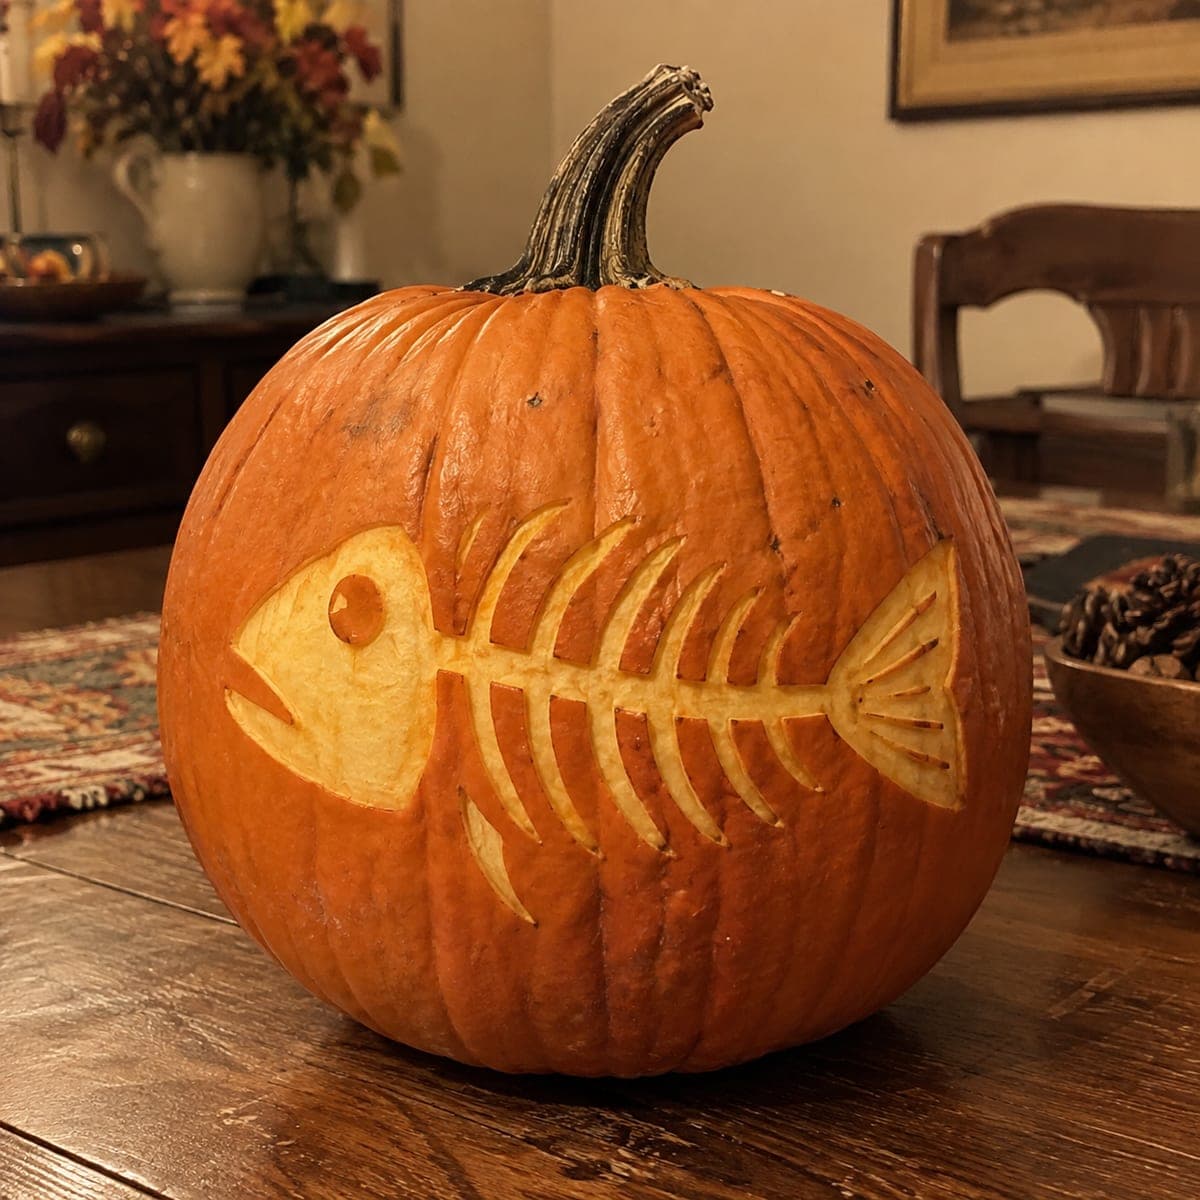
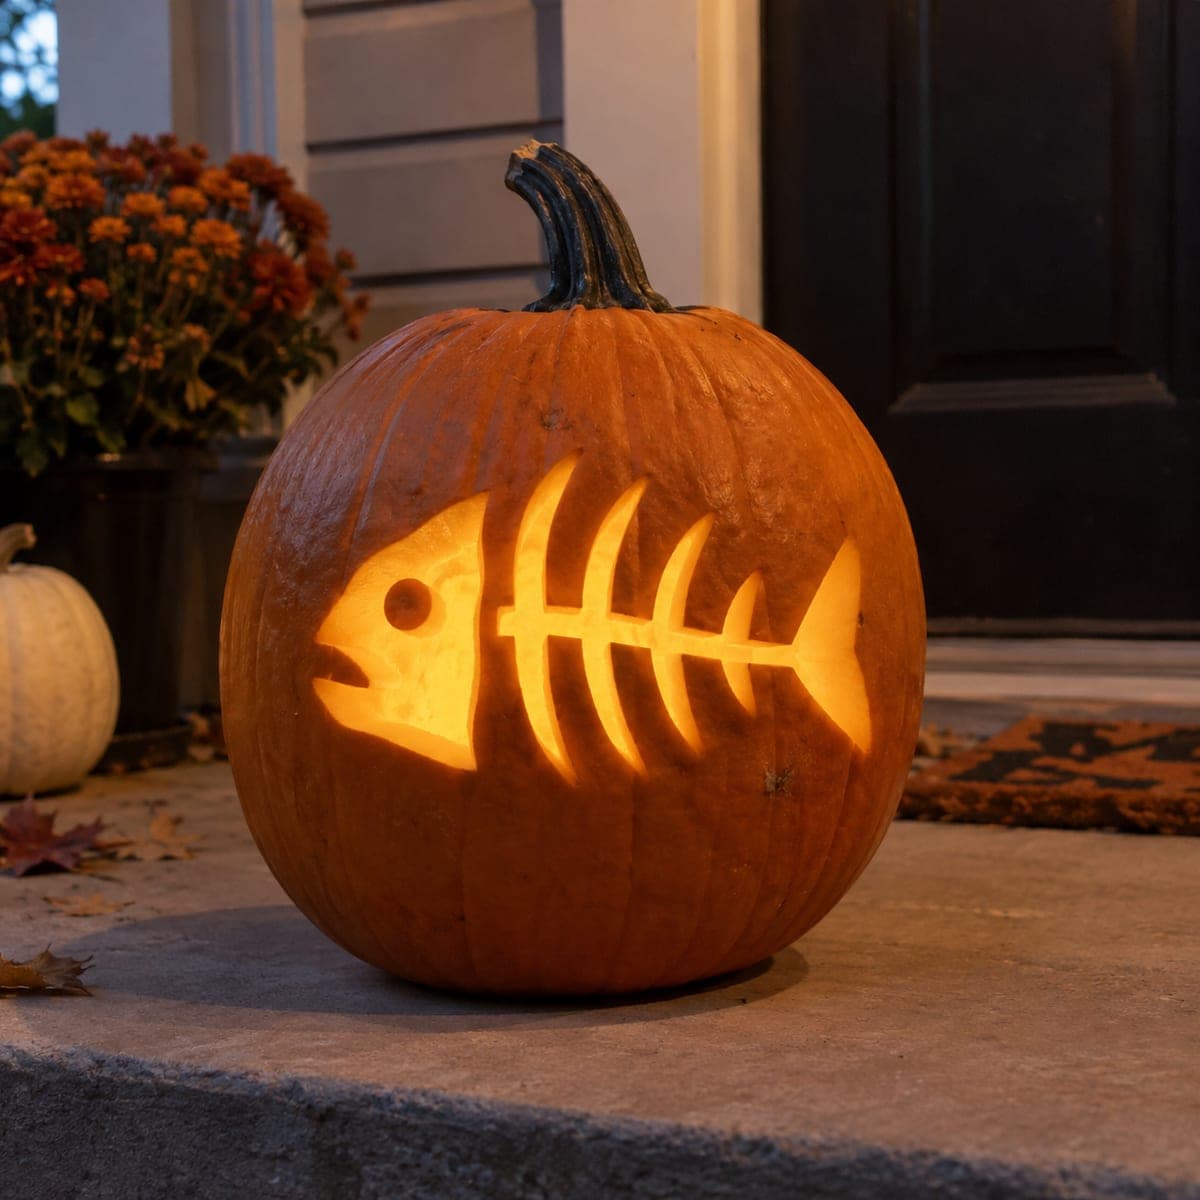
A cartoon fish skeleton glows from this pumpkin, just a head, tail, spine, and rib bones cut straight through the shell. The chunky shapes forgive wobbly saw lines, making it one of the fastest pumpkin carving ideas on this list. Cut the head and tail openings first, then the spine, and finish with the ribs, leaving each bone generously thick so the design stays strong all week.

This is an AI-generated concept image: a realistic, carvable design idea rather than a photo of a finished carve. AI concepts are always labeled and sit out the leaderboard and the contest.

No ratings yet · Sign in to rate
Comments (0)

  • No comments yet — be the first.

Save without an account. Sign in to like or comment.

Our tips for carving a similar design

The whole trick here is chunky, forgiving shapes cut straight through the shell, so wobbly saw lines still read as clean bones once the pumpkin is lit. The plan is to carve the biggest openings first, the head and the tail, then the spine, and save the thin ribs for last so the wall stays strong while you work. Keep every bone generously thick and you will get a bold silhouette that holds up all week.

Written by PumpkinCarvingIdeas.com, inspired by the image above. These are our suggestions, not instructions from the uploader. This approach to the AI concept has not been tested on a real pumpkin.

From pumpkin to porch

  1. Prep the pumpkin and pick your side

    Choose a pumpkin with a wide, smooth flat side for the fish body. An adult should cut a lid or, better for strength, a large hole in the back or bottom so you can reach in. Scoop the insides and scrape the carving wall down to about one inch thick with a loop tool. A thinner, even wall makes cutting the bones much easier.

  2. Transfer the fish skeleton pattern

    Print or draw a simple fish skeleton with a round head, a triangle tail, a straight spine, and curved ribs. Tape the pattern flat against the body and poke the outlines with a pushpin or a transfer tool, spacing dots close together on curves. Peel the paper and connect the dots with a washable marker. Double check that each bone stays fat and well separated from its neighbors.

  3. Cut the head and tail openings first

    Using a small serrated carving saw, cut out the head shape and the tail triangle since these are the largest openings. Saw with gentle, steady strokes held straight into the shell, letting the blade do the work. Remove each piece by pushing it inward, then trim the edges clean. Doing the big shapes first keeps the pumpkin sturdy while you tackle the finer bones.

  4. Carve the spine

    Cut the long spine that connects the head to the tail, working from one end to the other. Keep the spine a solid strip, at least a finger wide, so it anchors the whole design. Where the spine meets the ribs later, leave small bridges of uncut skin so nothing sags. Wipe away pulp as you go to keep your lines visible.

  5. Finish with the ribs

    Cut each rib one at a time, curving outward from the spine like a real fish. Leave plenty of solid shell between ribs so they stay crisp and do not merge into one big hole. Save the round eye dot for last and cut it small and clean. If a rib feels fragile, widen the surrounding skin rather than thinning the bone.

  6. Light it and photograph

    Drop in a battery LED puck or string and skip open flames, since the deep cutouts channel plenty of light on their own. Set the pumpkin on a step at dusk and check that every bone glows evenly, adjusting the light position if the tail looks dim. A little petroleum jelly on the cut edges slows drying and keeps the shapes sharp for days. Snap your photo while the surrounding light is still soft blue.

Gather your supplies

Check things off as you get ready.

Work on a stable surface, keep your free hand out of the cutting path, and have an adult handle sharp tools.

Three levels of light

  • Leave intact

    The whole orange body of the fish and the surrounding shell stay untouched and dark, framing the skeleton.

  • Peel & shade

    Optional: shave a thin halo just around the bones or a soft belly shape for a dim orange glow that adds depth.

  • Cut through

    The head, tail, spine, ribs, and eye dot are cut clean through for the brightest glowing bones.

Learn the carving basics

Before you start cutting

How thick should I leave the ribs so they do not break?

Aim to leave at least a finger width of solid shell between each rib and keep the ribs themselves fat rather than needle thin. The chunky spacing is what keeps the design strong for a full week. If your pattern looks crowded, remove a rib or two rather than crowding them.

Should I cut a lid on top or open the back?

For this design an opening in the back or bottom is best because it keeps the front face fully intact and strong. A top lid works too, but the back opening lets you seat an LED easily without a hole showing. Either way, make the opening big enough to fit your hand and the light.

This is an AI concept image, so can a real pumpkin look like this?

Yes, the shapes are simple and physically sound, so a real pumpkin can absolutely match it. Keep the spine and ribs generously thick and leave uncut skin between the bones so the wall supports itself. Because no real pumpkin was carved here, treat the picture as a target look rather than a finished example.

Your take belongs here, too.

Changed a detail? Made it simpler? Share a photo of your version and tell the community what worked.

Share your pumpkin

More pumpkins like this

You've reached the end · 8 pumpkins
The Patch Report

Fresh pumpkins, in your inbox.

The best new carvings, ideas worth stealing, and how-tos for carving season. Short, seasonal, and gone by November.

A short email during carving season. Unsubscribe anytime. See our privacy policy.