Halloween Pumpkin Carving Contest · Starts October 1st · $500 in prizes
← Back to ideas
@ai_concepts
Aug 17, 2026
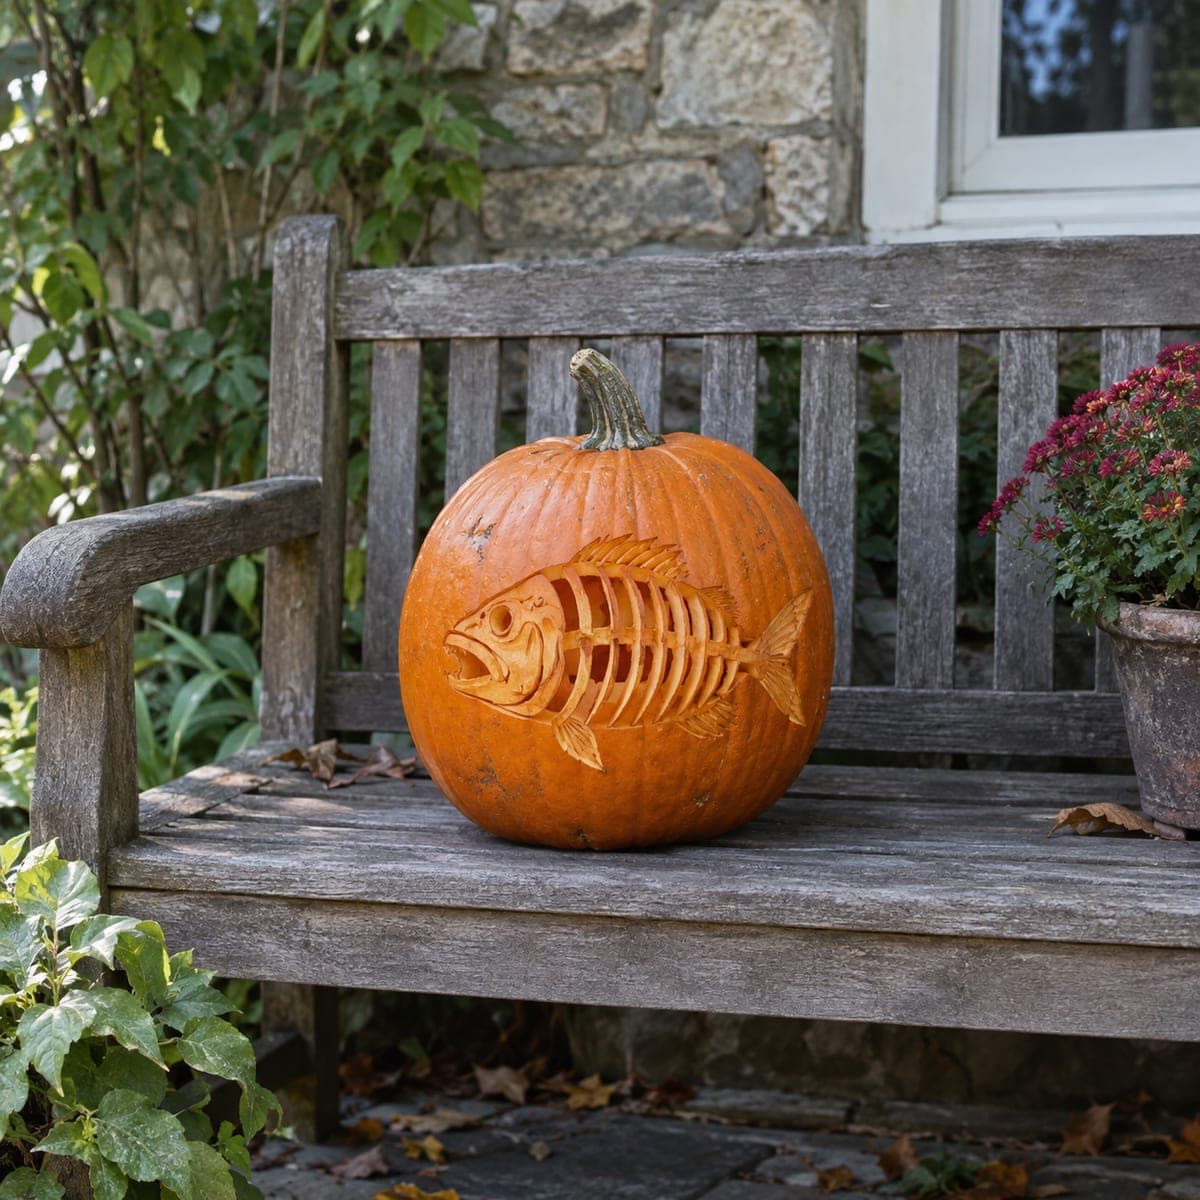
Carved Fish Skeleton Pumpkin With Dimensional BonesAI
0

Carved Fish Skeleton Pumpkin With Dimensional Bones

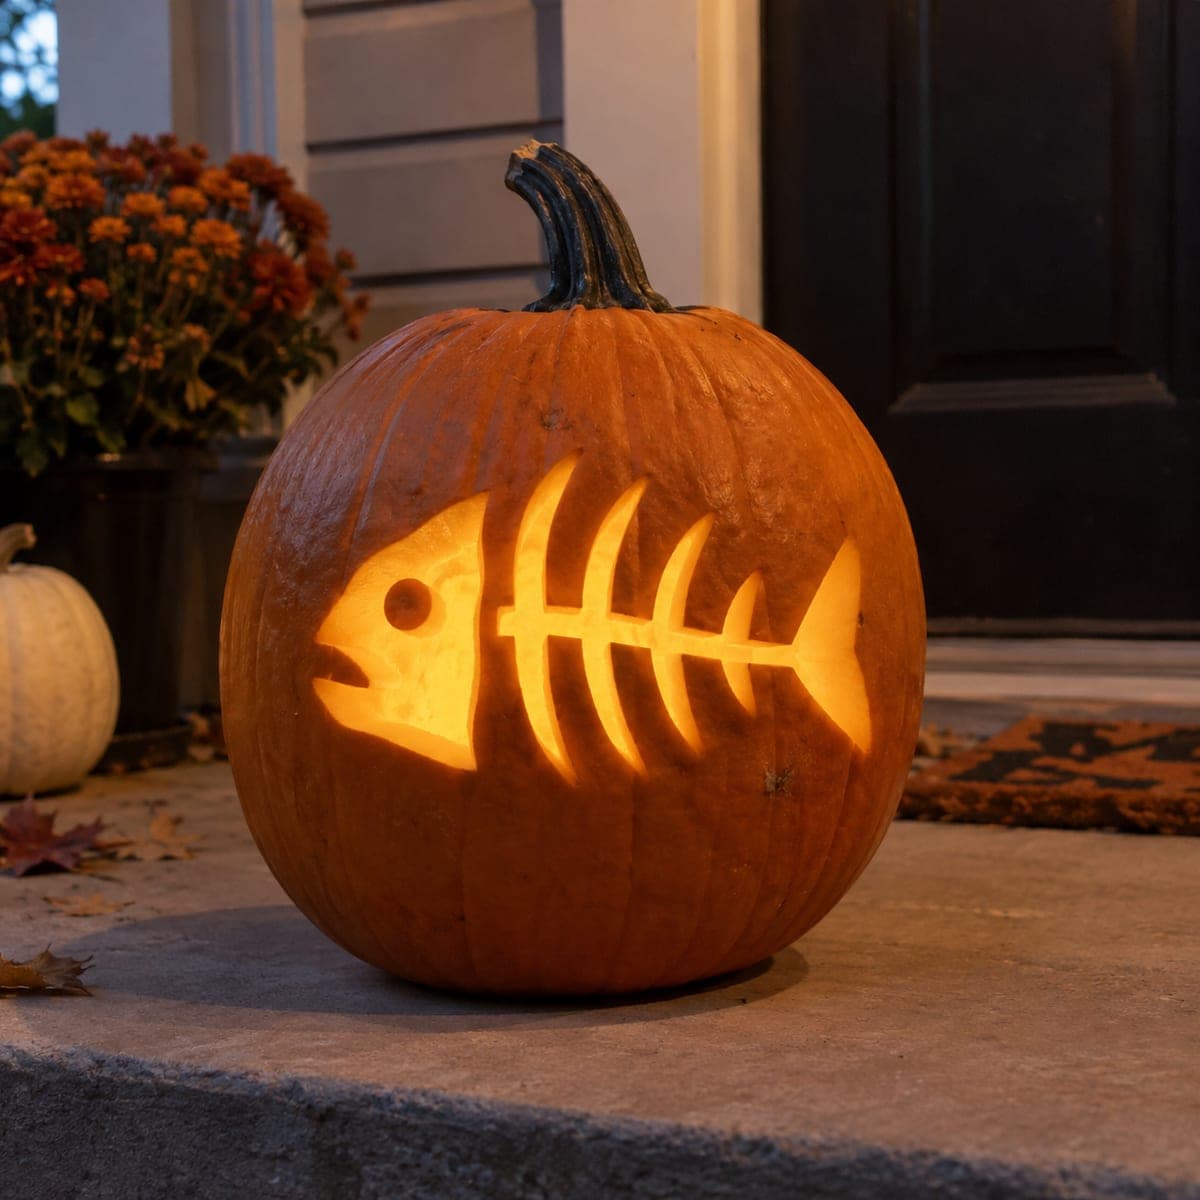
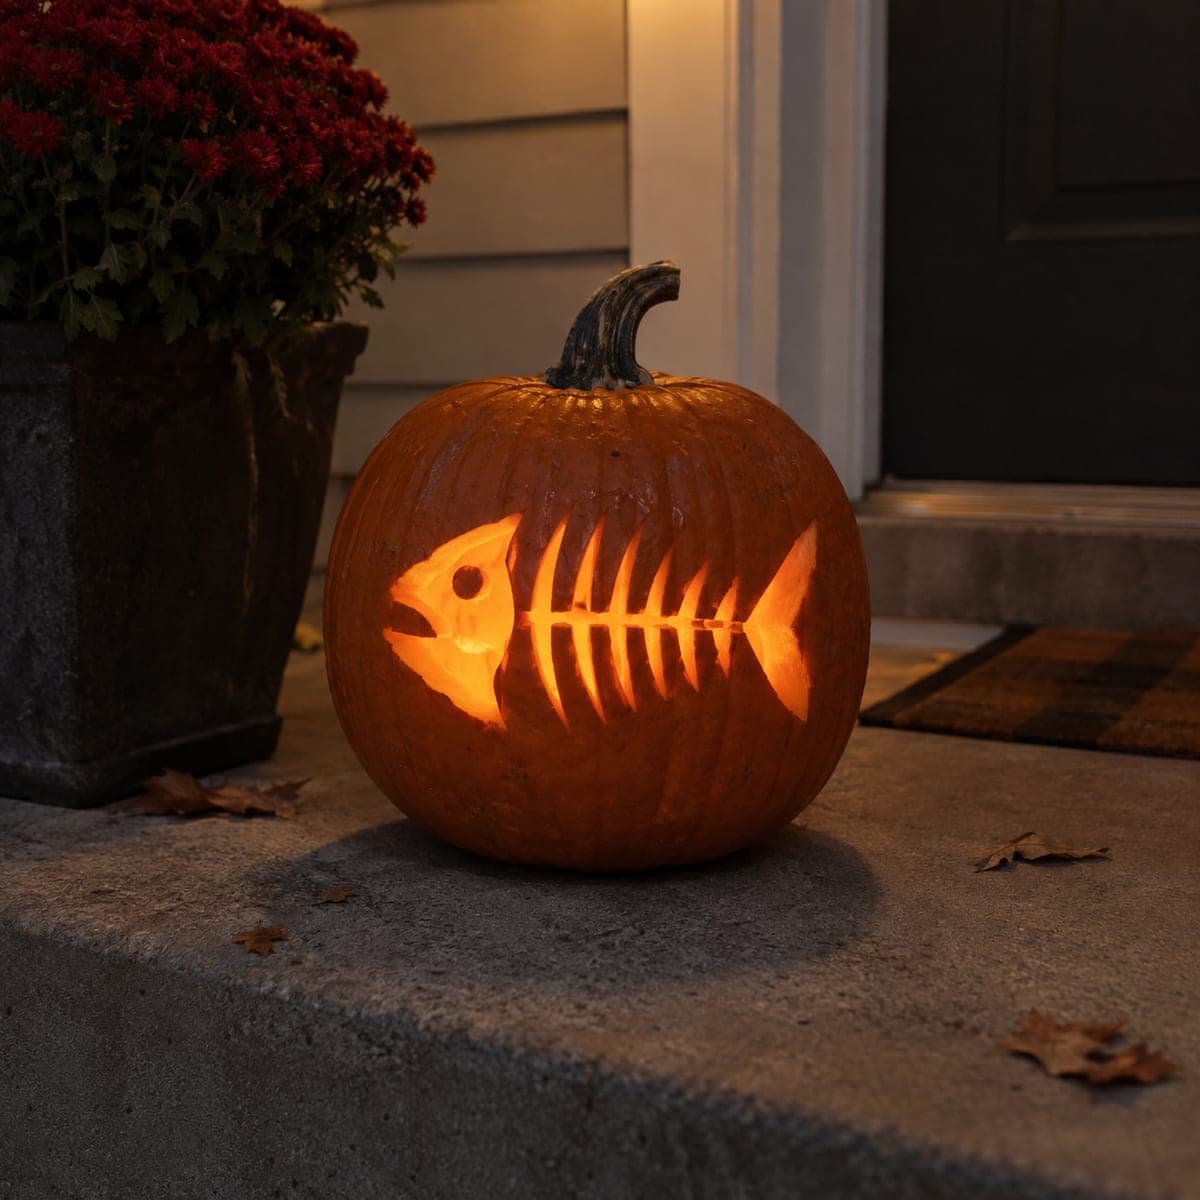
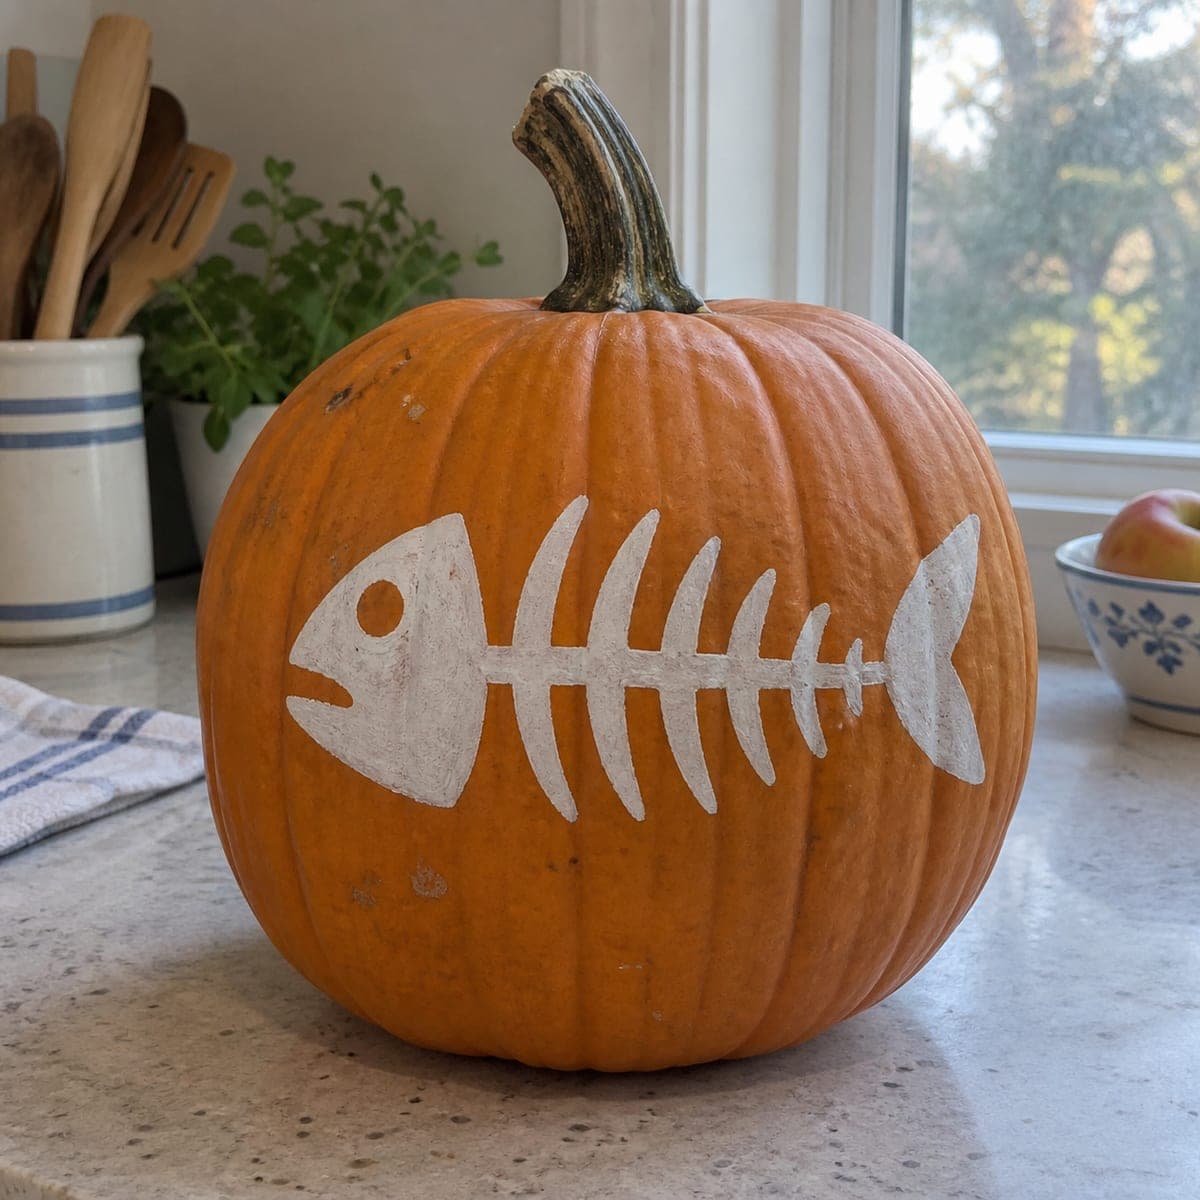
Carved in full relief, this fish skeleton arcs across the pumpkin with dimensional ribs, an open-jawed skull, and a fanned tail that catch real shadows in daylight. Gaps between the bones are cut deep so the design pops without interior lighting. Rough out the spine and skull first, then thin each rib with a small loop tool, leaving the fragile fins for last.

This is an AI-generated concept image: a realistic, carvable design idea rather than a photo of a finished carve. AI concepts are always labeled and sit out the leaderboard and the contest.

No ratings yet · Sign in to rate
Comments (0)

  • No comments yet — be the first.

Save without an account. Sign in to like or comment.

Our tips for carving a similar design

This design's core trick is relief carving, where you shave away the outer skin at different depths instead of cutting all the way through. The skull, spine, and ribs stay raised and pale while the gaps between the bones are cut deep so real daylight shadows do the work. Plan it as a slow sculpting job: rough in the big shapes first, then refine each bone from thick to thin.

Written by PumpkinCarvingIdeas.com, inspired by the image above. These are our suggestions, not instructions from the uploader. This approach to the AI concept has not been tested on a real pumpkin.

From pumpkin to porch

  1. Prep the pumpkin and transfer the outline

    Pick a large pumpkin with one broad, flat side so the whole fish fits comfortably. Wipe it clean and dry, then tape your fish skeleton stencil flat against the carving face. Poke the main outlines with a transfer tool or push pin: the skull, the arc of the spine, each rib, and the fan of the tail. Since this design relies on shading rather than a lit interior, you can leave the pumpkin whole and skip cutting a lid for now.

  2. Rough out the spine and skull

    Use a ribbon loop tool to shave away the skin around the skeleton first, lowering the background so the bones start to stand up in relief. Establish the spine as a continuous raised ridge running from skull to tail. Block in the open-jawed skull as the thickest, most three dimensional part. Work in shallow passes and keep checking your depth so you do not dig through the shell too early.

  3. Shape and thin the ribs

    Switch to a small loop tool and carve each rib as a separate raised curve branching off the spine. Round the top of every bone so light rakes across it and casts a soft shadow. Scoop the valleys between ribs deeper than the background to build contrast. Take your time here, since evenly spaced ribs are what sell the skeleton look.

  4. Cut the deep gaps between the bones

    Now carve the negative spaces between ribs deeper, and cut fully through only where the reference shows open windows. Use a fine detail saw for the through cuts and keep short bridges of pumpkin intact so no rib snaps free. Save the largest openings for last so the surrounding bones stay supported while you work. Slow, patient strokes prevent cracks in the thin sections.

  5. Carve the fragile fins and tail last

    The fanned tail and fins are the most delicate parts, so leave them until the rest is finished. Thin them gradually with the small loop tool, tapering the edges without carving them paper thin. Keep each fin ray connected to the body and to its neighbors with small bridges for strength. Add fine surface lines to suggest the spread of the tail and the jaw's teeth.

  6. Clean up and stage for daylight

    Brush out loose pulp and shavings with a dry pastry brush, then sharpen any edges that got fuzzy. Coat the cut surfaces with a thin layer of petroleum jelly to slow drying and browning. Set the pumpkin on a bench or step in raking morning or afternoon sun so the relief casts shadows. If you want a glow at dusk, tuck a small battery LED behind it rather than inside, and photograph it while the light is low and angled.

Gather your supplies

Check things off as you get ready.

Work on a stable surface, keep your free hand out of the cutting path, and have an adult handle sharp tools.

Three levels of light

  • Leave intact

    The untouched skin around the fish stays dark, framing the skeleton against the pumpkin's natural orange.

  • Peel & shade

    The raised skull, spine, ribs, and tail are skin-peeled to a pale, dim glow that reads as bone.

  • Cut through

    Only the deepest gaps between the ribs are cut through for the brightest openings and strongest shadow lines.

Learn the carving basics

Before you start cutting

Do I need to light this pumpkin from inside?

No, this is built as a daylight relief carving, so shadows on the raised bones do most of the work. You can leave it unlit and display it where sun rakes across the surface. If you want an evening effect, set a small battery LED behind or beside it rather than hollowing the whole pumpkin.

How do I keep the thin ribs and fins from breaking?

Carve from thick to thin and never take a bone down to paper thickness. Leave small bridges of pumpkin connecting the fins and tail rays so nothing floats free. Save the biggest deep cuts for last so the surrounding bones stay supported while you carve.

Since this is an AI concept, can a real pumpkin look like this?

Yes, a similar result is achievable with patient relief carving, though real pumpkin walls limit how fine the bones can get. Keep ribs a bit thicker than the image suggests and lean on shading rather than full cutouts. A firm, thick walled pumpkin gives you the most material to sculpt.

Your take belongs here, too.

Changed a detail? Made it simpler? Share a photo of your version and tell the community what worked.

Share your pumpkin

More pumpkins like this

You've reached the end · 8 pumpkins
The Patch Report

Fresh pumpkins, in your inbox.

The best new carvings, ideas worth stealing, and how-tos for carving season. Short, seasonal, and gone by November.

A short email during carving season. Unsubscribe anytime. See our privacy policy.