Halloween Pumpkin Carving Contest · Starts October 1st · $500 in prizes
← Back to ideas
@ai_concepts
Aug 18, 2026
Simple Five Petal Flower Pumpkin EtchingAI
0

Simple Five Petal Flower Pumpkin Etching

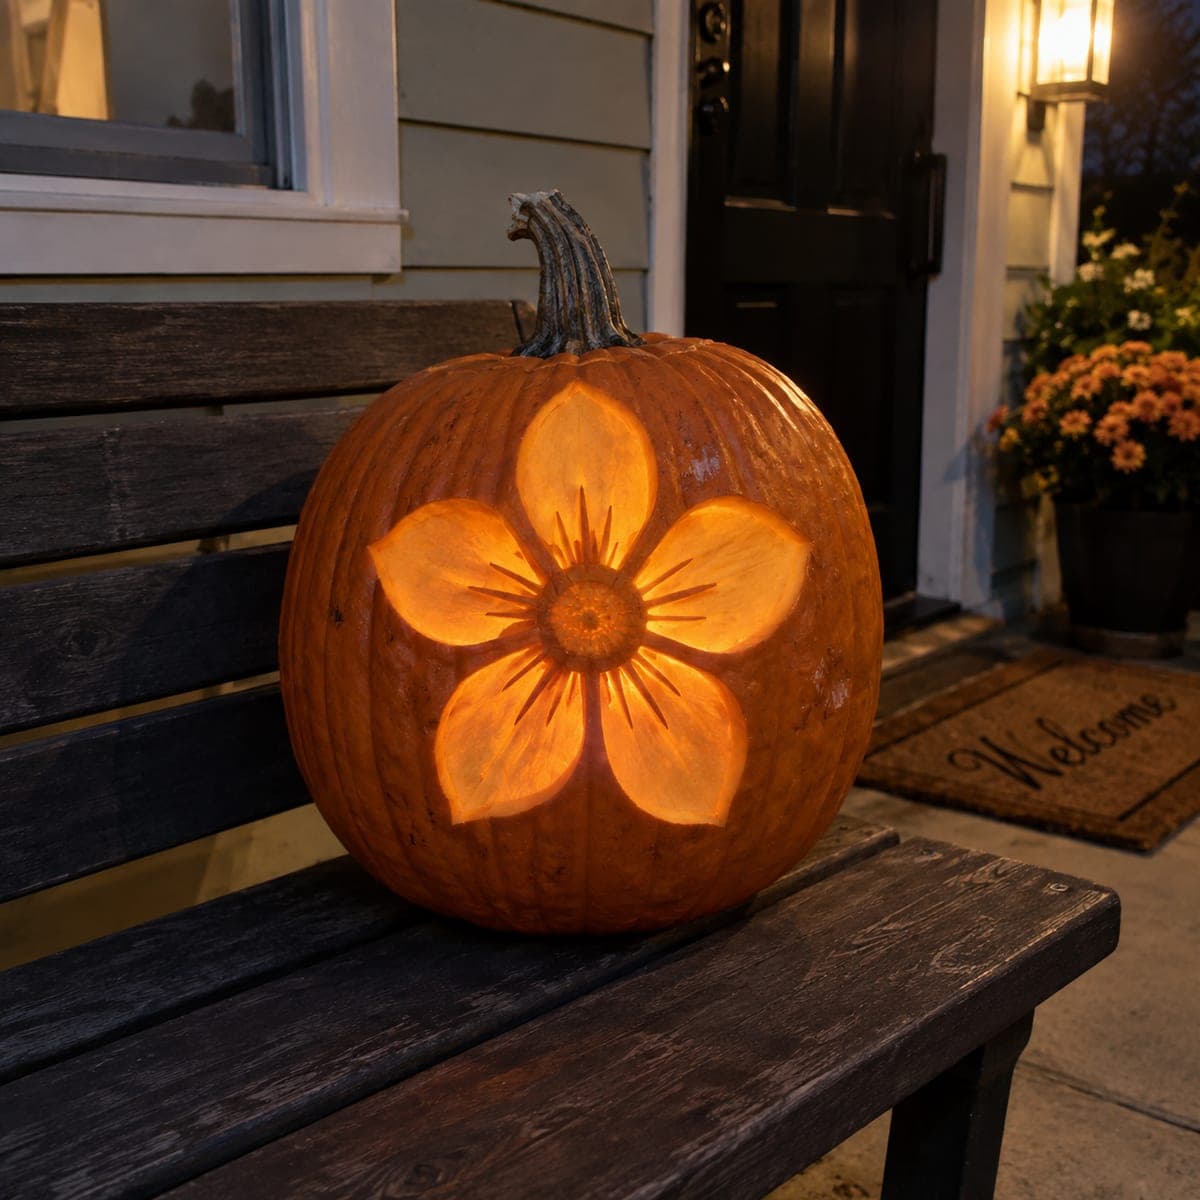
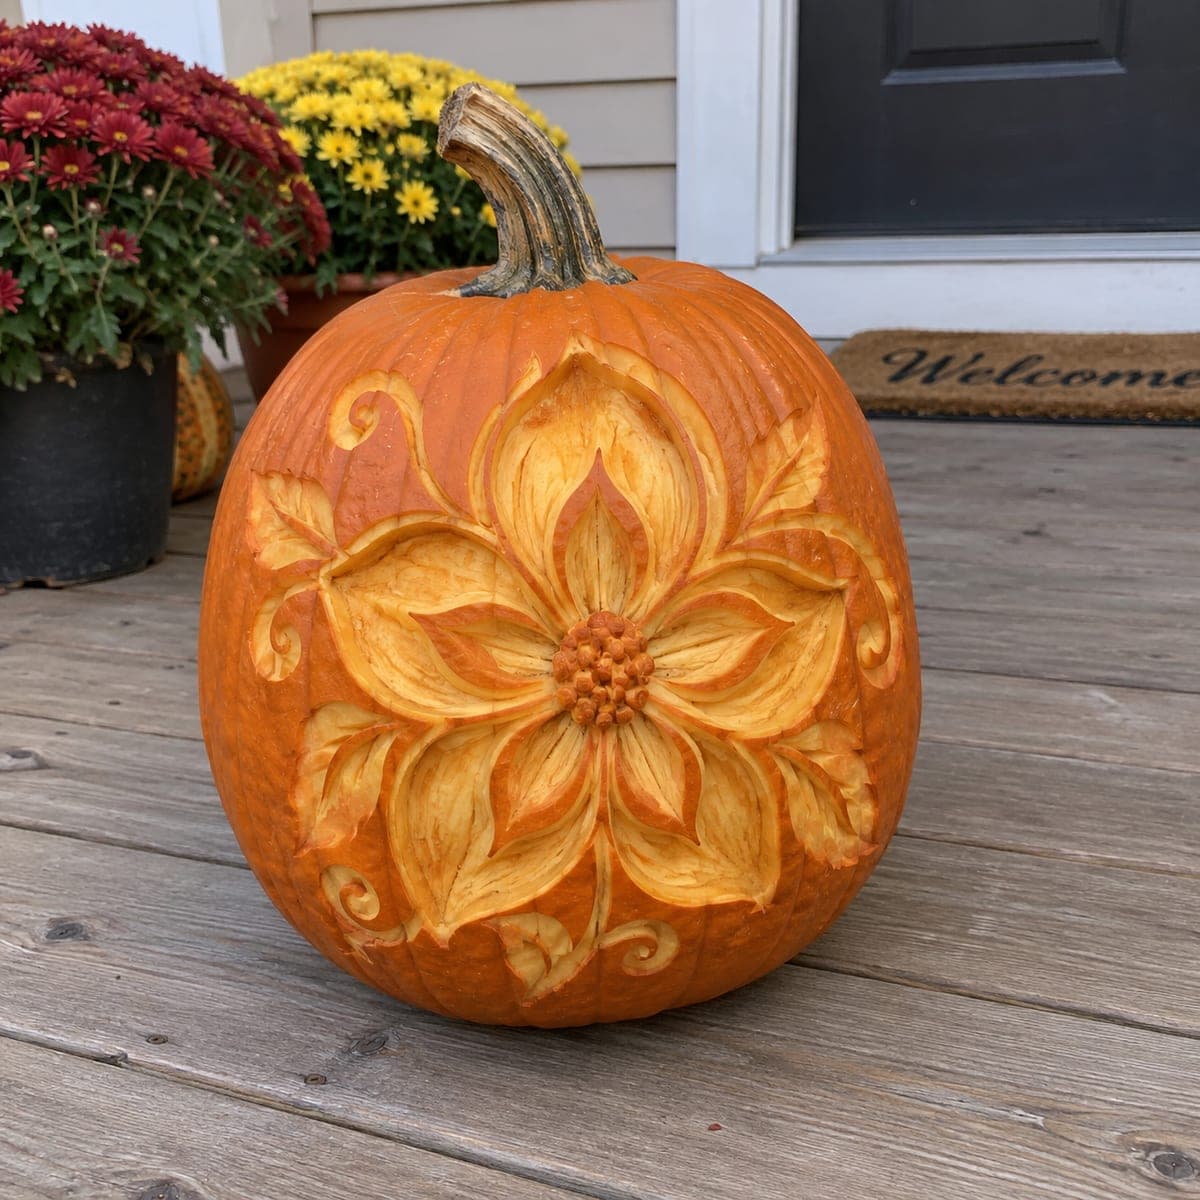
Five broad petals radiate from an etched center in this simple flower pumpkin, glowing like a lantern on a fall porch bench. Each petal is peeled to an even translucent thickness rather than cut through, so the pumpkin stays sturdy. Sketch the petals with a chalk pencil, scrape them smooth with a spoon or scraper tool, and score fine rays for the burst lines.

This is an AI-generated concept image: a realistic, carvable design idea rather than a photo of a finished carve. AI concepts are always labeled and sit out the leaderboard and the contest.

No ratings yet · Sign in to rate
Comments (0)

  • No comments yet — be the first.

Save without an account. Sign in to like or comment.

Our tips for carving a similar design

The core trick here is shading rather than cutting. Each of the five petals is scraped down to an even, thin layer of pumpkin skin so it glows a soft orange, while the center burst is scored with fine lines that catch just a little more light. Because almost nothing is cut all the way through, the pumpkin stays strong and the whole design reads like a warm lantern.

Written by PumpkinCarvingIdeas.com, inspired by the image above. These are our suggestions, not instructions from the uploader. This approach to the AI concept has not been tested on a real pumpkin.

From pumpkin to porch

  1. Open the pumpkin and clean the wall

    Pick a pumpkin with a smooth, flat-ish front panel and cut a lid from the top or a hatch from the back so you can reach inside. Scoop out the seeds and pulp, then thin the inside wall of the carving area to about one inch with a sturdy scraper. A thinner wall makes the peeled petals glow more evenly. Work on a towel to keep the pumpkin from sliding.

  2. Sketch the flower with chalk

    Draw a small circle in the middle for the flower center, then sketch five broad petals radiating out from it. Keep the petals roughly equal in size and leave a thin gap of untouched skin between each one so the shapes stay separate. Use a chalk pencil or washable marker so you can wipe away and redraw until the balance looks right. Step back and check that the layout is centered on the pumpkin face.

  3. Peel the petals to an even glow

    With a ribbon loop tool or the edge of a spoon, scrape away only the orange skin inside each petal, exposing the pale flesh underneath. Aim for the same depth across every petal so they light up evenly, checking thickness by holding a small light inside now and then. Do not cut through the wall; you want a translucent layer, not a hole. Keep the thin dividing lines between petals untouched so they stay dark and define each shape.

  4. Score the center burst

    Etch a ring of short, fine rays fanning out from the flower center to create that sunburst look. Use a small detail knife or a lino-style V tool and keep the cuts shallow, just breaking the surface. Peel the center circle itself a little more lightly so it reads as its own shape. These fine lines catch the light and add texture without weakening the pumpkin.

  5. Test the light and refine

    Drop in an LED tea light or a small battery puck and view the pumpkin in a dim room. Any petal that looks dull can be scraped a touch thinner, and any spot that is too bright means you went close to cutting through, so leave it be. Even out the petals until all five glow at a similar warmth. Wipe off leftover chalk with a damp paper towel.

  6. Set it out and photograph it

    Place the pumpkin on a porch bench or step where the flower faces your walkway. Use LED lights only, never a real candle, especially since the thin walls can scorch. Shoot your photo at dusk so the glow shows against the darker background. Bring it inside overnight to help it last longer.

Gather your supplies

Check things off as you get ready.

Work on a stable surface, keep your free hand out of the cutting path, and have an adult handle sharp tools.

Three levels of light

  • Leave intact

    The background skin and the thin dividing lines between petals stay untouched and dark.

  • Peel & shade

    All five petals and the flower center are scraped thin for a soft, even orange glow.

  • Cut through

    Nothing is cut fully through on this design; the burst rays are only lightly scored for a hint of extra brightness.

Learn the carving basics

Before you start cutting

How thin should I scrape the petals?

Aim for a consistent translucent layer, roughly an eighth of an inch, so light passes through as a warm glow. Check by holding a light inside as you work. Stop as soon as the flesh brightens; going further risks poking through and losing the smooth glowing effect.

Do I need to cut all the way through anywhere?

No, this design is meant to be an etched, shaded piece rather than a cut-out. Keeping the wall intact is exactly what makes it glow evenly and stay sturdy. If you want a brighter accent, lightly score the center rays, but keep those cuts shallow.

Will an etched pumpkin like this last as long as a cut one?

Etched pumpkins dry out faster because so much skin is removed, so expect a few days of good glow. Rub the scraped areas with a little petroleum jelly to slow drying and store the pumpkin somewhere cool overnight. Carving it close to the day you want to display it helps most.

Your take belongs here, too.

Changed a detail? Made it simpler? Share a photo of your version and tell the community what worked.

Share your pumpkin

More pumpkins like this

You've reached the end · 8 pumpkins
The Patch Report

Fresh pumpkins, in your inbox.

The best new carvings, ideas worth stealing, and how-tos for carving season. Short, seasonal, and gone by November.

A short email during carving season. Unsubscribe anytime. See our privacy policy.