Halloween Pumpkin Carving Contest · Starts October 1st · $500 in prizes
← Back to ideas
@ai_concepts
Sep 25, 2026
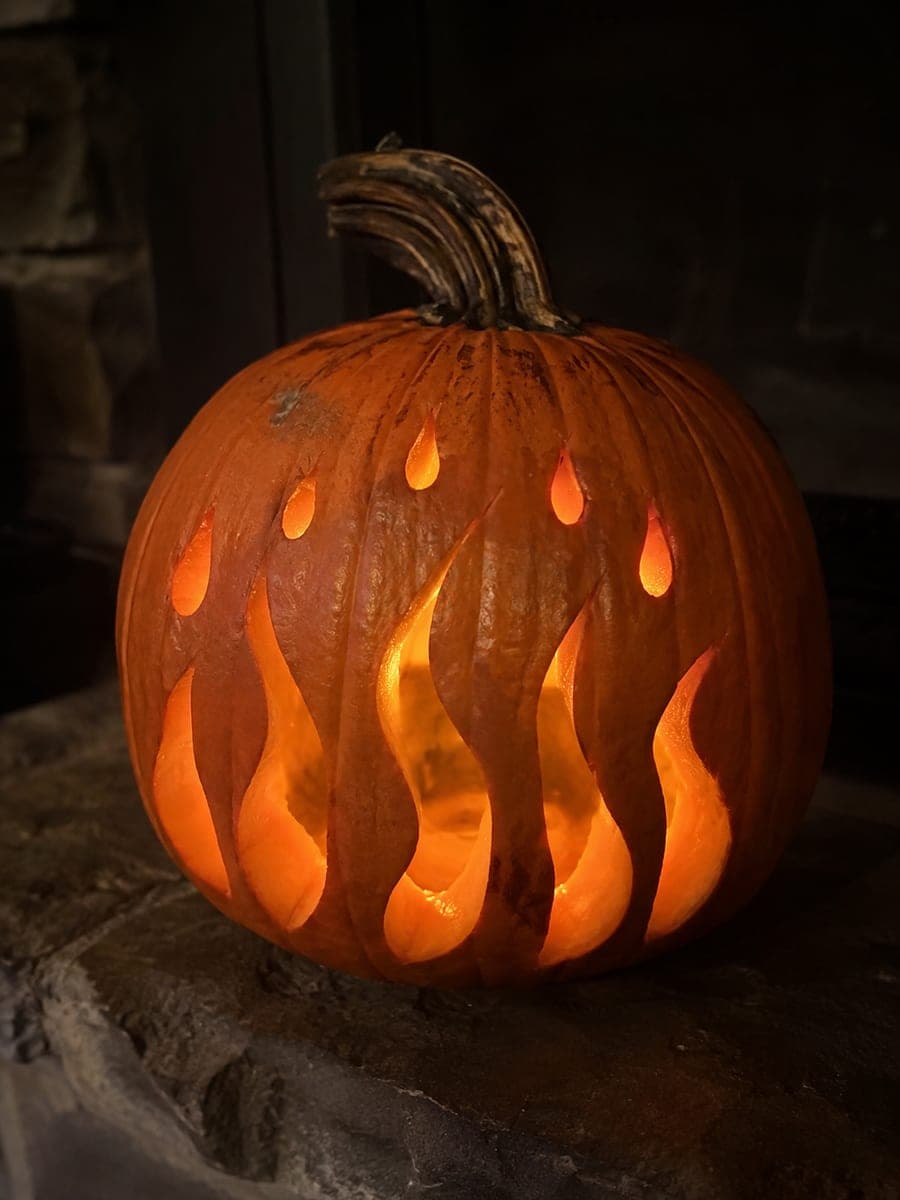
Single Bold Flame Cutout Pumpkin Glowing at NightAI
0

Report this carving

Tell us what is wrong. Reports are private.

Single Bold Flame Cutout Pumpkin Glowing at Night

One oversized flame aperture glows against the dark on this easy flame pumpkin carving, set on gravel at night. Draw the flame shape freehand or use a simple template, then cut the full opening without leaving any center material. A single large cutout is very forgiving for beginners because there is no retained center to knock loose. Place a battery-operated candle inside so the flame shape echoes the real flicker.

No ratings yet · Sign in to rate

Comments (0)

  • No comments yet — be the first.

Save without an account. Sign in to like or comment.

Our tips for carving a similar design

The entire design is a single large flame-shaped opening with no interior material to preserve. This simplicity is what makes it so beginner-friendly: one continuous cut, no bridges to worry about, and nothing that can fall out mid-carve. A battery-operated candle inside echoes the flame motif, making the design self-referential in the best way.

From pumpkin to porch

  1. Prep and gut the pumpkin

    Cut a wide bottom cap and scoop the interior to about an inch of wall thickness. Wipe the outer surface dry before transferring the design. A round, evenly curved pumpkin face works well for displaying a centered flame shape.

  2. Draw or transfer the flame outline

    Draw the flame shape freehand with a marker, or use a printed template and poking tool. Keep the base of the flame wide, at least two inches, and taper it to a rounded point at the tip. A wide base makes the single-cut approach much more forgiving.

  3. Pierce and cut the flame opening

    Start by piercing a small hole inside the flame outline with a poking tool, then insert a detail saw and cut the full outline in one continuous path. Work slowly around the curved tip to keep the point smooth rather than jagged. There is nothing to fall free until the last connecting cut is made.

  4. Remove the piece and clean edges

    Pop the flame piece free through the inside of the pumpkin. Use a linoleum U-tip to smooth any rough areas along the curves, especially at the tip. Clean flame edges read as intentional; rough ones look accidental.

  5. Check and seal cut edges

    Press gently around the outer edge of the flame opening to confirm the surrounding shell is solid. Rub a thin coat of petroleum jelly along all cut edges to slow dehydration and add a couple of days to the display life.

  6. Light and display

    Place a battery-operated candle inside through the bottom, positioning it just behind the flame opening so its glow fills the aperture evenly. Set on gravel, a step, or a railing and display at night so the single glowing flame shape creates maximum impact against the dark background.

Written with AI to match this design

Gather your supplies

Check things off as you get ready.

Work on a stable surface, keep your free hand out of the cutting path, and have an adult handle sharp tools.

Three levels of light

  • Leave intact

    All surrounding pumpkin rind outside the flame silhouette boundary

  • Peel & shade

    None, this design uses a single through-cut for all light

  • Cut through

    The entire interior of the flame shape as one open aperture

Learn the carving basics

Before you start cutting

How do I draw a flame shape that looks like a real flame rather than a blob?

Start with a wide oval for the base of the flame, then extend it upward into a single tapered point that leans slightly to one side. Real flames are asymmetric and slightly tilted, so a perfectly centered point looks stiff. Adding one gentle S-curve on the way up from the base to the tip gives it natural movement.

Can I cut this with a kitchen knife instead of a pumpkin saw?

A small serrated pumpkin saw gives you much better control around the curved flame tip than a kitchen knife. Kitchen knives are designed to cut straight, and the curved tip of a flame is exactly where control matters most. If a pumpkin saw is not available, a small linoleum tool can be used to score the outline first, making a knife cut easier to guide.

What size flame opening looks best on a standard carving pumpkin?

Aim for a flame height of about half to two-thirds of the total pumpkin face height. A flame that is too small looks insignificant from a few feet away at night. A flame that reaches nearly to the stem looks overpowering. Half to two-thirds is the sweet spot for a shape that reads clearly on a porch from the sidewalk.

Your take belongs here, too.

Changed a detail? Made it simpler? Share a photo of your version and tell the community what worked.

Share your pumpkin

More pumpkins like this

You've reached the end · 8 pumpkins
The Patch Report

Fresh pumpkins, in your inbox.

The best new carvings, ideas worth stealing, and how-tos for carving season. Short, seasonal, and gone by November.

A short email during carving season. Unsubscribe anytime. See our privacy policy.