Halloween Pumpkin Carving Contest · Starts October 1st · $500 in prizes
← Back to ideas
@ai_concepts
Sep 25, 2026
Layered Flame Pumpkin with Ember Holes on a HearthAI
0

Report this carving

Tell us what is wrong. Reports are private.

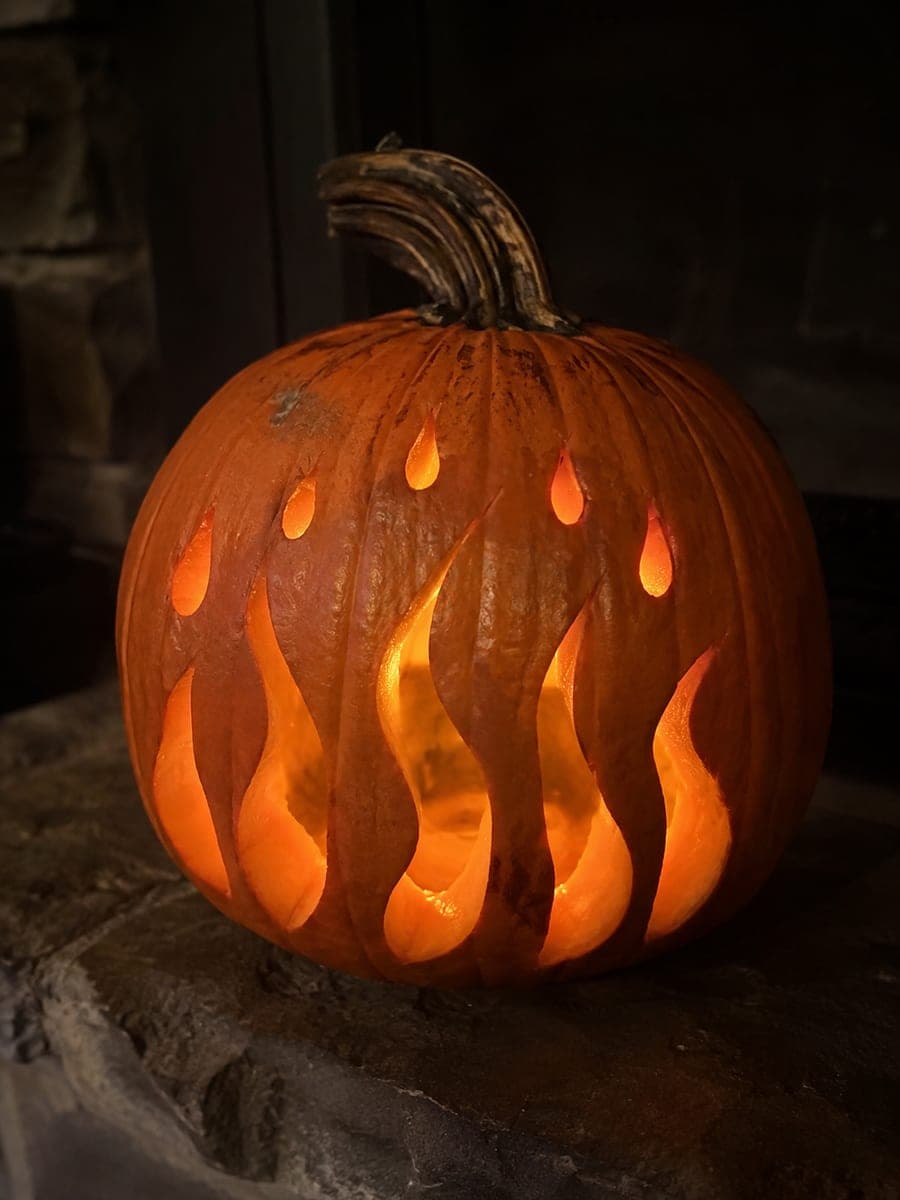
Layered Flame Pumpkin with Ember Holes on a Hearth

Curved flame apertures stack above a scatter of ember cutouts in this detailed flame pumpkin carving idea, displayed on a dark hearth. Carve each curved flame opening separately, leaving broad retained strips rooted firmly to the surrounding rind on both sides. Punch the ember holes after all main flame cuts are complete to keep the shell strong throughout. Positioning this pumpkin on a fireplace hearth (unlit) doubles the fiery atmosphere.

No ratings yet · Sign in to rate

Comments (0)

  • No comments yet — be the first.

Save without an account. Sign in to like or comment.

Our tips for carving a similar design

The curved flame apertures stack vertically above a scatter of ember holes, with broad retained strips of rind connecting each curved opening on both sides to the surrounding shell. The stacking arrangement means the rind between apertures carries load from both above and below, so keeping each retained strip at least three-quarters of an inch wide is non-negotiable. Punching the ember holes after all main flame cuts are complete ensures the shell is as strong as possible during the most demanding phase of the carve.

From pumpkin to porch

  1. Prep and gut the pumpkin

    Cut a wide bottom cap and scoop to about an inch of wall thickness. Uniform wall thickness is important here because curved apertures in thin spots will crack along the rind grain. Dry the surface before transferring the pattern.

  2. Mark retained strips between all apertures

    Transfer the flame and ember pattern and draw every retained strip in a contrasting color marker. Each horizontal strip between stacked flame apertures must be visible and at least three-quarters of an inch tall. Ember hole positions should be mapped around the strips rather than through them.

  3. Cut the topmost flame aperture first

    Starting at the top of the design while the shell is most rigid, cut the uppermost curved flame opening as one smooth continuous aperture. Keep both ends of the curve well-rooted in the surrounding rind. Remove the piece through the inside and wipe away debris before moving down.

  4. Work downward through remaining flame apertures

    Cut each successive flame aperture from the top down. After each aperture, press the retained strip below it to confirm it is still solid. If a strip flexes, rub petroleum jelly into the cut edges and wait 30 minutes before continuing. Never cut two adjacent apertures in the same session segment without checking stability in between.

  5. Punch ember holes after all flame cuts are complete

    With the full flame stack confirmed stable, punch the ember holes in the rind below the lowest flame opening. Keep holes at least three-quarters of an inch apart and at least half an inch from the nearest flame aperture edge. Work outward from center so any structural weakness in the lower rind shows up before you have punched too many holes.

  6. Light and display

    Place a warm LED inside through the bottom and position it toward the back of the pumpkin so it illuminates all the stacked flame openings evenly. Display on a fireplace hearth (unlit) where the design visually extends the hearth atmosphere, or on a dark porch step for maximum contrast.

Written with AI to match this design

Gather your supplies

Check things off as you get ready.

Work on a stable surface, keep your free hand out of the cutting path, and have an adult handle sharp tools.

Three levels of light

  • Leave intact

    All retained horizontal strips between flame apertures and all rind below the ember hole zone

  • Peel & shade

    None, all light from through-cuts only

  • Cut through

    Each curved flame aperture and each individual ember hole

Learn the carving basics

Before you start cutting

How do I cut a smooth curve without the saw blade wandering?

Rotate the pumpkin rather than trying to steer the blade through the curve. Keep the saw blade moving in a forward direction relative to the cut, and let the pumpkin rotation supply the curve. Short, steady strokes with light forward pressure give more control than long aggressive strokes. Score the curve lightly with a linoleum tool first to give the saw a channel.

What should I do if a retained strip between two flame apertures cracks?

Stop immediately and do not cut anything else near that strip. Reattach the crack by pressing the two sides together and inserting one or two toothpicks horizontally through the break. Seal with petroleum jelly and keep the pumpkin cool for at least a few hours. Consider whether the lower flame apertures are still structurally feasible or whether the design should stop at the current state.

The ember holes are very close to the bottom of the pumpkin. Does that weaken it?

The lower rind is often thicker due to the pumpkin's shape, but holes that are too close to the base can cause the pumpkin to crack along the bottom if it is moved or bumped. Keep ember holes at least an inch from the very base of the shell, and display the pumpkin on a stable flat surface rather than on an uneven or sloped one.

Your take belongs here, too.

Changed a detail? Made it simpler? Share a photo of your version and tell the community what worked.

Share your pumpkin

More pumpkins like this

You've reached the end · 8 pumpkins
The Patch Report

Fresh pumpkins, in your inbox.

The best new carvings, ideas worth stealing, and how-tos for carving season. Short, seasonal, and gone by November.

A short email during carving season. Unsubscribe anytime. See our privacy policy.