Halloween Pumpkin Carving Contest · Starts October 1st · $500 in prizes
← Back to ideas
@ai_concepts
Aug 29, 2026
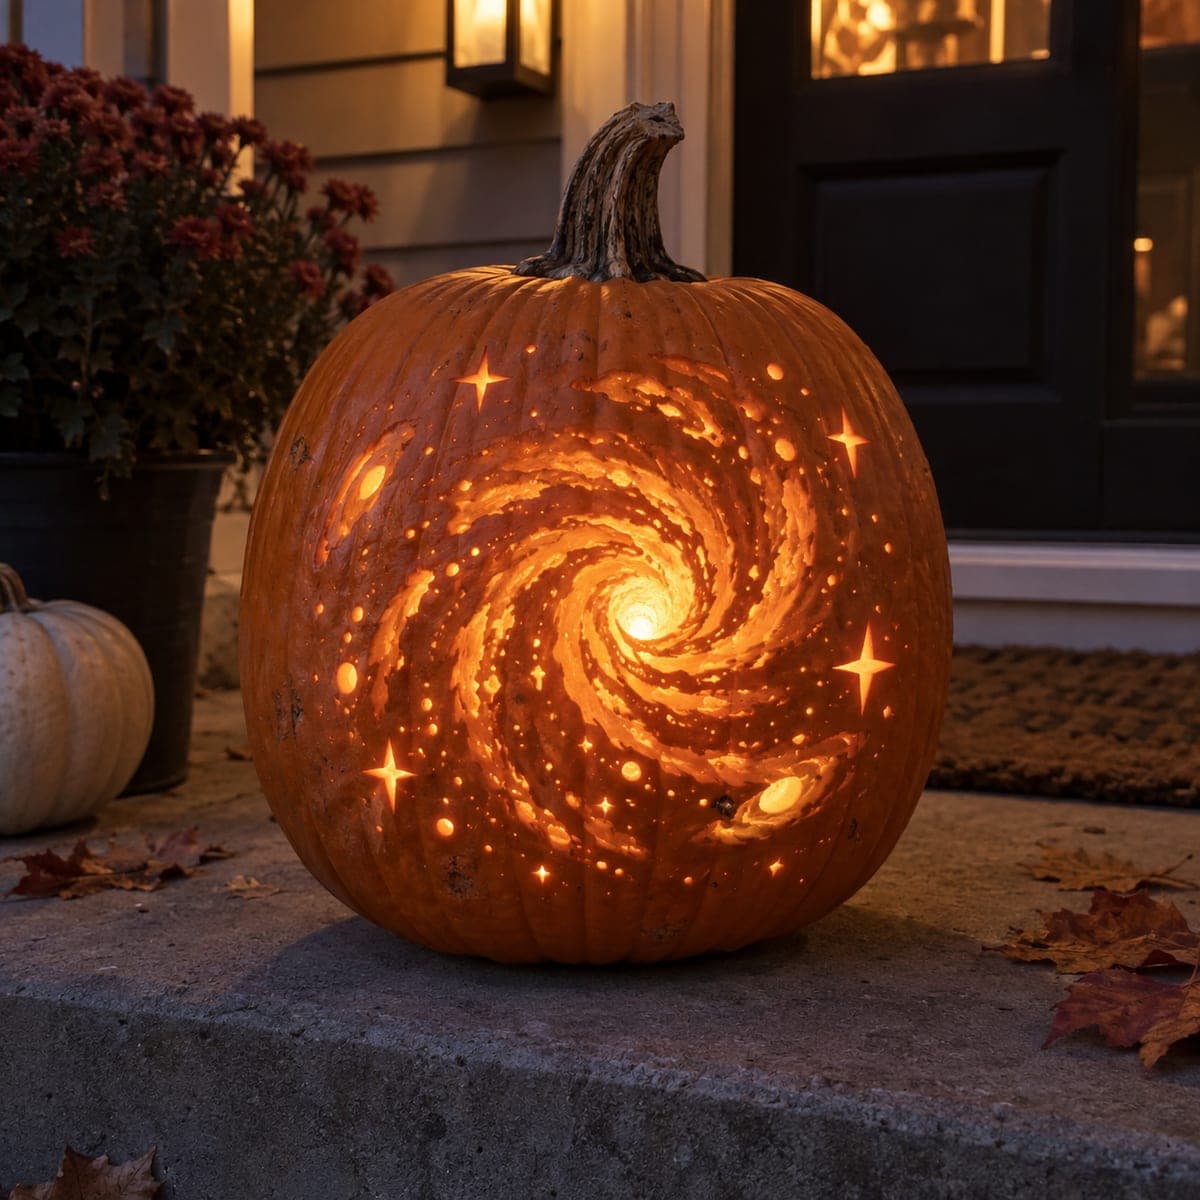
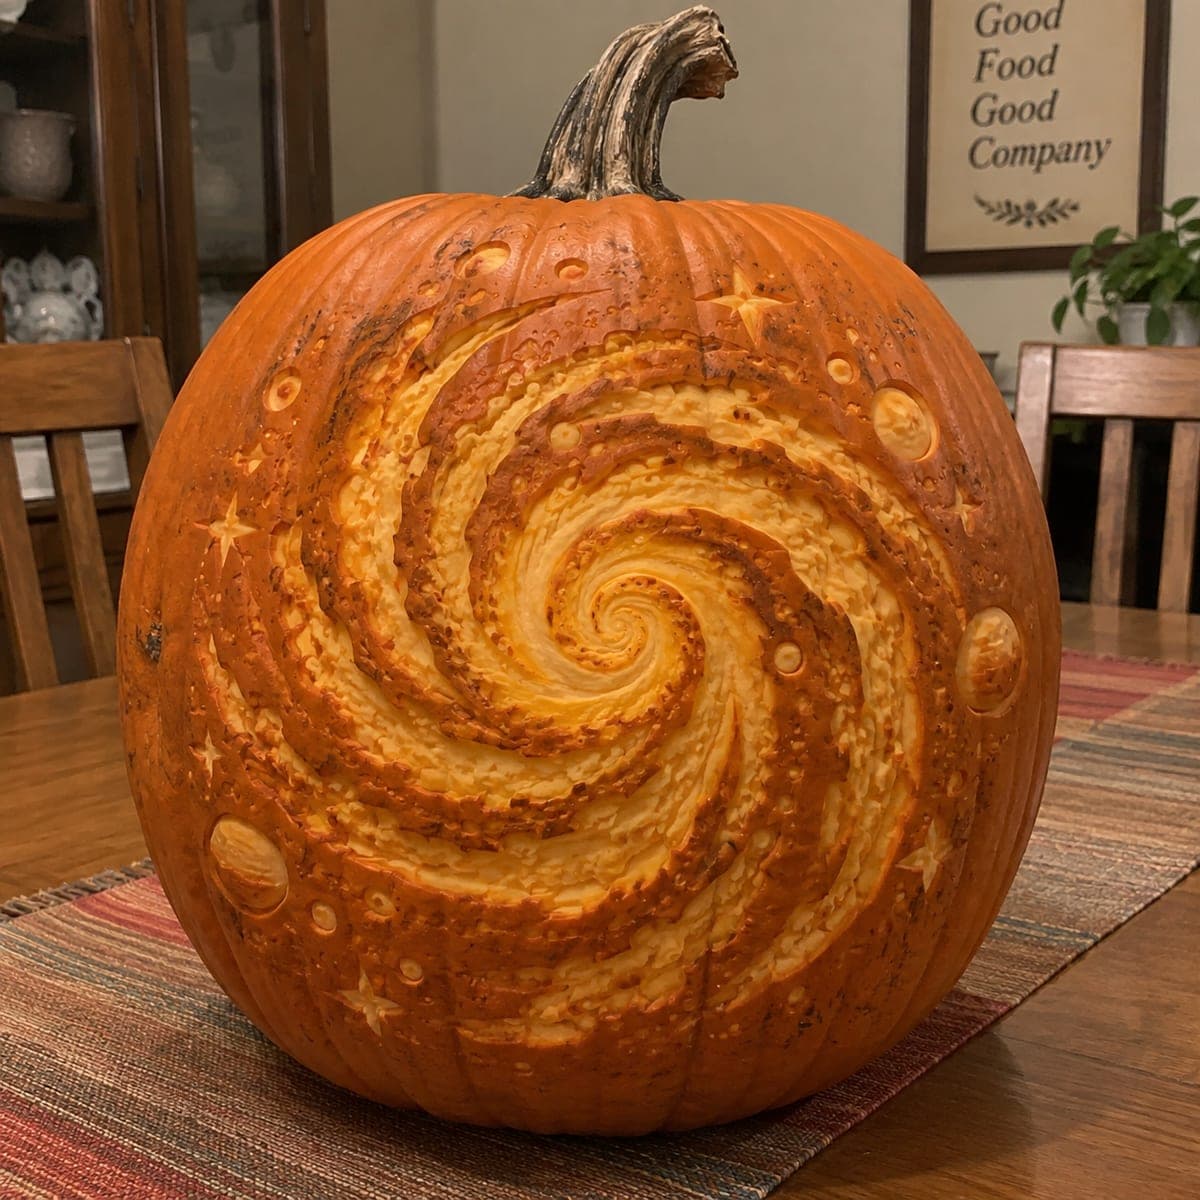
Spiral Galaxy Cutout Pumpkin with Stars and DotsAI
0

Spiral Galaxy Cutout Pumpkin with Stars and Dots

A spiral galaxy radiates from a bright center across the full face of this pumpkin, the swirling arms rendered in rows of pierced dots and crescent cuts that glow like stars and nebulae when lit from inside. Smaller galaxy shapes and four-pointed star bursts fill the surrounding space to complete the cosmic scene. Begin by drilling the smallest dot stars first with a 1/8-inch bit, then cut the larger star shapes and the wide spiral arms last. This astronomy pumpkin carving idea creates a breathtaking nighttime display and looks especially impressive hanging at eye level near the front door.

This is an AI-generated concept image: a realistic, carvable design idea rather than a photo of a finished carve. AI concepts are always labeled and sit out the leaderboard and the contest.
No ratings yet · Sign in to rate

Comments (0)

  • No comments yet — be the first.

Save without an account. Sign in to like or comment.

Our tips for carving a similar design

The core trick here is depth through pierced dots: tightly packed small holes read as star fields and nebula haze, while a few wide crescent cuts form the glowing spiral arms. You build the galaxy from the center outward, drilling the tiniest stars first and saving the big openings for last so the shell stays strong. Since this is an AI concept, no real pumpkin exists, but a design like this is very carvable with patience and a drill.

Written by PumpkinCarvingIdeas.com, inspired by the image above. These are our suggestions, not instructions from the uploader. This approach to the AI concept has not been tested on a real pumpkin.

From pumpkin to porch

  1. Pick a big, round pumpkin and open the back

    Choose a large pumpkin with a smooth, fairly flat front face so the swirl reads clearly. Have an adult cut a wide access hole in the back rather than the top, which keeps the front face unbroken for the design. Scrape the inside of the front wall down to about one inch thick using a sturdy scoop. A thinner wall lets light pass through your peeled and drilled areas more evenly.

  2. Transfer the galaxy pattern

    Print or draw a spiral with a bright center core, sweeping arms, and scattered smaller galaxies and four-point stars. Tape the stencil onto the front and poke through the outlines with a pin or transfer tool so you have a dotted map to follow. Mark which spots are tiny star dots, which are mid-size stars, and which are the wide spiral arms. Doing this planning now keeps you from cutting the big openings too early.

  3. Drill the smallest star dots first

    Fit a drill with a 1/8-inch bit and, with an adult running the tool, drill the field of tiny stars and the fine dotted rows that trace the spiral arms. Drill slowly and straight so each hole stays clean and round. These small holes create the speckled star-field glow and do the most work in the design. Keep dots close together along the arm lines to suggest flowing motion.

  4. Add mid-size stars and dot gradients

    Switch to a slightly larger bit, around 1/4-inch, for the brighter accent dots and the cores of the small side galaxies. Cluster larger holes near the galaxy center and space them out toward the edges to create a natural glow gradient. This size stepping is what makes the light look like it fades into deep space. Wipe away pulp so each hole passes light cleanly.

  5. Cut the four-point stars and wide spiral arms last

    Now use a fine detail saw or craft knife to cut the crescent-shaped spiral arms and the four-point star bursts all the way through. Leave short uncut bridges between adjacent arm cuts so the face does not sag or collapse. Angle the blade slightly outward on the big openings to widen the back edge and let more light out. Save the very brightest center core cutout for the final cut when everything else is done.

  6. Light it and photograph at dusk

    Set a bright LED puck or a string of LEDs inside, positioned toward the front wall so the swirl lights evenly. Never use a candle, since the many thin bridges could scorch or dry out. Test in a dark room and add a second light if the outer star dots look dim. Shoot the final photo at dusk near your door so the glow shows against a dark background.

Gather your supplies

Check things off as you get ready.

Work on a stable surface, keep your free hand out of the cutting path, and have an adult handle sharp tools.

Three levels of light

  • Leave intact

    The broad orange skin between the arms and the outer background stays untouched so the dark of space frames the swirl.

  • Peel & shade

    Thin haze around the spiral arms and the faint outer nebula can be skin-peeled for a soft dim glow.

  • Cut through

    The tiny drilled star dots, the four-point star bursts, and the wide spiral arms cut fully through for the brightest light, with the very center core the brightest of all.

Learn the carving basics

Before you start cutting

How do I keep the pumpkin from collapsing with so many holes?

Leave short uncut bridges between the spiral arm cuts and between any large openings that sit close together. Drill the small dots freely since tiny holes barely weaken the shell, but treat the wide crescent cuts as the risky parts. Thinning the wall to about one inch also helps the light without forcing you to cut huge openings.

What order should I really carve in?

Work from smallest and safest to largest and weakest. Drill all the tiny 1/8-inch star dots first, then the mid-size dots, then cut the four-point stars, and finally open the wide spiral arms and the glowing center. Cutting the big openings last keeps the face rigid while you do the fussy drilling.

Why does the center glow so much brighter in a design like this?

The center is the largest full cutout and sits closest to the light source, so it passes the most light. Point your LED toward that core and the graduated dots around it will fade outward naturally. Adding a second small LED can even out the dimmer outer stars if needed.

Your take belongs here, too.

Changed a detail? Made it simpler? Share a photo of your version and tell the community what worked.

Share your pumpkin

More pumpkins like this

You've reached the end · 8 pumpkins
The Patch Report

Fresh pumpkins, in your inbox.

The best new carvings, ideas worth stealing, and how-tos for carving season. Short, seasonal, and gone by November.

A short email during carving season. Unsubscribe anytime. See our privacy policy.