Halloween Pumpkin Carving Contest · Starts October 1st · $500 in prizes
← Back to ideas
@ai_concepts
Aug 4, 2026
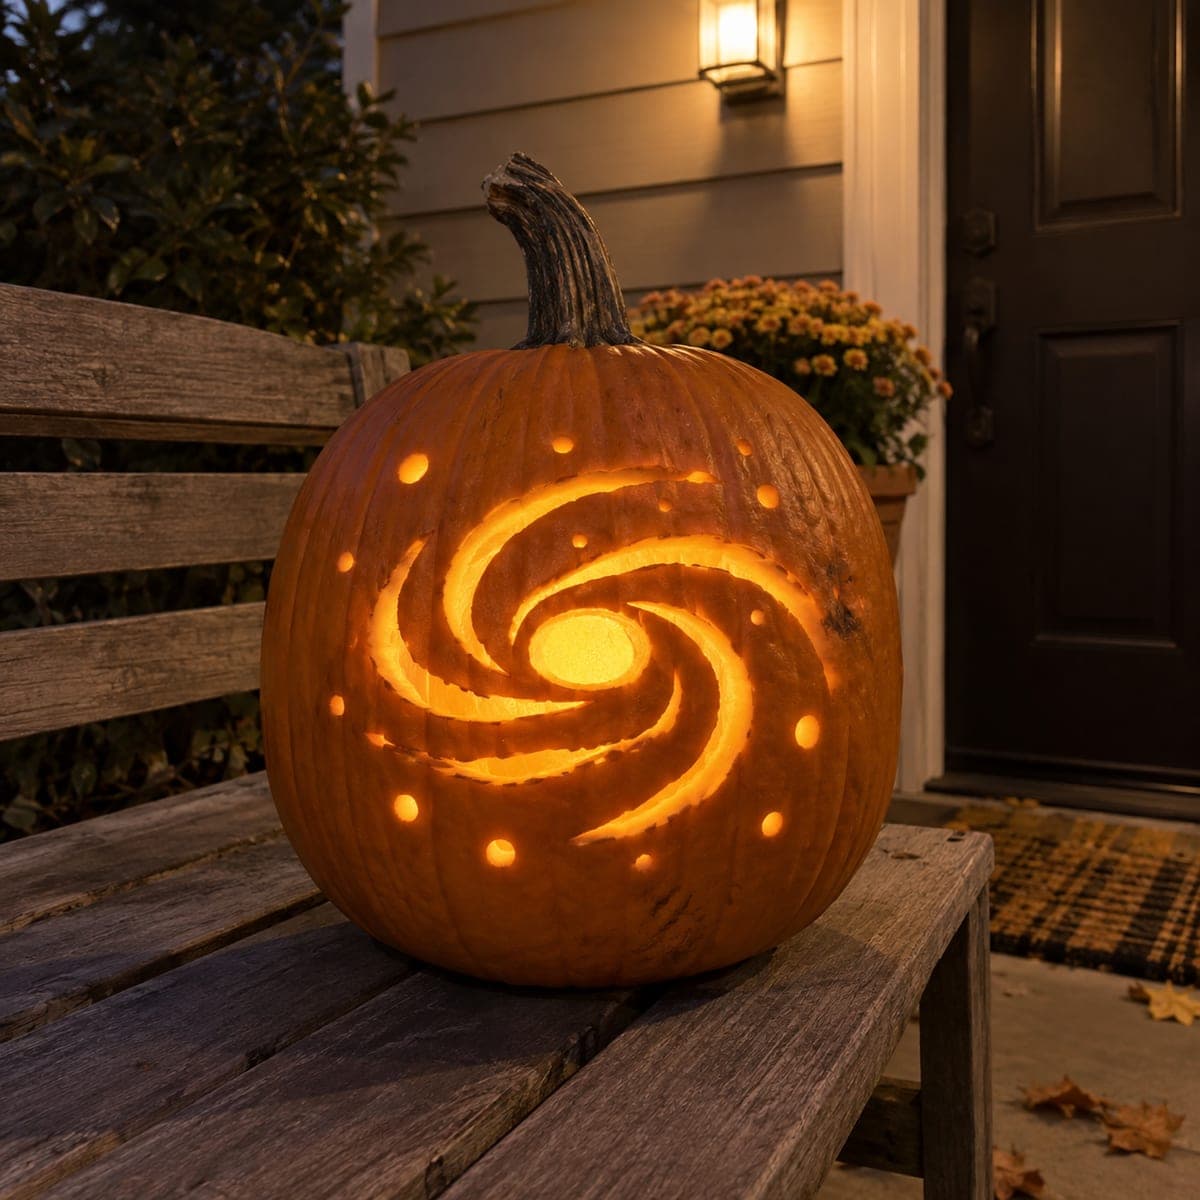
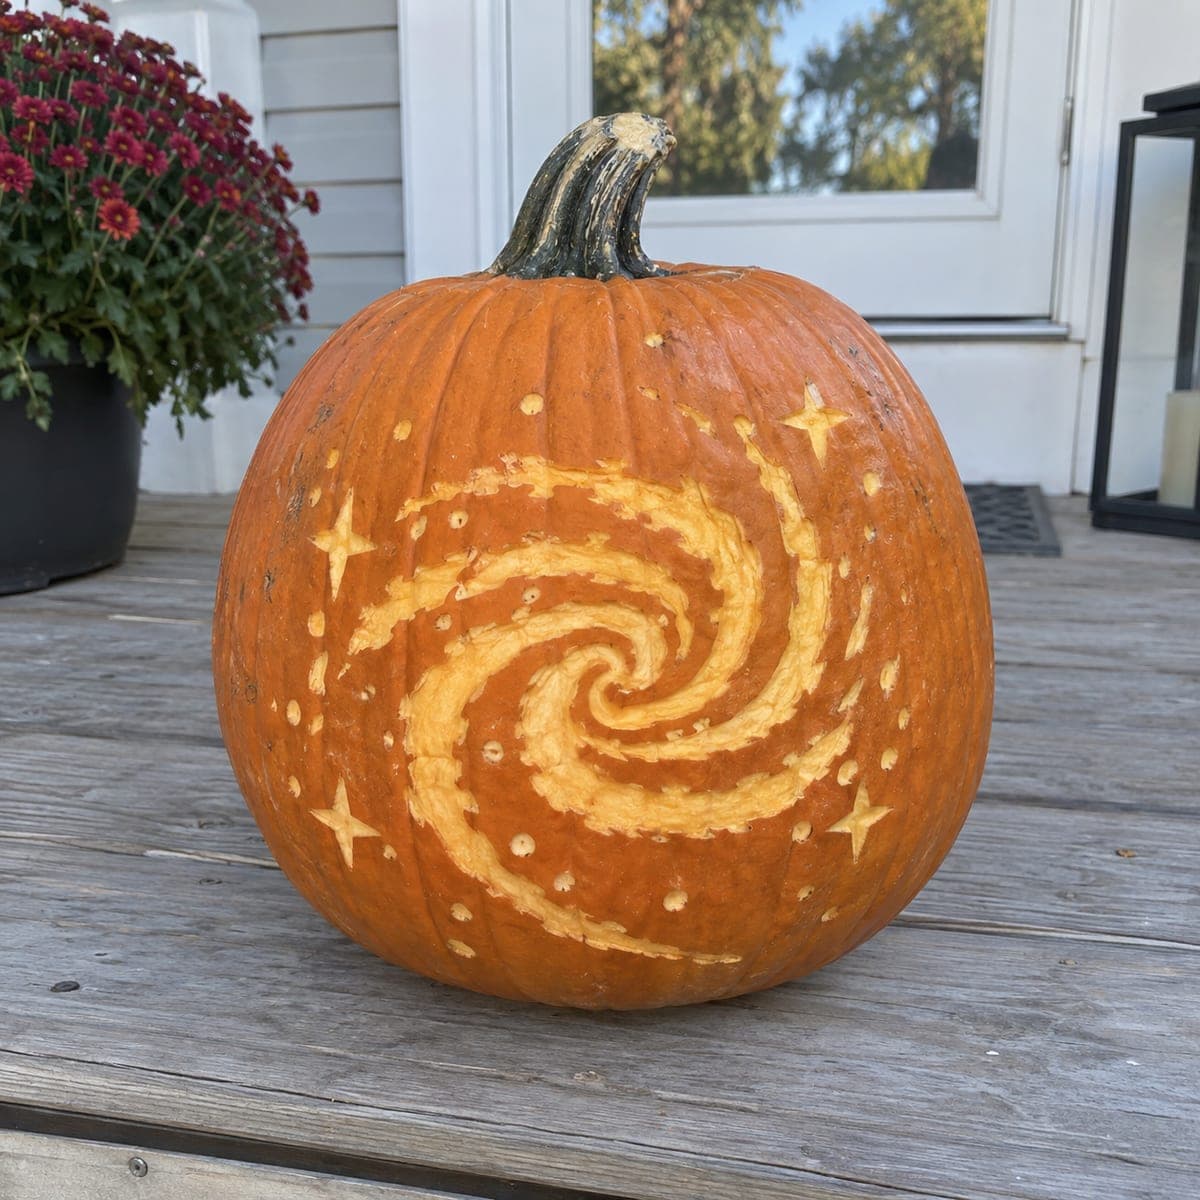
Spiral Galaxy Etched Pumpkin with Planets and StarsAI
0

Spiral Galaxy Etched Pumpkin with Planets and Stars

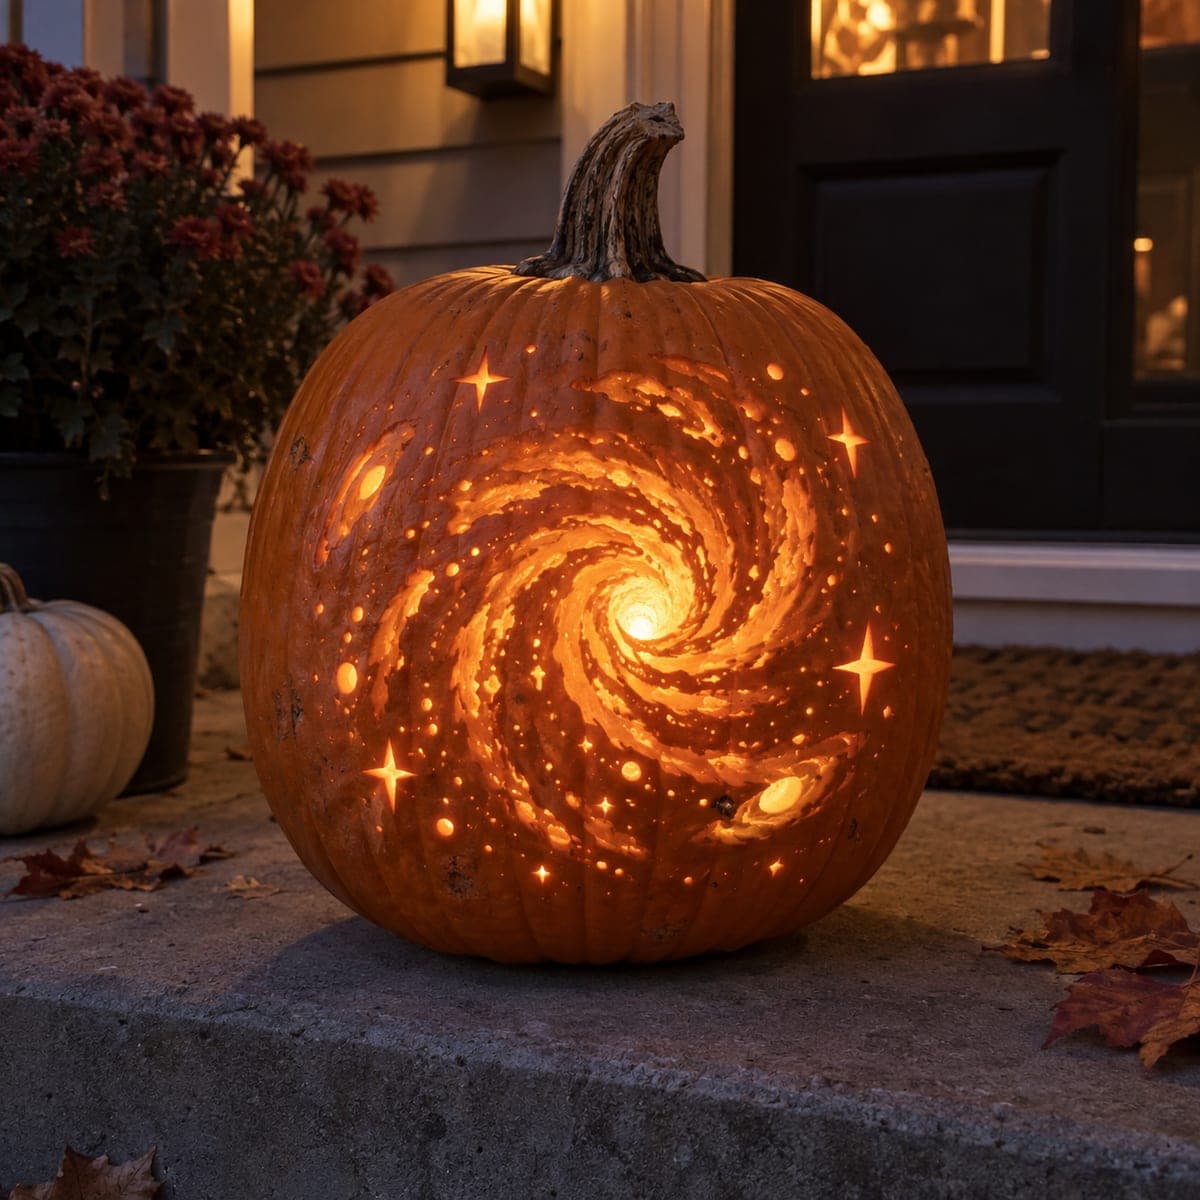
A sweeping spiral galaxy dominates this pumpkin, with concentric carved grooves radiating from a bright center and small spherical planets scattered around the edges. The design relies entirely on depth-varied etching, no cutouts, so the pumpkin stays structurally solid while showing dramatic tonal gradients from deep amber to pale cream. Work from the center outward with a Dremel ball-tip bit, carving the brightest core shallowest and gradually deepening the spiral arms. A strong side light rather than a candle inside will cast dramatic shadows across the texture and make each groove stand out.

This is an AI-generated concept image: a realistic, carvable design idea rather than a photo of a finished carve. AI concepts are always labeled and sit out the leaderboard and the contest.
No ratings yet · Sign in to rate

Comments (0)

  • No comments yet — be the first.

Save without an account. Sign in to like or comment.

Our tips for carving a similar design

The whole effect here comes from depth-varied etching rather than any cutouts, so the pumpkin stays solid while the flesh shifts from deep amber to pale cream. The core trick is carving the bright galaxy center shallowest and letting the spiral arms deepen as they sweep outward. Plan to light it from the side rather than inside so every groove throws its own shadow.

Written by PumpkinCarvingIdeas.com, inspired by the image above. These are our suggestions, not instructions from the uploader. This approach to the AI concept has not been tested on a real pumpkin.

From pumpkin to porch

  1. Prep and transfer the spiral

    Pick a large, round, blemish-free pumpkin and wipe the surface clean and dry. Because this is an etch-only design there is no lid or gutting needed, though you can hollow the back later if you want an interior LED. Print or draw a spiral galaxy with scattered planets, then tape the stencil on and poke the main lines with a transfer tool. Sketch over the dots with a washable marker so you have a clear road map before any tool touches the skin.

  2. Skin the whole galaxy field first

    Using a wide loop or peeler tool, remove just the outer orange skin across the entire spiral area to reveal the pale flesh underneath. This creates your dim base glow and gives the Dremel something to bite into cleanly. Leave the surrounding pumpkin skin intact so the galaxy sits inside a dark border. Keep this pass shallow and even, you are only taking off the top layer.

  3. Carve the bright core shallowest

    Switch to a rotary tool with a ball-tip bit and start at the very center of the spiral. Work in small circles and keep this core pass shallow so it reads as the brightest, palest area. Let the tool do the work rather than pressing hard, and keep your free hand clear of the bit. An adult should always handle the rotary tool, and eye protection plus a dust mask are smart here.

  4. Deepen the spiral arms outward

    Follow your marked arms from the center out, going gradually deeper as you move away from the core. The deeper flesh turns a richer amber, which gives the arms their tonal falloff. Vary your pressure to create a dotted, starry texture along the edges of each arm. Step back often and check the gradient under a side light so you can adjust before you go too far.

  5. Add planets, stars, and dot texture

    Etch the scattered planets as smooth shallow domes so they stay lighter than the arms around them. Use a small V-tool or fine bit to flick in the little star shapes and speckle dots between the arms. Keep these accents shallow, since deep cuts here would compete with the core. Blow or brush away pulp as you go so you can read the true tone.

  6. Light it from the side and photograph

    Set a battery LED or small spotlight off to one side rather than inside the pumpkin, since there are no cutouts to glow through. Raking light across the surface makes each groove cast a shadow and shows off the depth gradient. Try a few angles until the spiral pops. Mist the carved flesh with water and shoot in a dim room for the strongest contrast.

Gather your supplies

Check things off as you get ready.

Work on a stable surface, keep your free hand out of the cutting path, and have an adult handle sharp tools.

Three levels of light

  • Leave intact

    The untouched skin ringing the galaxy and the unetched gaps between arms stay dark for contrast.

  • Peel & shade

    The skinned galaxy field and the domed planets glow a dim, even cream.

  • Cut through

    There are no full cutouts here; the shallow bright core reads as the lightest area instead.

Learn the carving basics

Before you start cutting

Do I need to hollow this pumpkin if there are no cutouts?

Not for the effect itself, since the whole design is surface etching lit from the side. If you still want an inside glow, hollow the back and set an LED there, but the front reads best under a raking side light. Leaving it solid also keeps the thin etched flesh from drying and sagging as fast.

How do I keep the tonal gradient smooth from cream to amber?

Work by depth, not by color guessing. The core stays shallow for pale cream, and each pass gets slightly deeper as you move out along the arms to reach richer amber. Check your progress under a side light often, because shaded depth reads very differently than a bright work lamp.

This is shown as an AI concept, so can a real pumpkin actually look like this?

Yes, a design like this is achievable because it relies on depth shading rather than fragile cutouts, so nothing is structurally risky. The main challenge is patience and steady rotary control across a large area. Expect your real version to have a bit more surface variation, which actually adds to the galaxy texture.

Your take belongs here, too.

Changed a detail? Made it simpler? Share a photo of your version and tell the community what worked.

Share your pumpkin

More pumpkins like this

You've reached the end · 8 pumpkins
The Patch Report

Fresh pumpkins, in your inbox.

The best new carvings, ideas worth stealing, and how-tos for carving season. Short, seasonal, and gone by November.

A short email during carving season. Unsubscribe anytime. See our privacy policy.