Halloween Pumpkin Carving Contest · Starts October 1st · $500 in prizes
← Back to ideas
@ai_concepts
Jul 14, 2026
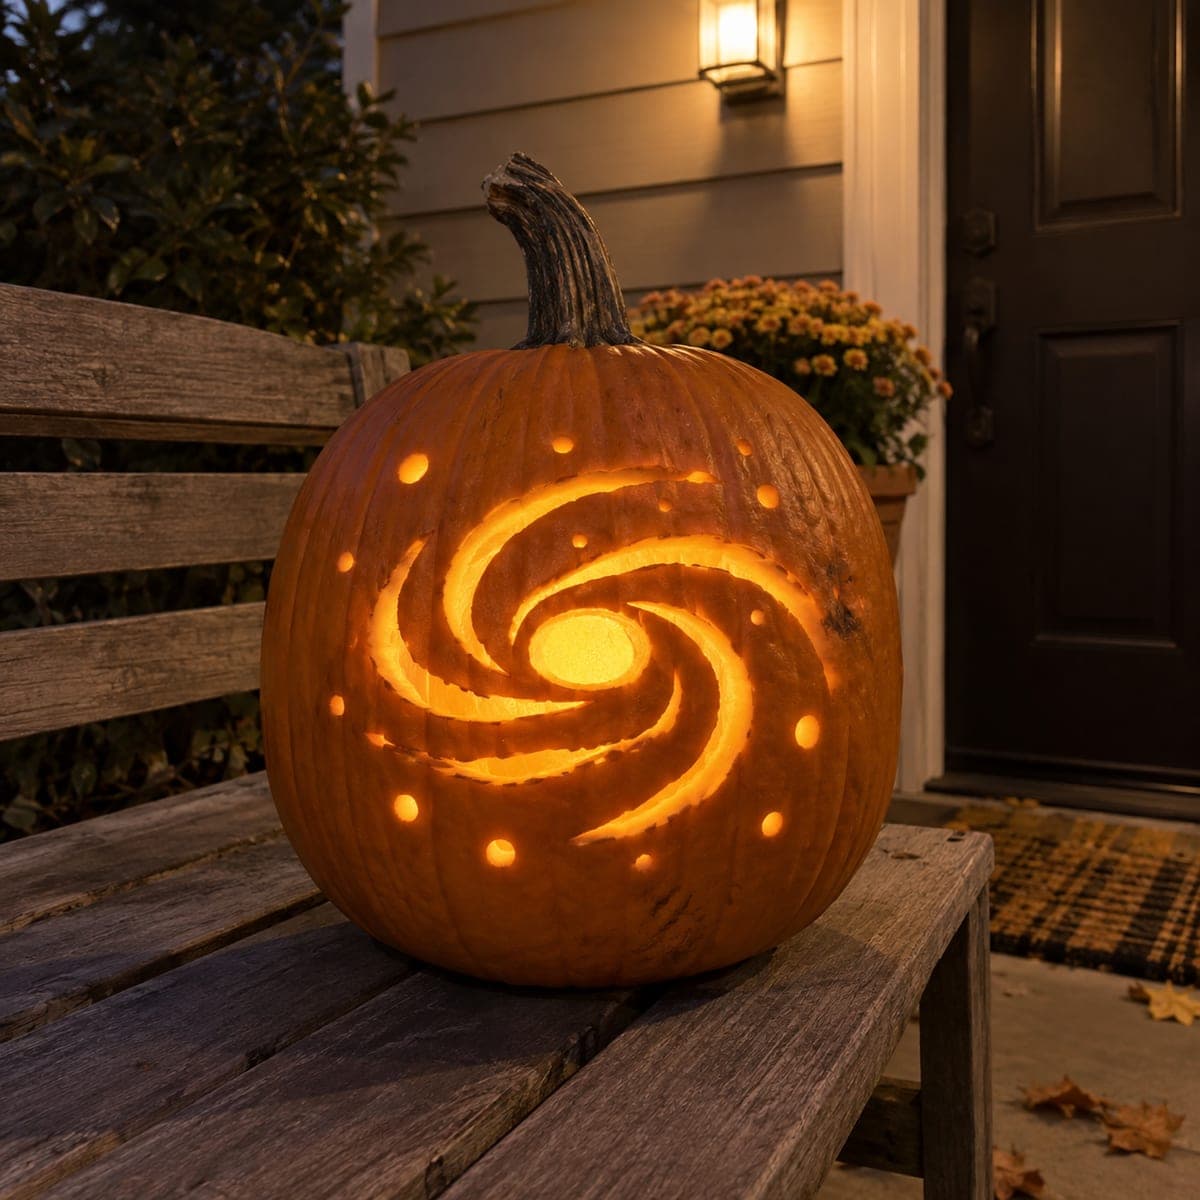
Spiral Galaxy with Stars Shaded Pumpkin CarvingAI
0

Spiral Galaxy with Stars Shaded Pumpkin Carving

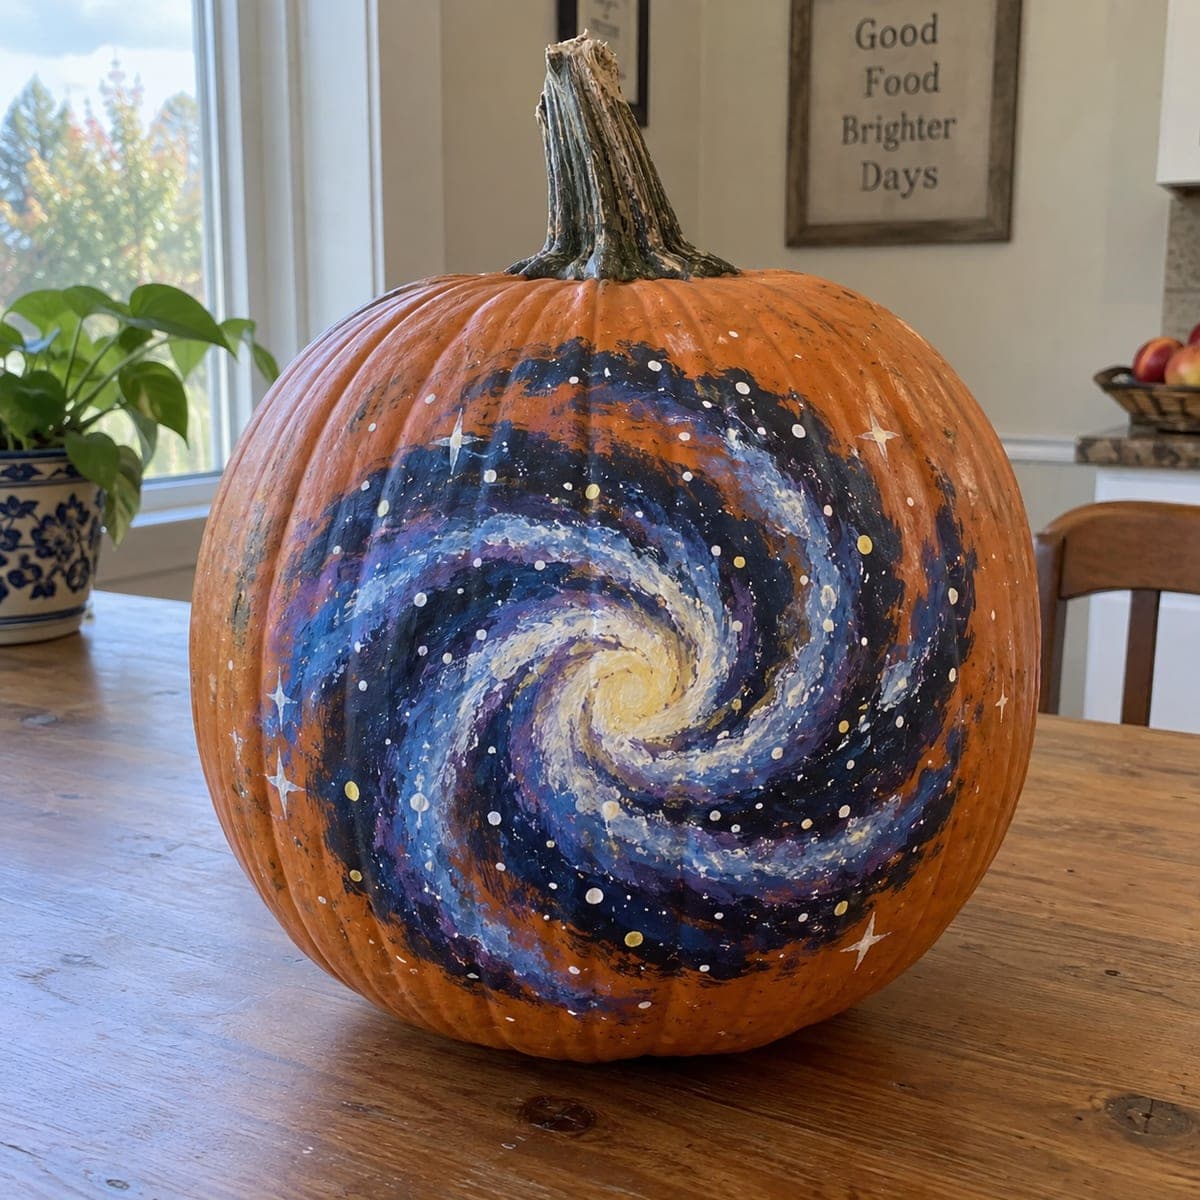
A swirling galaxy spiral radiates outward from the center of a pumpkin, surrounded by four-pointed stars and scattered dot clusters carved in shallow relief shading across the entire surface. The design avoids any cutouts, so the carved skin glows softly at dusk with just the ambient light catching the relief. Start at the center spiral core and work outward in a single continuous arc motion with a half-round gouge, adding the star and dot accents last with a small v-tool. Indoors near a lamp or outdoors at dusk, this cosmic pumpkin carving idea has an understated elegance that works well into November.

This is an AI-generated concept image: a realistic, carvable design idea rather than a photo of a finished carve. AI concepts are always labeled and sit out the leaderboard and the contest.
No ratings yet · Sign in to rate

Comments (0)

  • No comments yet — be the first.

Save without an account. Sign in to like or comment.

Our tips for carving a similar design

The whole trick here is shading, not cutting. You skin away the outer peel to reveal the pale flesh underneath, so the galaxy arms glow a soft dim orange while the untouched skin stays dark around them. Since this is an AI concept, no real pumpkin exists, but you can recreate the look by carving a continuous spiral of peeled arms and scattering shallow star and dot accents across the surface.

Written by PumpkinCarvingIdeas.com, inspired by the image above. These are our suggestions, not instructions from the uploader. This approach to the AI concept has not been tested on a real pumpkin.

From pumpkin to porch

  1. Prep and plan the spiral

    Pick a large pumpkin with a smooth, flat-ish front face and cut a lid or a base opening so you can reach in and add an LED later. Scrape the inside wall behind your design down to about one inch thick so light passes through the peeled areas more easily. Lightly sketch the center of the spiral first, then draw two or three curving arms sweeping outward. Keep your lines loose since a galaxy is meant to look organic.

  2. Peel the galaxy core

    Start at the center swirl and use a half-round gouge to remove only the outer skin, leaving the pale flesh exposed. Work in one continuous arc motion, following your sketched arms outward from the core. Keep the depth shallow and even, roughly an eighth of an inch, so you get a consistent dim glow. Do not cut all the way through, the whole design stays as relief shading.

  3. Widen and taper the arms

    Follow each spiral arm outward, letting it grow slightly wider near the core and thinning to a wispy tail at the edges. Vary the pressure so some spots are peeled a little deeper and glow brighter than others. This uneven texture is what sells the cloudy, dusty look of a real galaxy. Step back often to check the swirl reads clearly from a few feet away.

  4. Add the four-pointed stars

    Switch to a small v-tool for the scattered stars around the swirl. Carve four short strokes meeting at a center point to form each cross-shaped star, keeping them shallow like the arms. Place a few larger stars out at the corners and smaller ones tucked near the spiral. Space them unevenly so the field feels natural rather than tidy.

  5. Scatter the dot clusters

    Use the tip of the v-tool or a small round gouge to dab in clusters of tiny dots between the arms and stars. These read as distant star clusters and fill the empty skin. Group some tightly and let others trail off alone. Keep them shallow so they glow faintly without becoming holes.

  6. Light it and photograph

    Drop a warm LED puck or a string of battery lights inside, never a candle, since the thin peeled areas can scorch. Set the pumpkin near a lamp indoors or out on the porch at dusk when ambient light catches the relief. Rub a little petroleum jelly on the peeled areas to slow drying and keep the glow fresh for days. Snap your photo in low light to capture the soft cosmic effect.

Gather your supplies

Check things off as you get ready.

Work on a stable surface, keep your free hand out of the cutting path, and have an adult handle sharp tools.

Three levels of light

  • Leave intact

    The dark orange skin between the spiral arms, forming the empty space of the galaxy.

  • Peel & shade

    The swirling spiral arms, stars, and dot clusters, all skinned to the pale flesh for a soft dim glow.

  • Cut through

    Nothing is cut all the way through on this design, which keeps the light gentle and even. If you want a few brighter pinpoints, you could pierce a handful of the smallest dots through the wall.

Learn the carving basics

Before you start cutting

How do I keep the spiral from looking messy?

Sketch the whole swirl before you touch a tool, and carve each arm in one smooth continuous motion instead of short choppy strokes. Work from the center outward so the arms all flow from the same core. Stepping back every minute or two helps you catch arms that drift too close together.

How deep should I peel for the glow to show?

Aim for a shallow, even peel of about an eighth of an inch, just past the outer skin into the pale flesh. Thinning the inside wall to about an inch behind the design lets the LED light push through. Test with the light on partway so you can peel a little deeper anywhere that stays too dark.

Will a shaded pumpkin like this last long enough to display?

Peeled surfaces dry out faster than an uncarved pumpkin, so expect a few days at peak. Coat the carved areas with petroleum jelly and keep the pumpkin cool and out of direct sun to slow it down. A quick soak in cold water overnight can revive a slightly wilted surface.

Your take belongs here, too.

Changed a detail? Made it simpler? Share a photo of your version and tell the community what worked.

Share your pumpkin

More pumpkins like this

You've reached the end · 8 pumpkins
The Patch Report

Fresh pumpkins, in your inbox.

The best new carvings, ideas worth stealing, and how-tos for carving season. Short, seasonal, and gone by November.

A short email during carving season. Unsubscribe anytime. See our privacy policy.