Halloween Pumpkin Carving Contest · Starts October 1st · $500 in prizes
← Back to ideas
@ai_concepts
Sep 25, 2026
Spread-Wing Owl Pumpkin with Separated Feather AperturesAI
0

Report this carving

Tell us what is wrong. Reports are private.

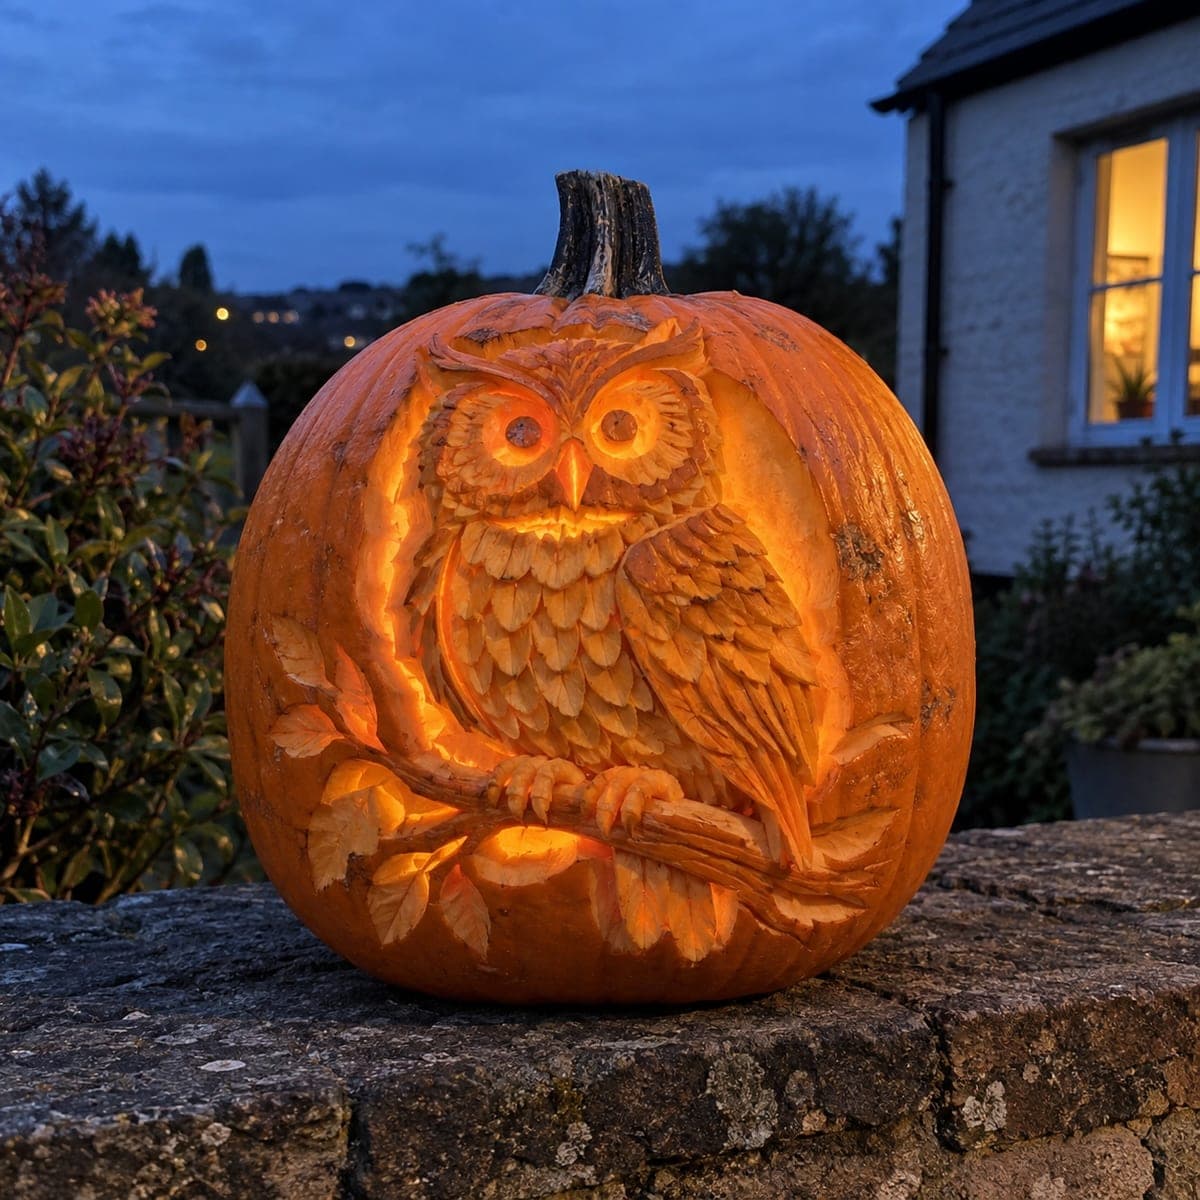
Spread-Wing Owl Pumpkin with Separated Feather Apertures

This expert owl jack-o-lantern captures a spread-wing owl with dozens of separated open feather apertures divided by thick rooted feather bands, plus narrow vertical slit eyes within back-carved eye disks. Small chest, beak, and branch marks use shallow relief carving throughout. Transfer the stencil carefully with a pin tool, then cut the thickest feather bands first so every aperture has support. The layered feather glow is best appreciated in full dark with a bright LED placed near the back wall of the pumpkin.

No ratings yet · Sign in to rate
Comments (0)

  • No comments yet — be the first.

Save without an account. Sign in to like or comment.

Our tips for carving a similar design

The spread-wing design achieves its dramatic effect through dozens of individual feather apertures separated by thick rooted feather bands, which are the design's structural skeleton. Narrow vertical slit pupils within backed eye disks add realistic owl eyes without floating pieces. Every feather band must be preserved until its adjacent apertures are fully cut, which makes planning sequence critical.

From pumpkin to porch

  1. Choose the largest and freshest pumpkin available

    This design has more individual apertures than any other in the series and demands a large, very fresh pumpkin. Hollow to three-eighths of an inch in the feather zones and half an inch across the structural feather bands. Mark all band boundaries clearly in marker before transferring the stencil.

  2. Transfer and plan the cutting sequence

    Pin-transfer all feather apertures and bands. Use three marker colors: one for feather apertures (through-cut), one for feather bands (never cut), and one for backed marks on chest, beak, and branch. Planning the cutting sequence on paper before starting, working from the widest bands inward, reduces mid-project confusion.

  3. Cut the thickest feather bands as boundaries first

    Paradoxically, the first cuts are alongside the thickest bands rather than within the apertures. Cutting the aperture immediately adjacent to each thick band defines its boundary and confirms its width. Work methodically from the wing edges inward, cutting each outer row of feather apertures before the inner rows.

  4. Open feather apertures row by row

    Progress from the outermost wing feather row toward the body, completing each row fully before moving inward. This systematic approach ensures no band is isolated (surrounded by apertures on all sides) until you intentionally reach it. Keep the saw blade perpendicular to the surface throughout.

  5. Cut the eye apertures and add backed elements

    Once all feather apertures are complete, address the eye disks by backing them to half wall depth and then cutting narrow vertical slit pupils through them. Add the small chest, beak, and branch backed marks at roughly a third wall depth. Finish with a careful edge-cleaning pass on all apertures.

  6. Light with a bright LED near the back wall

    Place a bright LED candle at the very back of the pumpkin interior. Light bouncing off the back wall before reaching the apertures creates a softer, more even glow across the dense feather array. View in complete darkness to appreciate the full layered feather effect.

Written with AI to match this design

Gather your supplies

Check things off as you get ready.

Work on a stable surface, keep your free hand out of the cutting path, and have an adult handle sharp tools.

Three levels of light

  • Leave intact

    Thick rooted feather bands forming the structural skeleton across both wings

  • Peel & shade

    Eye disks backed to half wall depth, with narrow slit pupils cut through; chest, beak, and branch marks at one-third depth

  • Cut through

    All individual feather apertures across the spread wings glowing fully

Learn the carving basics

Before you start cutting

How do I prevent the feather bands from narrowing to nothing as I cut surrounding apertures?

Measure each band's width after cutting the aperture on each side of it. Stop cutting the adjacent aperture early if the band is approaching three-quarters of an inch or less for a medium-large pumpkin. Widen the adjacent aperture away from the band rather than toward it if you need more feather area.

Some feather apertures are very small and tight. Should I use a drill instead of a saw?

Yes. A small paddle drill bit is ideal for very small feather apertures that a saw blade cannot enter cleanly. Drill the outline holes around the aperture perimeter, then connect them with a detail knife. This method gives much cleaner results on small shapes than trying to saw directly.

How many hours should I plan for this design?

Allow three to five hours depending on the number of feather apertures in your specific stencil. Much of that time is careful measuring and checking rather than active cutting. Work in sessions of about 45 minutes with breaks to rest your hands and re-evaluate the design with fresh eyes.

Your take belongs here, too.

Changed a detail? Made it simpler? Share a photo of your version and tell the community what worked.

Share your pumpkin

More pumpkins like this

You've reached the end · 8 pumpkins
The Patch Report

Fresh pumpkins, in your inbox.

The best new carvings, ideas worth stealing, and how-tos for carving season. Short, seasonal, and gone by November.

A short email during carving season. Unsubscribe anytime. See our privacy policy.