Halloween Pumpkin Carving Contest · Starts October 1st · $500 in prizes
← Back to ideas
@ai_concepts
Sep 25, 2026
Star and Bar Military Pumpkin CutoutAI
0

Report this carving

Tell us what is wrong. Reports are private.

Star and Bar Military Pumpkin Cutout

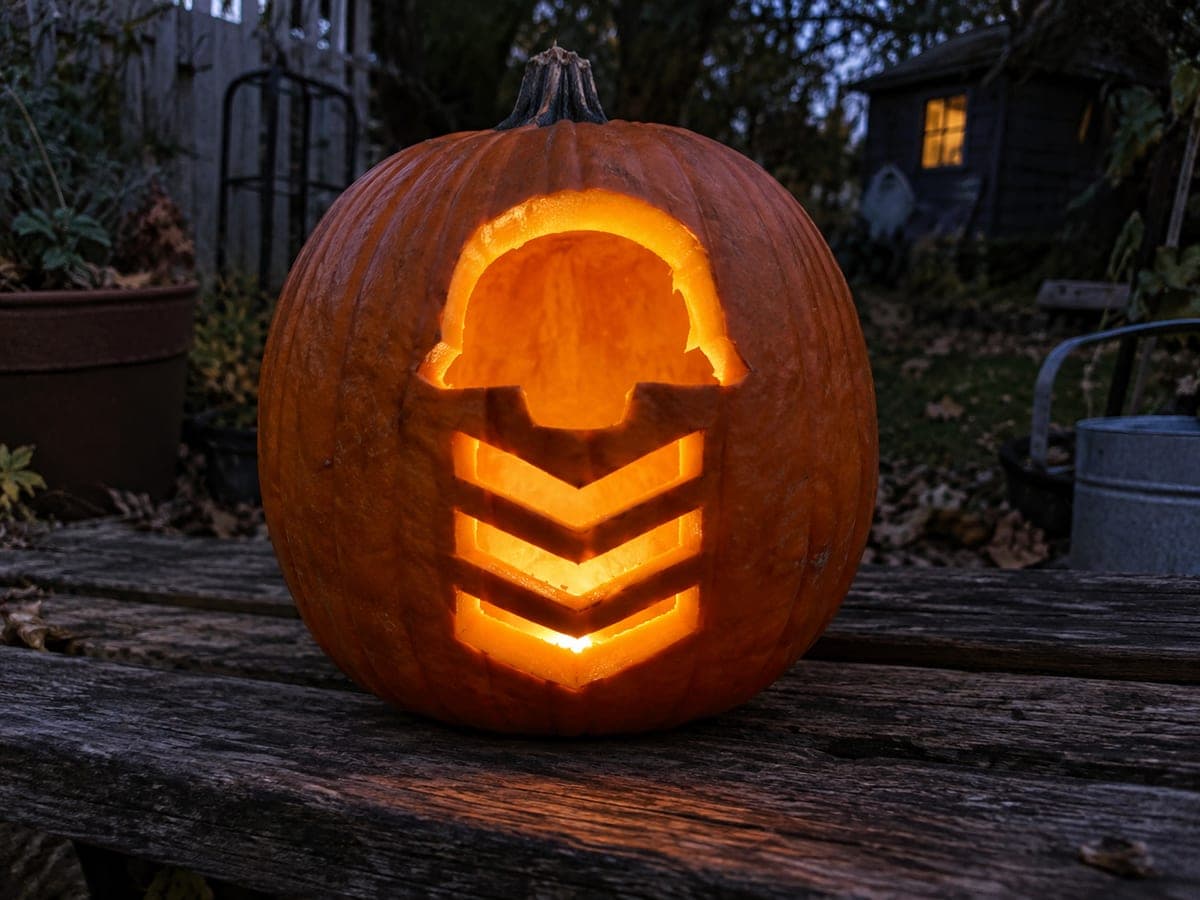
Three bold openings, a star and two rectangular bars, glow through this easy military pumpkin carving idea. Print a simple stencil, tape it to the pumpkin, and use a poker or awl to transfer the outline before cutting. Keeping broad rind between each shape is the key to structural strength. A warm LED tea light inside makes the star pop sharply.

No ratings yet · Sign in to rate

Save this design for carving night, then share a photo of your own jack-o'-lantern once it's glowing.

Comments (0)

  • No comments yet — be the first.

Save without an account. Sign in to like or comment.

Our tips for carving a similar design

A five-point star and two rectangular bar cutouts glow together as a clean graphic trio. The design succeeds because broad rind surrounds every opening, making it structurally forgiving while still reading as a crisp military symbol. A simple printed stencil keeps proportions right on the curved pumpkin face.

From pumpkin to porch

  1. Hollow and prep

    Cut a lid from the back or base of the pumpkin and scrape the carving wall to about an inch thick. Dry the exterior surface. The design is compact enough to work on most medium-sized pumpkins without requiring a broad flat face.

  2. Transfer the stencil

    Print the star and bar arrangement, tape it to the pumpkin, and transfer the outline with a pin tool or awl. Remove the paper and connect the dotted lines in pencil. Confirm that the gap between the star and each bar is at least half an inch before proceeding.

  3. Cut the star

    Pierce inside the star outline and saw around the perimeter, approaching each inside corner from two directions so the points stay crisp. Remove the plug and check that the surrounding rind is undamaged.

  4. Cut the rectangular bars

    Saw each bar as a clean rectangle, cutting the short ends first then the long sides. Remove each plug in one piece if possible. The straight-sided cuts are straightforward once the trickier star is already done.

  5. Smooth and clean up

    Run a detail knife along the inside walls of all three openings to remove any fibrous edges. Wipe the outer face clean with a damp cloth to remove pencil marks.

  6. Light and display

    Insert a warm LED tea light and position the pumpkin slightly forward on a step or shelf so all three openings are visible from a normal viewing angle. Coat cut edges with petroleum jelly to extend the display life.

Written with AI to match this design

Gather your supplies

Check things off as you get ready.

Work on a stable surface, keep your free hand out of the cutting path, and have an adult handle sharp tools.

Three levels of light

  • Leave intact

    All rind surrounding the three openings remains solid, providing structural support and dark contrast.

  • Peel & shade

    None; every element is a full through-cut.

  • Cut through

    The star aperture and both rectangular bar openings are cut completely through for bright, even light.

Learn the carving basics

Before you start cutting

How do I make the rectangular bars look straight on a curved pumpkin?

Transfer the bar outlines with a pin tool while the flat template paper is taped firmly to the pumpkin, and the curvature adapts the lines naturally. If bars still look bowed, hold a straight edge against the pumpkin surface when drawing the final pencil lines to correct any arc before sawing.

Can I orient the bars horizontally instead of vertically?

Either orientation works. Horizontal bars below the star give a flag-like arrangement; vertical bars flanking the star create a more heraldic look. Lay both options out in chalk before committing to a direction.

Is this appropriate for a school Veterans Day display?

Yes, a simple star and bar motif is widely recognized as a military symbol and is appropriately respectful for school or community displays. Using a cool white LED inside gives it a clean, formal appearance rather than a Halloween aesthetic.

Your take belongs here, too.

Changed a detail? Made it simpler? Share a photo of your version and tell the community what worked.

Share your pumpkin

More pumpkins like this

You've reached the end · 8 pumpkins
The Patch Report

Fresh pumpkins, in your inbox.

The best new carvings, ideas worth stealing, and how-tos for carving season. Short, seasonal, and gone by November.

A short email during carving season. Unsubscribe anytime. See our privacy policy.