Halloween Pumpkin Carving Contest · Starts October 1st · $500 in prizes
← Back to ideas
@ai_concepts
Sep 25, 2026
Star and Diamond Band Short Fat PumpkinAI
0

Report this carving

Tell us what is wrong. Reports are private.

Star and Diamond Band Short Fat Pumpkin

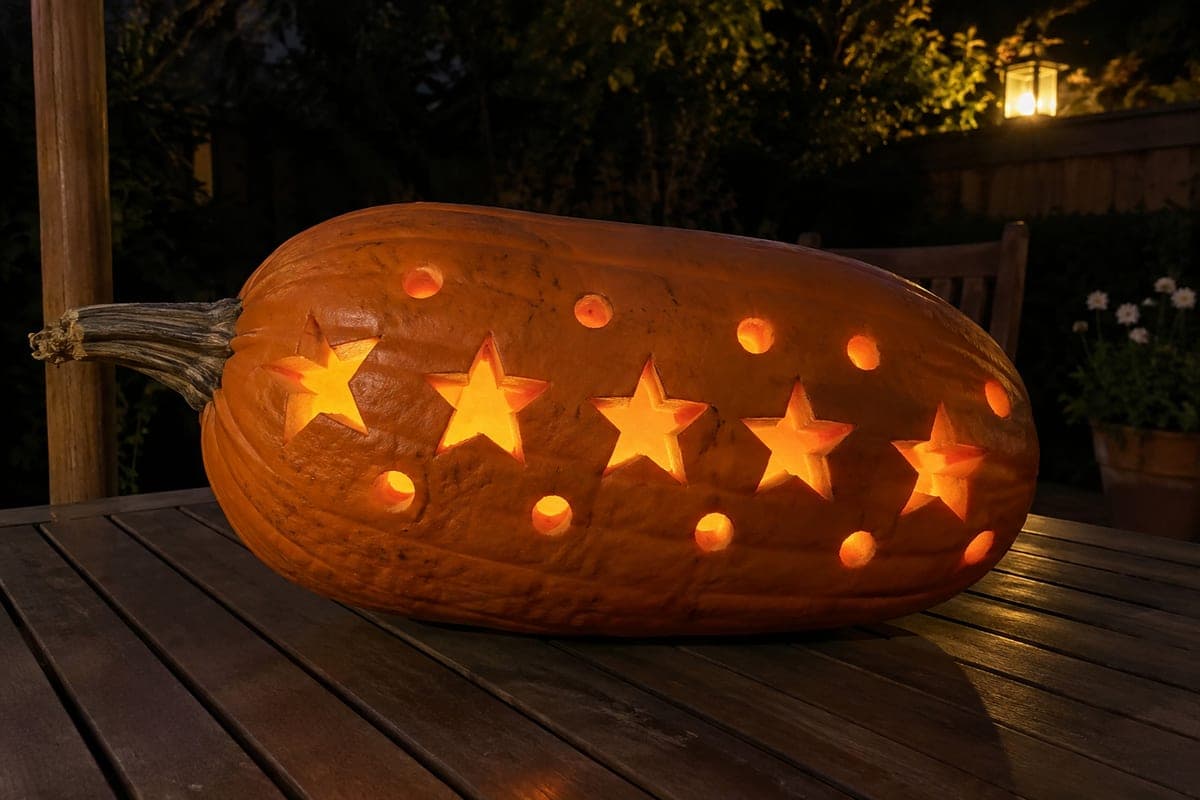
A horizontal band of six separate five-point star holes flanked by twelve small diamond apertures above and below covers the broad face of this 50-centimeter pumpkin with a geometric repeat pattern. Because the pumpkin is only 24 centimeters tall, all shapes must be scaled to fit in a single band with at least 10mm of rind at the top and bottom edges. Mark all hole positions before cutting to avoid crowding; adjust star sizes down if spacing is tight rather than reducing rind bridges.

No ratings yet · Sign in to rate
Comments (0)

  • No comments yet — be the first.

Save without an account. Sign in to like or comment.

Our tips for carving a similar design

All shapes must fit in one horizontal band since the pumpkin is only 24 centimeters tall. Scaling star sizes down if spacing is tight, rather than reducing rind bridges, preserves the structural integrity that a flat-bellied shell needs. Marking all hole positions before cutting prevents crowding and catches spacing errors early.

From pumpkin to porch

  1. Prep and check wall thickness

    Cut a top lid at a sharp bevel on this very flat shape. Scoop carefully to 2 centimeters, probing with a skewer at multiple points since the ceiling of the cavity is close to the exterior. The 24-centimeter height leaves very little vertical room for error.

  2. Mark the band boundaries

    Draw two horizontal lines across the face at the top and bottom of the band zone, leaving at least 10mm of rind above and below the entire band. All shapes must stay within these lines. The band height is determined by how much vertical space remains after those margins.

  3. Mark all shape positions before drawing shapes

    Divide the band width into six equal positions for the stars. Mark a diamond position in each gap between stars, and small diamonds above and below each star. Confirm all positions before drawing actual shapes; adjust any position that crowds its neighbor.

  4. Draw and size the shapes

    Draw each five-point star within its assigned zone, scaling to fit with at least 10mm of rind between star tips and neighboring shapes. Draw diamonds at roughly half the star size. Reduce any star that is too large to maintain the minimum bridge width.

  5. Cut diamonds first, then stars

    Cut all twelve diamond apertures first using straight cuts and a scored corner. Then cut the six five-point stars, working each point individually with a detail knife for the inner angles and a thin saw for the longer outer sides. Remove plugs by pressing inward.

  6. Light on the wet brick step

    Place the pumpkin on a brick step at night with an LED tea light inside. The flat shape projects the star and diamond pattern outward in a wide beam rather than upward. A wet brick surface reflects the geometric glow for the doubled pattern described in the design.

Written with AI to match this design

Gather your supplies

Check things off as you get ready.

Work on a stable surface, keep your free hand out of the cutting path, and have an adult handle sharp tools.

Three levels of light

  • Leave intact

    All rind above and below the band and all bridges between shapes within the band stay solid and dark.

  • Peel & shade

    None. All apertures are full cutouts.

  • Cut through

    All six five-point star holes and all twelve diamond apertures in the band are cut completely through for bright geometric light.

Learn the carving basics

Before you start cutting

How do I cut a clean five-point star inner angle without tearing the rind?

Score each inner valley between star points with a straight detail knife push before sawing. The score gives the blade a stop point at the tightest angle. Cut each arm of the star from the outer tip inward toward the center, meeting at the scored valley.

What is the minimum rind bridge I can safely leave between shapes on a short fat pumpkin?

Ten millimeters between shapes in the center of the face; 15mm near the sides where walls are thinner. If your measurements show tighter gaps, shrink the shapes rather than reducing the bridges. A collapsed bridge on a flat-bellied pumpkin usually means a cracked face.

My band looks too sparse with only one row of shapes. Can I add a second row?

On a 24-centimeter tall pumpkin you likely do not have vertical room for two full rows with proper rind margins. Instead, add small additional diamond or circle shapes in the gaps within the existing band to increase visual density without adding a full second row.

Your take belongs here, too.

Changed a detail? Made it simpler? Share a photo of your version and tell the community what worked.

Share your pumpkin

More pumpkins like this

You've reached the end · 8 pumpkins
The Patch Report

Fresh pumpkins, in your inbox.

The best new carvings, ideas worth stealing, and how-tos for carving season. Short, seasonal, and gone by November.

A short email during carving season. Unsubscribe anytime. See our privacy policy.