Halloween Pumpkin Carving Contest · Starts October 1st · $500 in prizes
← Back to ideas
@ai_concepts
Sep 14, 2026
Tall Haunted House With Side Wings PumpkinAI
0

Tall Haunted House With Side Wings Pumpkin

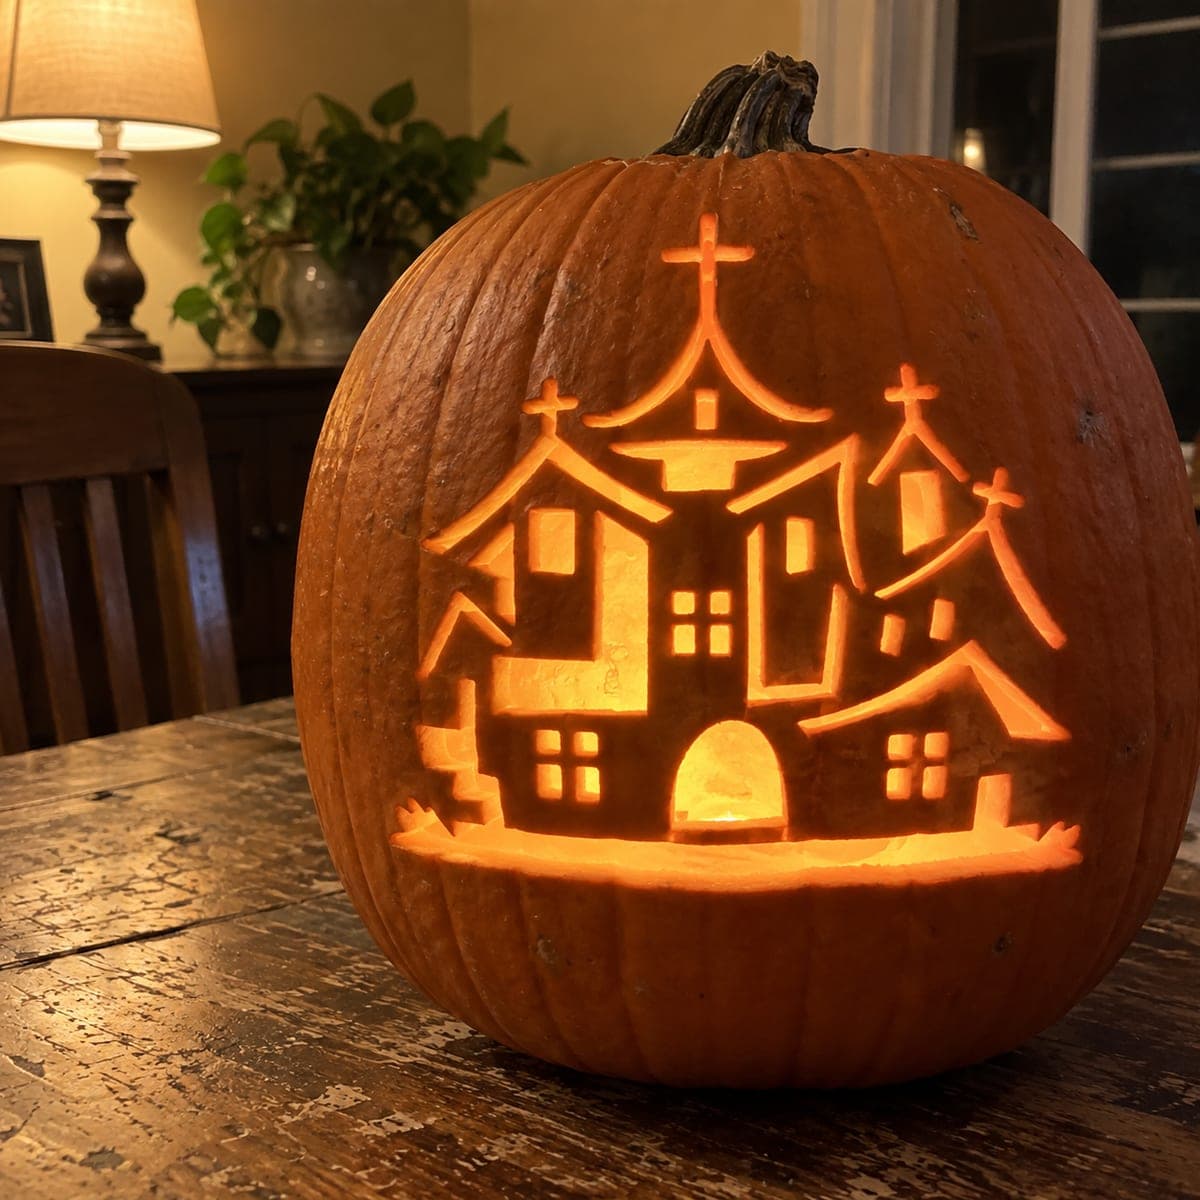
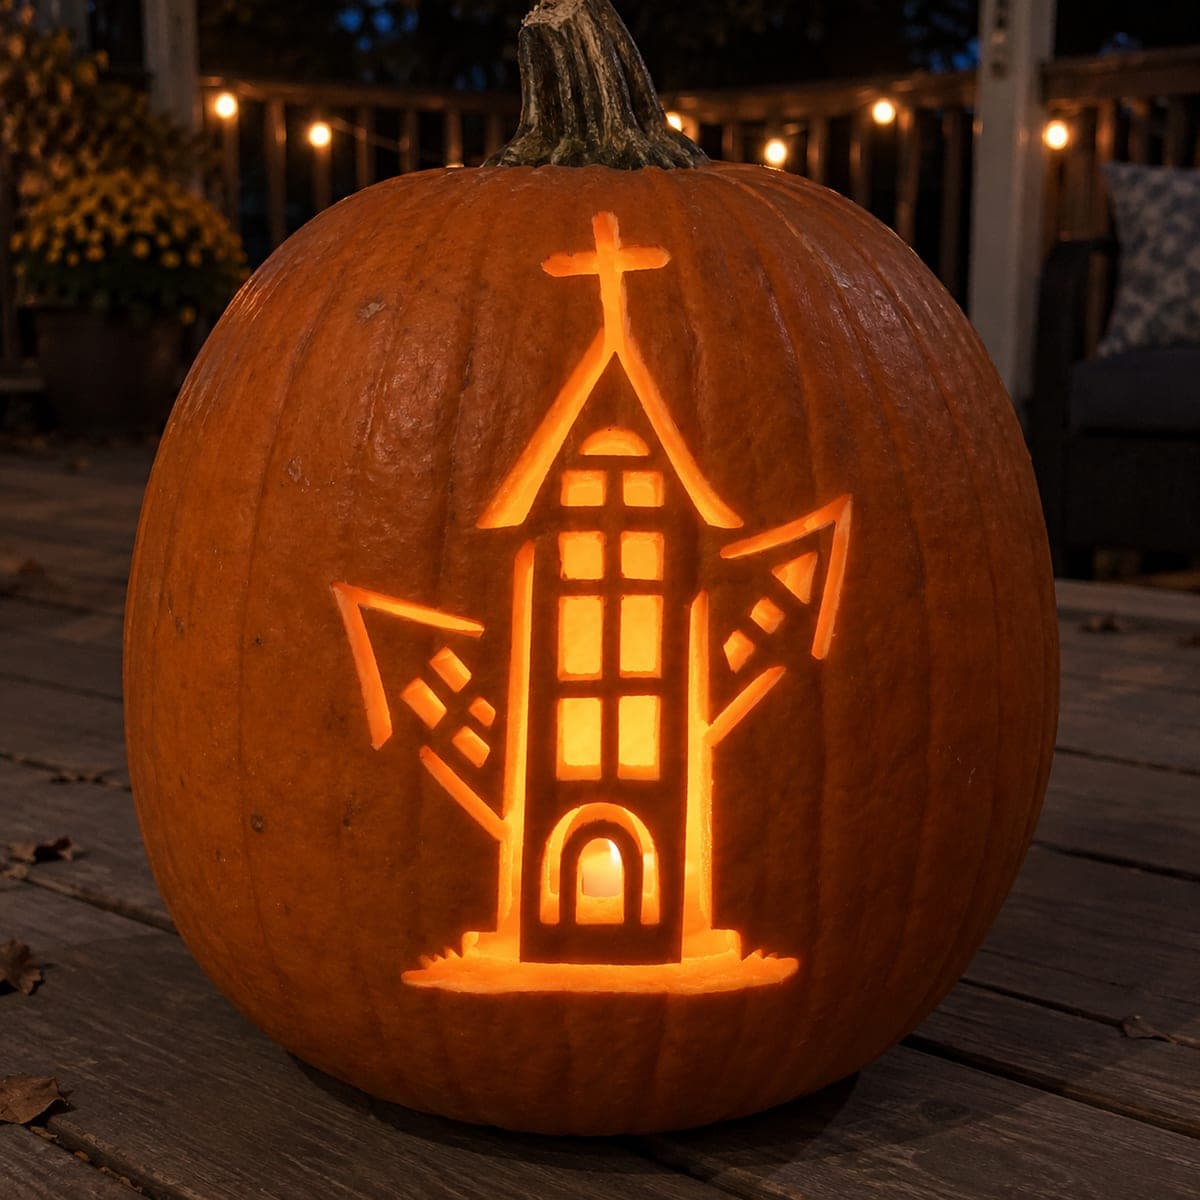
A tall thin haunted tower with a cross-topped steeple, a large gridded front window flanked by angular side wings with crosshatch detail, and an arched doorway at the base glows in this artistic cutout pumpkin carving design. The window grid, door arch, and the open sections within the side wings are all pierced through, with the crosshatch lines and steeple shaft left as dark uncut rind. Carve the crosshatch grid inside the side wings before removing any large open areas, since those thin diagonal strips depend on surrounding rind for support during cutting. A warm LED behind the gridded window makes the mullion lines read as crisp dark bars against a glowing orange rectangle.

This is an AI-generated concept image: a realistic, carvable design idea rather than a photo of a finished carve. AI concepts are always labeled and sit out the leaderboard and the contest.
No ratings yet · Sign in to rate

Comments (0)

  • No comments yet — be the first.

Save without an account. Sign in to like or comment.

Our tips for carving a similar design

The core trick here is contrast between pierced cutouts and dark uncut rind: the gridded window, arched door, and open panels in the side wings are cut clean through for full glow, while the mullion bars, crosshatch strips, and steeple shaft stay as solid skin. Work from the small fragile lines outward, and save the big open rectangles for last so those thin diagonals keep their support. Because this is a concept design, plan your bridges before you cut so every skinny strip stays anchored to surrounding rind.

Written by PumpkinCarvingIdeas.com, inspired by the image above. These are our suggestions, not instructions from the uploader. This approach to the AI concept has not been tested on a real pumpkin.

From pumpkin to porch

  1. Prep the pumpkin and mount the pattern

    Pick a tall, fairly smooth pumpkin so the narrow tower has room to sit upright. Cut a lid from the bottom or the back rather than the top, which keeps the stem intact and makes it easy to seat an LED later. Scrape the inside wall behind the design down to about one inch thick so light passes through evenly. Tape your printed pattern flat over the front and poke the outlines with a transfer tool or pin.

  2. Score the outlines and the dark keep lines

    With a fine gouge or the tip of a poker tool, lightly trace every line so you can read the design once the paper is off. Mark clearly which parts stay dark: the steeple shaft, the mullion bars in the window, and the diagonal crosshatch strips in the side wings. Marking these first stops you from cutting away a line you meant to keep. Go slow and let an adult handle every blade.

  3. Carve the crosshatch inside the side wings first

    Cut the small open diamonds and slivers between the diagonal strips of each wing before you remove any large area. These thin strips rely on the surrounding rind for support, so opening them while everything else is still solid keeps them from flexing or snapping. Use a small detail saw and make short, gentle strokes, clearing one little opening at a time. Leave the diagonal lines themselves as uncut skin.

  4. Pierce the window grid and steeple points

    Cut out each pane of the tall gridded window as a separate opening so the mullion bars remain as dark bridges between them. Keep the bars an even width for that crisp barred look when lit. Trim the open triangles beside the steeple and the roofline peaks, leaving the steeple shaft and cross as solid rind. Take breaks to check that no bridge has gotten too thin.

  5. Open the arched door and base last

    Save the largest opening, the arched doorway, for the end since it removes the most support at the bottom of the tower. Cut the arch cleanly, then nick the small step and ground lines at the base. Cutting big openings last keeps the whole panel rigid while you work the fine detail above. Round the inside edges of the door slightly so the glow spreads softly.

  6. Light it and photograph

    Drop a warm white LED inside, ideally two so both the window and doorway glow, and never use an open flame near thin rind. Set the pumpkin at eye level on a dark porch or deck to mimic the moody backdrop. Shoot at dusk with a little ambient string light behind for depth. A light coat of petroleum jelly on the cut edges slows drying and keeps the lines sharp for a few days.

Gather your supplies

Check things off as you get ready.

Work on a stable surface, keep your free hand out of the cutting path, and have an adult handle sharp tools.

Three levels of light

  • Leave intact

    The steeple shaft, the cross, and the outer walls stay as untouched dark rind.

  • Peel & shade

    The narrow mullion bars and the diagonal crosshatch strips can be skin-peeled if you want them to read as dim glowing lines instead of solid black.

  • Cut through

    The window panes, the open panels in the side wings, and the arched doorway are cut fully through for the brightest glow.

Learn the carving basics

Before you start cutting

How do I keep the thin diagonal wing strips from breaking?

Carve the small openings between them while the rest of the panel is still solid, because the surrounding rind braces the strips as you work. Use short, light saw strokes rather than forcing the blade. If a strip feels loose, stop and leave a little extra skin at each end as an anchor.

Why cut the arched door last?

The doorway is the biggest opening and sits at the base where it removes the most structural support. Cutting it last keeps the tower panel rigid while you handle the delicate window grid and crosshatch above. Once everything else is done, the large opening is safe to remove.

How do I make the window bars look crisp instead of muddy?

Cut each pane as its own clean opening and keep the mullion bars an even width so they read as dark lines against the glow. Place a warm LED directly behind the window so the light fills each pane evenly. Avoid over-thinning the bars, since bars that are too skinny lose their sharp shadow.

Your take belongs here, too.

Changed a detail? Made it simpler? Share a photo of your version and tell the community what worked.

Share your pumpkin

More pumpkins like this

You've reached the end · 8 pumpkins
The Patch Report

Fresh pumpkins, in your inbox.

The best new carvings, ideas worth stealing, and how-tos for carving season. Short, seasonal, and gone by November.

A short email during carving season. Unsubscribe anytime. See our privacy policy.