Halloween Pumpkin Carving Contest · Starts October 1st · $500 in prizes
← Back to ideas
@ai_concepts
Sep 14, 2026
Three-Gabled Haunted Mansion PumpkinAI
0

Three-Gabled Haunted Mansion Pumpkin

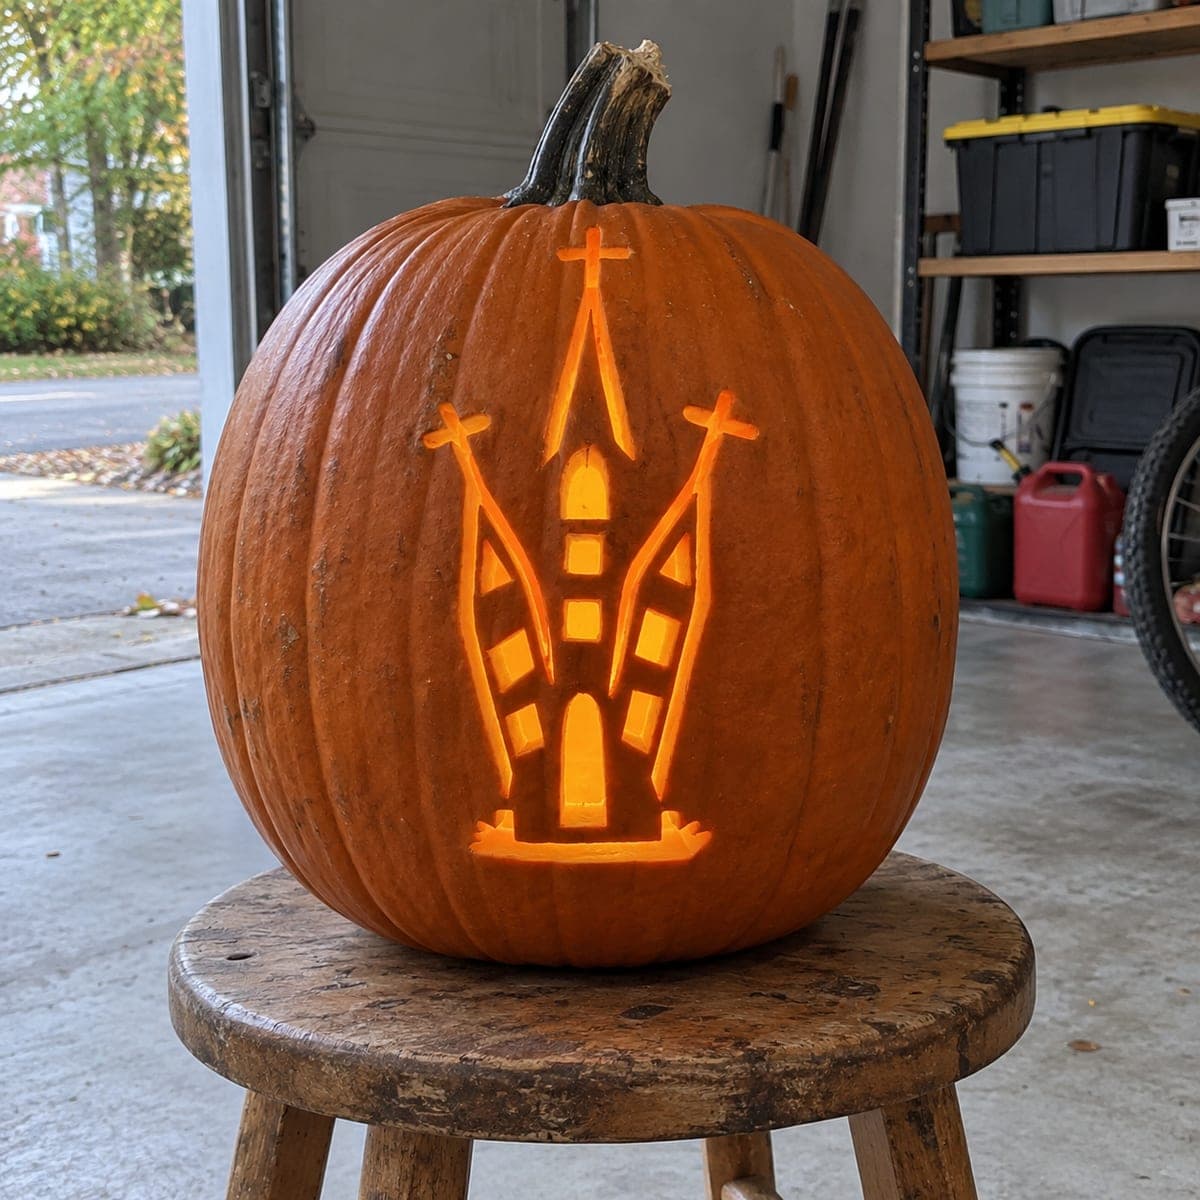
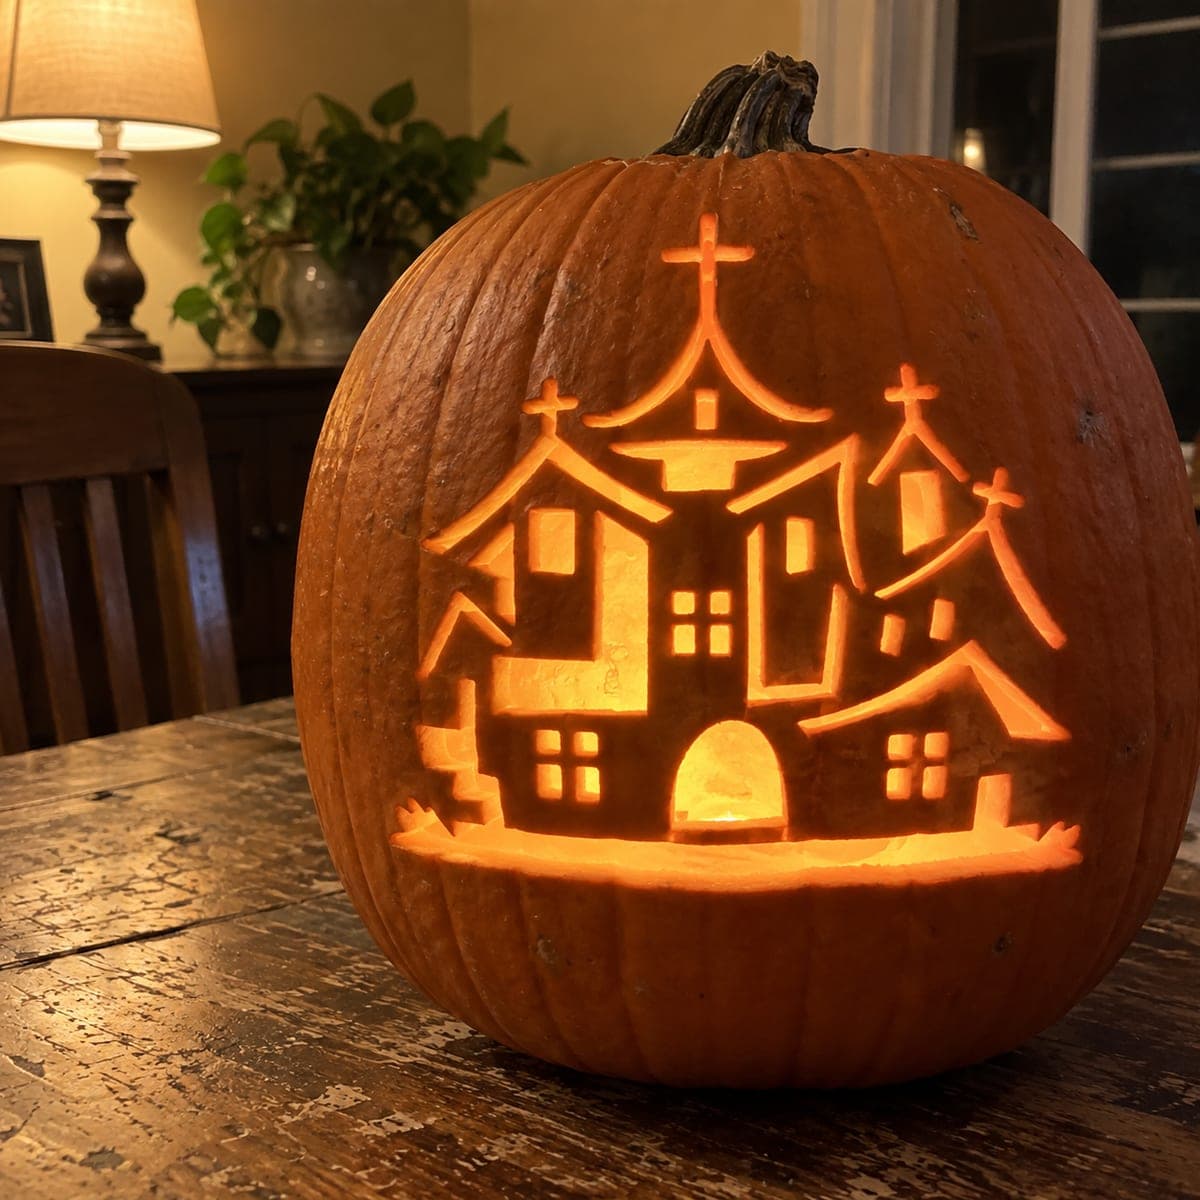
A wide spooky church or haunted mansion with three cross-tipped steeples, arched doorways, and a row of glowing square windows spreads across the pumpkin face in this intricate artistic cutout pumpkin carving idea. The window openings, door arches, and sky sections between the steeples are pierced through, while the rooflines, steeple shafts, and cross finials remain as dark rind. Carve the small window squares first and use a detail knife rather than a pumpkin saw for the cross finials at the top, since those four-armed shapes require short precise strokes. An LED light set toward the front of the pumpkin cavity makes the arched doorway glow the brightest, drawing the eye to the entrance.

This is an AI-generated concept image: a realistic, carvable design idea rather than a photo of a finished carve. AI concepts are always labeled and sit out the leaderboard and the contest.
No ratings yet · Sign in to rate

Comments (0)

  • No comments yet — be the first.

Save without an account. Sign in to like or comment.

Our tips for carving a similar design

The whole trick here is contrast between solid dark rind and pierced openings, so the three steeples, rooflines, and cross finials read as silhouettes against glowing sky. Plan it as a cutout piece where you pierce all the way through the small windows, arched doors, and the sky gaps between the roofs, while leaving the beams and crosses fully intact. Work from the smallest windows outward and save the big sky openings for last so the shell stays firm while you cut the delicate parts.

Written by PumpkinCarvingIdeas.com, inspired by the image above. These are our suggestions, not instructions from the uploader. This approach to the AI concept has not been tested on a real pumpkin.

From pumpkin to porch

  1. Pick a tall pumpkin and open it from the bottom

    Choose a large, wide pumpkin with a smooth flat front for this sprawling scene. Cut a hatch in the bottom rather than the top so the stem stays as a natural finial above the center steeple. Scrape the front interior wall down to about one inch thick with a loop tool so light passes evenly. A thinner wall makes the many small window cuts far easier and cleaner.

  2. Transfer the mansion pattern

    Print or draw the three-gabled scene and tape it flat against the front, clipping darts into the paper so it hugs the curve. Poke the outlines with a pushpin or transfer tool, spacing dots closer together on the crosses and window frames. Peel the paper and connect the dots lightly with a pencil so you can see every shape. Double check that the steeple shafts and rooflines stay connected before you cut anything.

  3. Carve the small square windows first

    Start with the tiny grid windows and single square panes using a fine detail saw or craft knife. Cutting these while the pumpkin is still solid keeps the surrounding walls from flexing. Push straight in and pop each little square out gently so the thin bars between panes survive. Take your time, since a slip here removes a whole window frame.

  4. Detail the cross finials with a knife

    Switch to a sharp detail knife for the four-armed crosses at the tops of the steeples. Use short, precise strokes to pierce the sky around each cross so the arms stay attached to the steeple shaft below. Keep each cross narrow but not paper thin, leaving enough rind width that the arms do not snap. This is slow work, so rest the pumpkin on a towel and cut toward open space, never toward your hand.

  5. Pierce the doorways and sky gaps last

    Now open the arched front door and the larger sky sections between the roofs. Cutting these big openings last keeps the shell rigid while you handle the fine details. Support each roofline with a finger as you free the sky around it so nothing tears loose. Round the top of the arch smoothly for that welcoming glow.

  6. Light it and shoot the photo

    Set a bright LED puck or string toward the front of the cavity so the arched doorway glows the strongest and draws the eye to the entrance. Add a second small LED higher up to backlight the steeples and sky gaps. Photograph in a dim room so the pierced openings pop against the dark rind. Rub a little petroleum jelly on cut edges to slow drying if you want it to last a few extra days.

Gather your supplies

Check things off as you get ready.

Work on a stable surface, keep your free hand out of the cutting path, and have an adult handle sharp tools.

Three levels of light

  • Leave intact

    The steeple shafts, rooflines, gable edges, and the four cross finials stay as untouched dark rind so they read as a black silhouette.

  • Peel & shade

    Optional skin-peeling on wall panels or a foreground ground line gives a soft dim orange that separates the buildings without full cuts.

  • Cut through

    The square windows, the arched front door, and the sky sections between the steeples are pierced all the way through for the brightest glow.

Learn the carving basics

Before you start cutting

How do I keep the thin cross finials from breaking off?

Cut the sky around each cross with a sharp detail knife using short strokes, and leave the arms a little wider than they look on paper. Keep each cross joined to the steeple shaft below it so it has a solid anchor. Work slowly and avoid twisting the blade, which is what usually snaps a thin arm.

What order should I cut so the pumpkin does not collapse?

Carve the small windows first while the shell is solid, then the crosses, and save the large arched door and sky gaps for last. Big openings remove the most support, so doing them last keeps the surrounding detail firm. Support each roofline with a finger as you free the sky around it.

Since this is a concept image, can a real pumpkin hold all this detail?

Yes, if you choose a large pumpkin, thin the front wall to about an inch, and keep the crosses and window bars from getting too skinny. The design is realistic as long as every steeple and roof stays connected to solid rind. Give yourself a couple of hours and it is very doable for an intermediate carver.

Your take belongs here, too.

Changed a detail? Made it simpler? Share a photo of your version and tell the community what worked.

Share your pumpkin

More pumpkins like this

You've reached the end · 8 pumpkins
The Patch Report

Fresh pumpkins, in your inbox.

The best new carvings, ideas worth stealing, and how-tos for carving season. Short, seasonal, and gone by November.

A short email during carving season. Unsubscribe anytime. See our privacy policy.