Halloween Pumpkin Carving Contest Β· Starts October 1st Β· $500 in prizes
← Back to ideas
@ai_concepts
Sep 14, 2026
Thin-Legged Garden Spider PumpkinAI
0

Thin-Legged Garden Spider Pumpkin

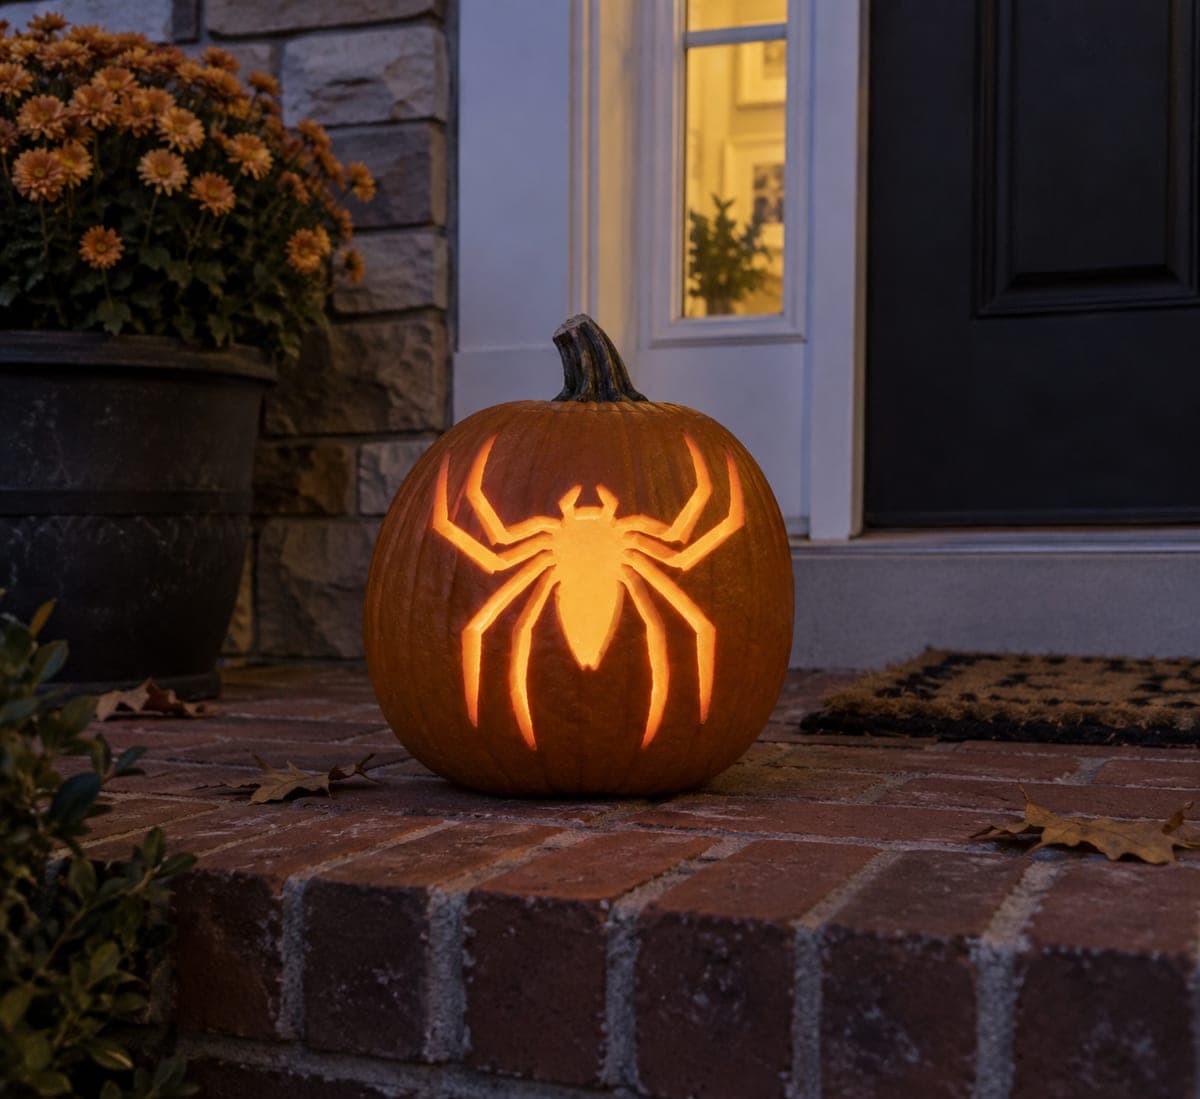
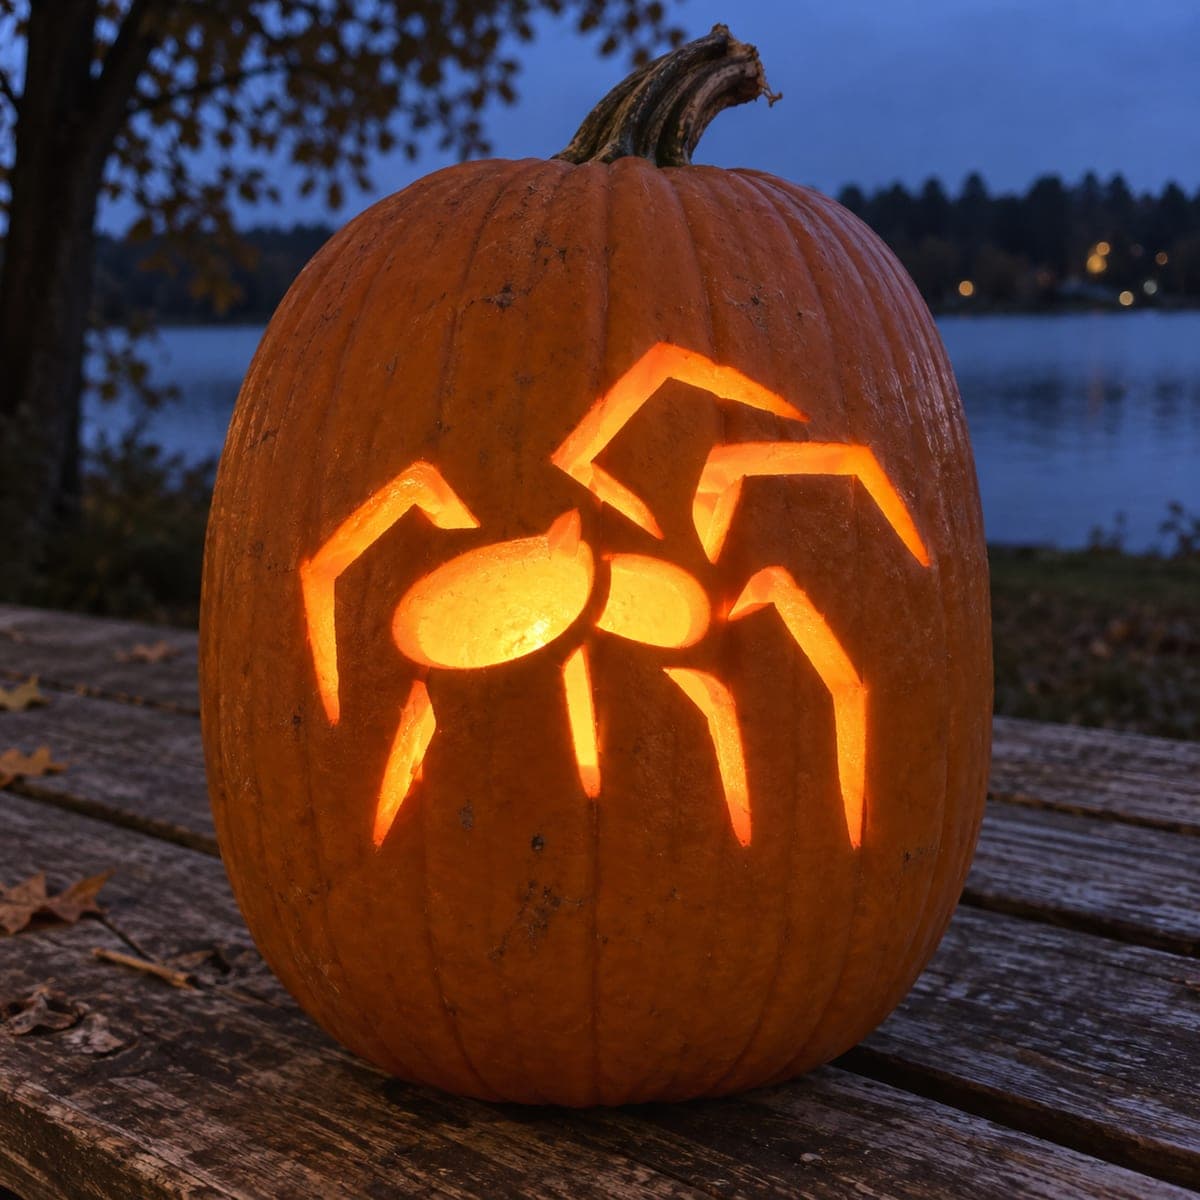
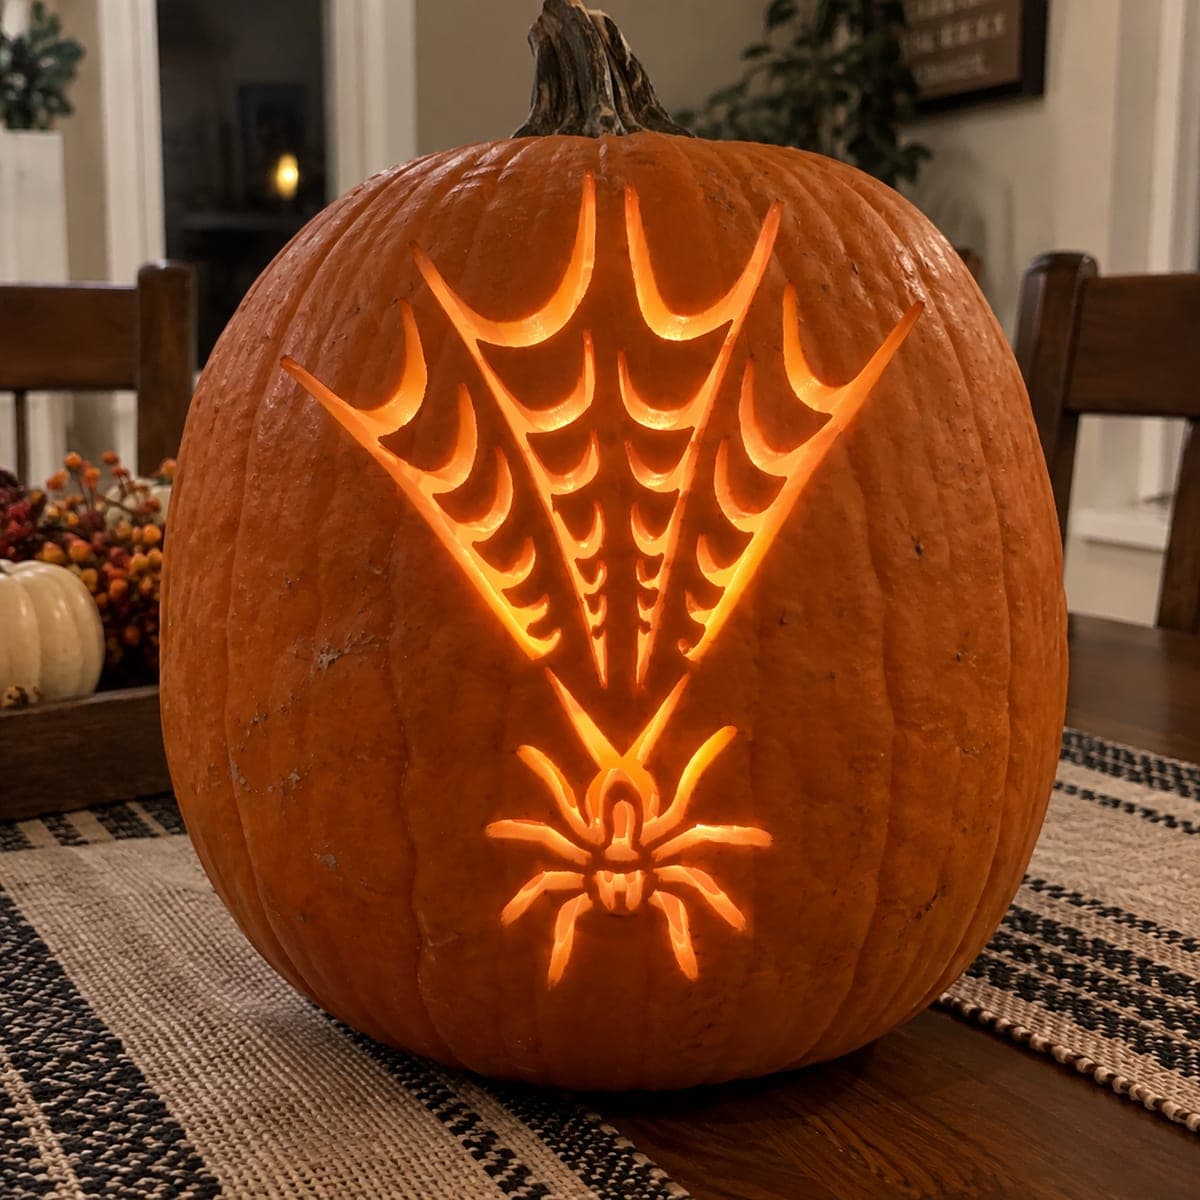
Eight long, angular legs radiate from a small oval body with a skull-like marking at the center, all glowing warmly against the orange pumpkin skin in this spider jack-o-lantern carving idea. Each leg is cut as a clean geometric strip, giving the design a bold graphic look that reads well from across the yard. Start by piercing the body first, then work outward along each leg so the surrounding wall stays supported while you maneuver the saw. Use a bright LED inside rather than a candle to make the thin legs glow evenly without scorching the narrow bridges between them.

This is an AI-generated concept image: a realistic, carvable design idea rather than a photo of a finished carve. AI concepts are always labeled and sit out the leaderboard and the contest.
No ratings yet Β· Sign in to rate

Comments (0)

  • No comments yet β€” be the first.

Save without an account. Sign in to like or comment.

Our tips for carving a similar design

The core trick here is treating each spider leg as a clean, angular strip of full cutout so the whole shape reads as bright light from across the yard. Everything hinges on keeping the narrow bands of skin between the legs intact, so you work from the center outward and save the widest openings for last. The small oval body with its skull-like marking anchors the design and is the first thing to pierce.

Written by PumpkinCarvingIdeas.com, inspired by the image above. These are our suggestions, not instructions from the uploader. This approach to the AI concept has not been tested on a real pumpkin.

From pumpkin to porch

  1. Pick a firm pumpkin and plan the layout

    Choose a tall pumpkin with a smooth, evenly rounded front so the eight legs have room to spread. Wipe the surface dry and hold your stencil flat against the widest part of the face. Since a design like this is very symmetrical, take a moment to center the body and check that the legs curve outward evenly on both sides. A slightly flat front reads better than a sharply ribbed one for crisp geometric lines.

  2. Open the pumpkin and clean it out

    Have an adult cut a lid from the bottom or the back rather than the top, which keeps the front wall unbroken and easier to carve. Scoop out the seeds and pulp, then scrape the inside of the carving wall down to about one inch thick. A thinner wall lets the narrow legs cut cleanly and glow brighter. Save some pulp scraps in case you want to patch a slip later.

  3. Transfer the stencil

    Tape the pattern snugly over the front and poke closely spaced holes along every line with a pin or an awl. Follow the sharp angles of each leg carefully, since the corners are what give this spider its graphic look. Pull the paper off and connect the dots lightly with a washable marker if the pinholes are hard to read. Double check that the thin bands between the legs are marked clearly so you know exactly what to leave standing.

  4. Cut the body and skull marking first

    Start with the small oval body in the center and the little skull-shaped notch inside it. Piercing the body first relieves pressure on the surrounding wall so it stays supported while you work outward. Use a fine carving saw with gentle in-and-out strokes rather than forcing the blade. Cutting the smallest interior shapes early means the wall is at its strongest while your hands are near delicate detail.

  5. Work outward along each leg

    Cut one leg at a time, starting near the body and traveling out to the tip, keeping the saw perpendicular to the surface. Stop at each angle, back the blade out, and restart on the new line so the corners stay sharp instead of rounded. Leave the thin ribs of skin between neighboring legs fully intact, since those bridges hold the whole face together. Save the longest, widest leg openings for last so the pumpkin stays rigid as long as possible.

  6. Light it and photograph it

    Drop a bright battery LED inside and skip the candle, which can scorch the narrow bridges and heat the thin legs unevenly. Set the light low and slightly behind the face so every leg glows from base to tip. Take your photo at dusk on a porch or bench so the warm cutouts pop against the darker background. If any edge looks fuzzy, shave it clean with a paring knife before the final shot.

Gather your supplies

Check things off as you get ready.

Work on a stable surface, keep your free hand out of the cutting path, and have an adult handle sharp tools.

Three levels of light

  • Leave intact

    The main pumpkin skin across the body of the shell stays untouched and dark, framing the spider.

  • Peel & shade

    The thin ribs of skin between the legs can be lightly skinned for a soft glow that keeps the bridges structurally intact.

  • Cut through

    The eight angular legs, the oval body, and the skull-like notch are cut all the way through for the brightest light.

Learn the carving basics

Before you start cutting

How do I keep the thin legs from breaking off?

Keep your carving wall about one inch thick and leave the bands of skin between the legs fully intact rather than cutting them away. Work from the body outward so the wall stays supported as long as possible. Save the longest cuts for last, and handle the finished pumpkin by its base, not the carved face.

This is a concept image, so can a real pumpkin look like this?

Yes, a design like this carves well on a real pumpkin as long as you keep the legs as clean strips and leave solid skin bridges between them. Avoid making the legs any thinner than the stencil shows. A tall pumpkin with a broad, gently ribbed front gives you the flattest canvas for the straight geometric lines.

Why cut the body before the legs?

Piercing the central body first relieves internal pressure and keeps the surrounding wall firm while you carve the fine detail. It also lets you carve the smallest interior shapes, like the skull notch, while the pumpkin is at its strongest. Then you can work outward along each leg without the face flexing under the saw.

Your take belongs here, too.

Changed a detail? Made it simpler? Share a photo of your version and tell the community what worked.

Share your pumpkin

More pumpkins like this

You've reached the end Β· 8 pumpkins
The Patch Report

Fresh pumpkins, in your inbox.

The best new carvings, ideas worth stealing, and how-tos for carving season. Short, seasonal, and gone by November.

A short email during carving season. Unsubscribe anytime. See our privacy policy.