Halloween Pumpkin Carving Contest · Starts October 1st · $500 in prizes
← Back to ideas
@ai_concepts
Aug 16, 2026
Creepy Spider Silhouette Glowing Pumpkin CarvingAI
0

Creepy Spider Silhouette Glowing Pumpkin Carving

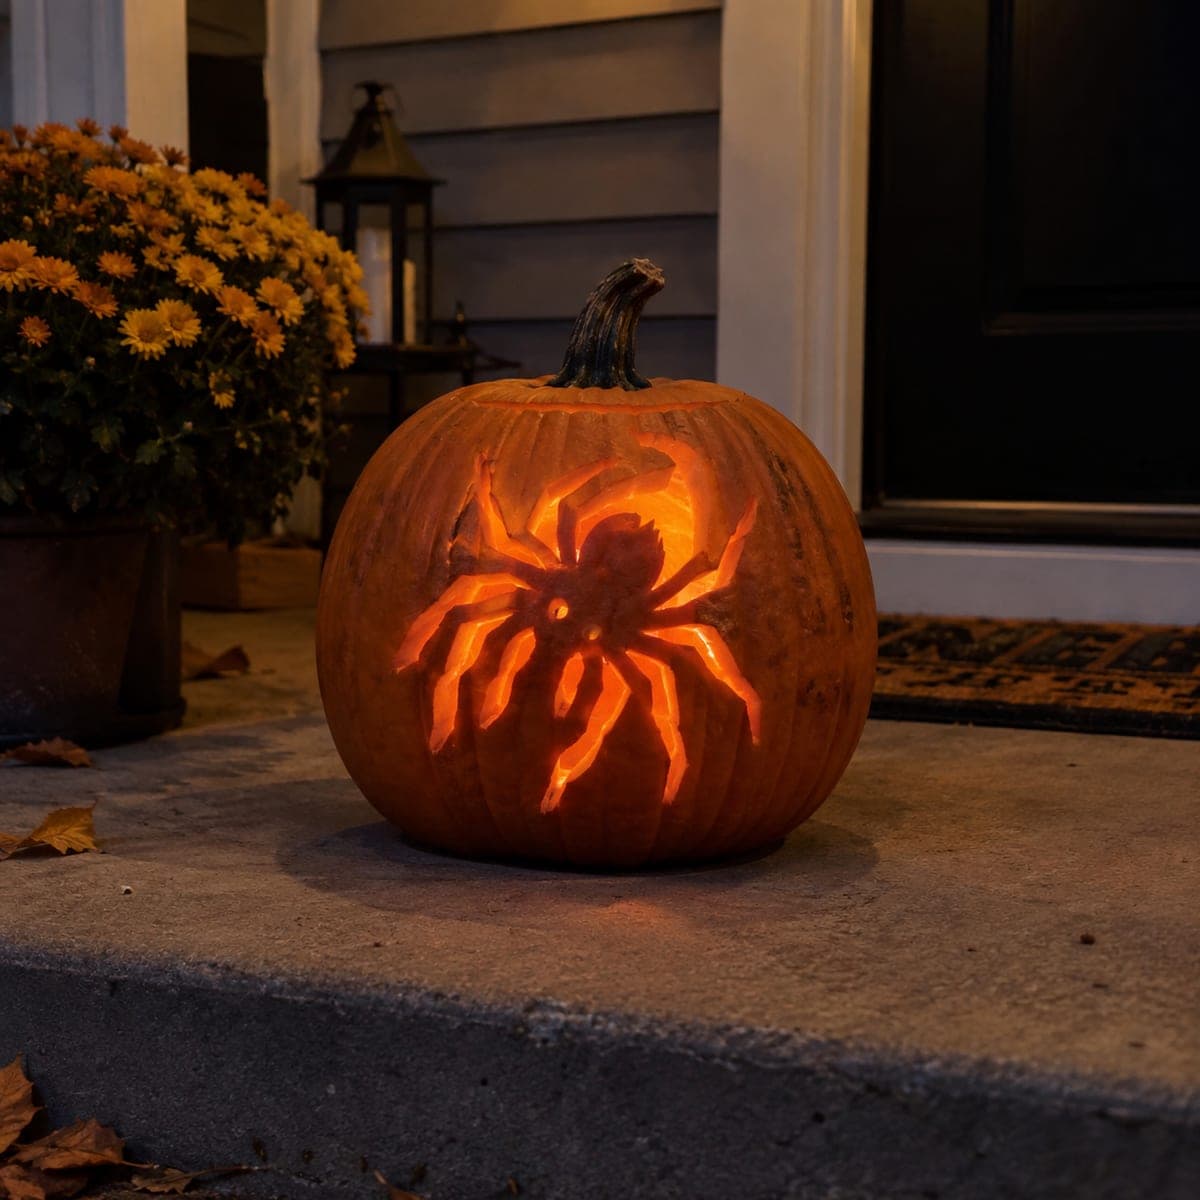
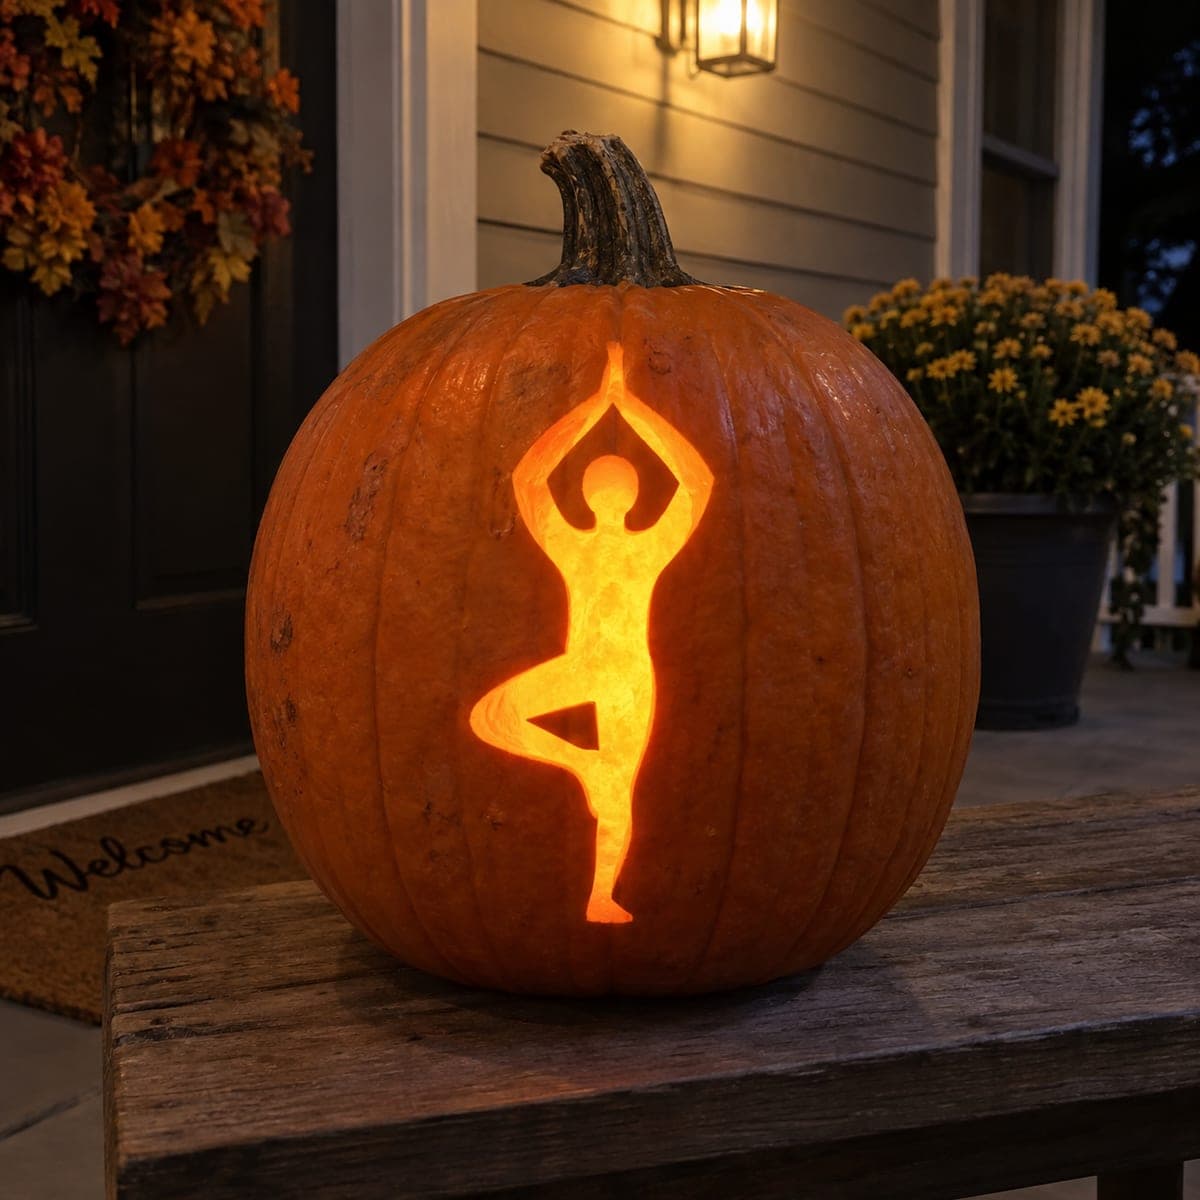
A large eight-legged spider silhouette is carved into the pumpkin so the orange skin acts as the dark shape against the glowing carved background, creating an eerie silhouette effect. This pumpkin carving idea delivers strong visual impact with a relatively straightforward cut, since the spider body and splayed legs form one continuous shape. Use a thin jigsaw blade or pumpkin saw to follow the leg curves precisely, and carve away the surrounding wall in sections to keep the design stable. Candlelight from inside makes the spider appear to float in a wash of amber.

This is an AI-generated concept image: a realistic, carvable design idea rather than a photo of a finished carve. AI concepts are always labeled and sit out the leaderboard and the contest.
No ratings yet · Sign in to rate

Comments (0)

  • No comments yet — be the first.

Save without an account. Sign in to like or comment.

Our tips for carving a similar design

The core trick here is reverse silhouette carving: the spider itself stays as untouched orange skin, and you cut away everything around it so the light frames the body and legs. Because the body and splayed legs read as one connected shape, you keep the design strong by cutting the background in small sections instead of one giant hole. Plan the negative space first so the leg tips stay attached to the surrounding pumpkin wall.

Written by PumpkinCarvingIdeas.com, inspired by the image above. These are our suggestions, not instructions from the uploader. This approach to the AI concept has not been tested on a real pumpkin.

From pumpkin to porch

  1. Pick a smooth face and transfer the pattern

    Choose the roundest, cleanest side of a large pumpkin so the spider has room to spread. Tape your stencil down and poke the outline with a pin or transfer tool, marking the spider body and each leg. Shade in the areas that will become light so you never lose track of what stays and what goes. On this design the spider is the part you protect, so double check before any blade touches the skin.

  2. Open the lid and hollow the inside

    Cut a lid from the bottom or the back rather than the top so the stem stays intact and the shell stays strong. Scoop the pulp and scrape the carving wall on the spider side down to about one inch thick. A thinner wall lets light pass and makes the background cuts cleaner. Save some pulp trimmings if you want to test your blade angle.

  3. Outline the spider before removing anything

    With a fine pumpkin saw, carefully score just outside the entire spider outline so the body and every leg are defined as one continuous shape. Go slow around the tight curves where the legs bend, letting the saw do the work instead of forcing it. Do not fully cut through yet; you are just setting a clean border. Keep the leg tips connected to the surrounding wall as natural bridges.

  4. Cut the background away in sections

    Now remove the pumpkin wall in the gaps between the legs, working one wedge at a time so the shell never flexes too much. Cutting in small pieces keeps the structure stable and stops legs from snapping. Leave narrow bridges of skin at the far leg tips so nothing floats free. Take breaks to hold the piece up and check the balance of dark spider against open light.

  5. Clean edges and add a soft glow zone

    Bevel the cut edges slightly toward the inside so more light spills through and the silhouette pops. For an extra eerie halo, use a skin-peeling tool to shave a thin dim ring of the outer skin just around the spider so it seems to sit in a wash of amber. Wipe away loose bits and touch up any ragged leg curves. Rub petroleum jelly on the cut edges to slow drying.

  6. Light it and photograph on the porch

    Drop in a battery LED, warm flicker style, never a candle, since the many bridges and thin walls make open flame a bad idea. Set the pumpkin at eye level on a step so the spider reads clearly from the walkway. Test the light in the dark and rotate the LED until the legs glow evenly. Snap your photo at dusk when the amber background shows best against the dark skin.

Gather your supplies

Check things off as you get ready.

Work on a stable surface, keep your free hand out of the cutting path, and have an adult handle sharp tools.

Three levels of light

  • Leave intact

    The spider body and all eight legs stay as untouched skin, reading dark against the glow.

  • Peel & shade

    A thin shaved ring around the spider gives a dim amber halo so it looks like it floats.

  • Cut through

    The open background between and around the legs is cut fully through for the brightest light.

Learn the carving basics

Before you start cutting

How do I keep the thin legs from breaking?

The legs stay as solid skin in this reverse silhouette, so they are actually the strong part. The risk is the background cuts, so remove those gaps one small section at a time. Leave narrow skin bridges at the outer leg tips so no piece of the surrounding wall drops away and weakens the shape.

Should I carve the spider itself or the space around it?

Around it. This is a negative space design, so the spider is protected skin and everything surrounding it gets cut out. Shade your stencil clearly before you start so you never accidentally saw into a leg. When in doubt, cut a little less and check the light.

What size pumpkin works best for this?

Go large and round so the splayed legs have room to spread without crowding the edges. A tall narrow pumpkin will cramp the leg span and make the silhouette hard to read. Pick one with a smooth clean face on the side you plan to carve.

Your take belongs here, too.

Changed a detail? Made it simpler? Share a photo of your version and tell the community what worked.

Share your pumpkin

More pumpkins like this

You've reached the end · 8 pumpkins
The Patch Report

Fresh pumpkins, in your inbox.

The best new carvings, ideas worth stealing, and how-tos for carving season. Short, seasonal, and gone by November.

A short email during carving season. Unsubscribe anytime. See our privacy policy.