Halloween Pumpkin Carving Contest · Starts October 1st · $500 in prizes
← Back to ideas
@ai_concepts
Aug 5, 2026
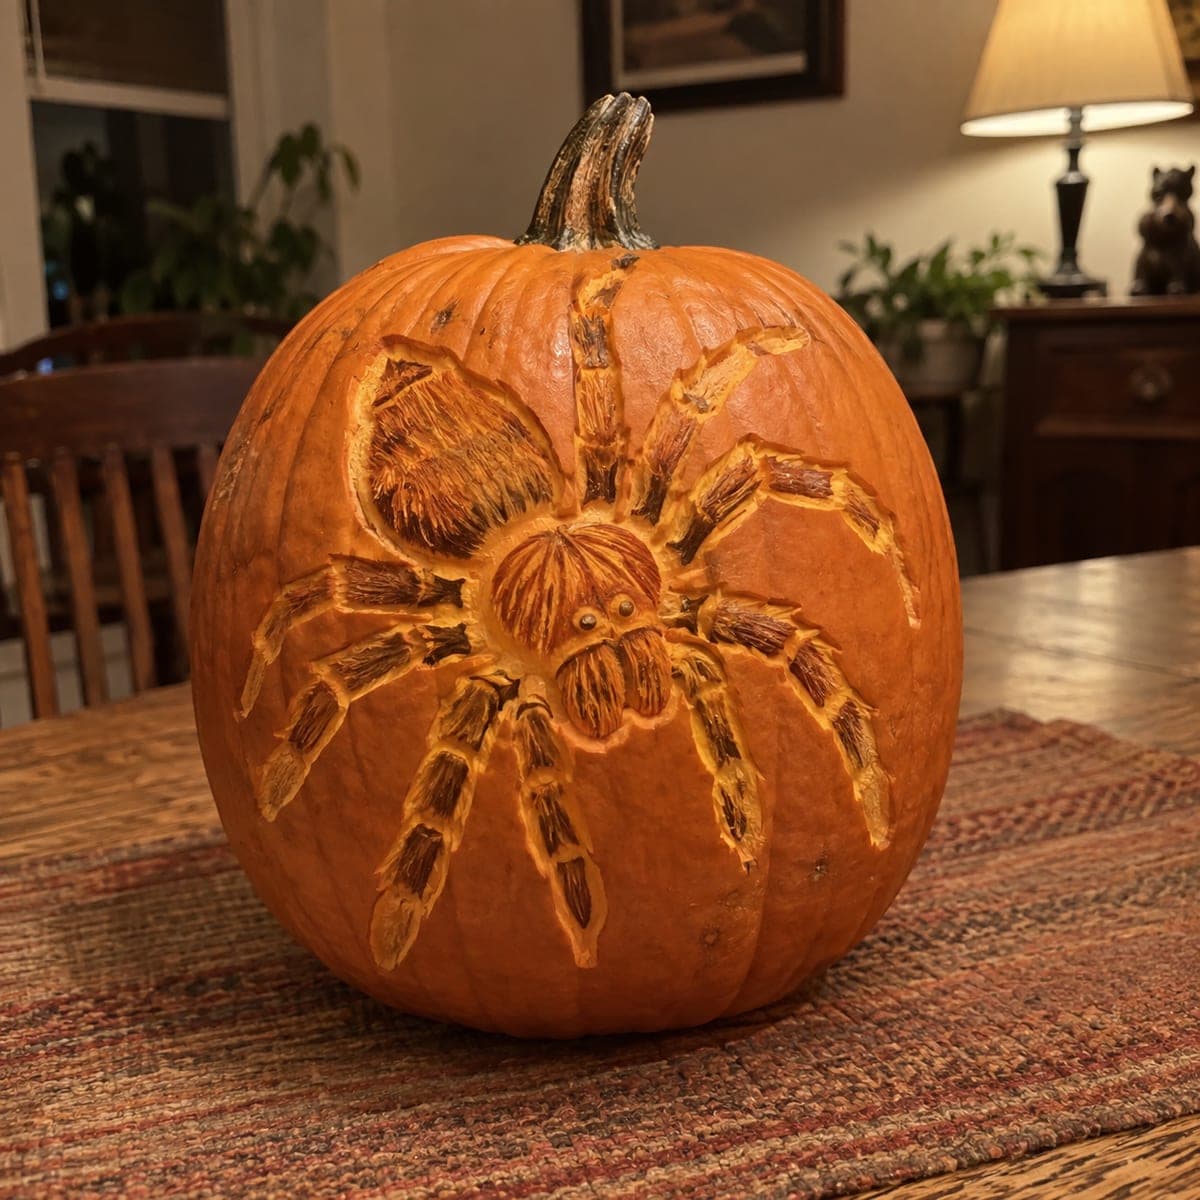
Hairy Tarantula Etched Pumpkin for HalloweenAI
0

Hairy Tarantula Etched Pumpkin for Halloween

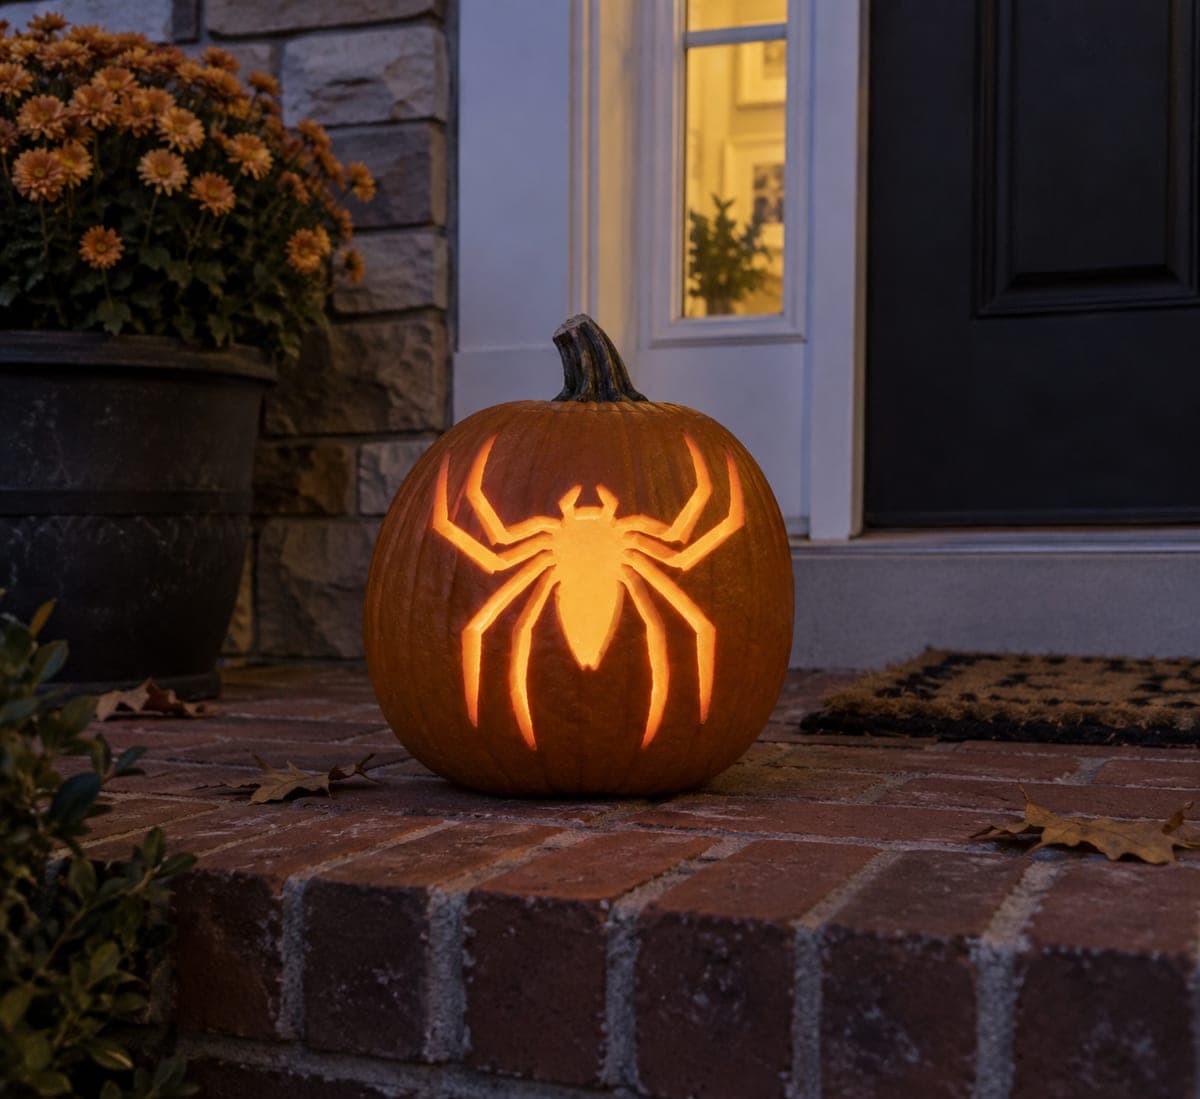
A tarantula sprawls across the full face of this pumpkin, its banded legs and bristly abdomen etched with dark shadowed strokes that make the hair look touchably real. Carve the pale outline first, then build the dark banding by leaving strips of original skin between peeled sections. Short flicked cuts along every leg edge create the fuzz. Face it toward the walkway so visitors meet it up close; arachnophobes will take the long way around.

This is an AI-generated concept image: a realistic, carvable design idea rather than a photo of a finished carve. AI concepts are always labeled and sit out the leaderboard and the contest.

No ratings yet · Sign in to rate
Comments (0)

  • No comments yet — be the first.

Save without an account. Sign in to like or comment.

Our tips for carving a similar design

This design lives entirely on the pumpkin skin, so almost nothing gets cut clean through. The core trick is contrast etching: leave strips of untouched skin as the dark leg bands and body, then peel away the areas around and between them to different depths for the pale highlights. Short flicked strokes along every edge sell the hairy, three dimensional look.

Written by PumpkinCarvingIdeas.com, inspired by the image above. These are our suggestions, not instructions from the uploader. This approach to the AI concept has not been tested on a real pumpkin.

From pumpkin to porch

  1. Prep the pumpkin and transfer the shape

    Pick a tall, smooth pumpkin and wipe the front face clean. Since this is a concept image with no real pumpkin behind it, you are building the look from scratch, so sketch or tape a spider stencil centered on the widest, flattest part of the surface. Trace the outline of the round abdomen, the head, and all eight legs with a washable marker or a poking tool. Keep the legs spread evenly so the body reads clearly from a few feet away.

  2. Score the outlines

    Use a fine detail knife or a lino style gouge to score along every traced line about a quarter inch deep. This defines the abdomen, the head, and the segmented legs without removing much material yet. Work slowly on the leg joints so each band stays crisp. These score lines act as stop cuts that keep your later peeling from wandering into the wrong section.

  3. Peel the background to a mid glow

    With a ribbon tool or shading loop, skin away the top layer of orange around the whole spider so the body stands out. Remove just the waxy outer skin to expose the lighter flesh underneath, which glows soft orange when lit. Keep the peeling shallow and even here. This background is your medium tone that makes the darker spider pop forward.

  4. Build the dark leg banding

    Leave strips of the original untouched skin across each leg to form the dark bands, and peel the flesh between them for the lighter rings. Alternating peeled and unpeeled strips creates the striped, banded tarantula look without any cutting through. Vary the width slightly so it looks natural rather than mechanical. Do the same on the abdomen, leaving raised untouched patches for the darkest shadow.

  5. Flick in the hair texture

    Switch to a small V gouge or the tip of your detail knife and make short, quick flicked strokes fanning outward along every leg edge and across the abdomen. Follow the direction the hair would grow, angling out from the body. Overlap the strokes at different depths so some catch more light than others. This is the step that makes the fuzz look touchable, so take your time and keep the cuts shallow.

  6. Add the eyes and light it up

    Etch the head bristles in the same flicked style, then make two small, shallow cutouts or deep pokes for the eyes so they catch a glint. Set a battery LED puck inside through a lid or a hole cut in the back, never a candle. Face the finished pumpkin toward the walkway and check the glow from a few feet back. Touch up any bands that read too pale by peeling their neighbors a little deeper.

Gather your supplies

Check things off as you get ready.

Work on a stable surface, keep your free hand out of the cutting path, and have an adult handle sharp tools.

Three levels of light

  • Leave intact

    The dark leg bands, the raised abdomen patches, and the shadow strokes stay as untouched skin.

  • Peel & shade

    The background around the spider and the lighter rings between leg bands get skin-peeled for a mid orange glow.

  • Cut through

    Only the two tiny eyes are cut through for a bright pinpoint glint.

Learn the carving basics

Before you start cutting

How do I keep the leg bands from blurring together?

Score every band line as a stop cut before you peel anything. When you remove flesh from a ring, the score keeps the tool from sliding into the neighboring dark band. Leave the untouched strips a little wider than you think, since peeled edges tend to spread as the pumpkin dries.

My flicked hair strokes look flat, how do I add depth?

Vary the depth and length of the strokes instead of making them uniform. Cut some deeper so they glow brighter and leave others as barely there scratches on the skin. Overlapping short strokes at slightly different angles reads as layered fuzz rather than a combed pattern.

Will an etched pumpkin like this last through Halloween night?

Etched designs dry out faster than clean cutouts because so much skin is exposed. Carve it within a day or two of when you want to display it, and store it somewhere cool between showings. A wipe of petroleum jelly on the peeled areas slows moisture loss and keeps the tones bright.

Your take belongs here, too.

Changed a detail? Made it simpler? Share a photo of your version and tell the community what worked.

Share your pumpkin

More pumpkins like this

You've reached the end · 8 pumpkins
The Patch Report

Fresh pumpkins, in your inbox.

The best new carvings, ideas worth stealing, and how-tos for carving season. Short, seasonal, and gone by November.

A short email during carving season. Unsubscribe anytime. See our privacy policy.