Halloween Pumpkin Carving Contest · Starts October 1st · $500 in prizes
← Back to ideas
@ai_concepts
Jul 10, 2026
Giant Tarantula Spider Shaded Pumpkin CarvingAI
0

Giant Tarantula Spider Shaded Pumpkin Carving

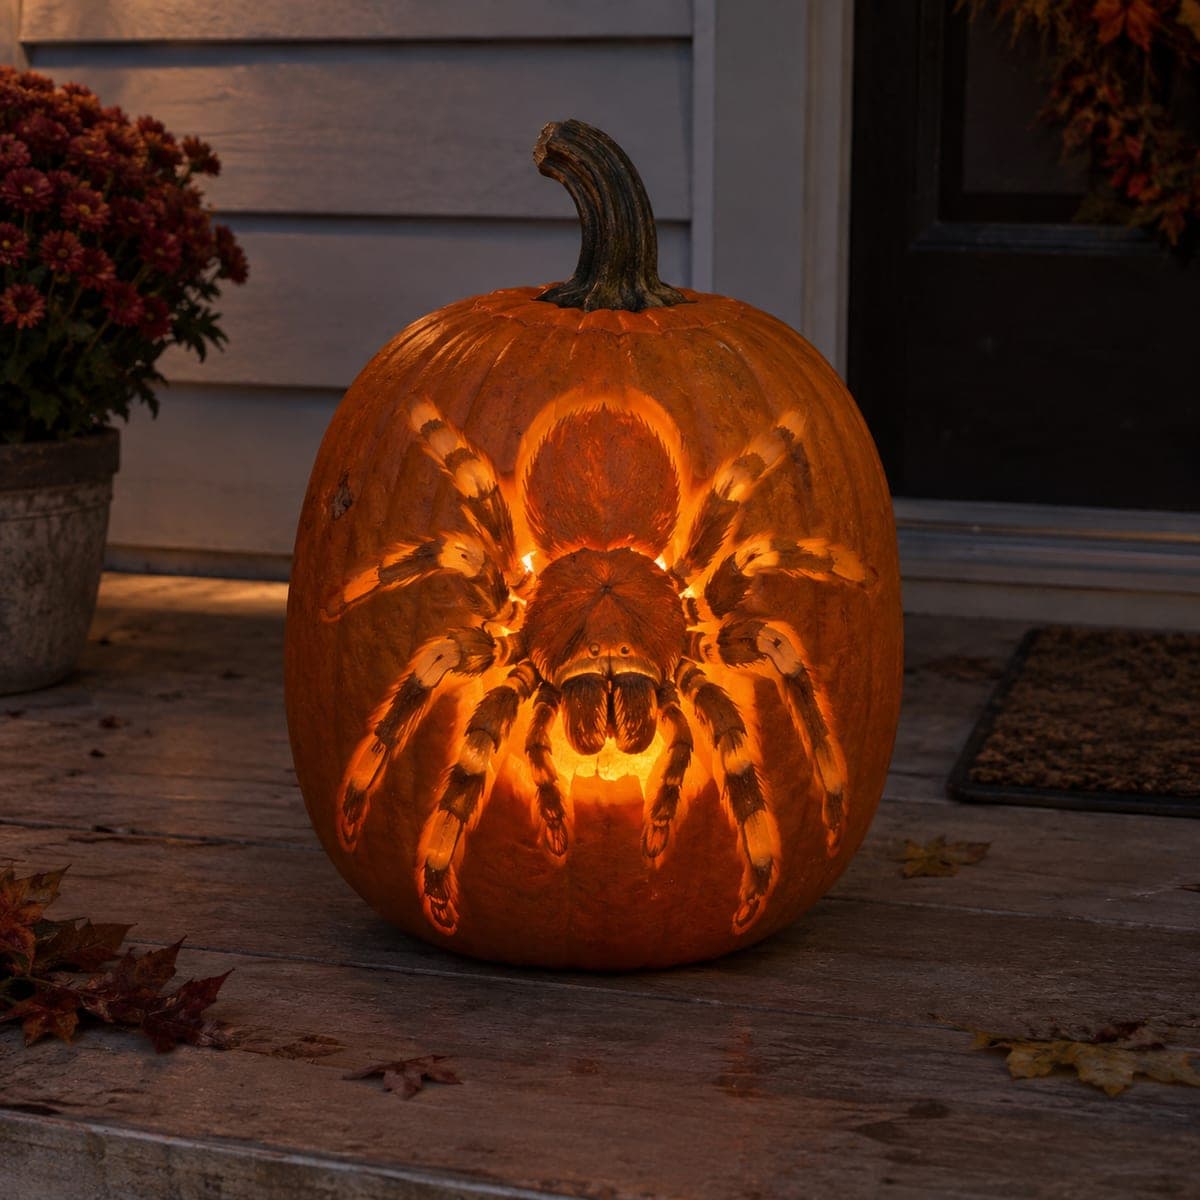
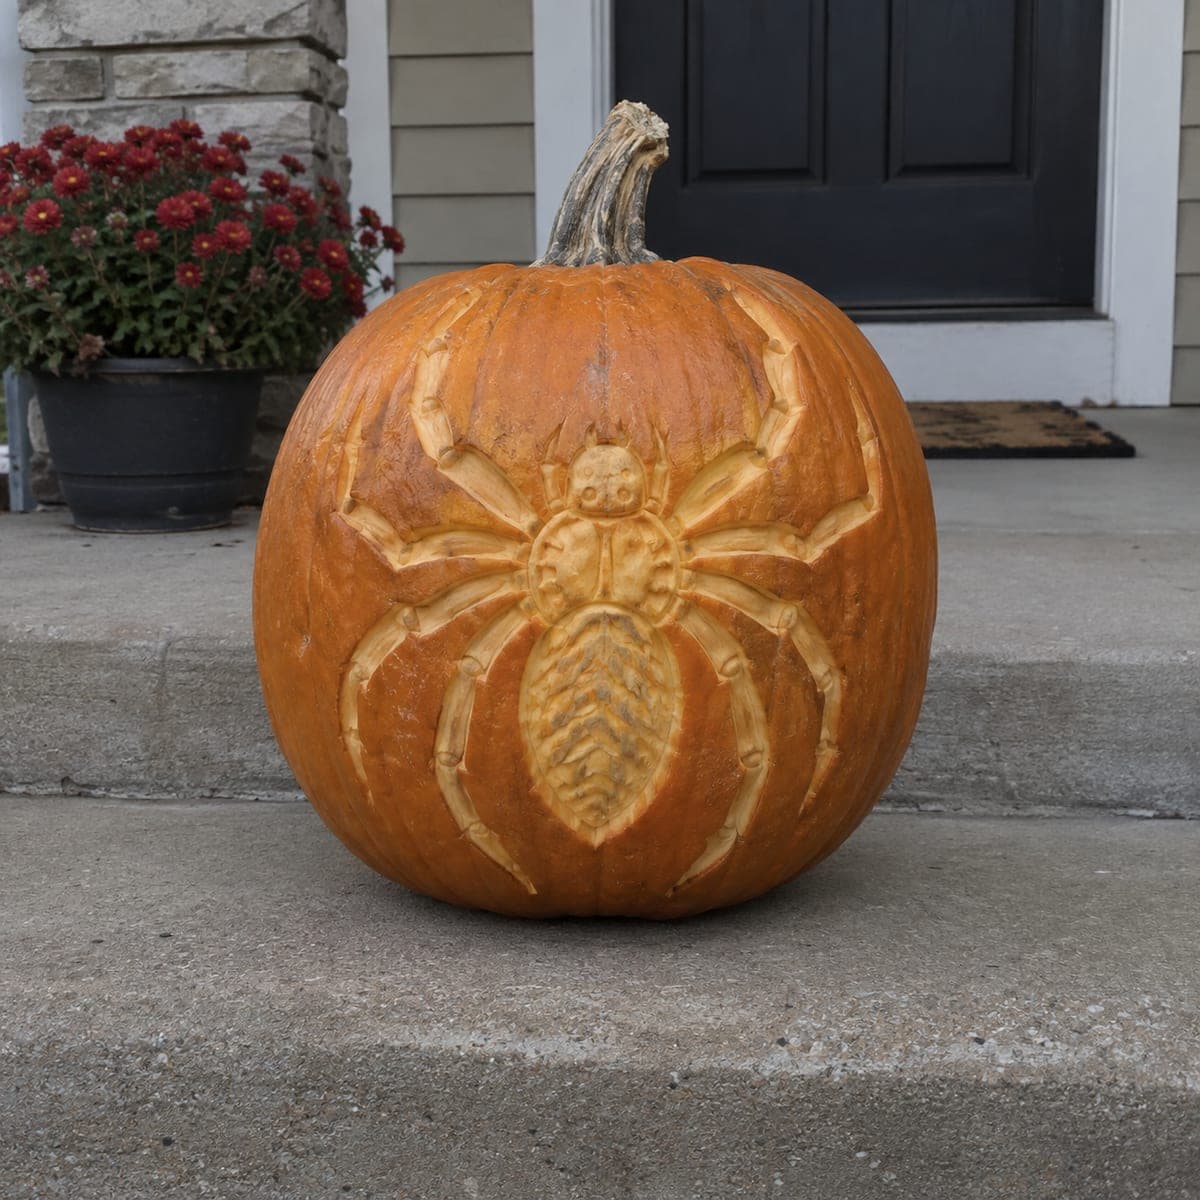
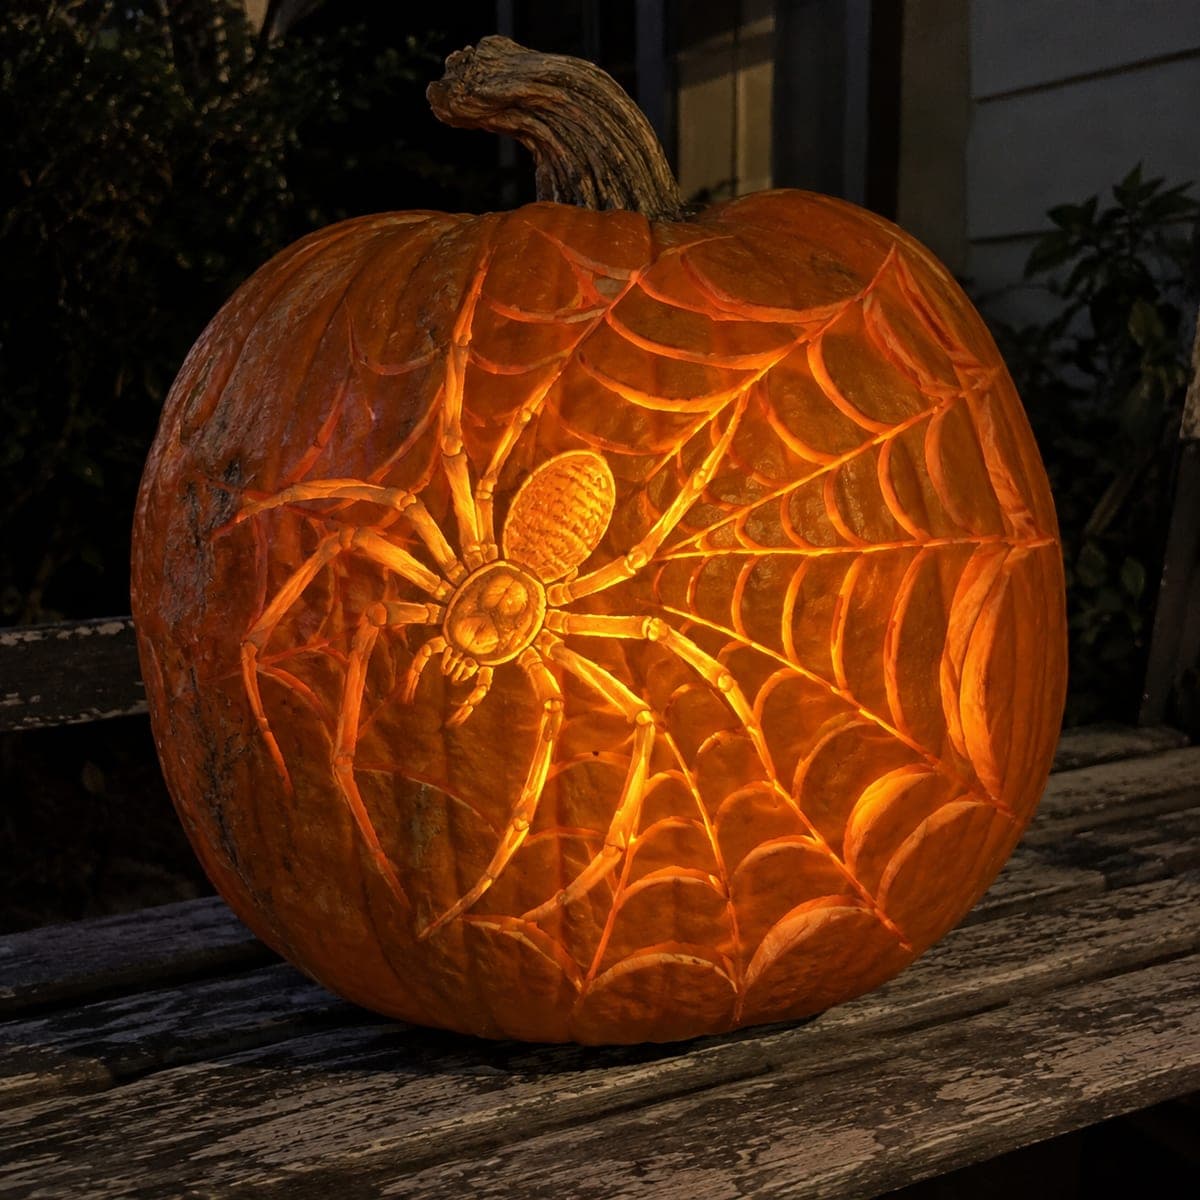
A life-size tarantula sprawls across a glowing pumpkin, eight hairy legs reaching toward the edges and the body centered just below the stem. The shading technique thins the pumpkin skin at varying depths to show the spider's banded leg markings and textured abdomen, while the body core is carved deepest so candlelight radiates from the center outward. Sketch the leg positions lightly with a dry-erase marker before committing to cuts, and carve each leg from base to tip. Place on a front-porch step where trick-or-treaters will spot the glow from a distance.

This is an AI-generated concept image: a realistic, carvable design idea rather than a photo of a finished carve. AI concepts are always labeled and sit out the leaderboard and the contest.
No ratings yet · Sign in to rate

Comments (0)

  • No comments yet — be the first.

Save without an account. Sign in to like or comment.

Our tips for carving a similar design

The core trick here is depth control: the spider's body is carved deepest so light radiates outward, while the eight legs are shaded at varying skin thicknesses to fake banded, hairy detail. Plan the whole layout first so the legs reach toward the edges without crowding, then work from the darkest untouched skin to the brightest central cutout. Keep the abdomen and legs as shaded relief and save the one true cutout at the body core for last.

Written by PumpkinCarvingIdeas.com, inspired by the image above. These are our suggestions, not instructions from the uploader. This approach to the AI concept has not been tested on a real pumpkin.

From pumpkin to porch

  1. Prep and map the layout

    Pick a large, tall pumpkin with a smooth front face so the eight legs have room to spread. Cut a lid or, better, a bottom access hole so the shell stays strong for all the shading. Scrape the inside of the carving wall down to about one inch so light passes through the thinned areas. Sketch the round body just below the stem and the eight legs lightly with a dry-erase marker before any blade touches the skin.

  2. Outline the body and legs

    Use a small detail knife or a poking tool to score the outlines of the abdomen, the front body, and each leg segment. This gives you clean borders to shade up against so your gouge does not wander. Work each leg from the base near the body out to the tip, keeping the joints slightly bent for a natural sprawl. Leave thin uncut ridges between adjacent legs so the shell keeps its strength.

  3. Shade the leg bands

    Switch to a shading loop or ribbon tool and peel the top skin off in bands to create the light and dark striping on each leg. Peel deeper where you want a brighter glow and shallower where the leg should stay dim. Vary the depth within each band so the legs read as furry rather than flat. Work slowly and check the effect by holding the pumpkin up to a lamp now and then.

  4. Texture the abdomen and head

    Give the round abdomen a stippled, hairy look by peeling short overlapping strokes that fan outward from the center. Keep the eyes and fang area as slightly raised, less peeled patches so they stay darker and stand out. This center section should be your most detailed shading, since it draws the eye. Take your time and step back often to judge the balance.

  5. Cut the glowing core last

    Once all the shading is done, carve one true opening at the very center of the body so light blasts outward through the legs. Keep this cutout modest and rounded so the surrounding shell and legs stay supported. Because this is the only full cutout, save it for the end when the rest of the design is locked in. Clean up the edges with a fresh blade for a crisp glow.

  6. Light it and stage the photo

    Drop in a battery LED, never a candle, since the thin shaded walls can scorch. Set the light low and centered so it rakes across the shading and makes the legs pop. Place the pumpkin on a front-porch step at dusk where trick-or-treaters catch the glow from a distance. Mist the cut edges with water and bag it in the fridge overnight to keep the detail crisp.

Gather your supplies

Check things off as you get ready.

Work on a stable surface, keep your free hand out of the cutting path, and have an adult handle sharp tools.

Three levels of light

  • Leave intact

    Untouched skin stays dark for the spider's eyes, fang edges, and the shadow gaps between legs.

  • Peel & shade

    Skin-peeled shading gives the mid orange glow on the banded legs and the hairy abdomen.

  • Cut through

    A single full cutout at the body core is the brightest point, radiating light outward through the legs.

Learn the carving basics

Before you start cutting

How do I keep eight legs from weakening the shell?

Most of the legs are shaded relief, not cutouts, so the wall stays intact. Leave thin uncut ridges between neighboring legs and keep your only true opening small and centered. Carving the big core hole last means the rest of the design supports the shell while you work.

How deep should I shade the leg bands?

Aim for a range: peel just under the surface for the dim, dark bands and go noticeably deeper, close to the inner wall, for the bright bands. Varying the depth within a single leg is what sells the furry, banded tarantula look. Test against a lamp as you go so you do not accidentally punch through.

Since this is a concept image, is a life-size tarantula actually carvable?

Yes, if you treat almost all of it as shading rather than cutouts. Keep the legs as thinned relief with bridges intact and reserve one modest opening at the body for the glow. That keeps thin, hairy detail structurally realistic on a real pumpkin.

Your take belongs here, too.

Changed a detail? Made it simpler? Share a photo of your version and tell the community what worked.

Share your pumpkin

More pumpkins like this

You've reached the end · 8 pumpkins
The Patch Report

Fresh pumpkins, in your inbox.

The best new carvings, ideas worth stealing, and how-tos for carving season. Short, seasonal, and gone by November.

A short email during carving season. Unsubscribe anytime. See our privacy policy.