@octoberoak
Sep 5, 2026
Totem of light
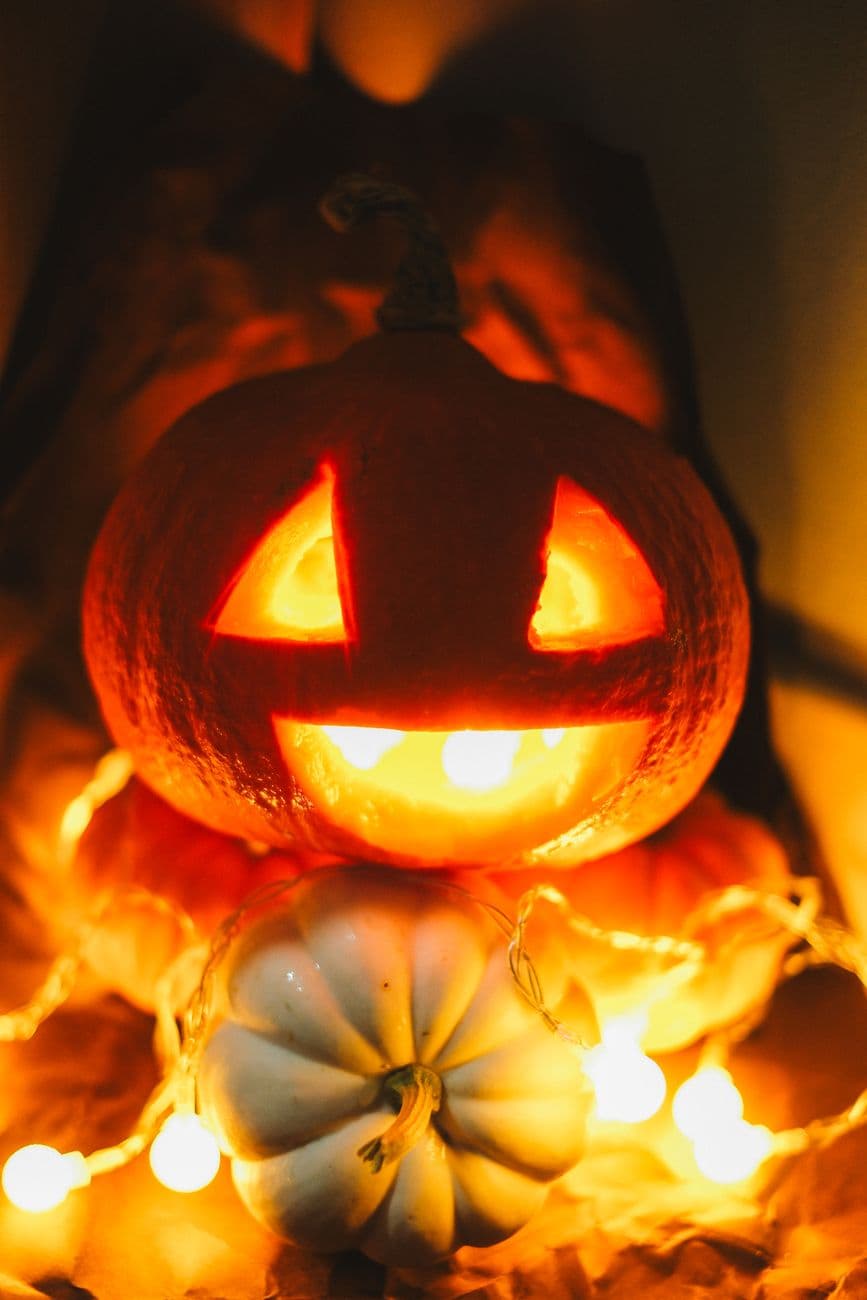
A blazing triangle-eyed jack stacked on a white pumpkin, wrapped in fairy lights. More lumens than lantern.
No ratings yet · Sign in to rate
A blazing triangle-eyed jack stacked on a white pumpkin, wrapped in fairy lights. More lumens than lantern.
The core trick here is a timeless triangle-eyed face paired with a two-pumpkin stack and a nest of fairy lights, so the glow spills far past the lantern itself. Keep the cuts bold and simple, then let the surrounding lights do the heavy lifting for atmosphere. A clean, wide grin with a couple of chunky teeth reads well from across the room.
Written by PumpkinCarvingIdeas.com, inspired by @octoberoak's photo above. These are our suggestions, not instructions from the uploader, and this approach hasn't been tested on their exact carve.
Choose a medium round orange pumpkin for the face and a small white pumpkin for the base. Cut a lid on the orange one at an angle so it will not fall in, then scoop the insides until the front wall is about one inch thick. Leave the white pumpkin whole and uncarved, since it is only a decorative pedestal. Pat the inside dry so your marker lines stay put.
Draw two triangle eyes tilted inward, pointing down toward the nose. Add a small triangle nose centered below them. Sketch a wide smiling mouth and pencil in two or three square teeth along the top edge so you know exactly what to keep. Step back and check the spacing before any blade touches the shell.
An adult should handle all the cutting with a small serrated carving saw. Start with the smaller shapes, the nose and eyes, sawing straight in with gentle pressure. Push the cut pieces outward or inward and lift them free. Doing the small openings first keeps the pumpkin sturdy while you work.
Save the big mouth for last so the face wall stays strong. Cut around the teeth carefully, leaving each tooth fully attached to the top and bottom of the mouth so they act as bridges. Remove the open gaps between teeth in clean pieces. Trim the inside edges of the mouth at a slight bevel so more light escapes.
Set the white pumpkin down first, then rest the carved pumpkin on top so the face sits at eye level. Place a battery LED puck or a short string of warm LEDs inside the carved pumpkin, never a candle. Test the glow and rotate the light until the eyes and grin read evenly. Keep the lid slightly cracked or add a small vent hole near the back for airflow.
Nest a strand of warm fairy lights around the base of the stack and let a few loops drape in front. Dim the room and shoot slightly below the face for that towering totem feel. Tuck any visible battery packs behind the pumpkins. Take a few frames at different light levels to catch the best balance of face and surrounding glow.
Check things off as you get ready.
Work on a stable surface, keep your free hand out of the cutting path, and have an adult handle sharp tools.
The whole orange rind and the white base pumpkin stay untouched and dark for contrast.
Optional: shave a thin halo of skin around the eyes or mouth if you want a soft dim ring of glow.
The two triangle eyes, triangle nose, and the toothy grin cut fully through for the brightest light.
A small hollow orange pumpkin is light, so a firm little white pumpkin can hold it fine. Set the flattest side of each together and press gently to find a stable seat. If it wobbles, slice a thin flat spot on the base pumpkin's top so the carved one nests securely.
Leave each tooth attached at both the top and bottom of the mouth so it forms a solid bridge rather than a dangling point. Keep the teeth chunky and square rather than thin and pointed. Cut slowly and remove the gaps between teeth as separate pieces.
Yes, the lights are extra atmosphere, not a requirement. A single warm LED inside the carved pumpkin will light the face well on its own. The strand simply spreads the glow outward and fills the base of the display.
Changed a detail? Made it simpler? Share a photo of your version and tell the community what worked.
The best new carvings, ideas worth stealing, and how-tos for carving season. Short, seasonal, and gone by November.





Comments (0)