Halloween Pumpkin Carving Contest · Starts October 1st · $500 in prizes
← Back to ideas
@ai_concepts
Sep 7, 2026
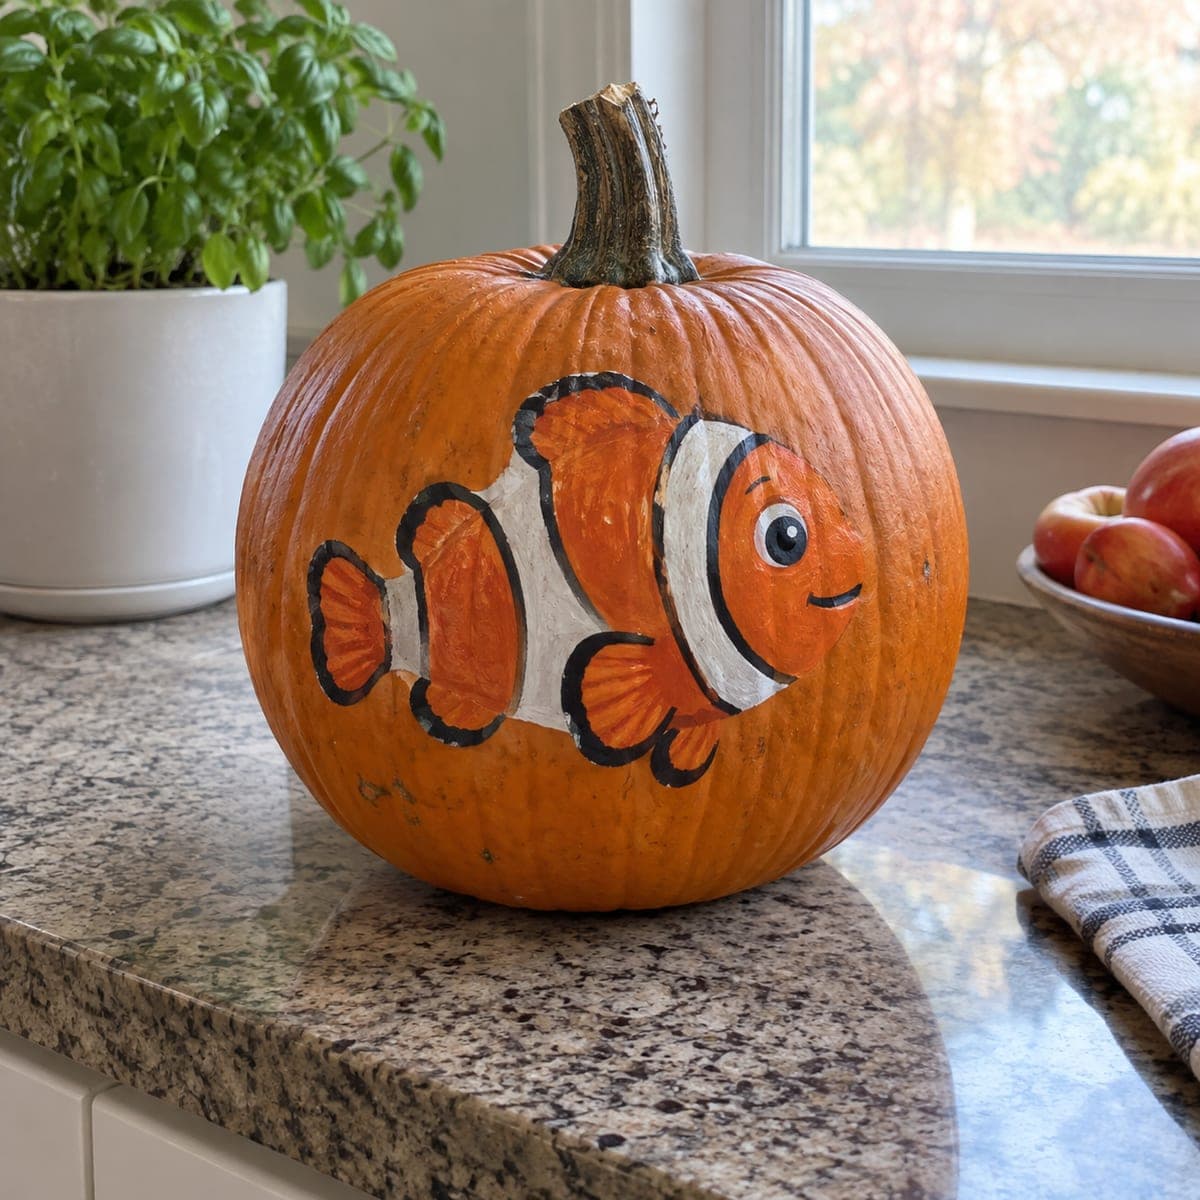
Tropical Clownfish Carved and Painted PumpkinAI
0

Tropical Clownfish Carved and Painted Pumpkin

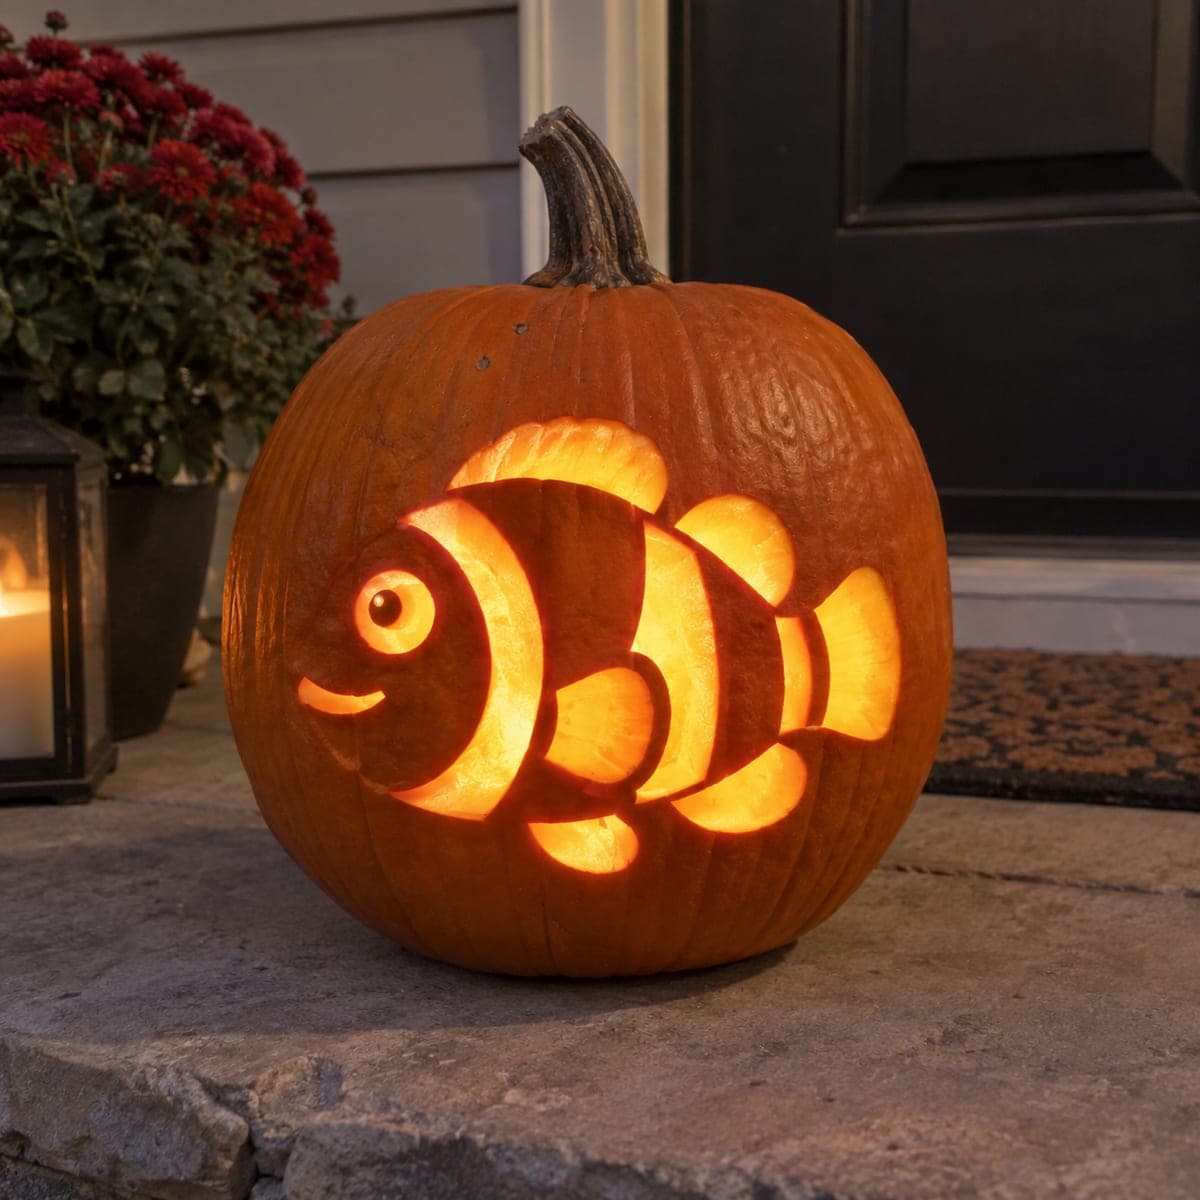
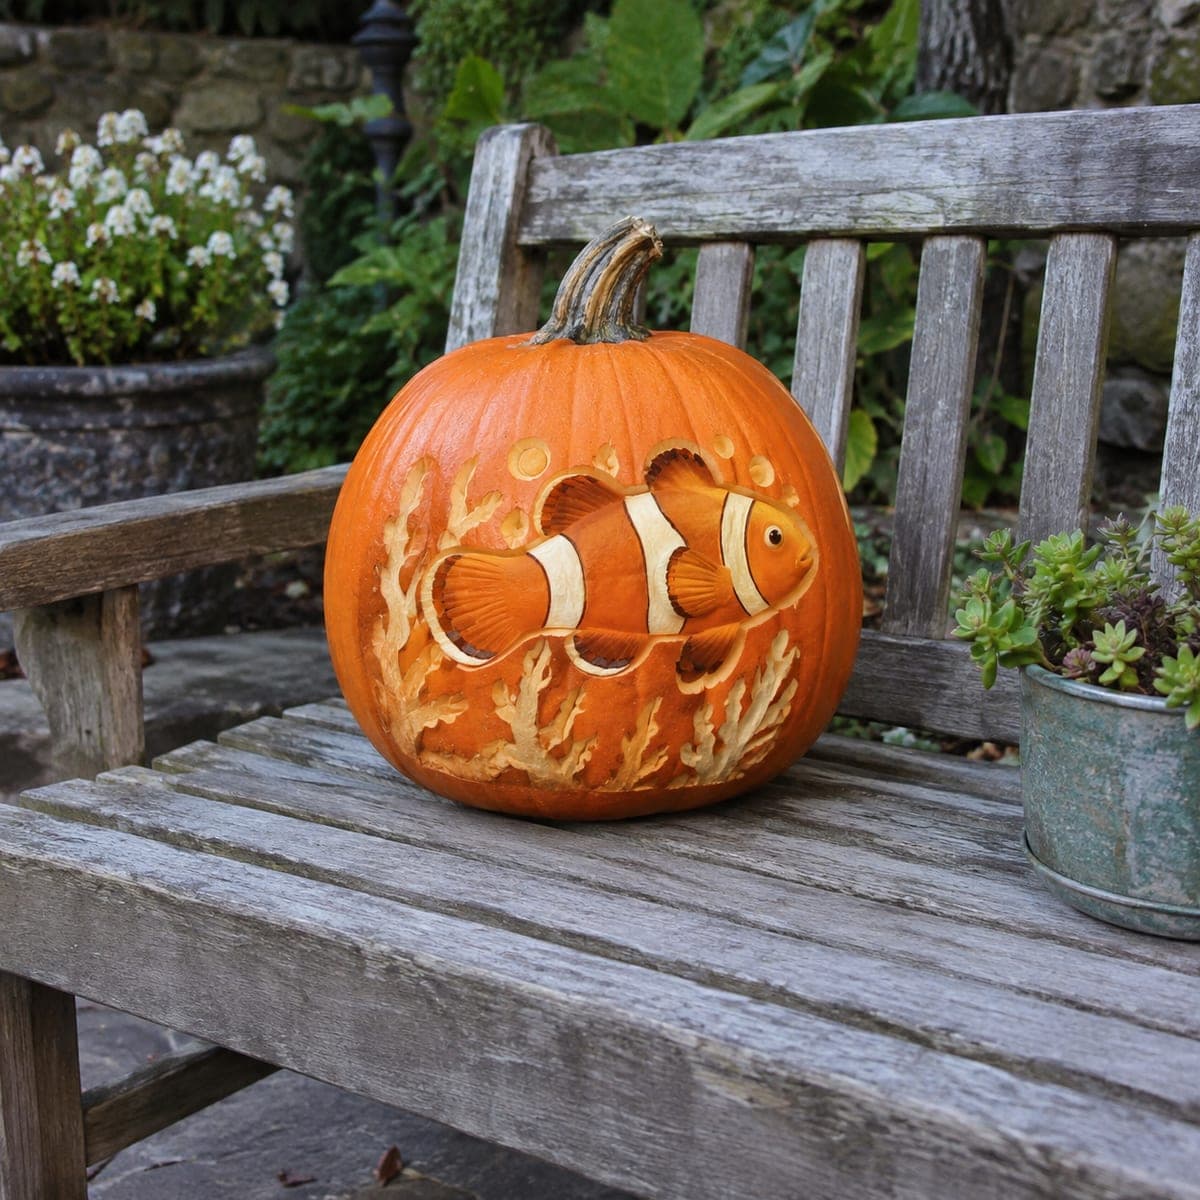
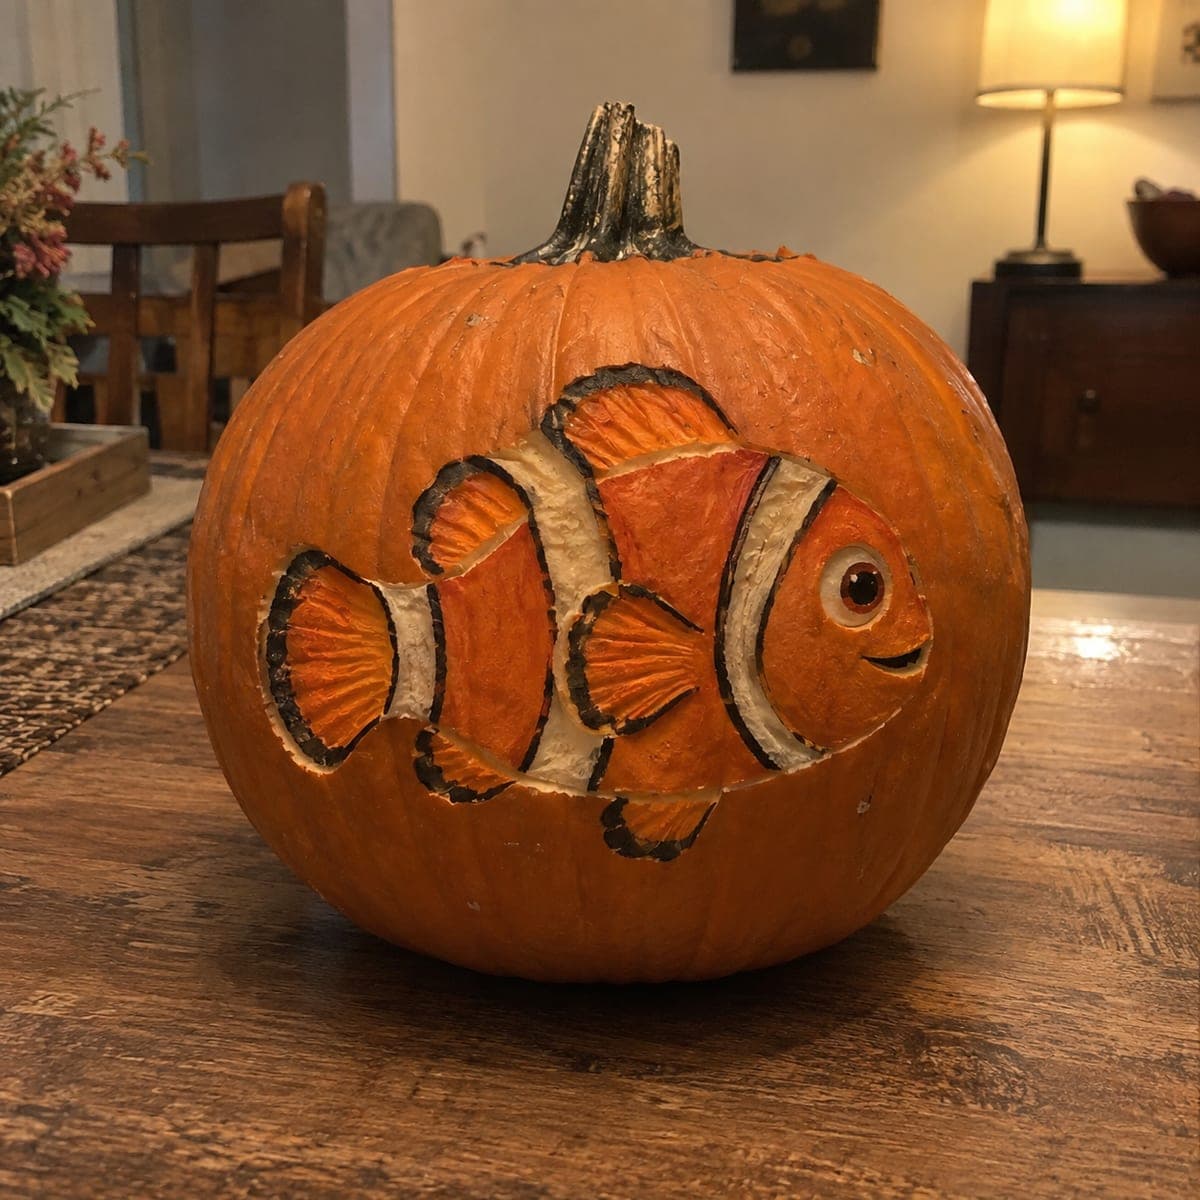
A cheerful clownfish swims across this pumpkin in carved relief, its white stripes and fins shaved into the flesh and outlined in bold black paint. Combining shallow carving with paint gives the fish crisp cartoon edges and real dimension at the same time. Carve the body and fin ridges first, let the surface dry, then paint the outlines and the eye. Kids who love aquarium movies will spot this design from across the yard.

This is an AI-generated concept image: a realistic, carvable design idea rather than a photo of a finished carve. AI concepts are always labeled and sit out the leaderboard and the contest.

No ratings yet · Sign in to rate
Comments (0)

  • No comments yet — be the first.

Save without an account. Sign in to like or comment.

Our tips for carving a similar design

The core trick here is combining shallow relief carving with painted outlines so the fish reads as a crisp cartoon while still catching real light and shadow. You shave the body, fins, and white bands to different depths in the skin, then let the surface dry and add bold black edges and the eye with paint. Because almost nothing is cut all the way through, this design is about controlled shaving rather than deep openings.

Written by PumpkinCarvingIdeas.com, inspired by the image above. These are our suggestions, not instructions from the uploader. This approach to the AI concept has not been tested on a real pumpkin.

From pumpkin to porch

  1. Transfer the clownfish outline

    Pick a smooth, wide face of the pumpkin and tape your stencil flat, smoothing out wrinkles over the curve. Poke through the main lines with a pin or transfer tool: the body outline, the three white bands, each fin, and the eye. Step back and check the fish sits centered and level before you touch a blade. This map keeps your shaving consistent later.

  2. Outline the shapes with a shallow score

    With a small detail knife, trace just the outer edges of the body, fins, and stripes about an eighth of an inch deep. Keep the blade nearly vertical so you get clean walls between sections. Do not try to remove anything yet, you are only defining borders. Take your time on the curved fin edges since those sell the shape.

  3. Shave the skin off the body and fins

    Switch to a loop or ribbon tool and peel the orange skin off the fish body and fins so the lighter flesh shows through. Work in shallow passes and keep the surface even for a smooth glow. Leave the three vertical bands slightly higher or shave them a touch differently so the white stripes stand out. Brush away pulp as you go so you can see your depth.

  4. Add texture and let it dry

    Drag the tip of your detail tool in fan lines across each fin to suggest rays, and round the body edges slightly for dimension. Blot the whole carved area with paper towels and set the pumpkin in a cool, airy spot for a few hours. A dry surface takes paint far better and stops it from beading. This pause also lets you spot any spots that need cleaning up.

  5. Paint the outlines and eye

    Using acrylic paint and a fine brush, lay down the bold black edges around the body, fins, and white bands for that cartoon look. Paint the round eye with a dark pupil and a small white highlight so it looks alive. Keep a damp cotton swab handy to wipe any slips before they set. Let each color dry before adding the next so lines stay sharp.

  6. Light it and photograph

    Drop a small battery LED puck inside or set one behind the pumpkin, since the relief shows best with soft light raking across it rather than glowing through. Turn the room lights down and take your photo at fish eye level to catch the shadows in the fins. A warm white LED makes the orange flesh pop. Never use a candle near painted, dried skin.

Gather your supplies

Check things off as you get ready.

Work on a stable surface, keep your free hand out of the cutting path, and have an adult handle sharp tools.

Three levels of light

  • Leave intact

    The surrounding pumpkin skin and the dark painted outlines stay untouched and dark

  • Peel & shade

    The fish body, fins, and white bands are shaved to glow a soft dim orange

  • Cut through

    Little to nothing is cut fully through, since this is a relief design; only the eye highlight could be opened for a bright spark

Learn the carving basics

Before you start cutting

Do I need to cut all the way through the pumpkin?

No, this is mostly a relief design, so you shave the skin rather than making full openings. The glow comes from thinning the flesh, not from light passing through cutouts. If you want extra brightness, you could carve just the eye highlight through, but keep everything else shallow.

Will the paint stick to the pumpkin flesh?

It will if you dry the surface first. Blot the shaved area with paper towels and give it a few hours in a cool spot before painting. Use acrylic paint and thin coats, and keep a damp swab nearby to fix any slips.

How do I keep the white stripes from blending into the body?

Shave the bands to a slightly different depth than the body so they catch light differently, and define their edges with a clean vertical score first. The black paint outlines then lock in the separation. Work the borders carefully since those crisp lines are what make the fish read as a clownfish.

Your take belongs here, too.

Changed a detail? Made it simpler? Share a photo of your version and tell the community what worked.

Share your pumpkin

More pumpkins like this

You've reached the end · 8 pumpkins
The Patch Report

Fresh pumpkins, in your inbox.

The best new carvings, ideas worth stealing, and how-tos for carving season. Short, seasonal, and gone by November.

A short email during carving season. Unsubscribe anytime. See our privacy policy.