@boo_radley
Sep 5, 2026

Two in the fog
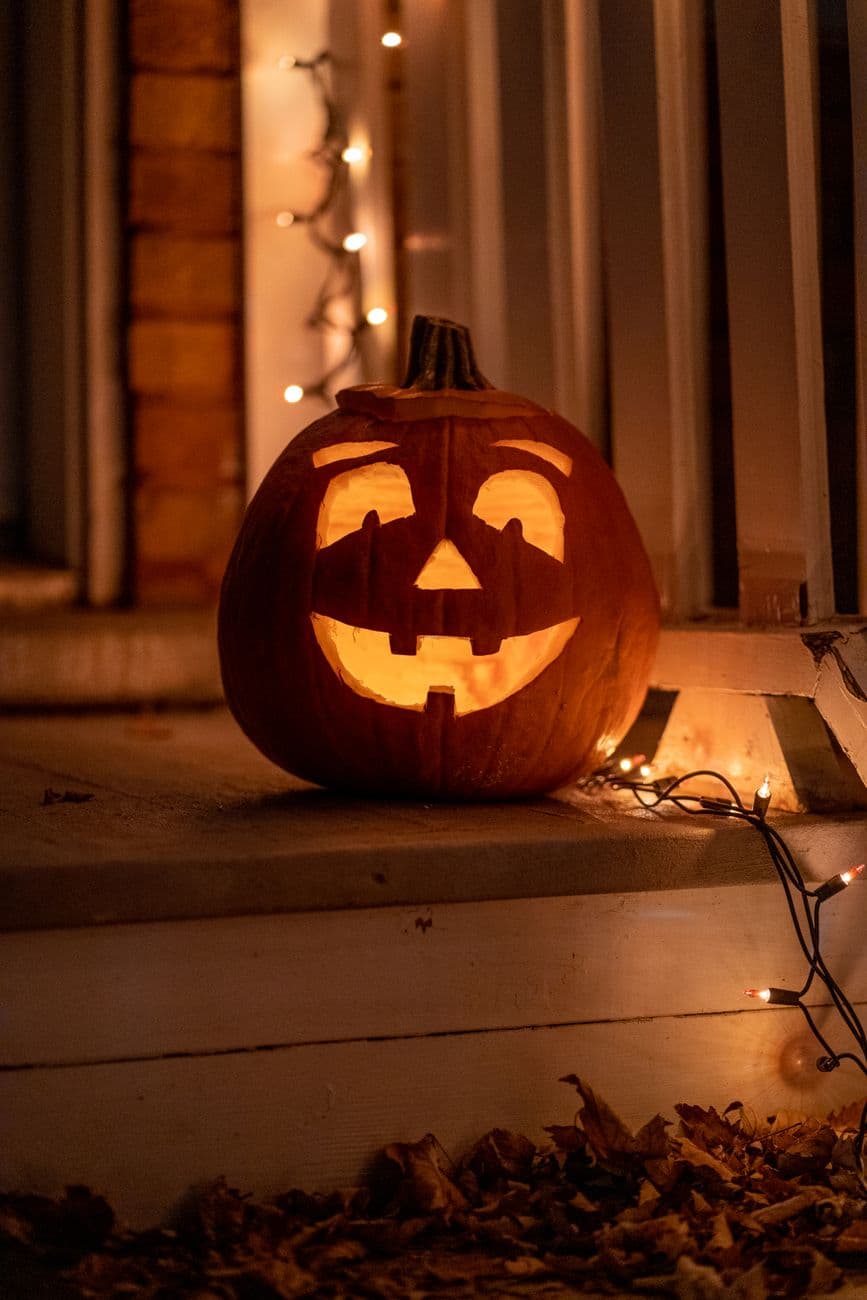
A wide-eyed little jack grinning through orange fog while a bigger lantern burns behind it. Pure October atmosphere.
No ratings yet · Sign in to rate
A wide-eyed little jack grinning through orange fog while a bigger lantern burns behind it. Pure October atmosphere.
The charm here is a simple happy face with two big round eyes, a triangle nose, and a zigzag grin, all cut clean through so the whole face floods with warm light. The trick that gives it personality is the pair of little pupil tabs left inside the eyes, plus staging a second lantern behind it in fog for depth. Keep the openings bold and the shapes clean, and the classic look does the rest.
Written by PumpkinCarvingIdeas.com, inspired by @boo_radley's photo above. These are our suggestions, not instructions from the uploader, and this approach hasn't been tested on their exact carve.
Choose a round pumpkin with a smooth, flat-ish front face so your design sits evenly. Cut a lid from the top at an angle so it rests without falling in, or cut a hole in the bottom instead for easier lighting later. Scoop out the insides and scrape the front wall down to about one inch thick so it carves easily. A thinner wall means cleaner cuts and a brighter glow.
Draw or print a simple face: two large circles for eyes, a triangle nose, and a wide smile with zigzag teeth. Tape the pattern to the front and poke along the lines with a pin or a poker tool. When you lift the paper, connect the dots with a marker so you have a clear guide. Keep the eyes big and rounded for that wide-eyed, friendly look.
To copy the cross-eyed charm, mark a small pupil shape inside each eye that you will leave uncut and attached at the bottom. These little tabs stay connected to the rim of the eye so they hold in place and read as pupils once lit. Do not free-float them, since a fully cut pupil would just drop out. This one detail gives the face its playful personality.
With a serrated carving saw, cut the nose and the teeth of the smile first while the pumpkin is still strong. Saw slowly and let the blade do the work, keeping fingers behind the cutting edge. Carve carefully around each pupil tab so it stays attached at its base. Push the cut pieces out gently from inside to avoid cracking the surrounding shell.
Save the two large eye circles for last so the face keeps its rigidity while you work. Cut each eye in a couple of arcs rather than one long stroke for cleaner curves. Ease the rounds out from the back and tidy the edges with your saw. Trim any rough inner edges so light spreads evenly.
Drop in a battery LED or two for a bright, safe glow, never a candle. For the two-pumpkin scene, carve or set a second, larger lantern behind and to the side. Add a little haze from a fog machine or dry ice at a distance, then photograph in the dark so the orange light blooms through the mist.
Check things off as you get ready.
Work on a stable surface, keep your free hand out of the cutting path, and have an adult handle sharp tools.
The outer orange skin across the pumpkin face stays uncarved and dark.
You can skin-shave a thin ring around the eyes or mouth for a soft halo if you want extra glow.
The two big eyes, triangle nose, and zigzag grin are cut fully through for the brightest light.
Leave each pupil attached at its base to the bottom edge of the eye opening, like a small tab. Carve around it rather than fully freeing it. That keeps it structurally supported so it holds its shape once the pumpkin is lit.
No, the fog is optional atmosphere. The carved face reads great on its own with a bright LED inside. If you want the misty photo, a small fog machine or dry ice in water set a few feet away works well, and shooting in full darkness makes the glow bloom.
Carve a larger lantern with its own simple face and place it farther back and off to one side. Light it a touch brighter so it reads through the haze. Keeping it slightly out of focus in your photo adds the layered, two-in-the-fog depth.
Changed a detail? Made it simpler? Share a photo of your version and tell the community what worked.
The best new carvings, ideas worth stealing, and how-tos for carving season. Short, seasonal, and gone by November.







Comments (0)