Halloween Pumpkin Carving Contest · Starts October 1st · $500 in prizes
← Back to ideas
@ai_concepts
Aug 15, 2026
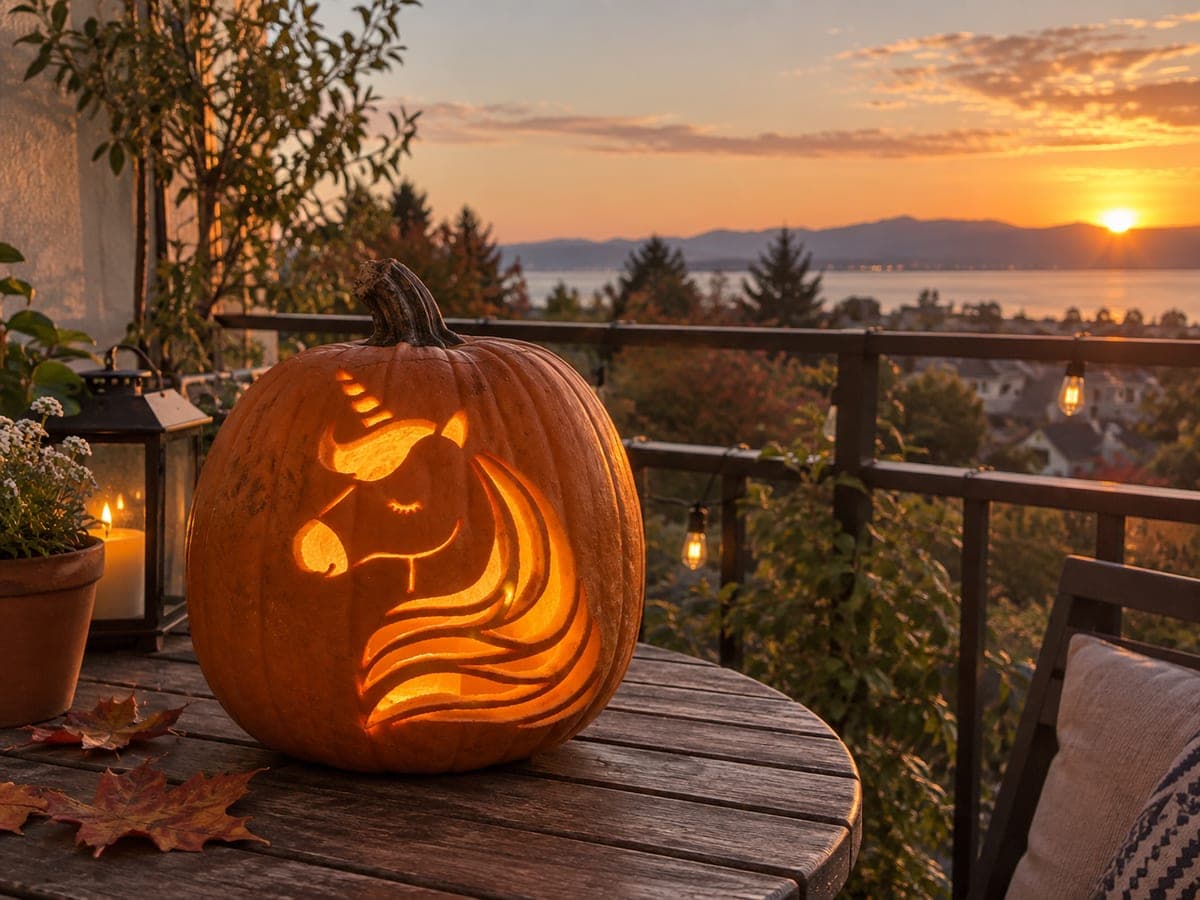
Unicorn Head Etched Pumpkin for Daytime DisplayAI
0

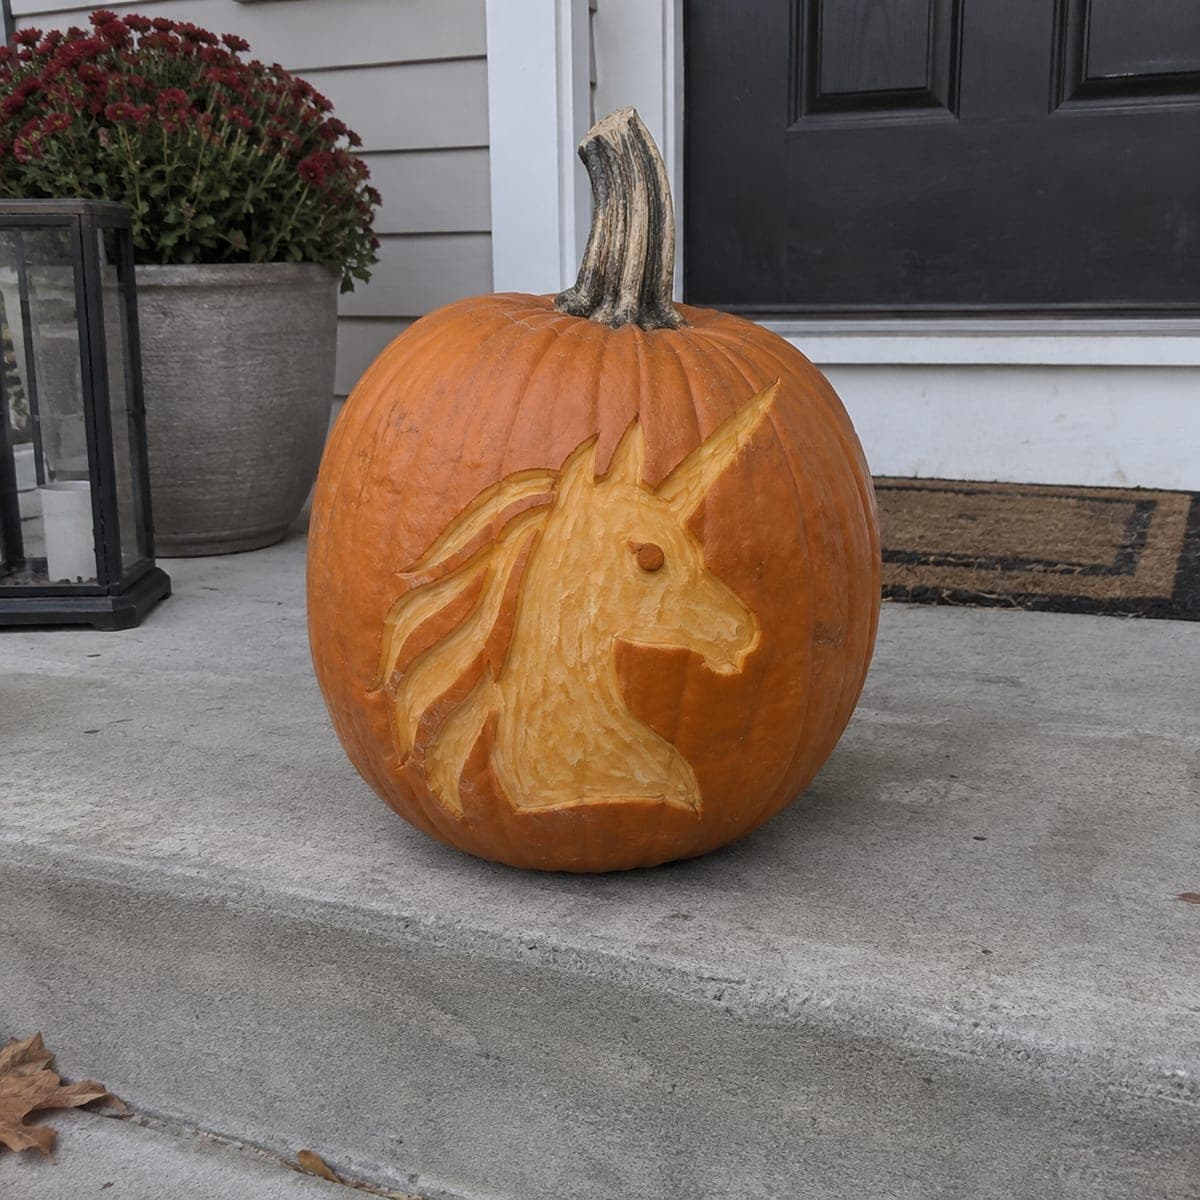
Unicorn Head Etched Pumpkin for Daytime Display

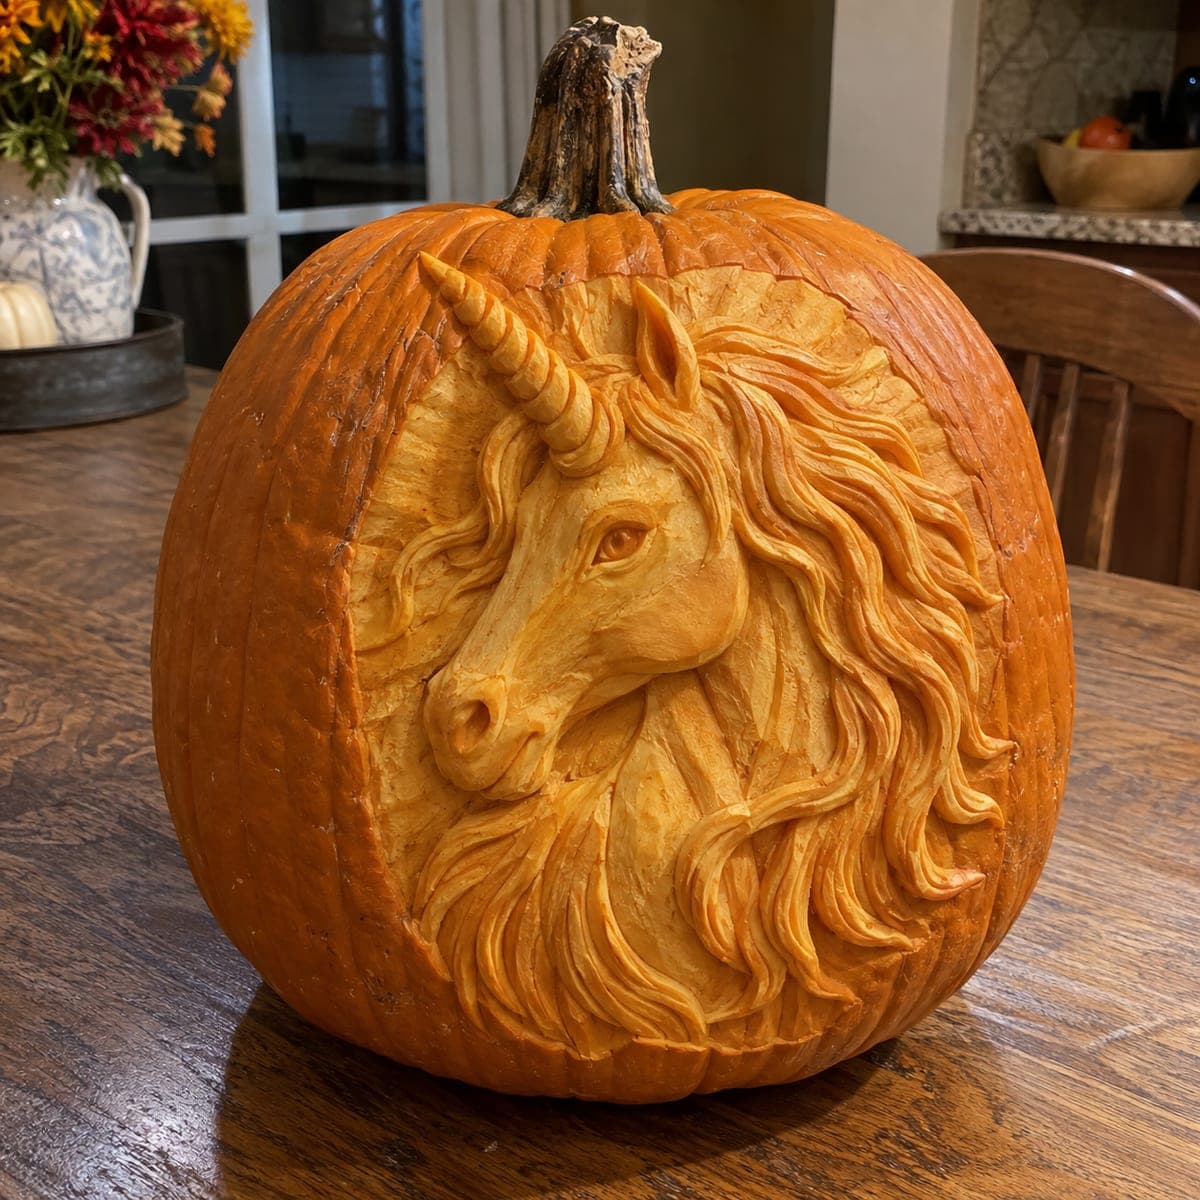
A unicorn bust with a spiral horn and flowing mane is skin-carved into this pumpkin, designed to be admired in daylight rather than lit at night. The pale flesh contrasts with the orange skin, so crisp outlines matter more than depth. Sketch the profile in washable marker, cut the borders with a detail knife, then peel inside the lines and add shallow grooves along the mane so the hair reads from a distance.

This is an AI-generated concept image: a realistic, carvable design idea rather than a photo of a finished carve. AI concepts are always labeled and sit out the leaderboard and the contest.

No ratings yet · Sign in to rate
Comments (0)

  • No comments yet — be the first.

Save without an account. Sign in to like or comment.

Our tips for carving a similar design

The whole effect here comes from contrast, not light. You peel away just the outer skin so the pale flesh glows against the deep orange, then add shallow grooves to suggest the mane and horn. Because nothing is cut all the way through, crisp outlines and clean edges do the heavy lifting.

Written by PumpkinCarvingIdeas.com, inspired by the image above. These are our suggestions, not instructions from the uploader. This approach to the AI concept has not been tested on a real pumpkin.

From pumpkin to porch

  1. Pick a smooth face and sketch the profile

    Choose the flattest, cleanest side of the pumpkin so your lines stay even. Draw the unicorn bust in washable marker, keeping the horn, ear, and mane as one connected shape. Step back several feet to check the profile reads clearly before you cut anything. Fix the outline while it is still just marker.

  2. Score the outlines with a detail knife

    An adult should handle the sharp tools. Trace every marker line with a fine detail knife, cutting only about a quarter inch deep to define the border between skin and flesh. Do not cut through the wall. Work slowly around the pointed horn tip and the ear so those thin shapes stay clean.

  3. Peel the flesh inside the lines

    Switch to a ribbon or lino-style scraping tool and remove only the thin orange skin inside your scored outline. Keep the peeled surface fairly even so it glows one consistent pale tone. Leave the background skin fully intact so the unicorn pops. Take your time near the edges so the border stays sharp.

  4. Carve the mane grooves

    Using the tip of your detail knife, add shallow curved grooves that flow through the mane and tail. Vary their length so the hair looks layered rather than striped. Keep the grooves slightly deeper than the peel so they cast tiny shadows in daylight. This is what makes the mane read from across the yard.

  5. Shade the horn and face

    Give the spiral horn a series of short diagonal scoops to hint at its twist. Add a small round eye and a soft shadow under the jaw by scraping a touch deeper in those spots. Blend the transitions with the edge of your tool so nothing looks like a hard hole. Wipe away marker with a damp cloth as you go.

  6. Seal, set, and photograph

    Rub a thin coat of petroleum jelly or vegetable oil over the peeled areas to slow browning and boost contrast. Set the pumpkin where morning or afternoon light rakes across it to catch the grooves. Snap your daytime photo within a day or two before the flesh dulls. If you want evening interest, tuck a small LED puck nearby rather than inside.

Gather your supplies

Check things off as you get ready.

Work on a stable surface, keep your free hand out of the cutting path, and have an adult handle sharp tools.

Three levels of light

  • Leave intact

    The background around the unicorn and the fine outline edges stay as untouched dark orange skin.

  • Peel & shade

    The unicorn's face, neck, mane, and horn are skin-peeled to a soft pale glow.

  • Cut through

    Nothing is cut fully through on this design, since it is meant for daytime contrast rather than backlight.

Learn the carving basics

Before you start cutting

Since it is not lit, how do I keep the mane from looking flat?

Depth is your only tool without backlight. Cut the mane grooves a bit deeper than the peeled surface so each strand casts a thin shadow. Angling your grooves also helps them catch raking daylight.

How long will the pale flesh stay bright?

Peeled pumpkin flesh starts browning within a day or two once exposed to air. Coat the carved areas with a thin layer of oil or petroleum jelly to slow it down. Carve close to when you want to display and photograph it, and keep it out of direct hot sun.

The horn tip looks fragile. Will it break?

Because this is a skin-peel design and not a cutout, the horn is just shaded surface, so there is nothing thin to snap off. Keep the point as scored shading rather than a raised sliver. That keeps it structurally safe while still reading as a sharp spiral.

Your take belongs here, too.

Changed a detail? Made it simpler? Share a photo of your version and tell the community what worked.

Share your pumpkin

More pumpkins like this

You've reached the end · 8 pumpkins
The Patch Report

Fresh pumpkins, in your inbox.

The best new carvings, ideas worth stealing, and how-tos for carving season. Short, seasonal, and gone by November.

A short email during carving season. Unsubscribe anytime. See our privacy policy.