Halloween Pumpkin Carving Contest · Starts October 1st · $500 in prizes
← Back to ideas
@ai_concepts
Jul 16, 2026
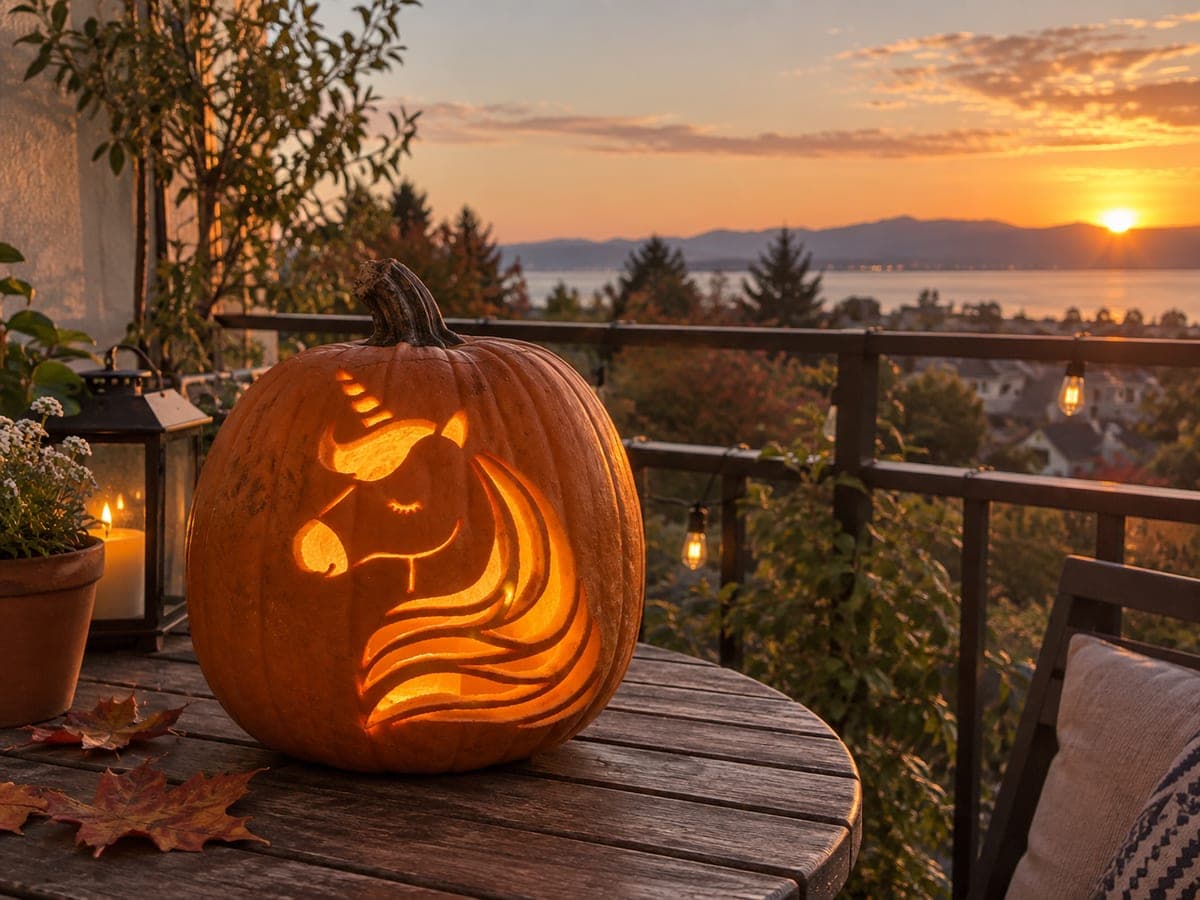
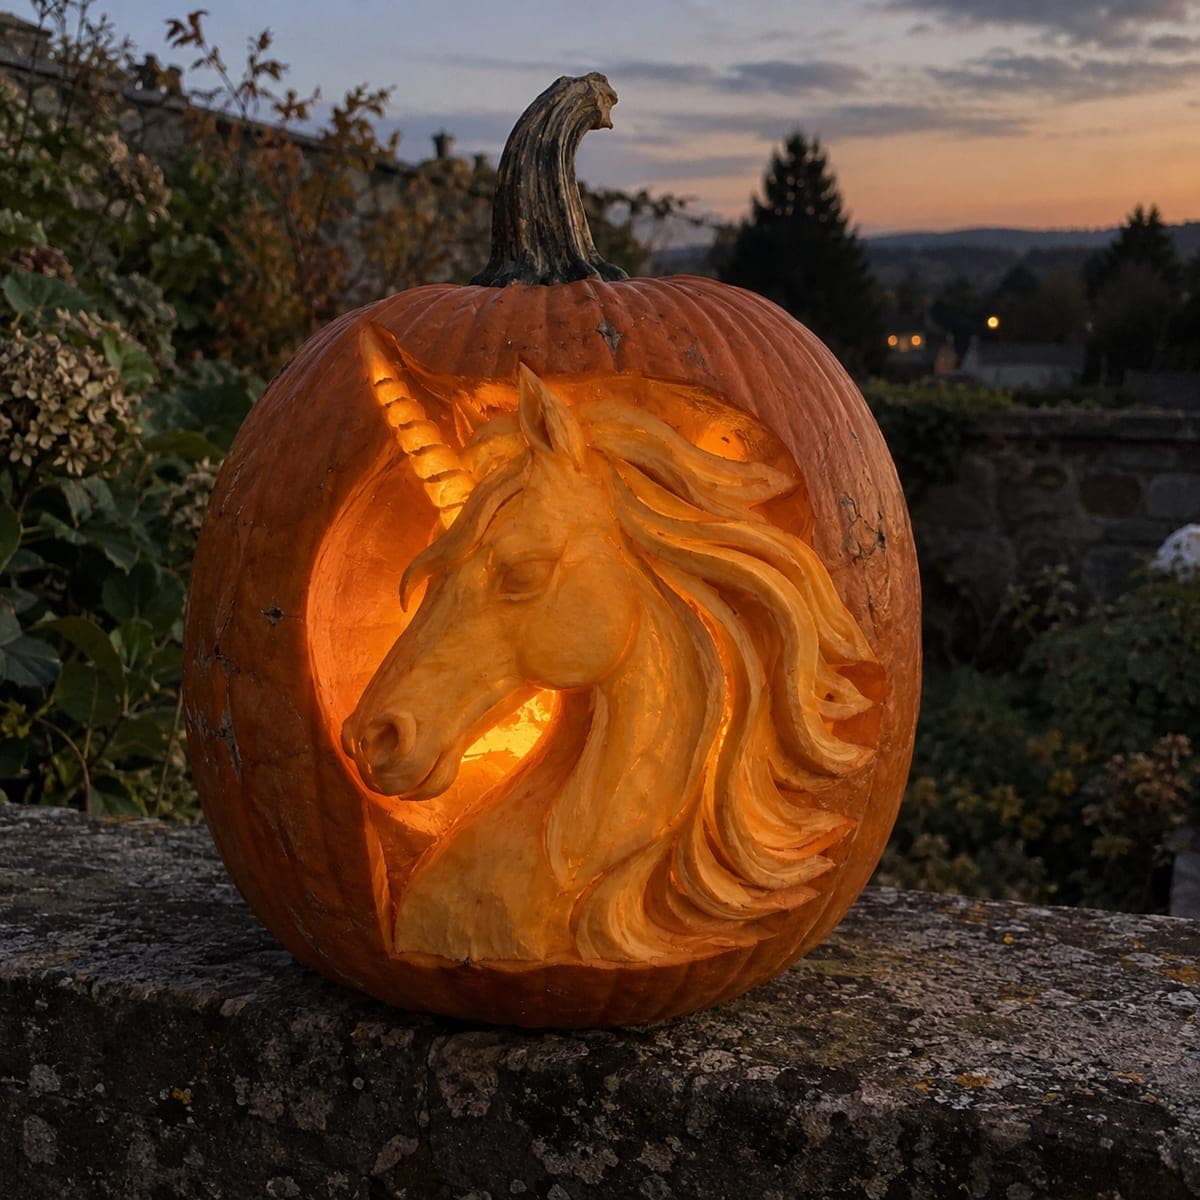
Flowing Mane Unicorn Relief Carved PumpkinAI
0

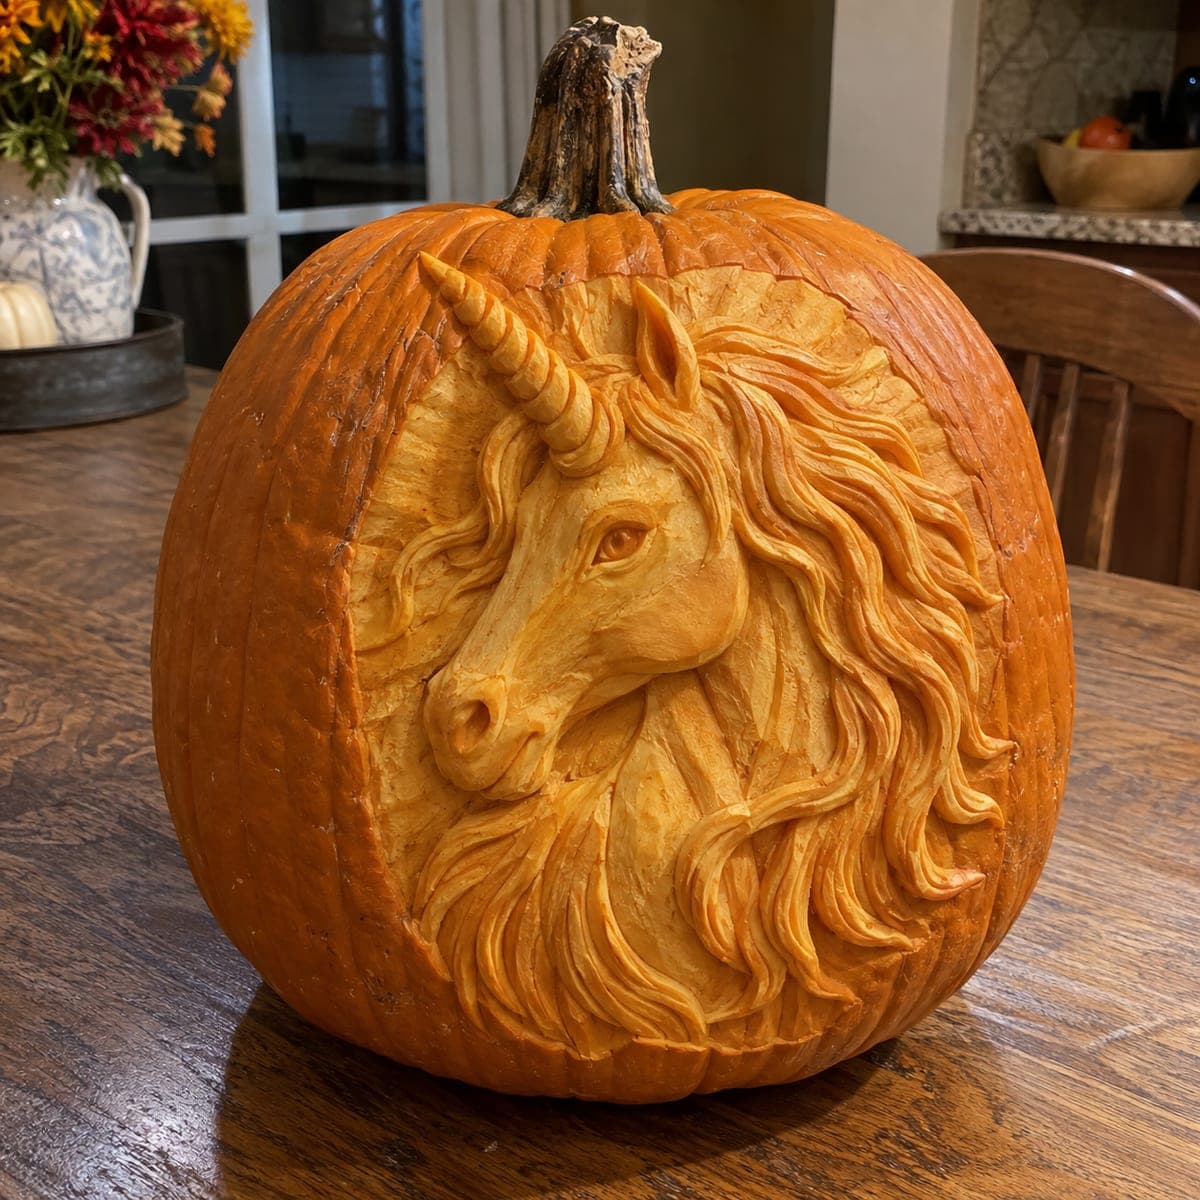
Flowing Mane Unicorn Relief Carved Pumpkin

A unicorn with a spiraled horn tosses its head inside a carved frame, its mane streaming around the pumpkin in long sculpted waves. The portrait sits in a recessed panel, so the first job is lowering the background before the head and neck are modeled in the round. Ribbon tools handle the sweeping mane strands, and a final smoothing pass makes the muzzle look polished. A dream project for unicorn lovers and fantasy-themed parties.

This is an AI-generated concept image: a realistic, carvable design idea rather than a photo of a finished carve. AI concepts are always labeled and sit out the leaderboard and the contest.

No ratings yet · Sign in to rate
Comments (0)

  • No comments yet — be the first.

Save without an account. Sign in to like or comment.

Our tips for carving a similar design

The core trick here is relief sculpting: you lower a framed background so the unicorn head and mane can be modeled in raised layers rather than cut all the way through. Since this is an AI concept image and no real pumpkin exists, treat it as a design you could recreate by carving into the shell wall, not by hollowing openings. Plan for the head to sit forward with the mane sweeping back in stacked ribbons of varying depth.

Written by PumpkinCarvingIdeas.com, inspired by the image above. These are our suggestions, not instructions from the uploader. This approach to the AI concept has not been tested on a real pumpkin.

From pumpkin to porch

  1. Pick a thick-walled pumpkin and prep it

    Choose a large pumpkin with a smooth, flat-ish face and the thickest wall you can find, since relief work carves into the shell without punching through. Cut a lid or a bottom access hole and scrape the inside wall on the carving side down to an even thickness. Leave that wall thick, around one to one and a half inches, so you have material to sculpt into. Wipe the surface dry before transferring your design.

  2. Transfer the design and score the frame

    Tape your unicorn stencil over the flat face and poke or trace the outer frame, the head outline, and the main mane sections. Score along the outer frame line first with a shallow detail knife so you have a clean border to work toward. Keep the horn, ear tips, and muzzle marked clearly since these are your high points. Do not cut deep yet, just establish the map.

  3. Lower the background to set the panel

    Using a loop or ribbon tool, shave away the skin and flesh in the recessed area around the unicorn until the background sits noticeably lower than the head. Work evenly and check your depth often so the panel floor stays flat and the head reads as raised. Leave a little extra height wherever the mane will later flow over the background. This lowering step is what makes the portrait pop, so take your time.

  4. Rough in the head and neck volumes

    Now shape the big forms: round the cheek, build up the muzzle, and slope the forehead down toward the nose. Keep the horn and ears as the tallest points and carve the eye socket as a gentle recess. Think in large planes first, then soften the transitions. Step back often to make sure the head still feels three dimensional from across the room.

  5. Sculpt the mane and horn detail

    Switch to ribbon and small loop tools to carve the mane as long overlapping waves, letting some strands sit higher than others for depth. Wrap the outermost strands around the curve of the pumpkin so the mane streams past the frame. Cut the spiral groove of the horn last among the details, keeping the ridge attached and supported so it does not snap. Vary your groove depth to catch shadow.

  6. Smooth, shade, and light it

    Do a final smoothing pass on the muzzle and cheek with a clean loop tool so those areas look polished against the textured mane. Peel a thin layer of skin on select mane strands and the forehead to add a soft glow tier. Set a battery LED puck inside, never a candle, and photograph it in a dim room to show off the relief shadows. Mist the cut surfaces and refrigerate between showings to slow browning.

Gather your supplies

Check things off as you get ready.

Work on a stable surface, keep your free hand out of the cutting path, and have an adult handle sharp tools.

Three levels of light

  • Leave intact

    The untouched outer shell around the frame and the darkest recesses of the mane stay dark for contrast.

  • Peel & shade

    Skin-peeled areas on the forehead, muzzle, and raised mane strands give a soft dim orange glow.

  • Cut through

    Reserve full cutouts for tiny accent gaps between the outermost mane tips if you want bright highlights, cut last and sparingly.

Learn the carving basics

Before you start cutting

Do I cut all the way through anywhere on this design?

Mostly no. This is a relief carving, so the head, mane, and frame are shaped into the pumpkin wall rather than cut through. You only need thin cutouts if you want a few bright light gaps between outer mane tips, and those should be cut last.

How do I keep the spiral horn from breaking?

Carve the horn as one of your final details and keep it as a raised ridge connected to the surface, not a free-standing spike. Cut the spiral grooves shallow and support the horn with your off hand while you work. On a real pumpkin the flesh is soft, so gentle passes protect the ridge.

Why does the wall need to be so thick?

Relief sculpting removes material in layers to build depth, so a thin wall would blow through to the hollow quickly. A wall of about one to one and a half inches gives you room to lower the background and still model the head. Scrape the inside evenly before you start carving the face.

Your take belongs here, too.

Changed a detail? Made it simpler? Share a photo of your version and tell the community what worked.

Share your pumpkin

More pumpkins like this

You've reached the end · 8 pumpkins
The Patch Report

Fresh pumpkins, in your inbox.

The best new carvings, ideas worth stealing, and how-tos for carving season. Short, seasonal, and gone by November.

A short email during carving season. Unsubscribe anytime. See our privacy policy.