Halloween Pumpkin Carving Contest · Starts October 1st · $500 in prizes
← Back to ideas
@ai_concepts
Jul 15, 2026
Viking Warrior Helmet Cutout Jack-O-LanternAI
0

Viking Warrior Helmet Cutout Jack-O-Lantern

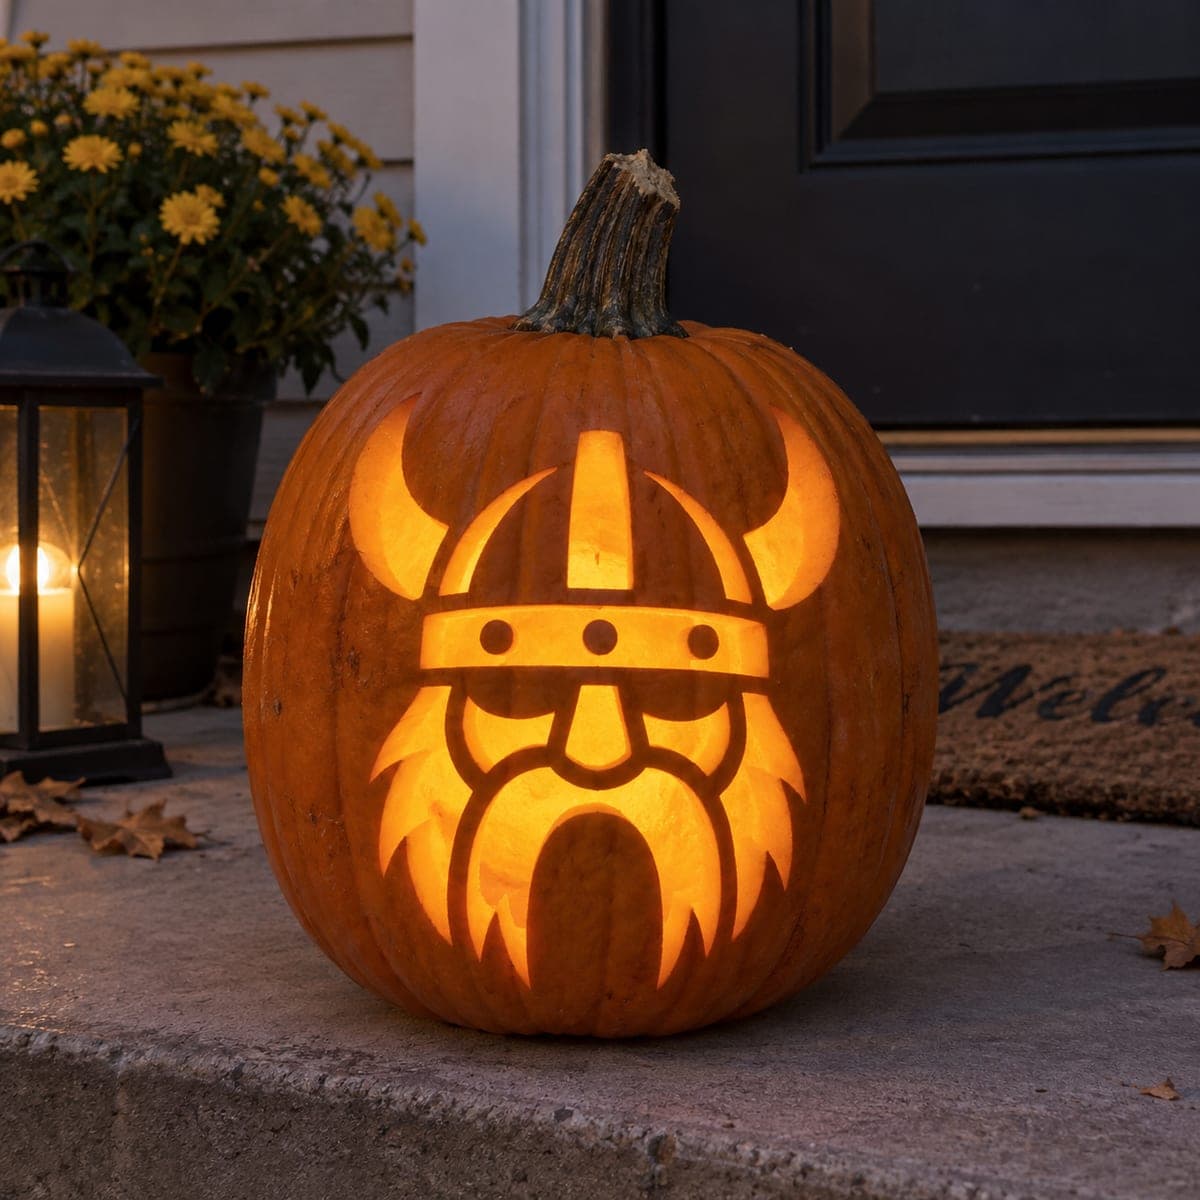
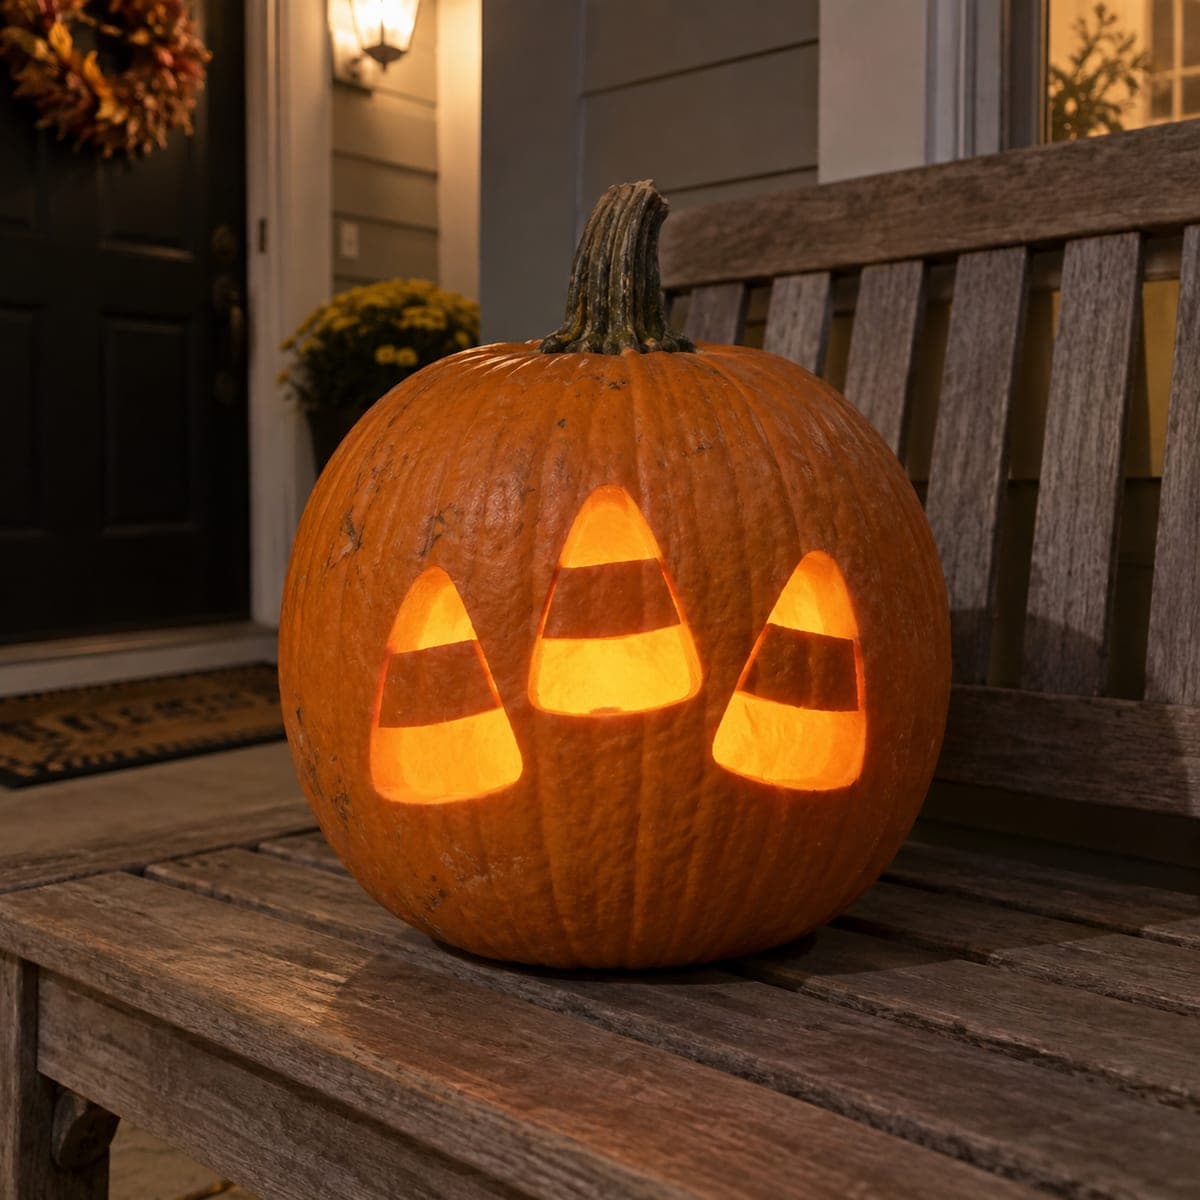
A cartoon Viking face with a horned helmet, dot eyes, and a flowing beard is cut through a pumpkin in a bold, graphic style that glows warmly on a front doorstep at night. The simplified linework keeps the design accessible for intermediate carvers while the distinctive horned helmet and beard make the character instantly recognizable. This funny pumpkin carving idea is a crowd-pleaser that works for all ages and stands out among traditional faces on the porch. Use a thin blade or detail knife to cut the beard flame shapes carefully, saving the helmet as the last element to preserve structural integrity.

This is an AI-generated concept image: a realistic, carvable design idea rather than a photo of a finished carve. AI concepts are always labeled and sit out the leaderboard and the contest.
No ratings yet · Sign in to rate

Comments (0)

  • No comments yet — be the first.

Save without an account. Sign in to like or comment.

Our tips for carving a similar design

The core trick here is treating the whole face as one connected cutout, where the dark pumpkin skin between shapes does the drawing for you. You leave narrow strips of skin as the helmet band, nose line, and beard outlines, then cut through everything else so the glow reads as a friendly Viking. Since this is a concept image, plan the shapes so every skin strip stays anchored to solid pumpkin on both ends.

Written by PumpkinCarvingIdeas.com, inspired by the image above. These are our suggestions, not instructions from the uploader. This approach to the AI concept has not been tested on a real pumpkin.

From pumpkin to porch

  1. Pick a tall pumpkin and open the back

    Choose a large pumpkin with one broad, fairly flat face so the wide helmet and beard have room. Cut a hole in the back rather than the top, which keeps the front wall unbroken and easier to carve. Scrape the inside of the carving wall down to about one inch thick so light passes through cleanly. A thinner wall also makes the fine beard cuts far easier to control.

  2. Transfer the Viking pattern

    Print the horned helmet face at a size that fits inside the flattest area, then tape it firmly in place. Poke closely spaced holes along every line with a pin or awl to transfer the outline onto the skin. Pay special attention to the small dots on the helmet band and the flame points of the beard so you can see them once the paper comes off. Connect the dots lightly with a washable marker if the pattern is hard to read.

  3. Score and peel the skin lines

    Before cutting anything through, decide which lines stay as raised skin: the helmet band, the vertical nose bar, the mustache, and the outer beard edges. Lightly score along both sides of those strips so they do not tear. Peeling the top layer of skin off nearby small areas gives a dim glow that separates the face from the helmet. Keep these strips connected at both ends to the surrounding pumpkin for strength.

  4. Cut the eyes, helmet dots, and interior first

    Use a small detail saw or thin blade to remove the interior openings first, starting with the smallest ones like the two dot eyes and the rivet dots on the band. Cutting small shapes early, while the wall is still mostly solid, keeps the pumpkin rigid and less likely to crack. Work from the center outward and let the removed pieces fall inward or gently push them out. Take your time on the curved horn openings so the tips stay crisp.

  5. Save the horns and beard flames for last

    The wide horn cutouts and the large flame gaps of the beard remove the most material, so cut them near the end to preserve structure. Make long, slow strokes and support the pumpkin wall with your free hand as each big piece comes free. If a beard point feels flimsy, leave a slightly wider skin bridge rather than cutting it razor thin. Clean up any ragged edges from the inside with the tip of your blade.

  6. Light it and set it on the step

    Drop in one or two battery LED lights, warm white or amber, and never a real candle near this many open cuts. Set the pumpkin on the doorstep and rotate it until the horns and eyes glow evenly. If one area looks dim, thin the inside wall behind it a little more. Snap your night photo once it is fully dark for the strongest contrast.

Gather your supplies

Check things off as you get ready.

Work on a stable surface, keep your free hand out of the cutting path, and have an adult handle sharp tools.

Three levels of light

  • Leave intact

    The helmet band, vertical nose bar, mustache, and outer beard outlines stay as dark, untouched skin so the linework reads.

  • Peel & shade

    Shallow peeled patches around the face and inside the helmet give a soft mid glow that sets the character apart from the background.

  • Cut through

    The dot eyes, rivet dots, horn shapes, and the open gaps between the beard flames cut fully through for the brightest light.

Learn the carving basics

Before you start cutting

How do I keep the long beard points from breaking off?

Treat the beard as skin outlines with open gaps between the points rather than free-floating spikes. Keep each flame tip attached to solid pumpkin at its base and avoid cutting the strips thinner than about a quarter inch. If one feels weak, widen it slightly, since a sturdy point still reads well once lit.

The horns are wide openings. When should I cut them?

Save the horns and the large beard gaps for last, after all the small dots and eyes are done. Removing big pieces early makes the wall flex and crack, so cutting them at the end keeps the pumpkin rigid while you work. Support the wall with your free hand as each horn piece comes free.

This is a concept image, so how do I make a real one look the same?

No physical pumpkin exists here, so treat the picture as a target and adapt the shapes to real pumpkin structure. Keep the helmet band and nose as connected skin bridges, and thin the inside wall to about an inch so the glow is even. Pick a pumpkin whose flat face matches the width of the horned helmet for the closest match.

Your take belongs here, too.

Changed a detail? Made it simpler? Share a photo of your version and tell the community what worked.

Share your pumpkin

More pumpkins like this

You've reached the end · 8 pumpkins
The Patch Report

Fresh pumpkins, in your inbox.

The best new carvings, ideas worth stealing, and how-tos for carving season. Short, seasonal, and gone by November.

A short email during carving season. Unsubscribe anytime. See our privacy policy.