Halloween Pumpkin Carving Contest · Starts October 1st · $500 in prizes
← Back to ideas
@ai_concepts
Sep 25, 2026
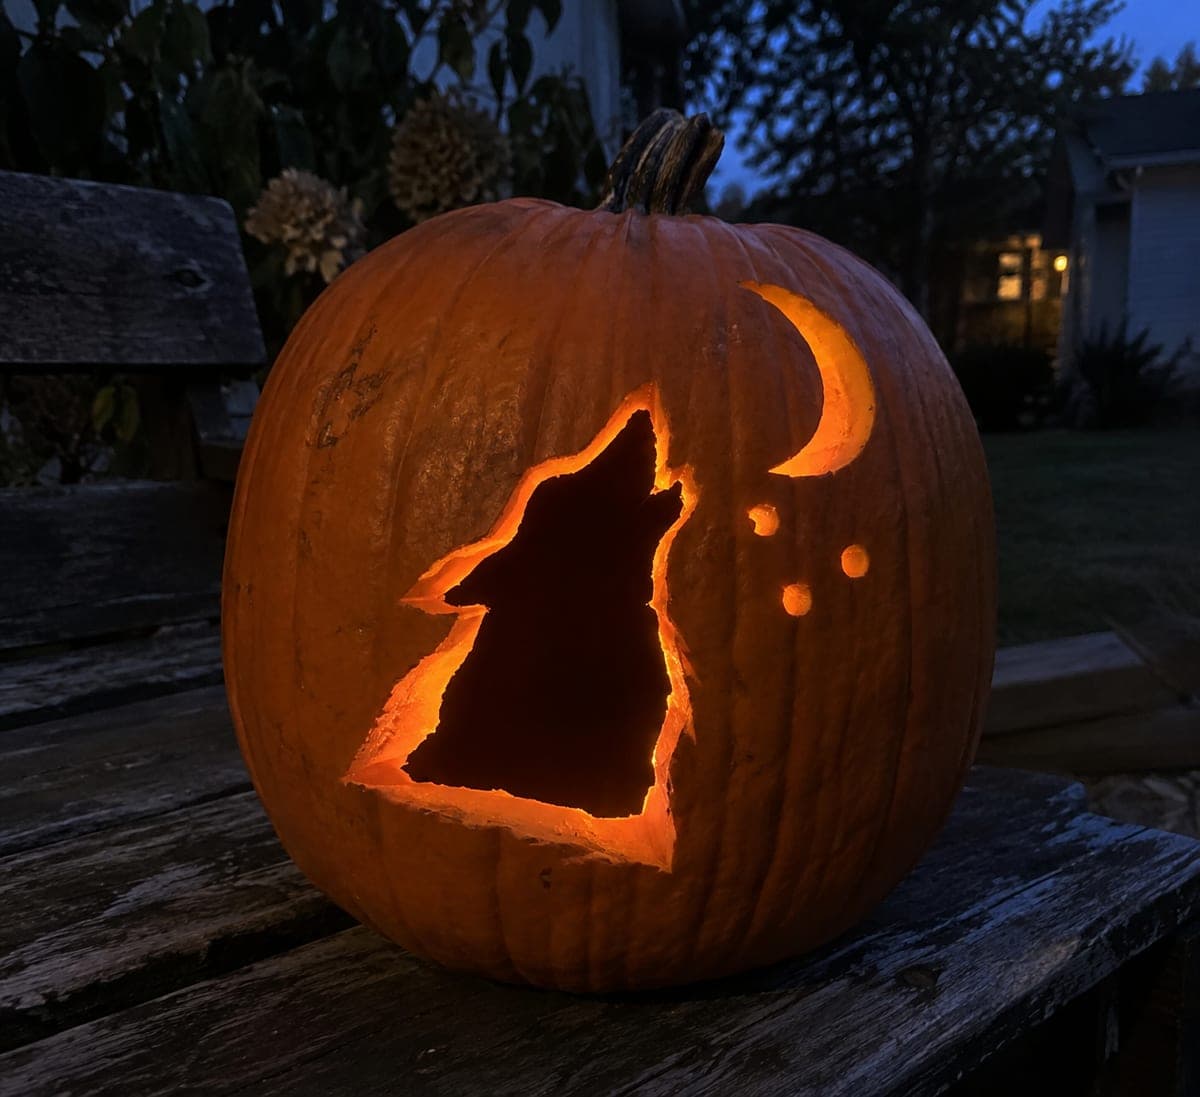
Wolf Pumpkin Carving with Moon and Dot AccentsAI
0

Report this carving

Tell us what is wrong. Reports are private.

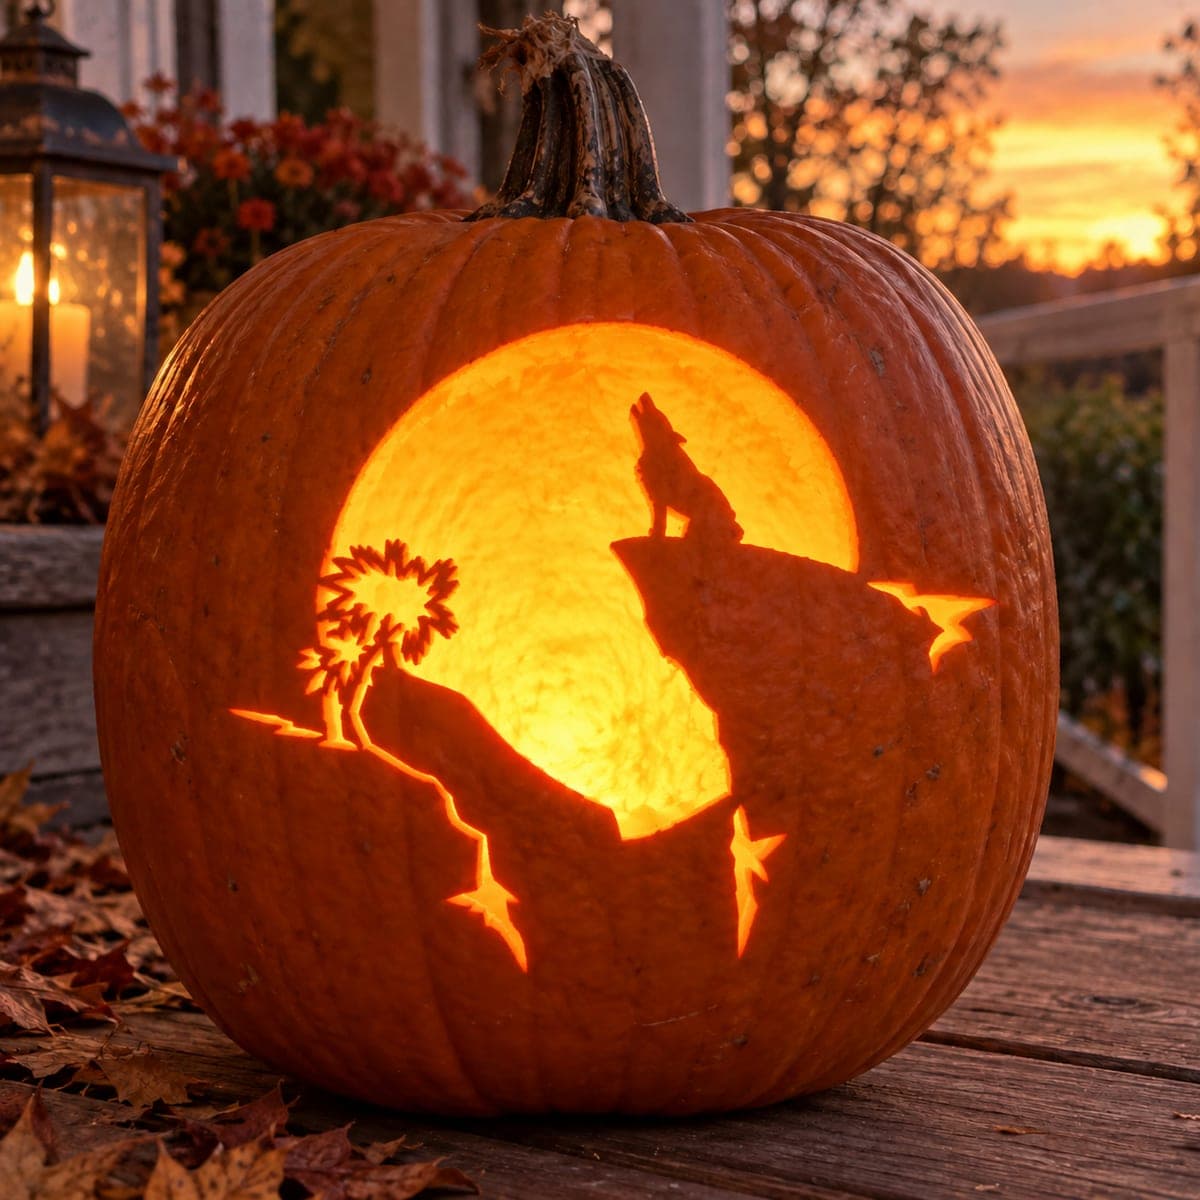
Wolf Pumpkin Carving with Moon and Dot Accents

A howling-wolf head aperture is cut through the shell in this intermediate wolf pumpkin carving, with a separate shallow backed moon shape and small dot accents adding atmosphere around the main figure. The moon and dots stay on solid rind backing, so they read as texture by day and glow softly at night. Cut the large head aperture first, then scoop the moon at roughly half the rind's depth. Pairing this with an amber LED gives the moon a warm golden hue.

No ratings yet · Sign in to rate

Comments (0)

  • No comments yet — be the first.

Save without an account. Sign in to like or comment.

Our tips for carving a similar design

The wolf head aperture carries all the primary light, and a separately backed moon shape and dot accents add a secondary, softer atmospheric layer around it. The moon stays on solid rind at roughly half depth, so it glows as a dimmer warm shape against the dark shell without requiring any structural bridging. Cutting the large head aperture first establishes the design's anchor before the detail work begins.

From pumpkin to porch

  1. Hollow to a consistent depth

    Scoop the pumpkin to a half-inch wall. In the area where the moon will sit, the backing work goes to roughly half that depth, so a consistent starting thickness gives you predictable control over the moon's final glow intensity.

  2. Transfer all elements

    Pin-punch the wolf head outline, the moon position, and the dot accent positions. Mark the head as a through-cut and the moon and dots as backed relief in a second color. Confirm the moon is entirely within the solid rind outside the wolf head boundary.

  3. Cut the wolf head aperture

    Saw around the full wolf head outline as a single continuous through-cut. Work slowly around the ears and the chin, which tend to be the tightest curves on a wolf head shape. Pop the piece free from inside once the perimeter is complete.

  4. Carve the backed moon

    Use a wide detail knife or a shallow gouge to scoop the moon shape to approximately half the wall thickness. Work around the outline of the crescent carefully, keeping the depth as even as possible across the whole shape. A crescent with consistent depth glows with uniform brightness.

  5. Add dot accents

    Use a drill bit or a punch tool to scoop the small dot accents to half wall depth. Even spacing and consistent depth make the dots read as stars or atmospheric scatter rather than random marks. Alternatively, if you prefer a brighter dot accent, punch them all the way through.

  6. Light and evaluate

    Insert an amber LED candle and view in a darkened room. The wolf head should glow brightly against the dark surrounding rind, and the backed moon should glow at roughly half the wolf's intensity, giving the design a genuine sense of depth. Adjust the LED position until the contrast feels right.

Written with AI to match this design

Gather your supplies

Check things off as you get ready.

Work on a stable surface, keep your free hand out of the cutting path, and have an adult handle sharp tools.

Three levels of light

  • Leave intact

    The solid rind surrounding the wolf and moon, providing the dark background

  • Peel & shade

    Backed crescent moon and dot accents at approximately half wall depth

  • Cut through

    The full howling-wolf head aperture at full glow

Learn the carving basics

Before you start cutting

How deep should the backed moon be to glow visibly without looking washed out?

Half the wall thickness is the sweet spot for most pumpkins. Thinner than a quarter of the wall and the glow disappears into the dark rind. Deeper than two-thirds and it may look almost as bright as a through-cut, which loses the atmospheric contrast with the wolf aperture.

The backed moon has an uneven glow with bright spots and dark areas. How do I fix it?

Uneven glow usually means the backing depth varies across the shape. Re-enter the moon area with a gouge and take one gentle pass across any darker patches to bring them to the same depth as the brighter spots. Check progress in a dark room after each pass.

Can I add more dot accents to fill in the background?

Yes, additional dot accents anywhere in the solid rind can suggest a starfield effect. Keep them small and consistent in depth so they read as scattered stars rather than damage. Fewer, well-placed dots often look better than a dense field, so add gradually and step back to assess.

Your take belongs here, too.

Changed a detail? Made it simpler? Share a photo of your version and tell the community what worked.

Share your pumpkin

More pumpkins like this

You've reached the end · 8 pumpkins
The Patch Report

Fresh pumpkins, in your inbox.

The best new carvings, ideas worth stealing, and how-tos for carving season. Short, seasonal, and gone by November.

A short email during carving season. Unsubscribe anytime. See our privacy policy.