Halloween Pumpkin Carving Contest · Starts October 1st · $500 in prizes
← Back to ideas
@ai_concepts
Sep 25, 2026
Intermediate Rat Pumpkin Stencil with Snout DetailAI
0

Report this carving

Tell us what is wrong. Reports are private.

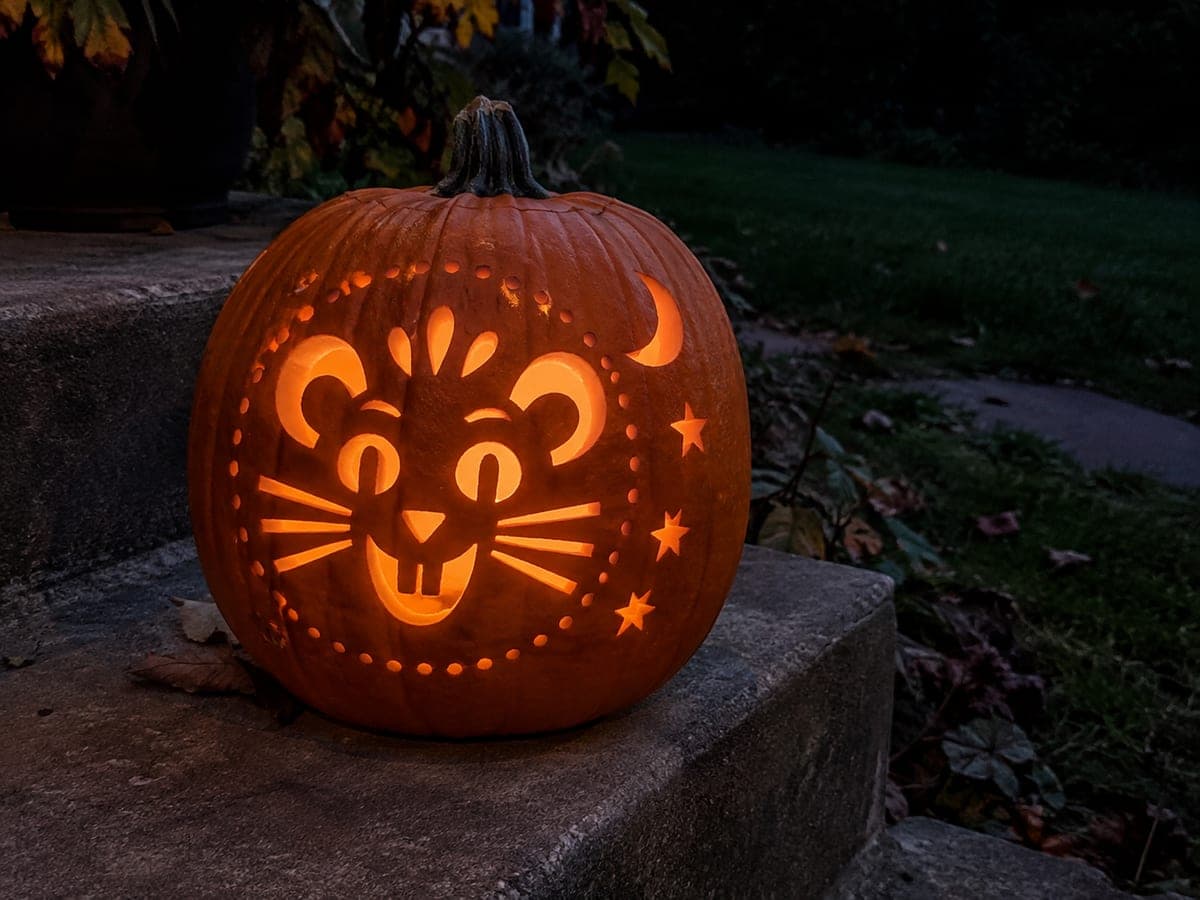
Intermediate Rat Pumpkin Stencil with Snout Detail

More apertures and finer retained features build a detailed rat face in this intermediate rat pumpkin stencil, with shallow backed contours adding snout and whisker-line dimension over fully supported rind. The long nose and rounded ear combination is what makes this design immediately recognizable. Cut the main eye and nose apertures first, then the ear shapes, before adding the fine snout contours with a detail gouge. Even indirect candlelight makes the layered snout detail visible from several feet away.

No ratings yet · Sign in to rate

Save this design for carving night, then share a photo of your own jack-o'-lantern once it's glowing.

Comments (0)

  • No comments yet — be the first.

Save without an account. Sign in to like or comment.

Our tips for carving a similar design

At medium difficulty, the rat face gains snout contours and shallow backed whisker-line marks that give the face its distinctly rodent character. The long nose and rounded ear combination is what makes this design immediately recognizable, and the backed marks that define the snout shape are the central technique challenge. Cut the main apertures first, then the ear shapes, and add the fine snout contours last with a detail gouge.

From pumpkin to porch

  1. Prep and hollow

    Hollow to 1 inch wall thickness for clean gouge work on the backed snout. A smooth interior helps the LED light pass evenly without hot spots through the backed snout zone.

  2. Transfer the stencil

    Pin-transfer all outlines and mark the backed snout and whisker areas with lighter prick pressure. Note which lines represent through-cuts and which represent surface contour marks before you start cutting.

  3. Cut the main eye and nose apertures

    Begin with the two small eye openings and the narrow nose slot. At medium level the eyes may sit closer to the snout than at easy level, so use a narrow blade to maintain accuracy near the snout's backed zone.

  4. Cut the ear apertures

    Cut each large round ear, working in a continuous stroke from the top of the circle. At intermediate level the ear roots may be slightly narrower than at easy level, so cut the base junction of each ear with extra care.

  5. Gouge the snout and whisker-line contours

    Use a fine gouge to carve the backed snout arc above the nose slot, and add short whisker-line marks on each side of the muzzle. Whisker lines work best when made with a single quick stroke in the direction the whisker would grow, lifting off at the tip.

  6. Display with indirect light

    Insert a bright LED and display in a spot where viewers can get within two feet to appreciate the snout contours. The layered snout detail is visible from several feet away, but the whisker lines reward close inspection.

Written with AI to match this design

Gather your supplies

Check things off as you get ready.

Work on a stable surface, keep your free hand out of the cutting path, and have an adult handle sharp tools.

Three levels of light

  • Leave intact

    The solid rind between ear roots, the forehead, and the jaw area stays fully dark.

  • Peel & shade

    The backed snout arc and whisker-line marks glow at a warm mid-level.

  • Cut through

    The ear apertures, eye openings, and nose slot glow at full brightness.

Learn the carving basics

Before you start cutting

How long should the backed whisker lines be to look convincing?

On a medium pumpkin (10-12 inches wide) each whisker line looks best at 1.5 to 2 inches long. Shorter lines disappear in the overall face at display distance, while lines much longer than 2 inches get close to the ear apertures and risk breaking through.

The snout backed arc is visible in daylight but disappears when the pumpkin is lit. How do I fix this?

The backed area needs to be slightly deeper to show as a visible mid-glow against the full-brightness eye and ear openings. Remove another thin layer from the snout arc with the gouge and test again. The difference between visible and invisible backed marks is often only a millimeter of depth.

Can I add a small ear-interior backed mark to suggest the ear membrane?

Yes. A small backed oval inside each ear aperture, positioned close to the inner edge, suggests the ear membrane structure. Use a fine gouge and keep the mark well within the ear opening boundary so it does not compromise the ear's structural bridges.

Your take belongs here, too.

Changed a detail? Made it simpler? Share a photo of your version and tell the community what worked.

Share your pumpkin

More pumpkins like this

You've reached the end · 8 pumpkins
The Patch Report

Fresh pumpkins, in your inbox.

The best new carvings, ideas worth stealing, and how-tos for carving season. Short, seasonal, and gone by November.

A short email during carving season. Unsubscribe anytime. See our privacy policy.