Halloween Pumpkin Carving Contest · Starts October 1st · $500 in prizes
← Back to ideas
@ai_concepts
Aug 24, 2026
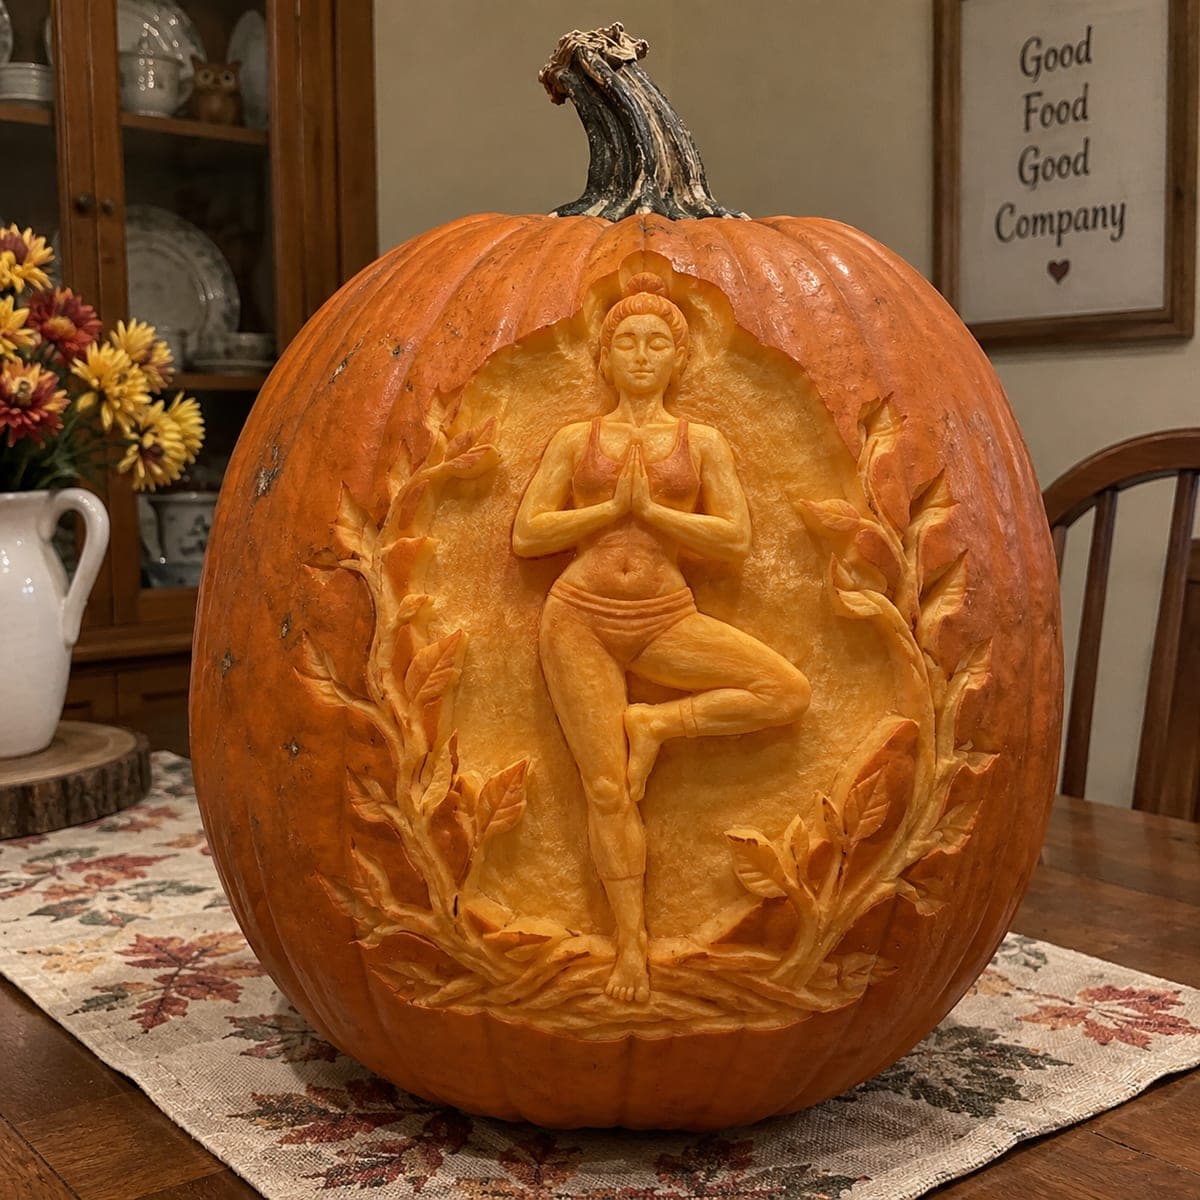
Yoga Tree Pose Relief Carved PumpkinAI
0

Yoga Tree Pose Relief Carved Pumpkin

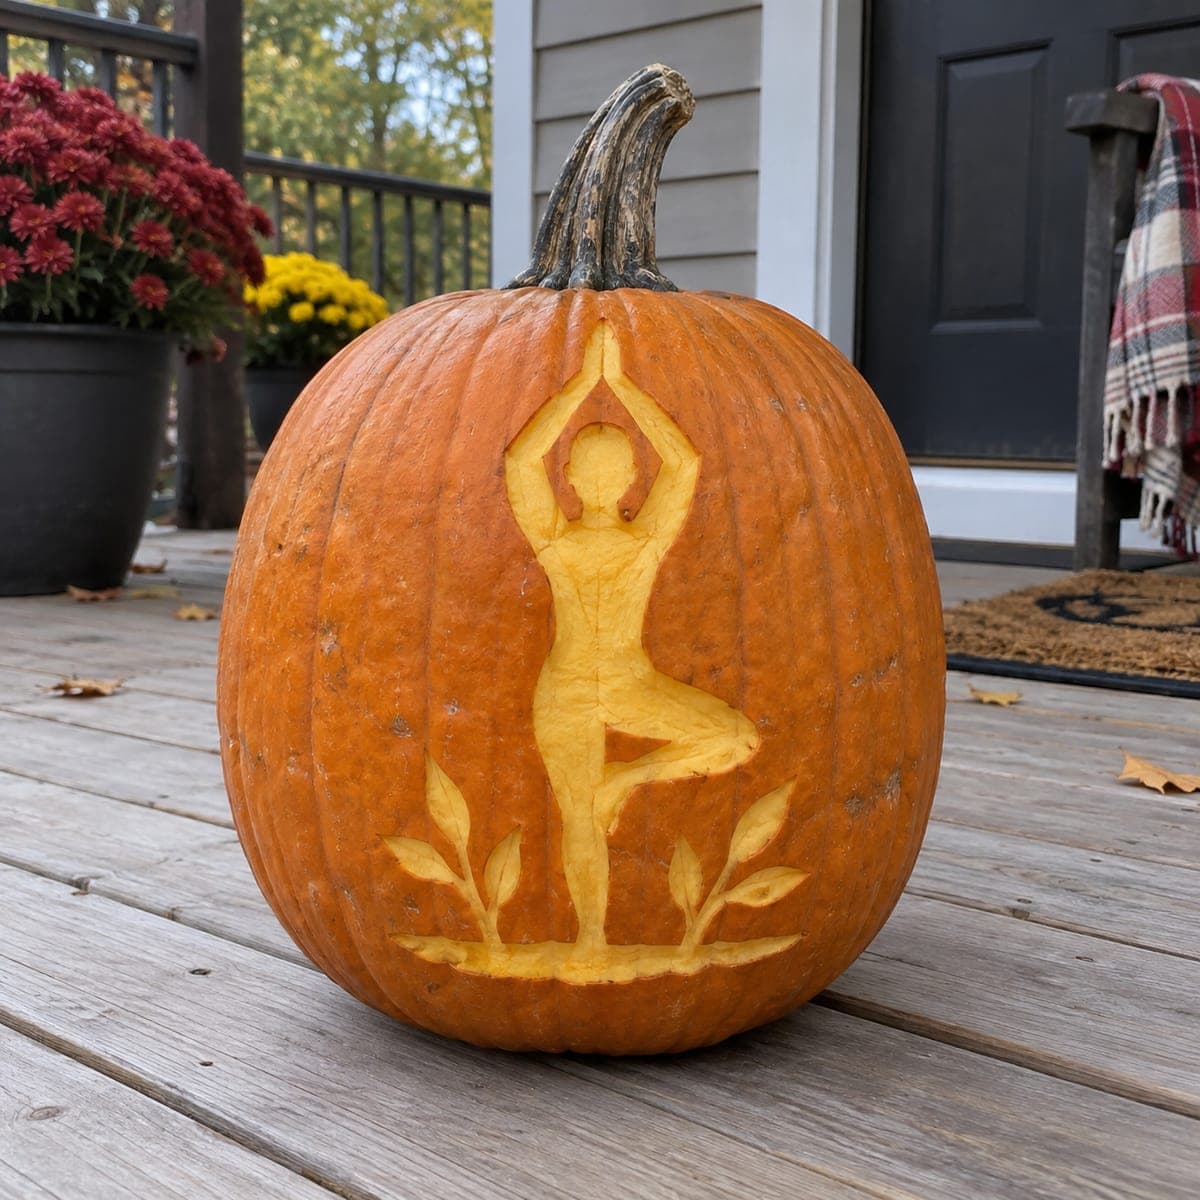
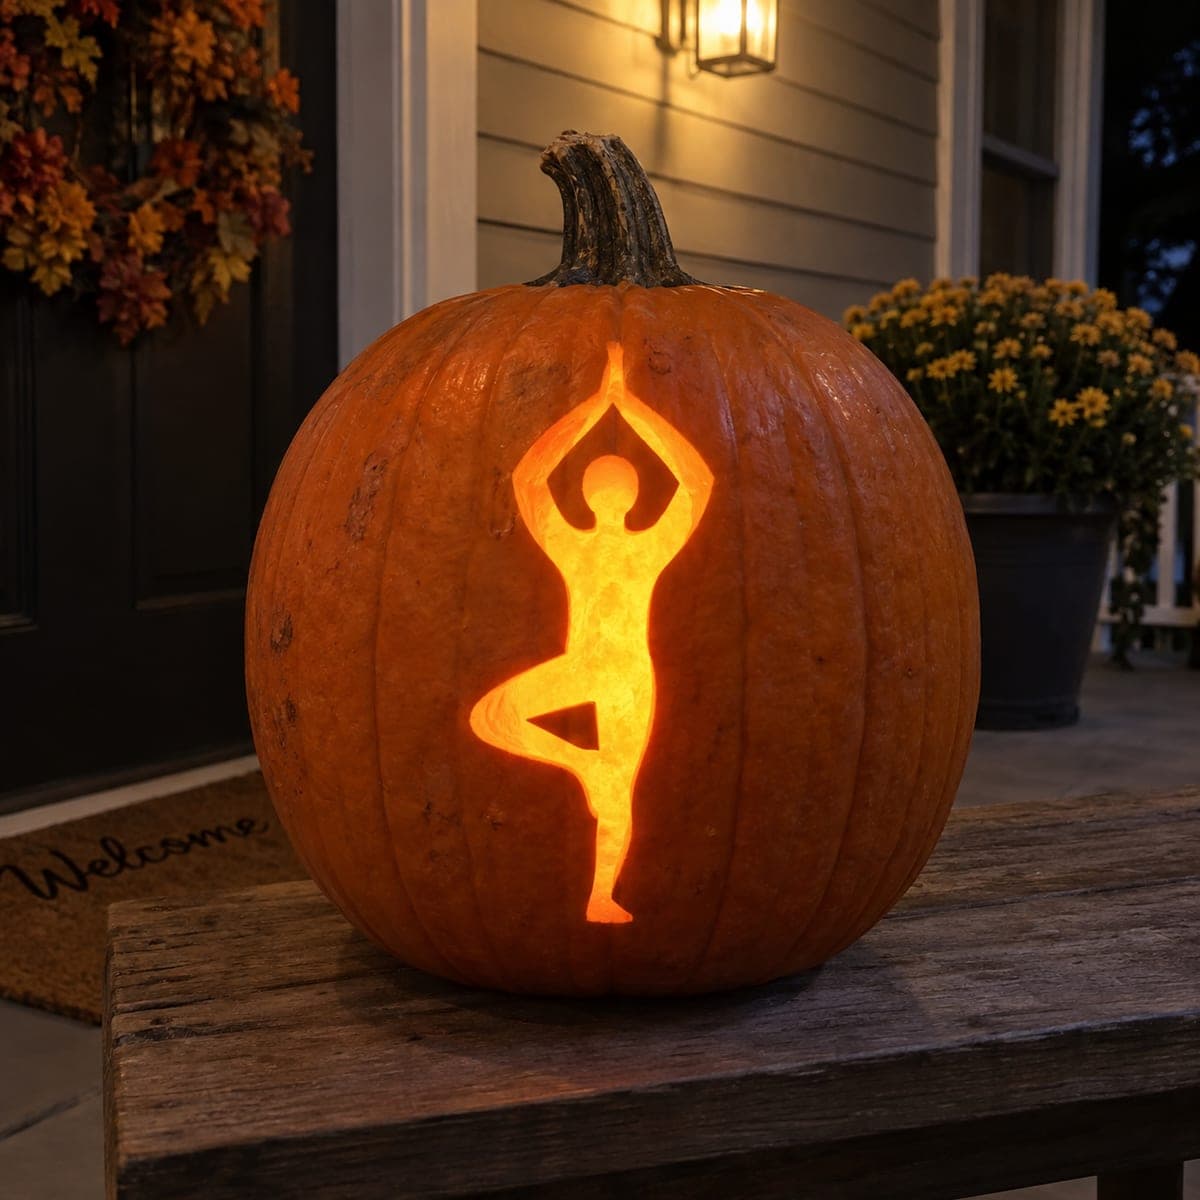
A serene figure balances in tree pose, palms pressed at heart center, inside an oval of sculpted leafy branches on this relief carved pumpkin. The figure is left proud of the surface while the background is carved away, a museum-style effect that takes loop tools and patience. Establish the recessed background depth evenly before modeling the body, and keep the carving misted and wrapped in plastic between sessions.

This is an AI-generated concept image: a realistic, carvable design idea rather than a photo of a finished carve. AI concepts are always labeled and sit out the leaderboard and the contest.

No ratings yet · Sign in to rate
Comments (0)

  • No comments yet — be the first.

Save without an account. Sign in to like or comment.

Our tips for carving a similar design

The core trick here is relief carving: instead of cutting holes, you lower the whole background and leave the figure and leaf border standing proud of the surface. You control brightness entirely by how thin you shave each area, so a lit pumpkin glows through the recessed skin while the raised body stays denser and darker. Plan it as two passes, first establishing an even recessed background, then modeling the muscles, face, and leaves.

Written by PumpkinCarvingIdeas.com, inspired by the image above. These are our suggestions, not instructions from the uploader. This approach to the AI concept has not been tested on a real pumpkin.

From pumpkin to porch

  1. Transfer the oval and figure

    Pick a tall, wide, blemish-free pumpkin and wipe it clean. Print the tree-pose figure inside its leafy oval, tape the pattern flat, and poke your outline with a transfer tool or fine awl. Mark the figure, the leaf border, and the background as three separate zones with a washable marker. Do not open the top or back, since a relief carving keeps the shell whole for strength.

  2. Score the borders before removing anything

    With a small detail knife, cut a clean vertical wall straight down along the outside of the figure and along every leaf edge. These score lines protect your raised shapes when you start scooping. Keep the blade shallow at first, no more than a quarter inch, and let adults handle all cutting. Working the outline before the field means slips run into background you plan to remove anyway.

  3. Lower the background evenly

    Switch to a ribbon or loop tool and shave the background skin away in thin, overlapping strokes until it sits an even depth below the figure. Aim for a consistent floor so the light glows uniformly behind the pose. Rotate the pumpkin often and check depth by eye against the raised edges. Stop and mist the surface if the flesh starts to feel dry or stringy.

  4. Model the figure and leaves

    Now round the body with small loop tools, rolling the edges of the arms, thigh, and torso so they curve instead of ending in flat cliffs. Shave the cheeks, collarbone, and calf muscle just slightly thinner to hint at highlights, and leave the hair bun and waistband denser to read as shadow. Give each leaf a raised central vein by carving the two halves a touch lower. Take breaks and rewrap in plastic between sessions to keep the flesh workable.

  5. Refine the shading contrast

    Walk the pumpkin to a dim room with an LED puck behind or beside it and see where it reads flat. Thin the recessed background a little more where you want a brighter halo around the figure. Leave the outer rim of skin fully untouched so the oval frame stays dark and crisp. Small differences in depth create the soft, museum-relief glow, so adjust gradually.

  6. Seal, light, and photograph

    Coat all cut surfaces with a thin layer of petroleum jelly or a spritz of lemon-water to slow browning. Set a battery LED inside or a warm spotlight in front, never a candle, since the dense relief blocks airflow and heat. Shoot in a softly lit room at dusk so the raised figure catches highlights while the recessed field glows. Keep it cool and misted between showings to buy a few extra days.

Gather your supplies

Check things off as you get ready.

Work on a stable surface, keep your free hand out of the cutting path, and have an adult handle sharp tools.

Three levels of light

  • Leave intact

    The outer rim of skin around the oval and the densest parts of the figure like the hair bun and waistband stay untouched and dark.

  • Peel & shade

    The recessed background field is shaved thin so it glows a soft, even orange behind the pose.

  • Cut through

    No full cutouts here, but the very thinnest shaved spots around the figure's silhouette can read almost as bright highlights.

Learn the carving basics

Before you start cutting

Do I cut all the way through anywhere on this design?

Not for the main effect. This is a relief carving, so brightness comes from shaving skin to different thicknesses rather than punching holes. Keeping the shell intact also gives the standing figure the support it needs, so treat any true cutout as optional and save it for last.

How do I keep the background depth even?

Score the figure and leaf outlines first so you have crisp walls to work against, then lower the field in thin, overlapping loop-tool passes. Check depth against the raised edges from several angles and use a consistent tool angle. Going slow and even matters more than going deep.

This is shown as an AI concept, so will it really last?

The pictured pumpkin is a digital concept, but you can carve a very similar relief on a real one. Relief carvings dry out faster than simple lanterns because so much skin is exposed, so mist it, wrap it in plastic in the fridge between sessions, and expect a few good display days rather than a week.

Your take belongs here, too.

Changed a detail? Made it simpler? Share a photo of your version and tell the community what worked.

Share your pumpkin

More pumpkins like this

You've reached the end · 8 pumpkins
The Patch Report

Fresh pumpkins, in your inbox.

The best new carvings, ideas worth stealing, and how-tos for carving season. Short, seasonal, and gone by November.

A short email during carving season. Unsubscribe anytime. See our privacy policy.