Similar to This
View all stencils →About this stencil
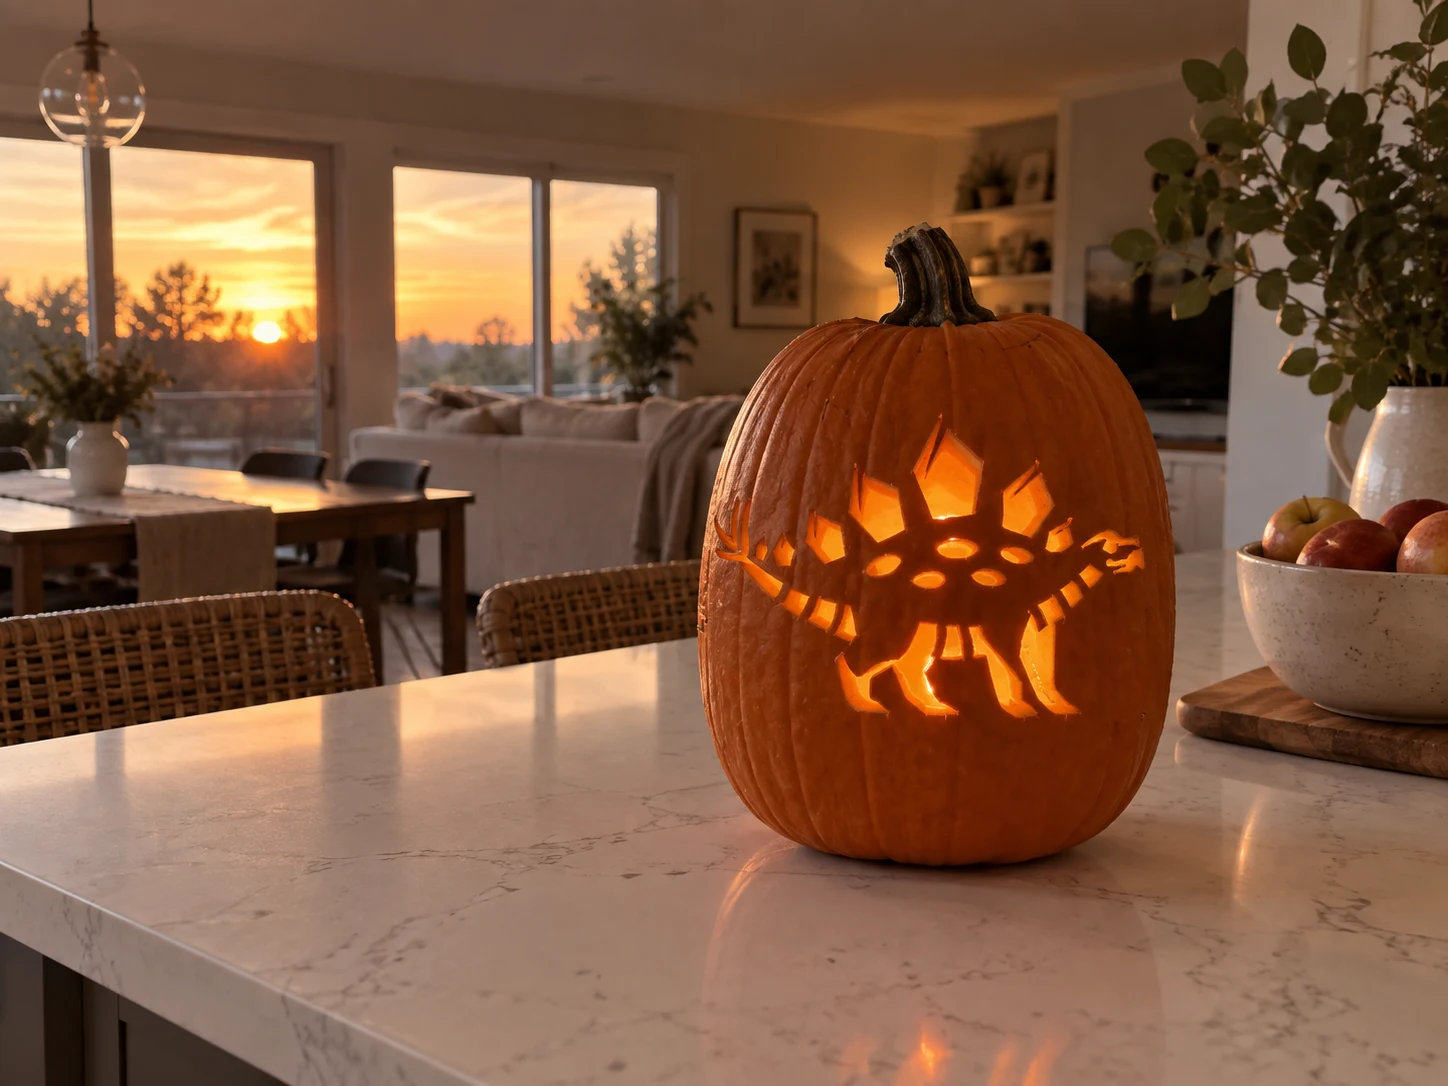
A stegosaurus skeleton pumpkin stencil shows the dinosaur in profile walking left, with a series of large angular back plates rising above the spine, a segmented backbone, oval body spots, four chunky limbs, a branched tail end, and a small open mouth with teeth. The back plates cut through as individual diamond and triangular shapes while the body spots and limb outlines are separate pierced sections, leaving orange ribs of skin between them. Cut the back plates from the tallest center spike outward toward the smaller side plates so the tallest unsupported pieces are freed last. This design is rated Advanced and takes most carvers around 150 minutes from trace to glow. Multi-layer cuts with skin-peel shading. Plan your cuts first.
Pumpkin size guide
- 🎃 Small (5–7") — print at 80%
- 🎃 Medium (7–10") — print at 100% (recommended)
- 🎃 Large (11–13") — print at 130%
- 🎃 Giant (14"+) — print at 150% on tabloid paper
Frequently asked questions
Can I resize this stencil?▾
Yes. The PDF is vector so it scales cleanly. Print at 100% for a 7–10 inch pumpkin, 130% for 11–13 inch, or 150% for a giant. Use your printer's "Fit to page" or "Custom scale" setting.
What kind of paper works best?▾
Standard 20 lb letter or A4 printer paper is fine. Heavier paper is harder to bend around the pumpkin curve. If your printer supports it, set the quality to 'best' so the lines are crisp.
How long will the carved pumpkin last?▾
Usually 5–10 days. Coat all cut surfaces with petroleum jelly and store the pumpkin somewhere cool overnight. Avoid direct sun. Battery tea lights produce no heat and double the lifespan.
Can I sell pumpkins carved with this stencil?▾
Yes, the carved pumpkin you make is yours. The license covers personal and small-scale commercial carving (selling carved pumpkins, photographing them, posting on social). You may not resell the PDF file itself.
What if my printer doesn't print the whole stencil?▾
Set 'Page scaling' to 'Fit' in the print dialog and uncheck 'Auto-rotate'. If it still cuts off, the design includes 0.25" of safe-area margin so a small crop won't ruin it.
How to carve this stencil
- Transfer the stencil and identify the floating oval body spots as the pieces most likely to fall out unexpectedly.
- Begin with the segmented backbone cut along the top of the body, which acts as the structural spine of the design.
- Cut the four limb outlines and the branching tail next while the body is still solid enough to grip.
- Remove each body oval spot individually; they are the largest negative-space pieces and require clean circular cuts.
- Carve the back plates from the smallest outer plates first, moving toward the tallest center spike; the tallest plates are narrow at the base, so use a detail saw and brace the plate with a finger.
- Finish with the small head and open-mouth cut; the tiny teeth detail requires a craft knife for the gaps between individual teeth.
Tools you'll need
For a advanced carve like this you'll want a linoleum cutter set, x-acto knife, peel tool, and pin transfer wheel. Here's the kit we reach for — start with whatever you already own.

Elmchee Pumpkin Carving Kit
13-piece kit with carrying case
Saws for the larger cutouts, plus a scoop for hollowing. Covers both jobs in one kit.
View on Amazon ↗
Speedball 4131 Lino Cutter Set
Handle + 5 interchangeable cutters
Interchangeable cutters for peeling and shading the face. Useful for the finer details.
View on Amazon ↗
Homemory LED Tea Lights
24-pack of battery-operated lights
Battery-operated, flickering lights for a candle-like glow inside your finished pumpkin.
View on Amazon ↗
Community Pumpkin Carving Ideas
Carving ideas that use stencils like this one.
Related stencils
Carvers who liked this one also downloaded these.
- Expert / Pro
Stegosaurus Skeleton Pumpkin Stencil
A stegosaurus skeleton shown in full side profile fills this expert pumpkin stencil: a long skull with open jaw, four bony legs with claw toes, a ribcage made of many individual rib-bone cutouts, vertebral column, and four large dorsal plate outlines along the back. The sheer number of individual rib and bone segments, each separated by thin pumpkin bridges, makes this a complex carve. Cut the large dorsal back plates first since they are the most isolated shapes, then work through the ribcage from front to back one rib at a time to avoid destabilizing the spine bridge.
- Advanced
T-Rex Pumpkin Stencil
A fleshed-out T-rex stands upright in this dinosaur pumpkin stencil, with a large skull showing serrated teeth, tiny forelimbs with claw tips, a muscular body, and thick hind legs with three-toed feet rendered as solid orange pumpkin wall. The spaces between and around the figure are cut through, so the lit jack-o-lantern silhouettes the dinosaur in warm orange against a glowing background. Cut the narrow gaps between the forelimb claws and the small toe gaps first before opening any of the large surrounding sections, as those tight details are easier to control while the wall is fully rigid.
- Beginner-friendly
Raptor Silhouette Pumpkin Stencil
A velociraptor strides in profile on this dinosaur pumpkin stencil, its long horizontal tail balancing a compact body, one forelimb raised, and its small head turned slightly with a visible eye circle. The entire figure is a single large silhouette cut away from the pumpkin wall, with a few small internal cuts defining the eye and forelimb. Because the tail is long and slender, cut it from the body outward toward the tip in one smooth pass before removing the larger torso section so the thin tail stays supported.
- Advanced
Velociraptor Pumpkin Stencil
A snarling velociraptor lunges forward on this dinosaur pumpkin stencil, its open jaws showing individual teeth, forelegs raised with curved claws, and a long stiff tail arcing behind. The design uses a mix of pierced negative space and thin pumpkin-wall bridges to define the body segments, so the lit jack-o-lantern shows the raptor as an orange figure ringed by dark gaps. Start by cutting the smallest interior tooth shapes and claw details before removing the large body sections, so the surrounding wall keeps the stencil stable throughout.
- Advanced
Parasaurolophus Pumpkin Stencil
A cute bipedal Parasaurolophus dinosaur faces right in this hard-level pumpkin stencil, with the signature backward-sweeping cranial crest arching above its round eye, a chunky body sectioned by organic blob-shaped cut-outs along the dorsal ridge and belly, two short front arms with clawed fingers, and sturdy hind legs. The blob-shaped body cut-outs stay open so the dinosaur glows in a spotted pattern when lit, while the outer silhouette stays solid. Cut the small claw details on the fingers before removing the large body sections so the arm area keeps its rigidity while you work.
- Expert / Pro
T-Rex Pumpkin Stencil
A T. rex tears across this expert pumpkin stencil in a side-profile attack pose: massive jaws open wide with individual pointed teeth, a large round eye socket, muscular body sections, short forearms with clawed fingers, and powerful hind legs with three-toed feet all rendered as separate cut-through shapes. The jagged teeth line along the upper jaw is the most technically demanding element. Cut each tooth gap individually from the back of the jaw toward the snout tip, finishing the tooth row before opening the large body cavities so the wall stays rigid during the fine work.