@boo_radley
Sep 5, 2026
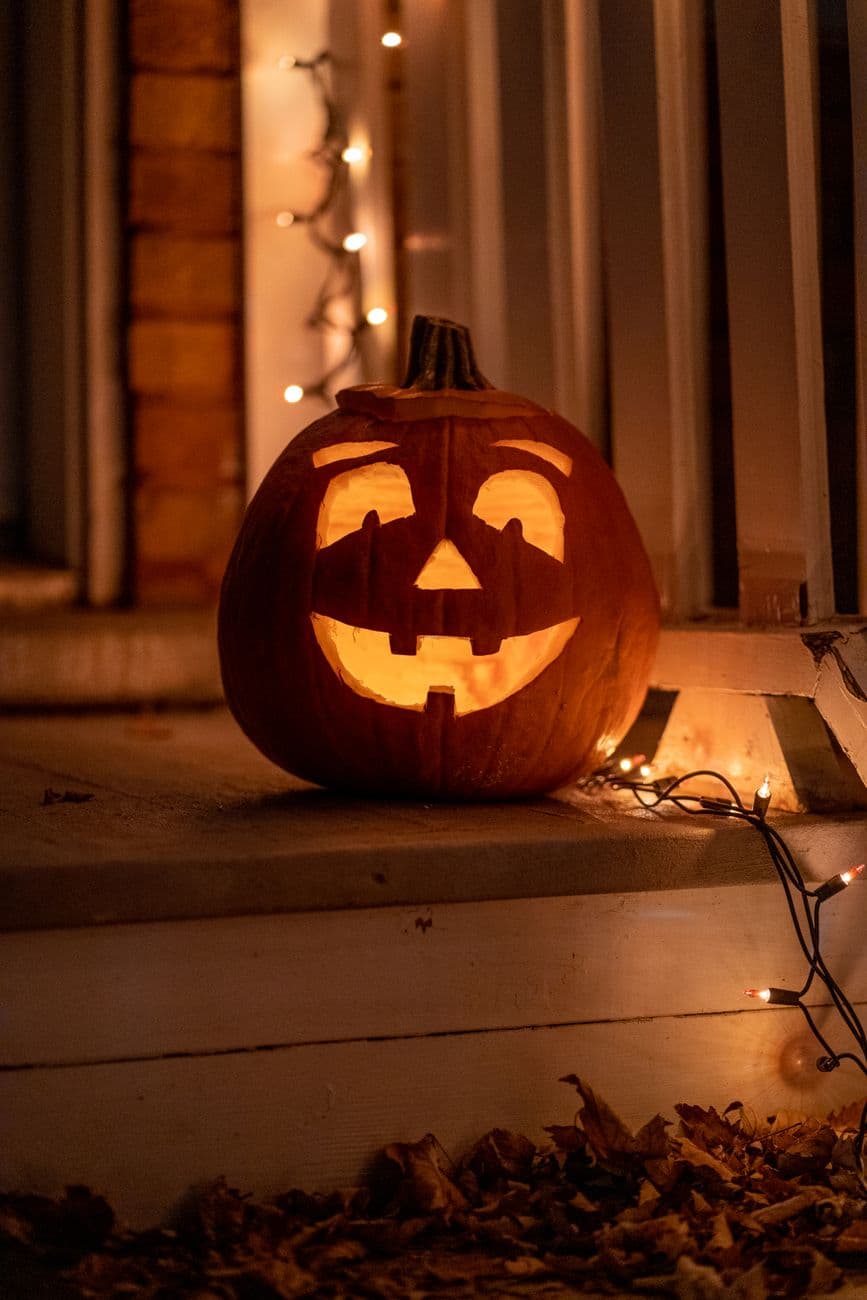
Bat brows on the step
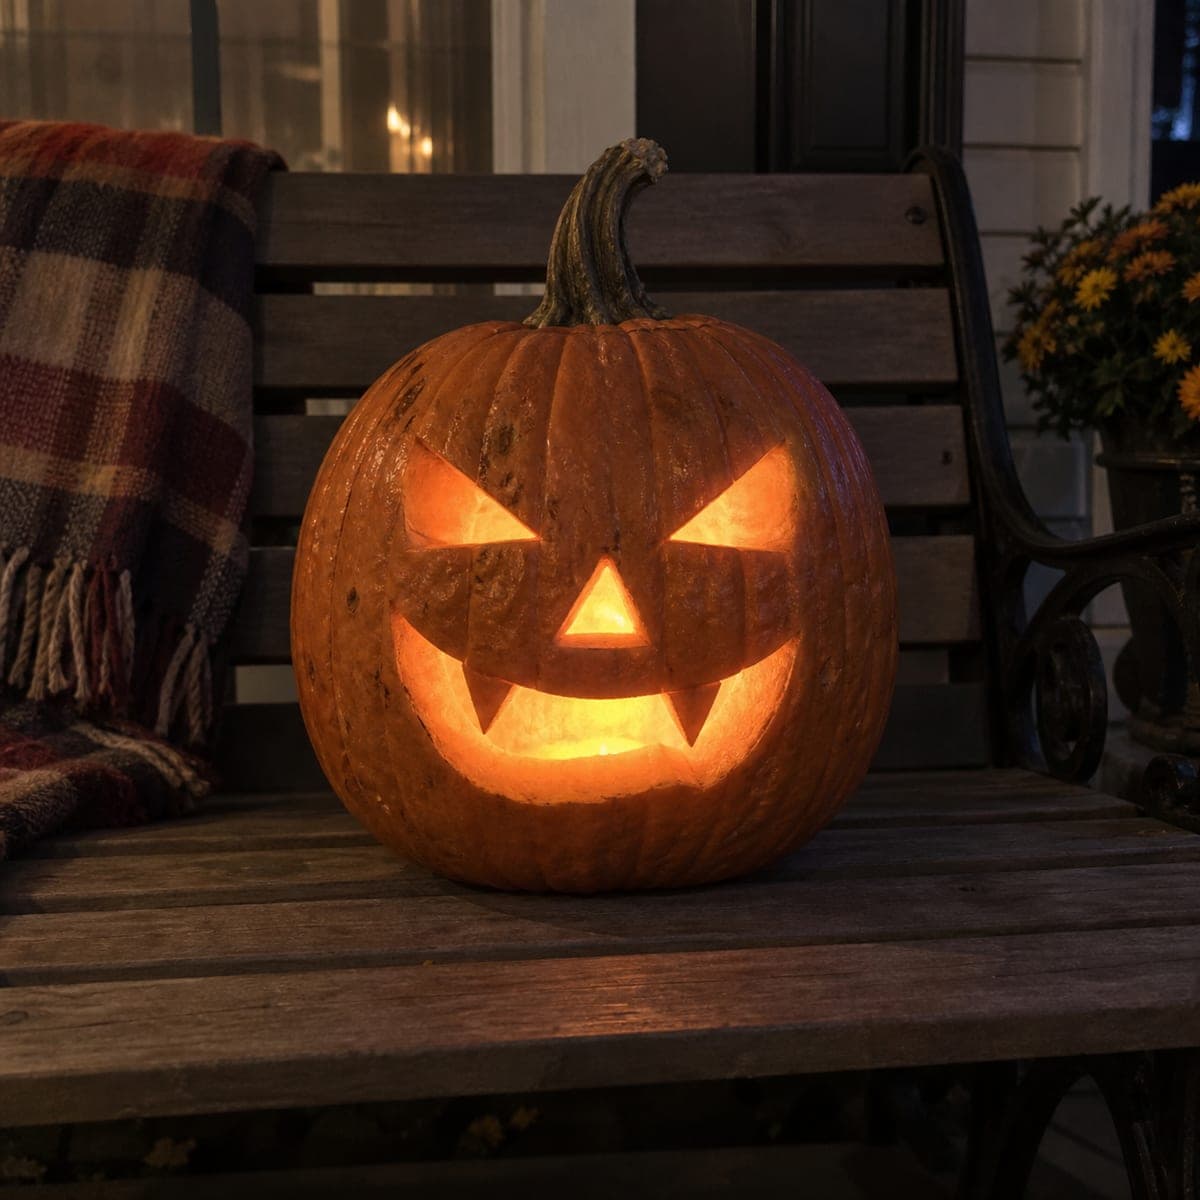
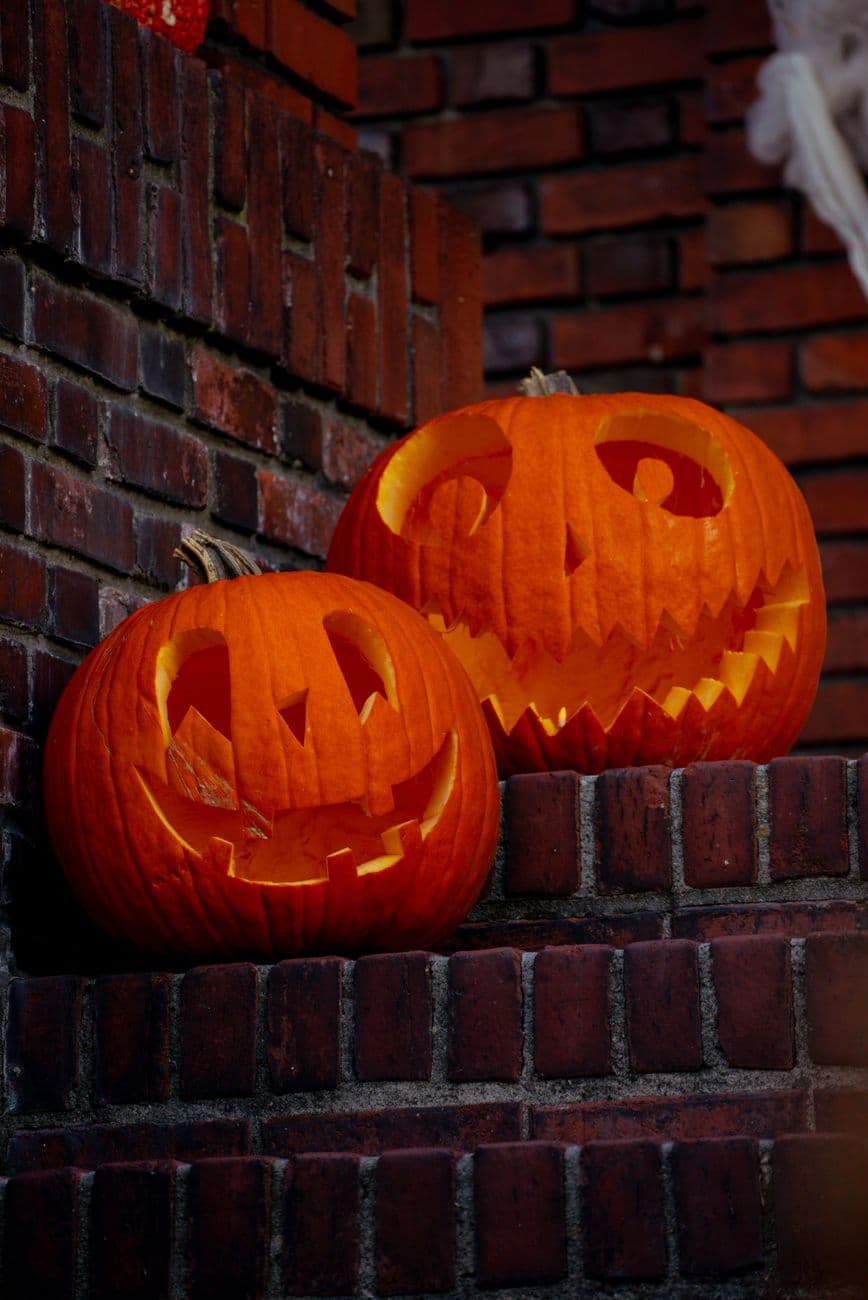
A friendly glowing face whose nose and mouth make a hidden bat silhouette, warming the porch steps under string lights.
No ratings yet · Sign in to rate
A friendly glowing face whose nose and mouth make a hidden bat silhouette, warming the porch steps under string lights.
The trick here is that the triangle nose and the notched grin read as a small bat silhouette when the pumpkin is lit. The plan is a straightforward classic jack-o-lantern with angular eyes, angled brows, and a wide smile, then a couple of teeth left in place so the mouth holds its shape and shows off the bat below the eyes. Keep every cut clean and let the interior glow do the rest.
Written by PumpkinCarvingIdeas.com, inspired by @boo_radley's photo above. These are our suggestions, not instructions from the uploader, and this approach hasn't been tested on their exact carve.
Choose a round pumpkin with a smooth front the size of a dinner plate for the face. Cut a lid from the bottom or back rather than the top so the stem stays intact for that classic look. Scrape the inside wall behind the face down to about one inch thick with a sturdy scoop. A thinner wall is much easier to cut cleanly and lets more light through.
Draw or tape on a pattern with two upward-slanting triangle eyes, short angled brows above them, a triangle nose, and a wide grinning mouth. Poke the outlines with a pushpin or transfer tool, spacing dots close together on curves. Keep the brow points and the cheek notches marked clearly since those angles are what suggest the bat. Step back and check the face is centered before you cut.
Start with the eyes, brows, and nose using a fine carving saw held straight into the wall. Cutting these smaller shapes before the big mouth keeps the pumpkin strong while you work. Saw with gentle steady strokes and let the blade do the work instead of forcing it. Push each piece out from the inside with a fingertip so the edges stay crisp.
Outline the whole mouth, then cut it out in sections so you can leave two or three square teeth attached top and bottom. Those teeth act as bridges that hold the mouth open and give the smile its friendly character. Save the widest openings for last so the face keeps its structure as long as possible. Trim any ragged inner edges once the shape is fully open.
Set a battery LED puck or a short string of warm LED lights inside, never a candle. Rest the pumpkin on a porch step where the face is at eye level for trick-or-treaters. Tuck outdoor string lights around the base for the same cozy backdrop seen in the photo. Check that the light sits low enough to fill the mouth and lift the bat shape.
Wipe the front clean and rub a little petroleum jelly on the cut edges to slow drying. Shoot your photo after dark with the porch lights on and your camera steady on the step. A slightly lower angle makes the grin glow warmly and the string lights blur behind it. Bring the pumpkin inside on warm days to help it last longer.
Check things off as you get ready.
Work on a stable surface, keep your free hand out of the cutting path, and have an adult handle sharp tools.
The outer face skin and the eyebrow angles stay dark to frame the features
Shave a thin ring around the eyes or mouth if you want a soft halo of dim orange
The eyes, nose, and toothy grin cut fully through for the brightest glow and the hidden bat shape
Keep the nose a clean triangle and leave the mouth teeth as squared notches rather than pointed spikes. The contrast between the dark teeth and the bright openings is what suggests the bat silhouette. Test it by lighting the pumpkin before you widen any cuts.
A bottom or back lid keeps the stem looking natural and lets you set the pumpkin down over the light like a cap. It also stops rain from collecting inside on a porch. If you prefer a top lid, cut it at an angle so it cannot fall through.
Two or three teeth top and bottom is plenty to hold the mouth open without crowding the smile. Each tooth is a bridge, so more teeth mean a stronger but busier grin. Space them evenly and keep them at least a half inch wide so they do not snap.
Changed a detail? Made it simpler? Share a photo of your version and tell the community what worked.
The best new carvings, ideas worth stealing, and how-tos for carving season. Short, seasonal, and gone by November.
Comments (0)