Halloween Pumpkin Carving Contest · Starts October 1st · $500 in prizes
← Back to ideas
@ai_concepts
Jul 28, 2026
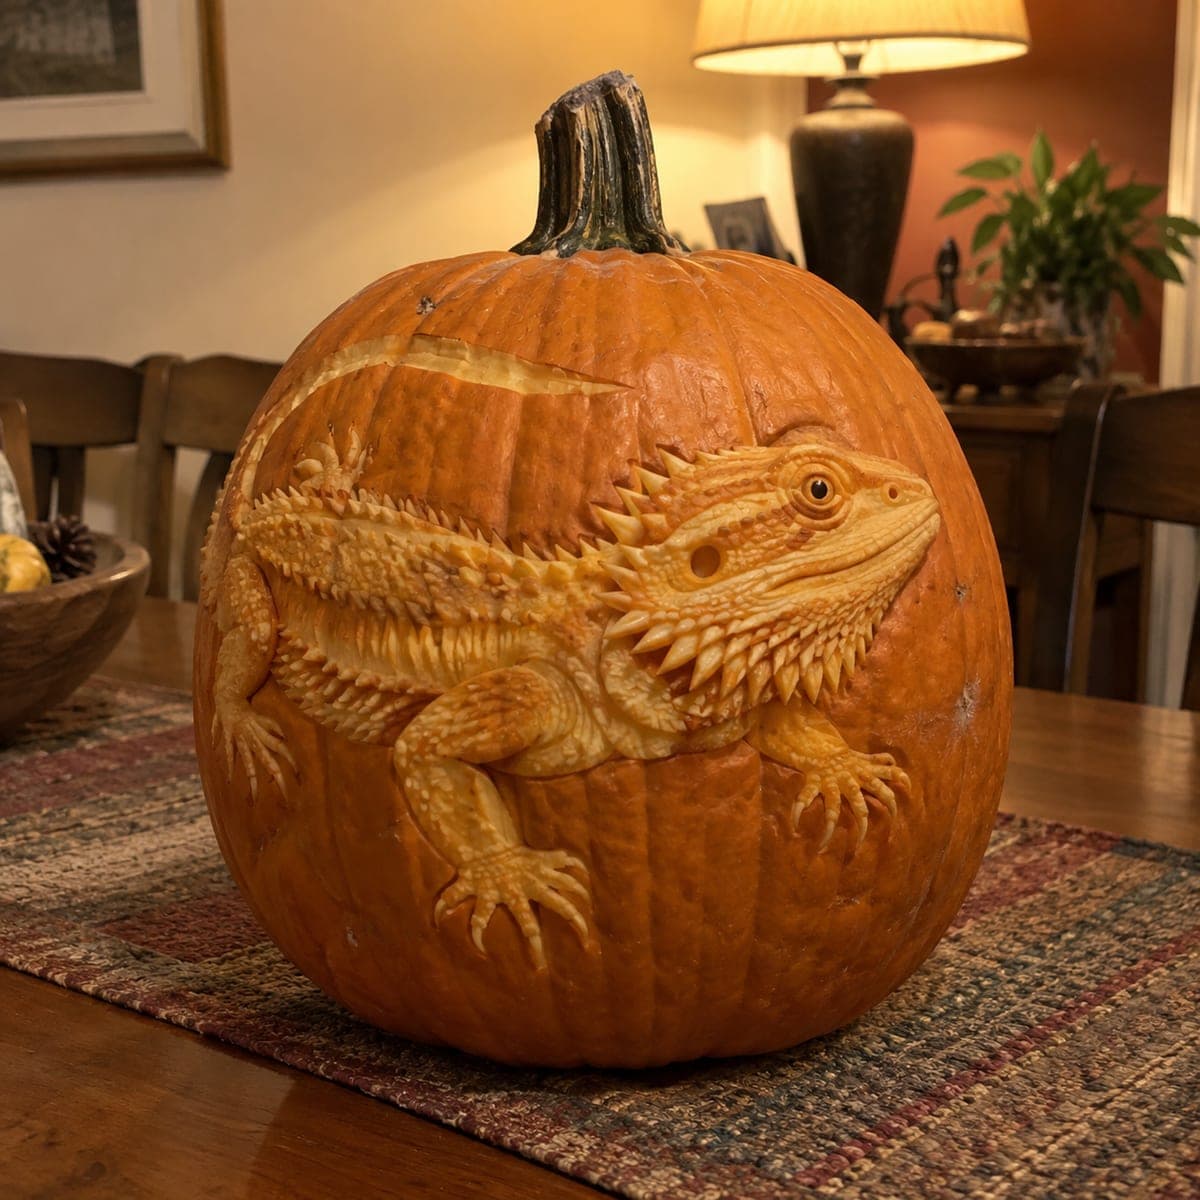
Bearded Dragon Expert Relief Pumpkin CarvingAI
0

Bearded Dragon Expert Relief Pumpkin Carving

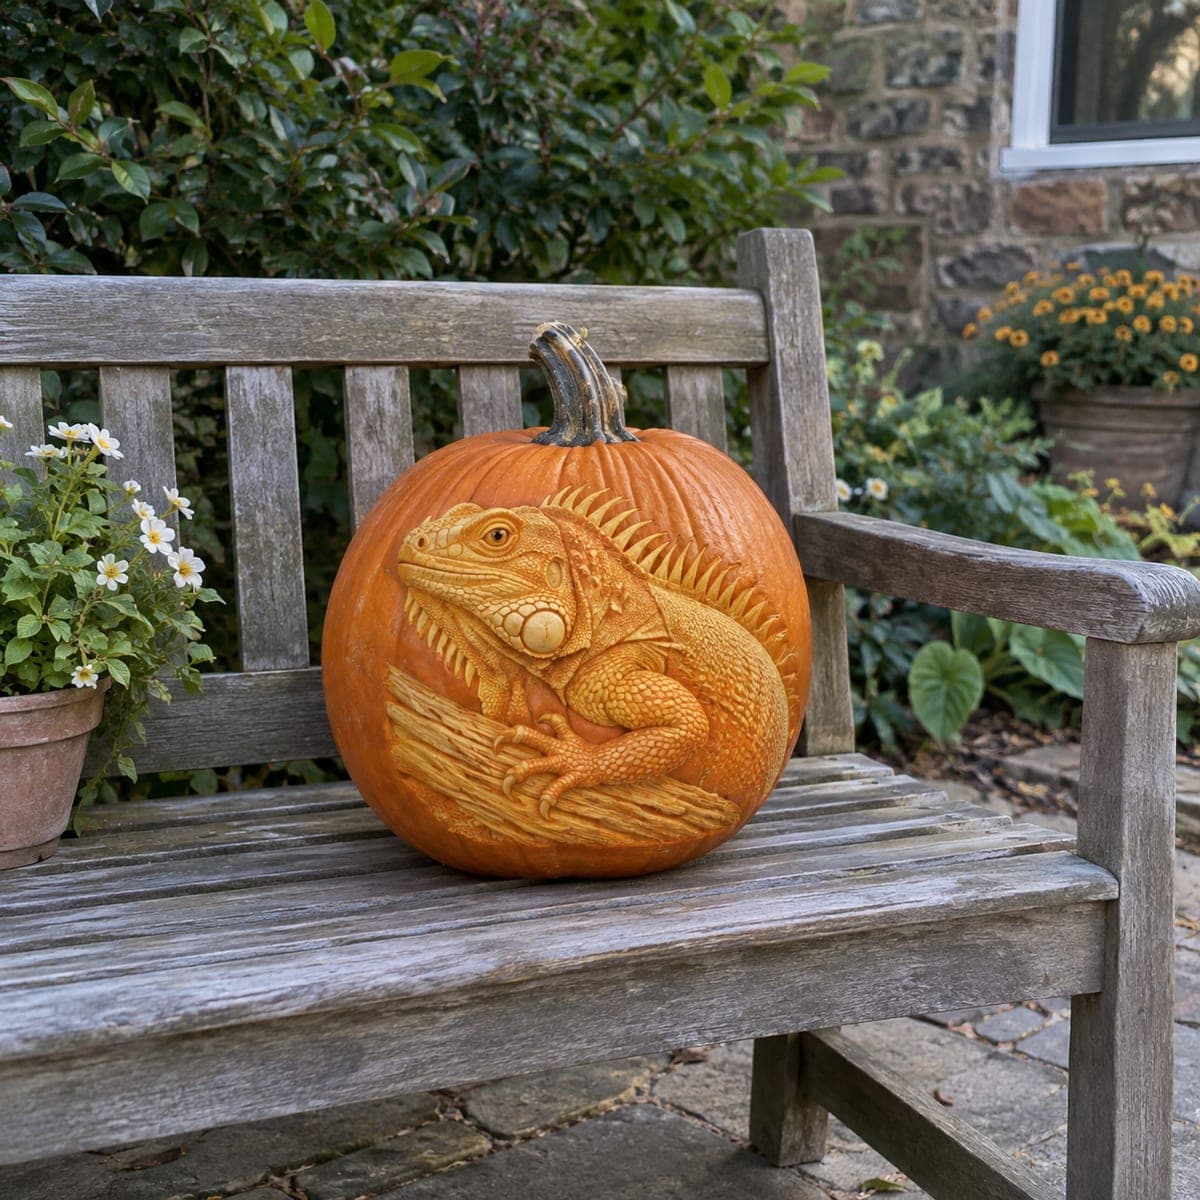
A bearded dragon lounges across this pumpkin in astonishing sculpted relief, every spike along its jaw and flank individually carved and the toes tipped with tiny claws. Deep background removal lifts the lizard off the surface, while shallow texture cuts create the pebbled scale pattern. Work the spiky beard fringe with a fine detail knife once the body is fully shaped. Reptile keepers will want this one on the table where lamplight can graze the texture.

This is an AI-generated concept image: a realistic, carvable design idea rather than a photo of a finished carve. AI concepts are always labeled and sit out the leaderboard and the contest.

No ratings yet · Sign in to rate

Comments (0)

  • No comments yet — be the first.

Save without an account. Sign in to like or comment.

Our tips for carving a similar design

The core trick here is surface relief carving, where you shave away the pumpkin skin and shell to different depths rather than cutting all the way through. The dragon sits raised against a lowered background, and shallow scoops build the pebbled scale texture while the spiky jaw and flank fringe are shaped last. Plan to work slowly from big shapes down to tiny claws, because relief work is all about depth control.

Written by PumpkinCarvingIdeas.com, inspired by the image above. These are our suggestions, not instructions from the uploader. This approach to the AI concept has not been tested on a real pumpkin.

From pumpkin to porch

  1. Pick a big, firm pumpkin and cut a base opening

    Choose a large pumpkin with a broad, smooth flat area on the front for the lizard. Cut a wide access hole in the bottom rather than the top so the whole front face stays intact for carving. Scrape the inside wall behind your design down to about one inch thick so light can pass through the thin spots later. A thinner wall gives you room to shade without breaking through.

  2. Transfer the dragon outline

    Tape your bearded dragon stencil onto the front and poke the main outlines with a pin or transfer tool. Mark the body, the head, the leg and toe positions, and the line of the spiky beard and flank fringe. Keep the fine scale detail off the stencil for now and just capture the big shapes. Step back and check the pose reads clearly before you start cutting.

  3. Lower the background to lift the body

    Using a ribbon or loop tool, shave away the skin and a shallow layer of shell all around the dragon so the body stands up in relief. Keep the background even and slightly deeper right against the lizard to make it pop. Leave the head, back, and legs at full height. Work in from the edges gradually so you do not gouge too deep and hit the hollow interior.

  4. Shape the body forms and scale texture

    Round the head, ridge the spine, and taper the tail with gentle scoops so the body has real volume. Add the pebbled scale pattern with a fine detail knife or a small U gouge, using shallow repeated cuts. Vary the depth so raised scales catch light and the grooves between them stay dim. Take breaks to wipe away shavings and read your progress.

  5. Carve the beard fringe, toes, and claws last

    Once the body is fully shaped, work the spiky beard and flank fringe with a fine detail knife, leaving each spike attached at its base so nothing snaps off. Keep the tiny toe claws short and connected to the foot rather than freestanding, since long thin points break easily. Carve the eye as a small deep pocket with a bright highlight peeled beside it. This detail stage is where the reptile really comes alive.

  6. Light it and photograph the texture

    Set a battery LED puck or a string of warm LEDs inside, never a candle, since the low flame would not graze the surface anyway. Position the pumpkin near a side lamp so raking light rakes across the scales and shadows the grooves. Snap photos from slightly to the side to show the relief depth. Mist the carved areas lightly and store cool to keep the texture crisp for a few days.

Gather your supplies

Check things off as you get ready.

Work on a stable surface, keep your free hand out of the cutting path, and have an adult handle sharp tools.

Three levels of light

  • Leave intact

    The lowered background and the deepest scale grooves stay dark to frame the animal.

  • Peel & shade

    The dragon body, head, and legs get skin peeled to a shallow depth for a warm mid glow that shows off the pebbled texture.

  • Cut through

    Only the eye highlight and a few narrow gaps in the beard fringe are cut thin enough for the brightest light.

Learn the carving basics

Before you start cutting

Do I cut all the way through anywhere on this design?

Almost nowhere. This is a relief carving, so the effect comes from shaving to different depths rather than making open holes. Keep the shell intact behind the dragon and only thin the eye or a few fringe gaps if you want a brighter accent.

How do I keep the spikes and claws from breaking?

Leave every spike and claw attached at its base and keep them short and thick rather than long and thin. Carve them last, after the body is shaped, so you are not bumping them during earlier steps. If one feels fragile, shorten it slightly instead of pushing the detail.

What lighting shows the scales best?

Relief texture reads best under raking light that comes from the side, so place the pumpkin near a lamp as much as the inside LED. A single warm LED puck inside adds glow through the thinned areas. Avoid candles, since an open flame will not graze the surface and is a fire risk with a bottom opening.

Your take belongs here, too.

Changed a detail? Made it simpler? Share a photo of your version and tell the community what worked.

Share your pumpkin

More pumpkins like this

You've reached the end · 8 pumpkins
The Patch Report

Fresh pumpkins, in your inbox.

The best new carvings, ideas worth stealing, and how-tos for carving season. Short, seasonal, and gone by November.

A short email during carving season. Unsubscribe anytime. See our privacy policy.