Halloween Pumpkin Carving Contest · Starts October 1st · $500 in prizes
← Back to ideas
@ai_concepts
Sep 25, 2026
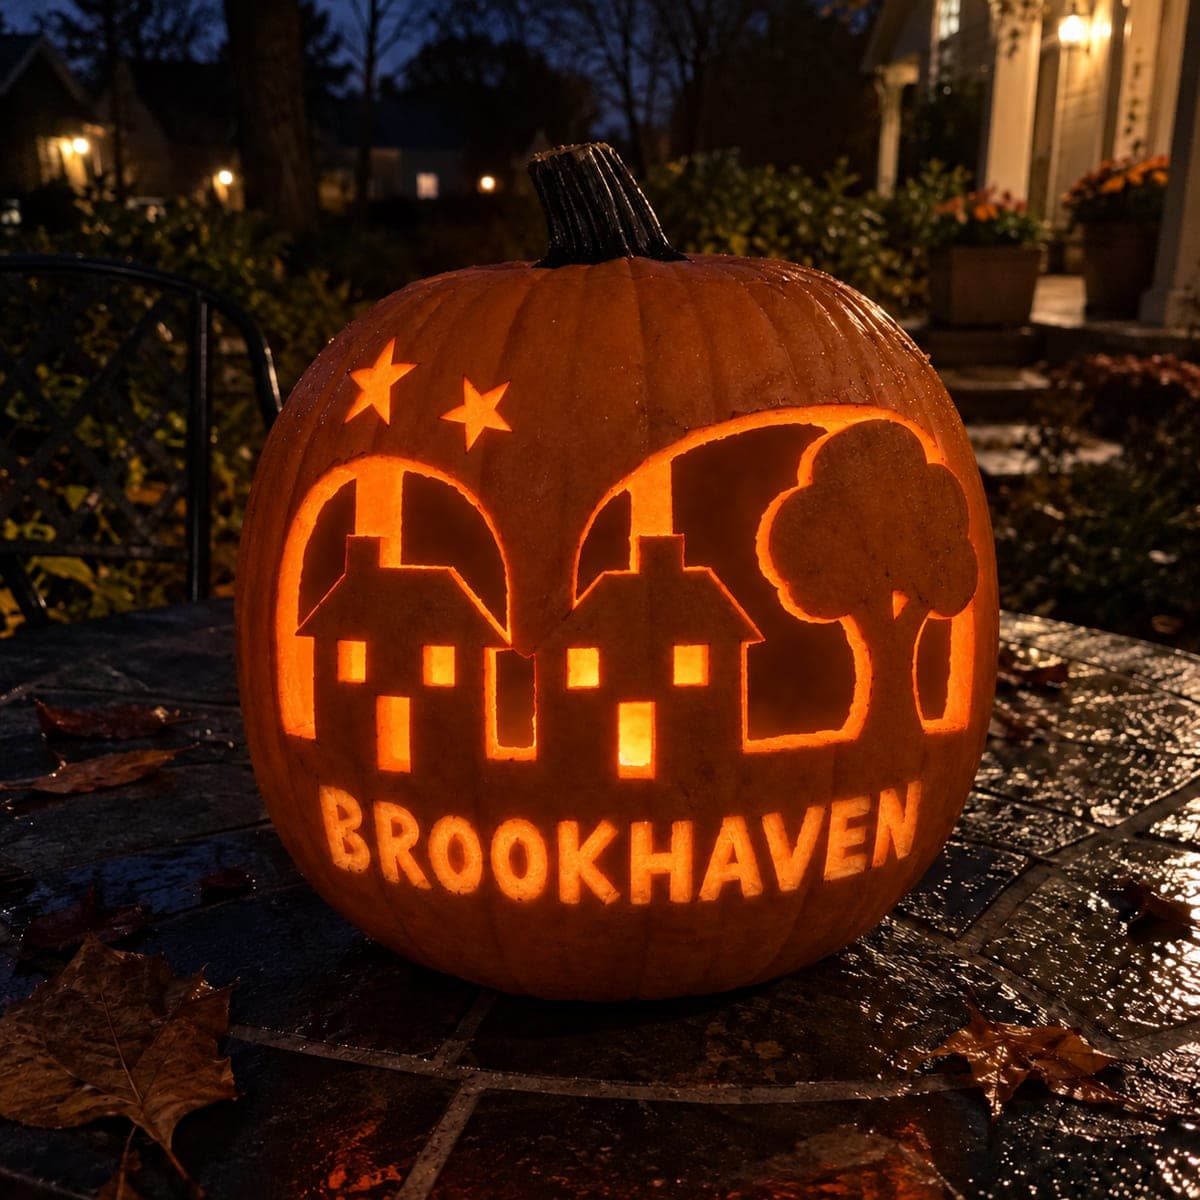
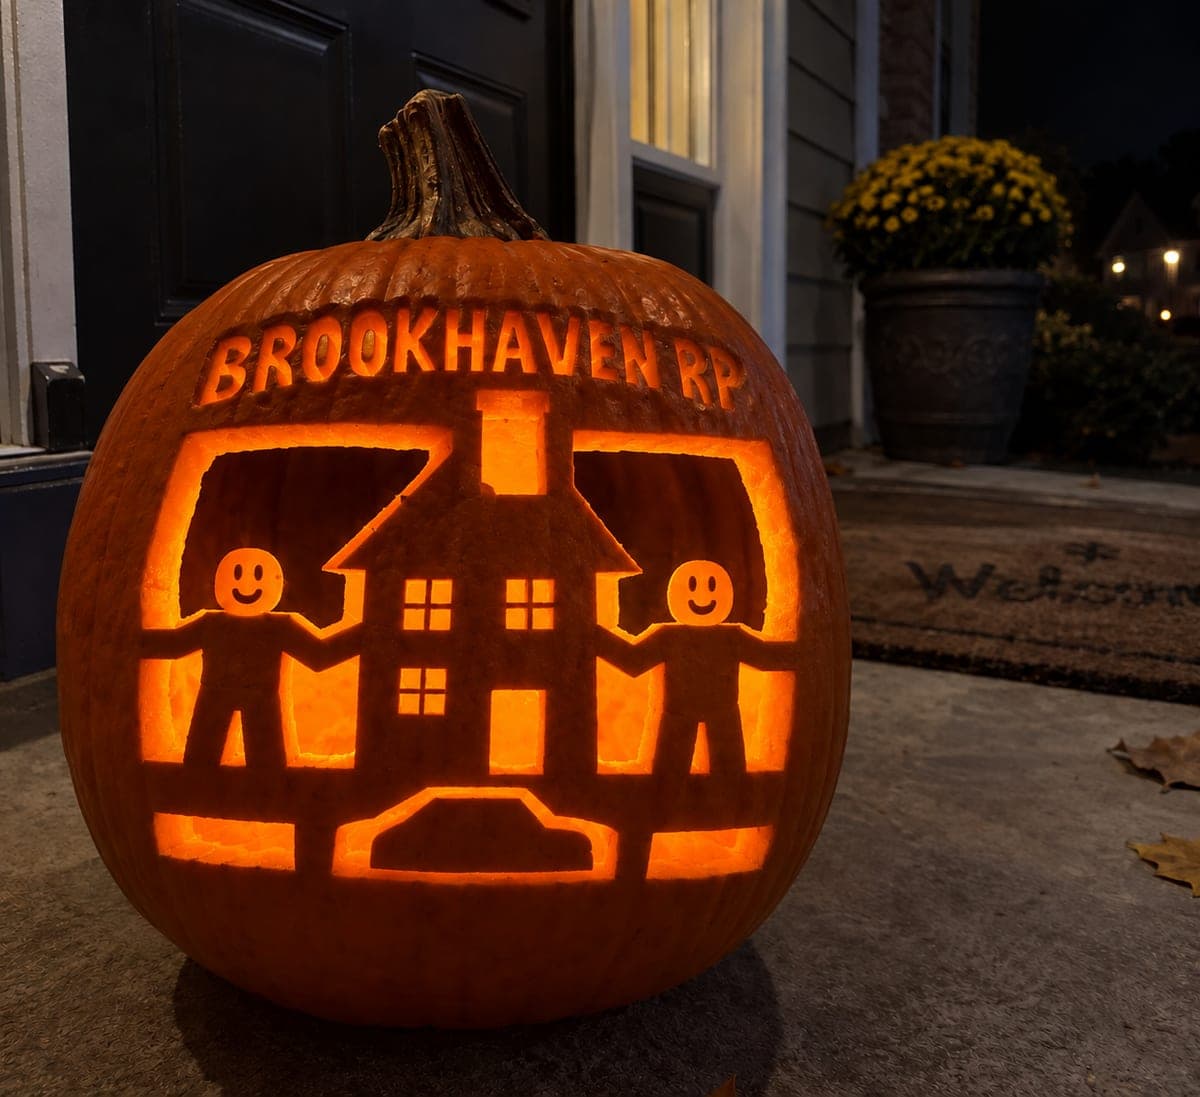
Brookhaven Houses and Tree Pumpkin in a GardenAI
0

Report this carving

Tell us what is wrong. Reports are private.

Brookhaven Houses and Tree Pumpkin in a Garden

This hard Brookhaven pumpkin carving connects two houses and a tree in a glowing garden scene, with chimneys attaching to the upper frame and bases rooting to the lower rail while an open background, window, and door apertures create the glowing neighborhood look. Carve the broad trunk and side connection of the tree first to establish the central anchor, then work outward to the house chimneys. Shallow-backed lettering in the sky area catches light through the rind for a subtle title reveal.

No ratings yet · Sign in to rate
Comments (0)

  • No comments yet — be the first.

Save without an account. Sign in to like or comment.

Our tips for carving a similar design

Two houses and a tree share the carving face, all connected to an upper frame through their chimneys and to a lower rail through their bases. The tree's broad trunk and its side connection to the outer rind are the central structural anchor for the whole composition, so establishing those first gives everything else a stable reference. Shallow-backed lettering in the sky area adds a finishing layer that glows softly behind the scene.

From pumpkin to porch

  1. Choose a wide, large pumpkin

    A wide pumpkin gives the two-house-plus-tree composition space to breathe. Cut the lid from the back, scoop to a consistent 2 cm wall, and mark the upper frame line and lower rail line on the carving face in pencil before transferring the stencil.

  2. Transfer and color-code the stencil

    Pin-transfer the full scene. Use one color pencil to mark chimney-to-frame connections, another for base-to-rail connections, and a third for the tree's trunk and side connections. Color-coding prevents accidentally cutting any bridge during the busy multi-element process.

  3. Establish the tree first

    Cut the tree's outer silhouette, leaving the broad trunk base connected to the lower rind rail and the side contact connecting the tree to the right or left pumpkin edge. The tree is the tallest element and sets the vertical scale for both houses. Do not cut any tree interior background until both houses are defined.

  4. Define the house silhouettes and chimneys

    Cut each house's outer silhouette, keeping chimneys attached to the upper frame at the top and base sections attached to the lower rail at the bottom. Work on one house at a time, checking structural integrity before starting the second. Keep the chimney-to-frame joints at least 1.5 cm wide.

  5. Open window, door, and background apertures

    Cut window and door openings as full through-cuts inside each house shape. Then open the background sections between and around the houses and tree that should glow, working carefully around each marked bridge. Adults should handle all cutting.

  6. Etch the lettering and display in the garden

    Shallow-etch the title lettering in the sky area using a small gouge. Place two LED candles inside for even coverage across the full width of the scene. Set the pumpkin in the garden among low plants or lanterns for a neighborhood scene effect.

Written with AI to match this design

Gather your supplies

Check things off as you get ready.

Work on a stable surface, keep your free hand out of the cutting path, and have an adult handle sharp tools.

Three levels of light

  • Leave intact

    House bodies, chimney connections, tree silhouette, trunk base, and all frame rail bridges stay dark.

  • Peel & shade

    Title lettering in the sky area is shallow-etched for a soft secondary glow.

  • Cut through

    Window apertures, door openings, and background sections between elements that should glow are fully cut through.

Learn the carving basics

Before you start cutting

What is the right order to cut the two houses and the tree?

Tree first to establish the central vertical anchor, then the house that shares a side boundary with the tree, then the second house at the outer edge of the composition. This order always anchors the center before working outward, which prevents the composition from pulling apart asymmetrically.

How do I ensure the chimney connections to the upper frame are solid enough?

Keep each chimney-to-frame contact at least 1.5 cm wide and cut along the chimney sides rather than across the top of the chimney until you are ready to define the roof-to-chimney join. A chimney that is too narrow will flex noticeably and may crack when the pumpkin is moved.

Can I do this design on a wide flat-sided pumpkin that is shorter than it is tall?

A wider pumpkin works well here because the horizontal composition needs lateral space. Adjust the stencil's vertical scale proportionally so the houses do not look squashed. Keep the upper frame and lower rail closer together if the pumpkin is shorter.

Your take belongs here, too.

Changed a detail? Made it simpler? Share a photo of your version and tell the community what worked.

Share your pumpkin

More pumpkins like this

You've reached the end · 8 pumpkins
The Patch Report

Fresh pumpkins, in your inbox.

The best new carvings, ideas worth stealing, and how-tos for carving season. Short, seasonal, and gone by November.

A short email during carving season. Unsubscribe anytime. See our privacy policy.