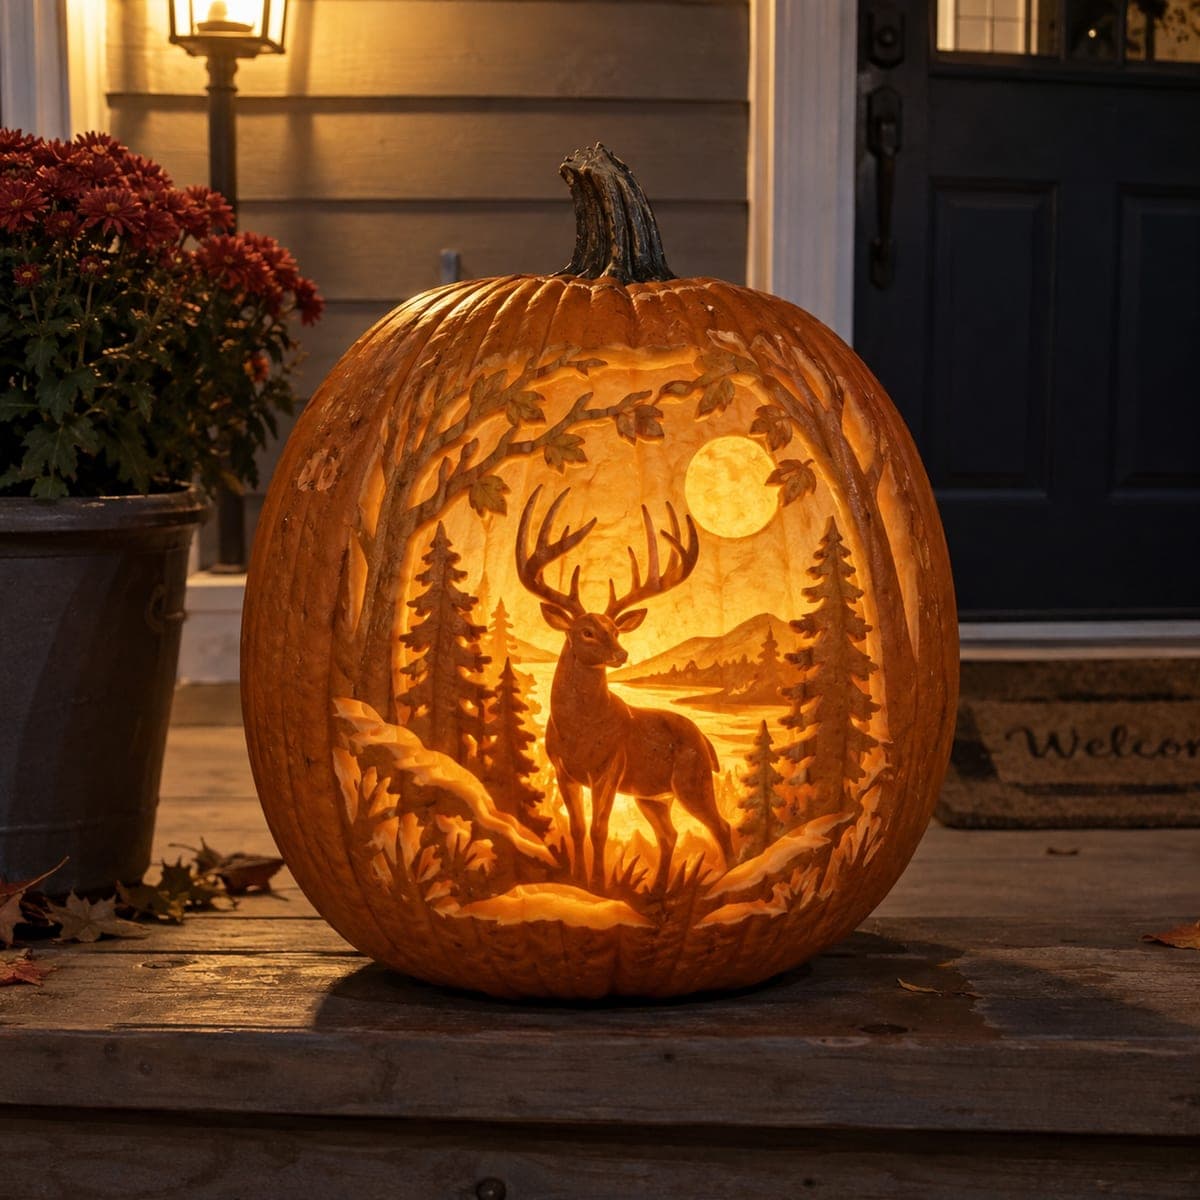
Buck Deer and Pine Forest Silhouette Jack-O-Lantern
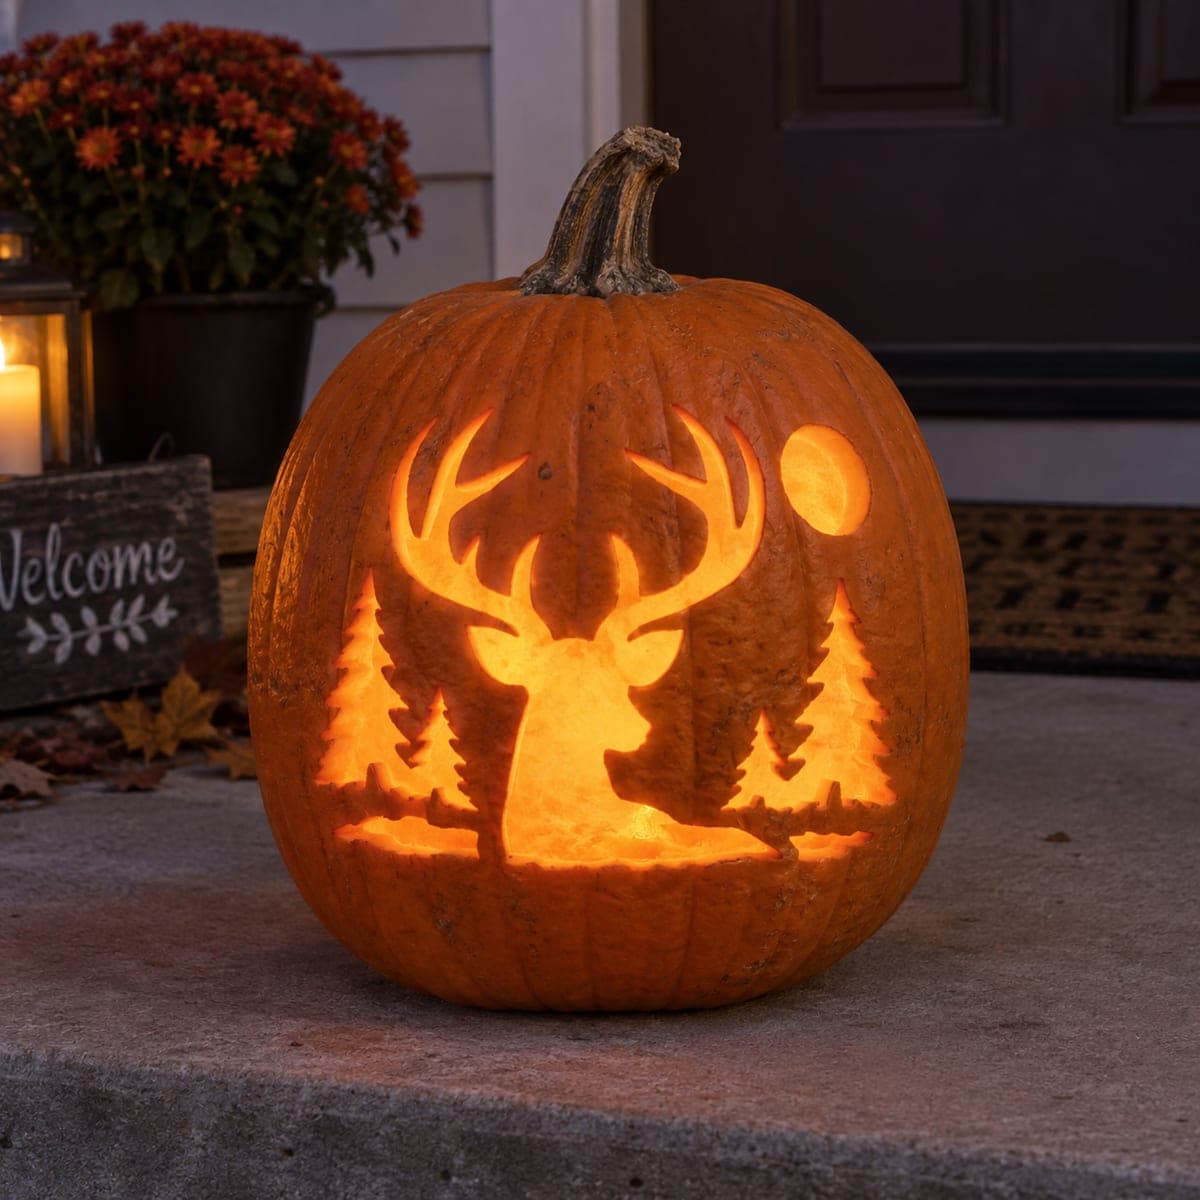
A majestic buck with a full rack of antlers stands among pine trees below a glowing full moon, cut as a warm silhouette against the bright interior of this large pumpkin. The layered silhouette design, with foreground grasses, mid-ground trees, and the deer head rising into the sky, creates convincing depth. Cut the moon first as an island of pumpkin skin surrounded by the cut sky, then work the treeline and finally the deer, using a detail saw for the antler tines.
This is an AI-generated concept image: a realistic, carvable design idea rather than a photo of a finished carve. AI concepts are always labeled and sit out the leaderboard and the contest.
The core trick here is reverse silhouette carving: the deer, trees, and grasses stay as solid dark skin while the entire night sky behind them is cut away for light. Plan for three depth layers, foreground grasses, mid-ground pines, and the buck rising into the sky, so the scene reads with real depth. The moon becomes a shaved island of skin surrounded by cut sky, so it glows softer than the open background.
Written by PumpkinCarvingIdeas.com, inspired by the image above. These are our suggestions, not instructions from the uploader. This approach to the AI concept has not been tested on a real pumpkin.
From pumpkin to porch
1
Pick a tall pumpkin and plan the layout
Choose a large, evenly shaped pumpkin with a smooth, flat-ish front panel big enough for the whole scene. Cut a lid from the bottom or the back rather than the top so the stem stays intact and the pumpkin sits stable. Scrape the inside wall behind your design down to about one inch thick so light passes through easily. Tape your printed pattern smoothly over the front and transfer it by poking dots along every line.
2
Shave and thin the moon first
Before any full cutting, define the moon as a clean circle. Use a ribbon tool or a shallow gouge to peel just the outer skin off the moon disc, leaving a thin, even layer so it will glow a soft, warm orange. Keep the edge crisp so it reads as a round shape once lit. Do this early while the pumpkin wall is still strong and easy to hold.
3
Cut the open sky around the moon
Now cut fully through the night sky area that surrounds the moon and frames the antlers. Work from the center of each opening outward toward your lines, making short, controlled strokes with a fine saw. Leave the moon island untouched and keep narrow skin bridges between the sky and the negative gaps inside the antler rack. Cutting the sky brightest here is what makes the buck pop as a dark shape.
4
Carve the treeline with a detail saw
Switch to a small detail saw for the pine trees on each side. Cut the sky between and around the branches so the trees remain as solid silhouettes, working the tips and gaps carefully to keep each pointed branch attached at its trunk. Take your time on the narrow slivers of sky between branches, since these thin cuts break easily if rushed. Support the pumpkin wall with your free hand as you go.
5
Free the antler tines and buck edges
Save the antlers for near the end since they are the most delicate part. Use the detail saw to cut the sky between each tine, leaving the antlers themselves as connected skin anchored to the head. Keep every tine joined to the main rack so nothing snaps off, and check that the buck's neck, ears, and grasses at the base stay intact. Clear away any loose pulp along the cut edges for a clean silhouette.
6
Light it and photograph
Drop in a battery LED puck or a string of warm LEDs, never a candle, since the interior is thin and the openings are large. Set the light low and centered so it fills the sky and backlights the moon evenly. Step back and check that the deer and trees stay dark against the glow, and add a second LED if any corner looks dim. Photograph at dusk on a porch step for the best contrast.
Gather your supplies
Check things off as you get ready.
Work on a stable surface, keep your free hand out of the cutting path, and have an adult handle sharp tools.
Three levels of light
Leave intact
The buck's head and antlers, the pine trees, and the foreground grasses stay as untouched skin so they read as a dark silhouette.
Peel & shade
The moon disc gets its outer skin shaved thin for a soft, dim orange glow that sets it apart from the open sky.
Cut through
The entire night sky behind the deer and between the branches is cut fully through for the brightest light.
Carve the antlers as solid skin and only cut the sky around them, so every tine stays connected to the main rack and the head. Save this area for last, when you have already cleared the surrounding sky and can see exactly where each point sits. Use a fine detail saw with gentle strokes and support the wall with your other hand.
Why cut the moon before the sky around it?
Defining and shaving the moon first lets you keep its edge crisp while the pumpkin wall is still strong and easy to grip. If you cut the wide sky opening first, the wall flexes and it becomes harder to hold a clean circle. Shave the moon thin, then cut the sky around it so it survives as a glowing island.
This design looks like an AI concept. Can a real pumpkin do this?
Yes, the layered silhouette is achievable if you keep the wall around an inch thick and leave skin bridges intact. The trees, grasses, and antlers must stay as connected skin rather than free-floating pieces, which is exactly how a silhouette carve works. Just go slowly on the thin sky gaps and use a detail saw.
Your take belongs here, too.
Changed a detail? Made it simpler? Share a photo of your version and tell the community what worked.
 AI
AI

Comments (0)